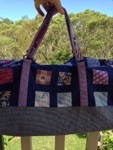
These straps look brilliant no matter how they flop around.
And don’t even get me started on this positively evil welt pocket!
Pocket with magnetic flap closure
Fully lined welt pocket. Wowsa.
I was in my comfort zone with piecing the patchwork sections, as I was inspired by this excellent pillow tutorial from Crazy Mom Quilts (I love that pillow!):
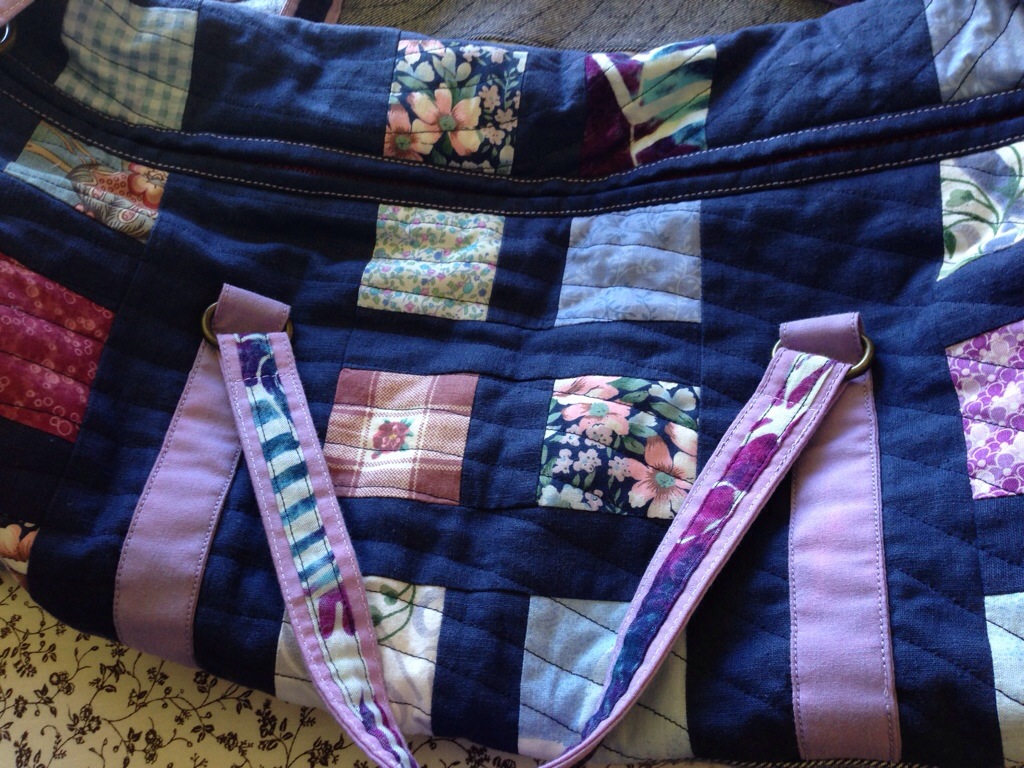
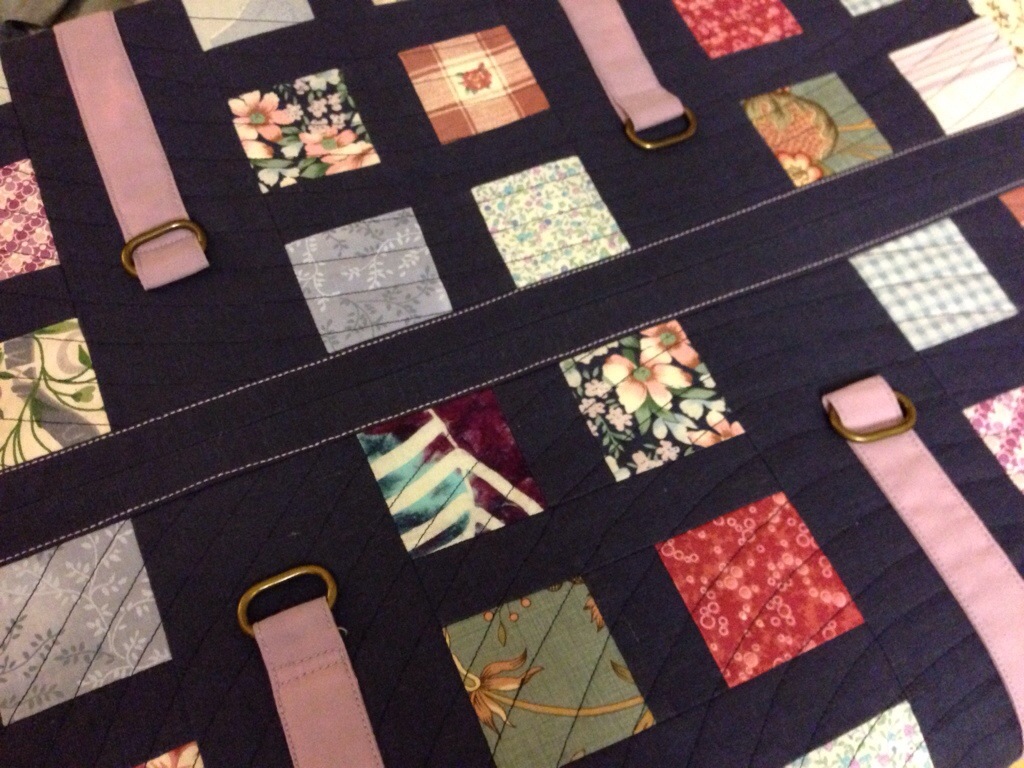
I’ve left a channel for the handle anchors between the contact prints, but you get the idea …
I tried out some spiral quilting, for the first time ever, inspired by another tutorial from Crazy Mom Quilts (again! Gotta love Amanda Jean’s stuff!):
The spiral quilting was easy to start on the firm denim fabric.
I put the centre of the spiral quite off centre on the bottom of the bag, and worked outwards, with only one dodgy spiral that needed unpicking. Verdict: fun! And I wouldn’t want to try this with a King Size quilt. 😉
I thought it would be oh-so-smart to balance this quilting with a square spiral onto the “round” ends of the duffle (I starting off thinking they would be circular, but they ended up trapezoidal):
Outside: blue linen
Inside: purple duvet cover fabric 🙂
I put an elasticised pocket into the inside of the duffle, to hold plastic bags for keeping sports shoes away from other items:
Elasticised pocket
And, of course, a special label for my special girl:
Label up near the zip, so she can show off her “exclusive” design to her friends 😉
I finished off with an improvised adjustable shoulder strap:
Two D-rings allow you to change the length of that top strap
Here it is closer, showing the anchor to the bag. Nice!
I used two D-rings because the bag I took all this hardware from had the wrong kind of adjustable doodad (a buckle, with metal eyelets). I didn’t want to mess about making my own thread-bound eyelets, so I borrowed a D-ring belt-fastening trick instead. It worked really well! Doesn’t slip at all due to the sturdy straps I made. I’m a bit chuffed with those!
I have been so flat out sewing this bag that I’m dog tired tonight. But I’m pleased with the result: the bag went to school already today and held up well, and it was a useful size (I was worried it would be too big).
Next time — and I know there will be a next time for bags — I will plan more in advance so I can add more pockets. I just ran out of time! And the learning curve was steep. I will probably also use some kind of stiffener for the base such as a plastic canvas, to give more rigidity.
Happy birthday Izzy! I hope the bag lasts you until at least next year. 😀
This year we have intentionally allowed our broccoli to go to seed. This will hopefully mean the next crop of broccoli that we sow will be from our very own seeds!
Seeding Broccoli plant
In the photo above you can see what happens if you leave some of the broccoli heads on the plant. We have already harvested the main head and a bunch of little side-shoots (these look just like “broccolini” that’s sold at the greengrocer).
The broccoli that we left on the plant has blossomed with cheerful yellow flowers, which then shoot up into the air on long stalks. The flowers are pollinated by our local bees and wildlife, and then those little pods grow: first green, and then they dry out and become brown.
Aphids on old Broccoli stems
Caterpillars going nuts for greens
Once the plant starts seeding, it becomes vulnerable to pests and diseases. I took the photo of the Aphids a couple of weeks ago: looks like they are really getting stuck in to that plant! But we have heaps of predatory insects that love munching on Aphids. By leaving them alone I’m encouraging the “good bugs” to stick around. They seem to be doing a reasonable job: the Aphids aren’t spreading to other plants. Great!
Last year we accidentally let some broccoli go to seed, and we were quite chuffed until we saw the Aphids arriving. We quickly pulled out all our old seeding plants because we were worried about encouraging an infestation. And, of course, the Aphids quickly transferred their attention to the young broccoli seedlings we had growing on. Oops! We’ve learnt better this year, and we’re leaving those skanky old broccoli plants to lure the Aphids and Cabbage White Moth caterpillars away from the real plants we want to protect!
Dried broccoli seed husks
Broccoli Seed
To collect the broccoli seed we just brought in those dried up brown pods and opened them up. They spilled out just like shelling peas. 🙂
Here’s hoping this seed will be viable for the next time we start some seedlings!
As promised in my last post, here begins a tutorial series on how to construct an octopus softie! For the first part, we will be looking at how to construct the body.
For this tutorial I’m going to concentrate on hand sewing, but I have previously used a sewing machine to assemble the body parts. I thought it would be fun to try English Paper Piecing to make this little fellow an entirely hand-sewn creation! That means you don’t need a sewing machine at all: just a needle and thread.
A Note on Materials and Colours
Choosing fabrics for the Octopus
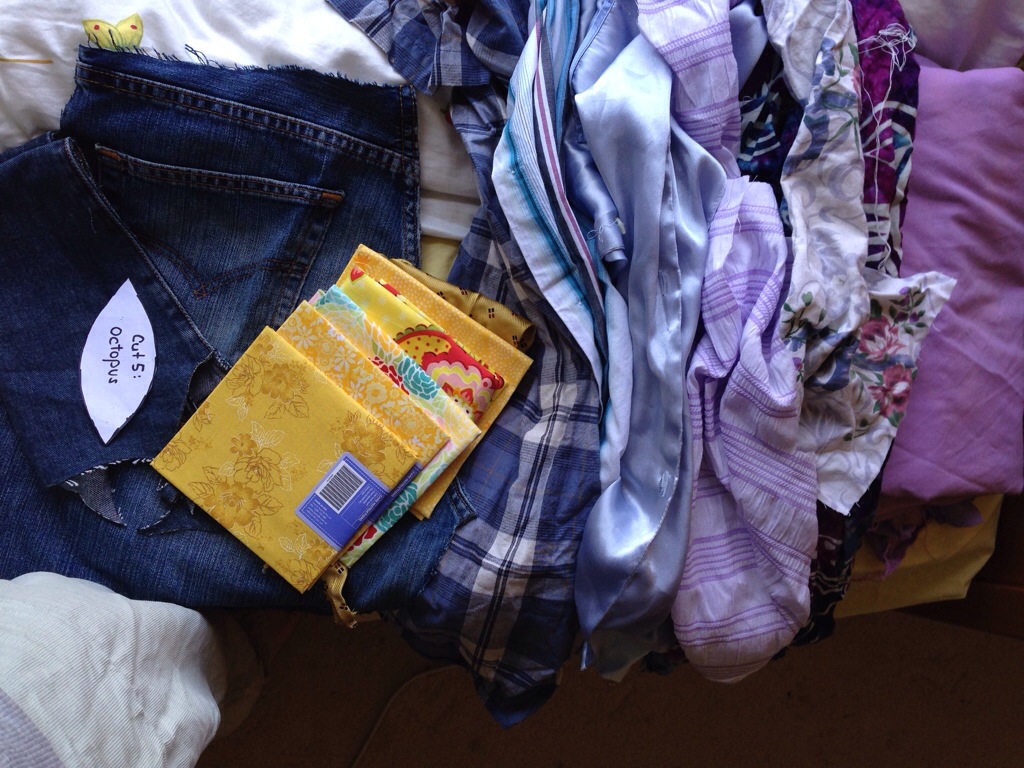
For the body: Choose 6 fabrics. Any scrappy fabrics will do, so long as they aren’t stretchy (like a knit). At least one of your fabrics should be low-volume print-wise, because you will be embroidering some eyes here. I prefer to choose very similar colours, but a rainbow would also be fun. 🙂 Five of these fabrics form the body, and the sixth goes on the bottom to cover the legs.
For the legs: Choose lightweight fabrics with a bit of scrunch, or slip. For example, cheesecloth, slippery nightie fabric, or an old t-shirt knit. Quilting quality cotton doesn’t work very well, as it is too stiff. For colours: go crazy! I find that using low-contrast colours for each leg works best (you will need three fabrics per leg). I make three strips from eight different fabrics and mix and match them.
For the booties: I chose some leftover blue linen, but I’ve also used denim cut from old jeans.
Other bits: A good firm fabric like heavy denim will also be needed for the “bottom” I mentioned earlier. And of course, you’ll need some stuffing – you could use leftover batting, or tiny scraps of fabric with fibrefill around it. Or just plain straight fibrefill. 🙂
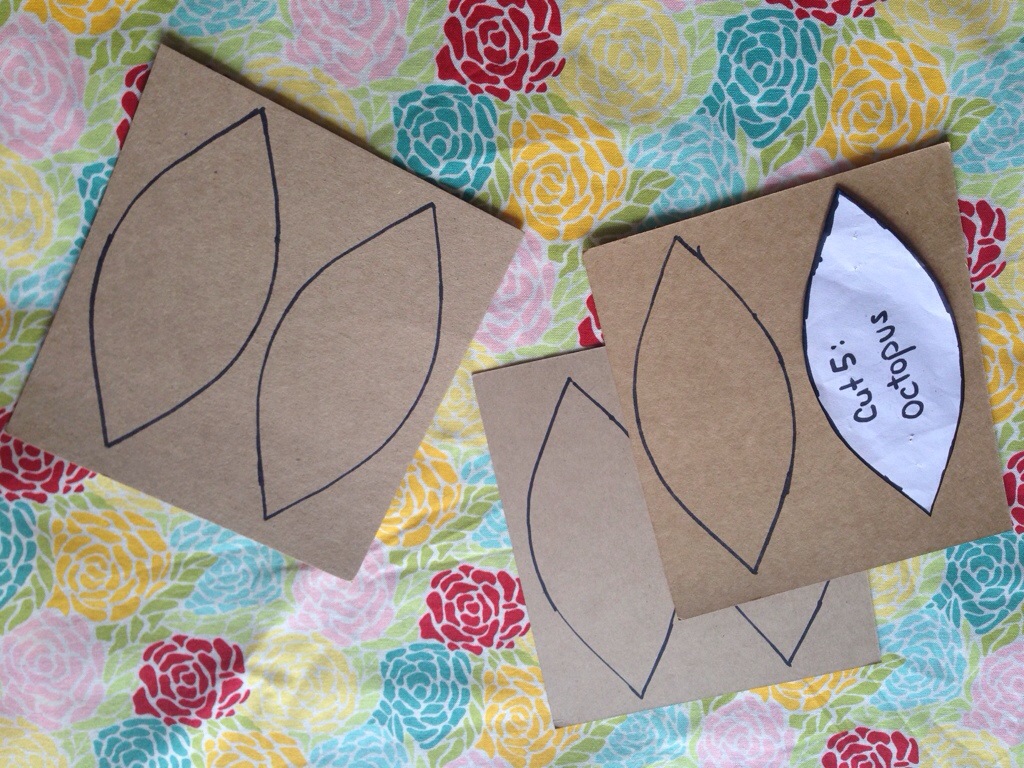
Step One: Make templates
With English Paper Piecing you create a bunch of card stock (or heavy paper) templates that help stabilise your fabric as you sew. First you will need to make a paper one, and then trace it onto something stiffer, like so:
Paper and card templates
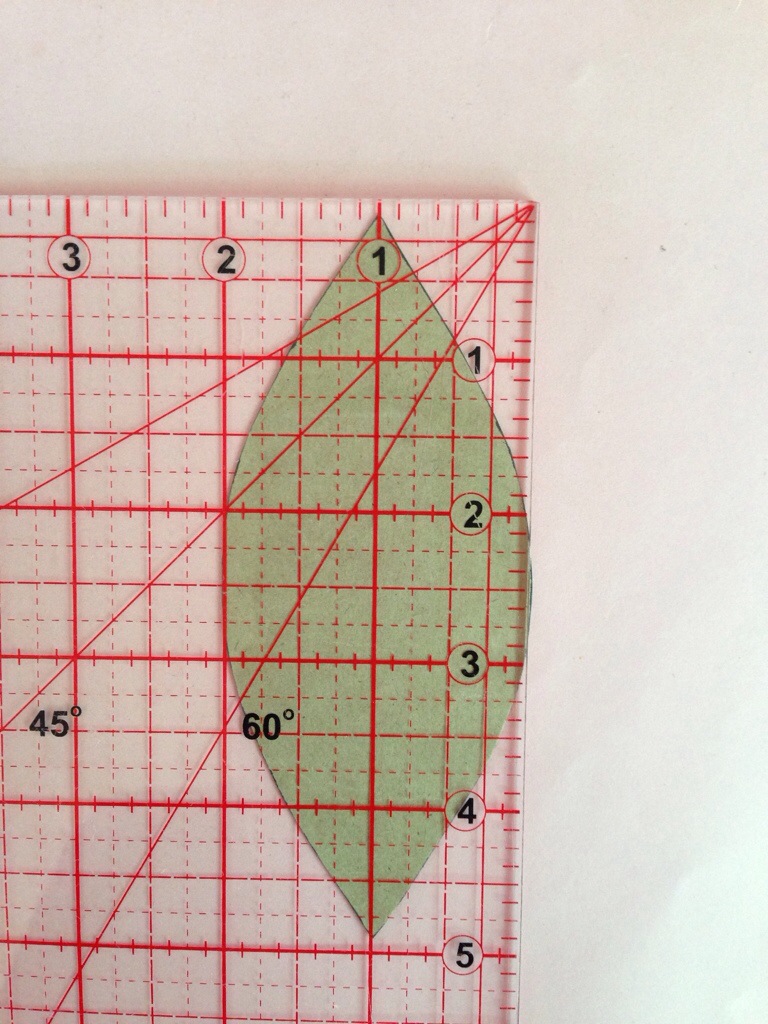
Your paper template should be about 5 inches long, and 2 inches wide. Here is my own template, underneath a grid (this may help you sketch your own). Aim for a gentle curve leading to a point at either end.
Template shape under a grid
Step Two: Secure your fabrics
Next up, place each template onto the Wrong Side (WS) of each body fabric scrap, making sure you have about 1/2 and inch of overlap to secure with stitching. Cut it out, and then get a sturdy piece of thread (I used perle cotton, but it doesn’t need to be this heavy). You are going to stitch the fabric around the template so that it takes the right shape:
This slideshow requires JavaScript.
A few notes:
Don’t stitch through the template, just catch a bit of the fabric itself.
Avoid stitching too close to the edge of the fabric – you don’t want the thread pulling through the edge
Use a nice even tension, not too tight, or your template may buckle up and it will be harder to sew later.
This stitching will be cut later, so don’t worry about how it looks!
It will use a surprising amount of thread because of zig-zagging back and forth.
When you get to the top of the template, fold the fabric around the top point in the same way, and secure with a few stitches.
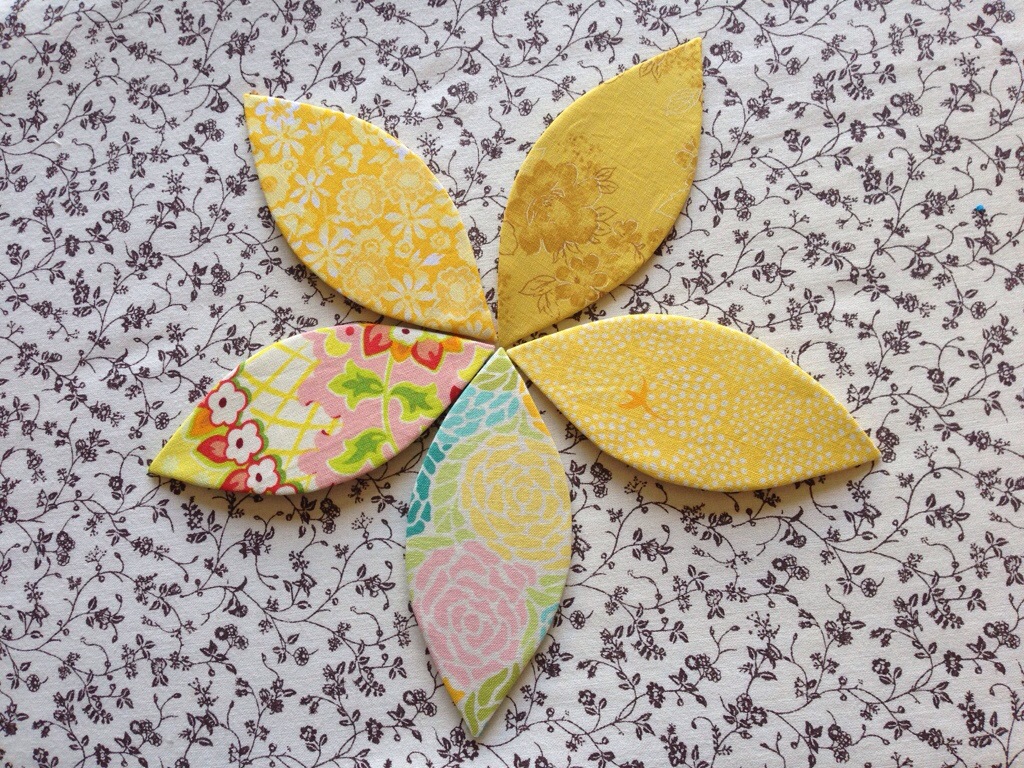
Once you have five templates sewn up, arrange them like this:
Arrange the fabrics in a flower shape
The centre of the flower will be the top of the octopus head. You might want to take a picture so you know which fabric goes where!
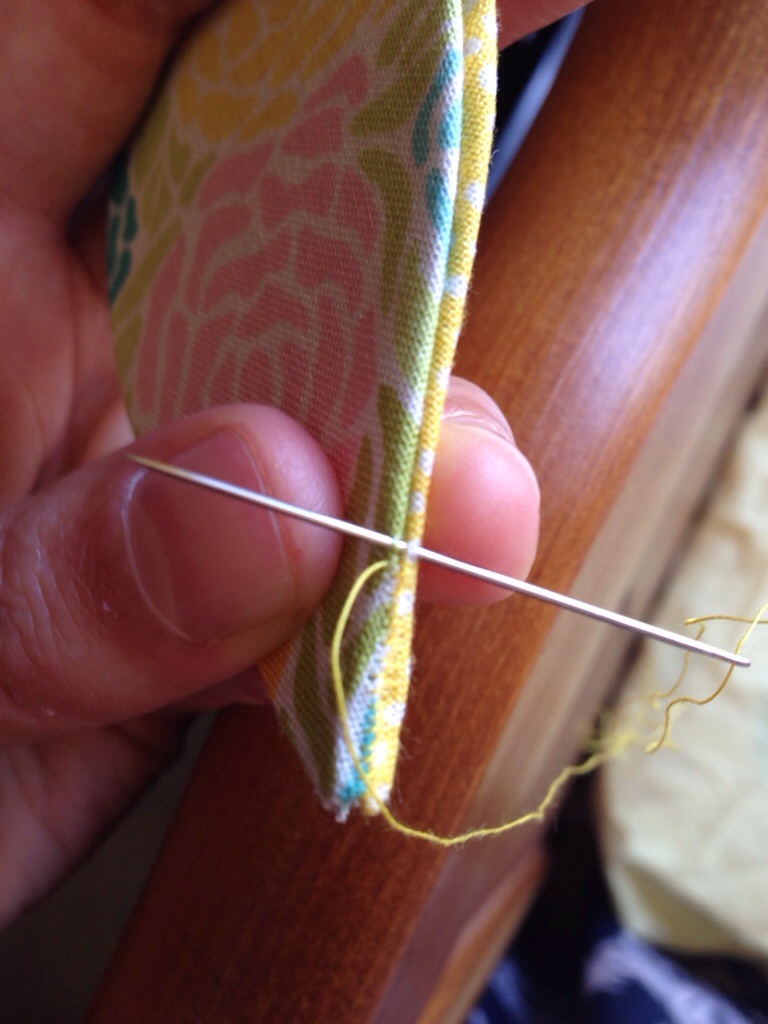
Step Three: Stitch together
Select two of your fabric templates and lay them side by side:
Stitch together using small stitches.
Take a couple of stitches at the bottom to secure your thread, then work up the spine of the template catching a few threads from each fabric. The smaller your stitches are together, the stronger your seam will be (and it will take longer to sew!). Keep going until you get to the top, then secure your thread again.
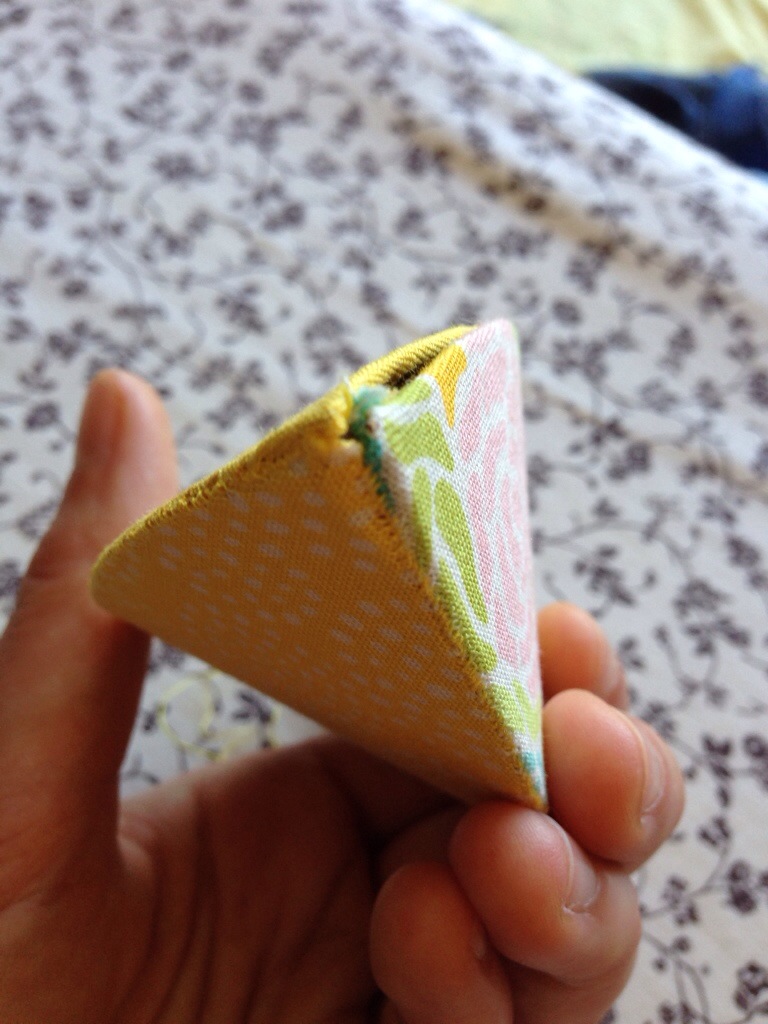
Now place the next fabric piece against the one you just attached. It is more awkward this time, because the curve of the template is already forcing a shape, a teardrop:
Three template pieces make a teardrop shape.
Here you can see I’ve already sewn this seam, and the three pieces naturally make a lovely teardrop shape (great for a Christmas decoration!). The most awkward places to sew are at the points, so try not to pull the fabric too much in these areas. It is reasonably forgiving when it is stuffed, though. 🙂
Once you’ve sewn up the second seam and have your own teardrop shape, you can push down on the points to make a hemisphere:
Squeezing the points
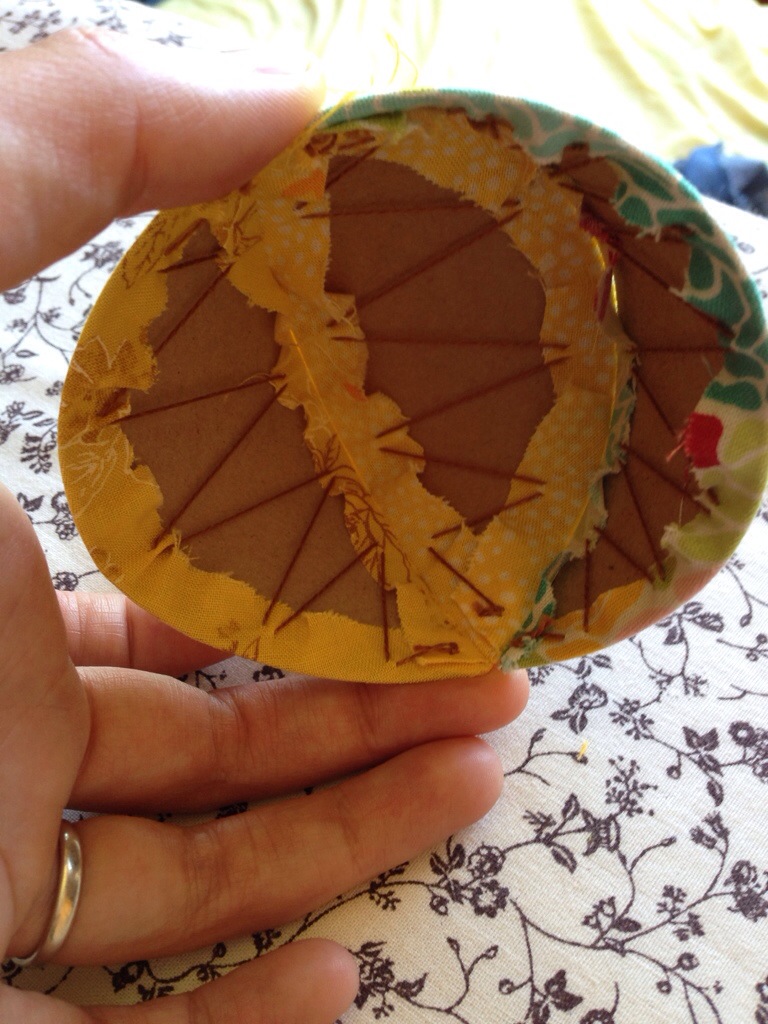
You are now going to remove the card piece from that middle template. This will make it easier to attach the next piece:
Middle card removed
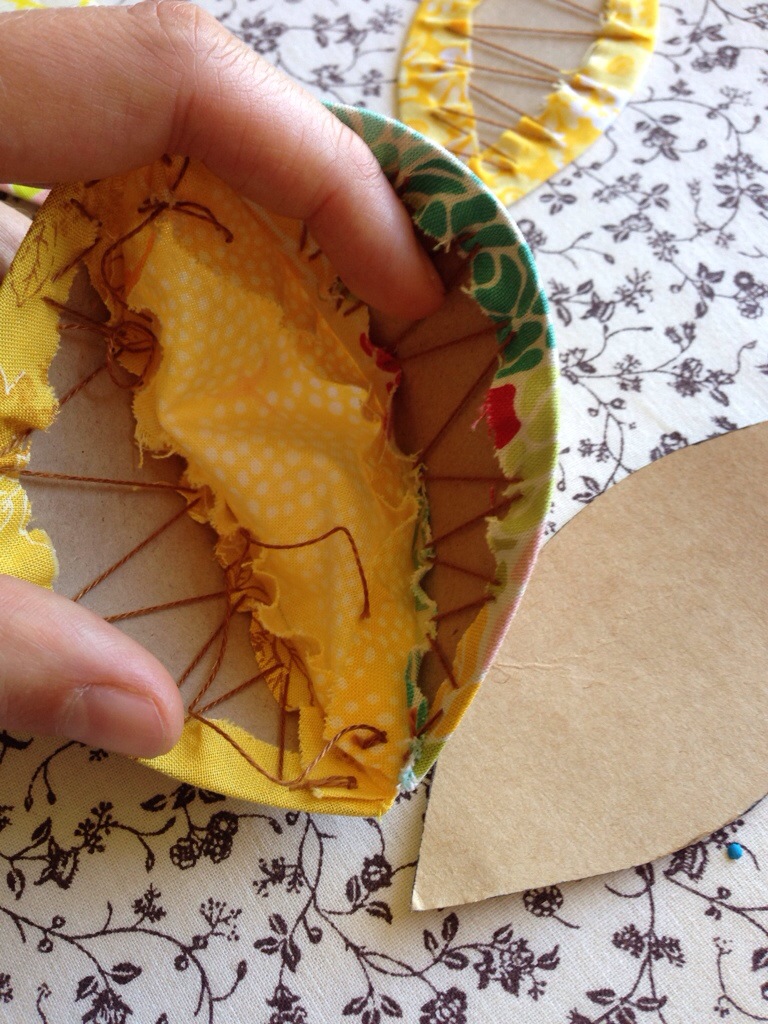
Now you keep repeating this last step, until you run out of pieces, i.e.:
attach the next piece (forming a teardrop shape as you go),
and then remove the middle card.
If you are in doubt as to which piece to remove the card from: it is always the one that has been completely sewn up. Don’t remove the card from any piece that still has a raw edge! 🙂
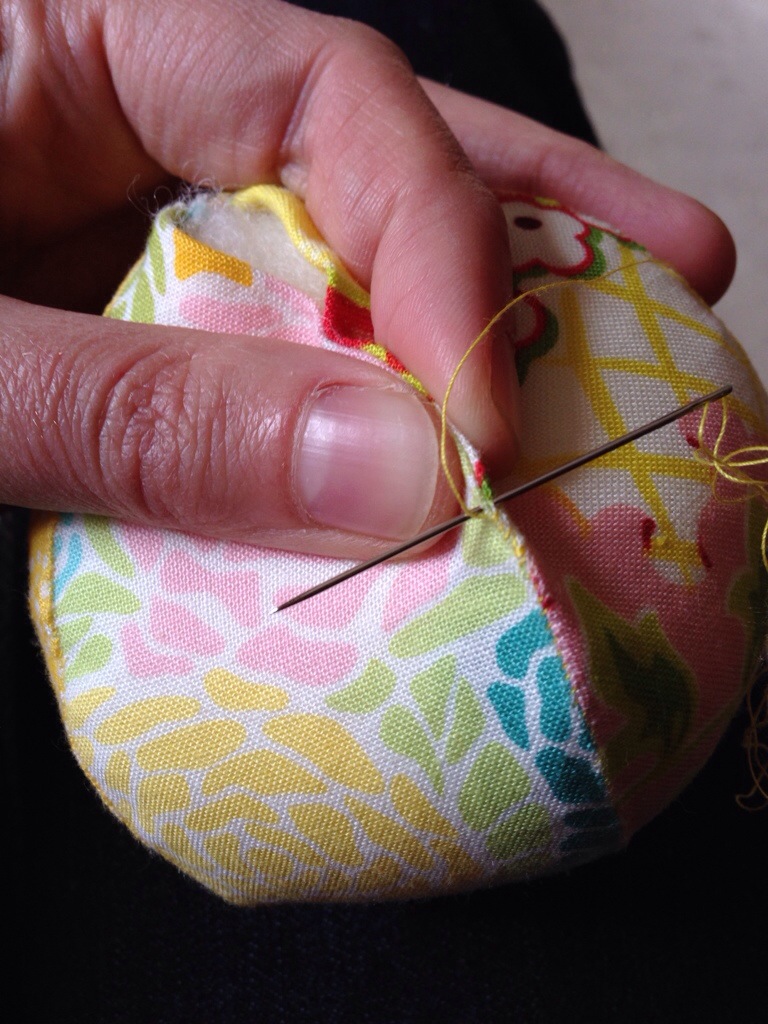
Once this (somewhat time consuming) process is complete, what you have is just one seam left to sew. Begin sewing in the same way you did the others, but stop about half way up. Now snip out the last two cards, and tidy up any leftover bits of thread. Stuff the opening with whatever you’ve chosen to fill with: fibrefill or batting around the casing and fabric scraps in the middle, if you are using any:
Pinch to sew the remainder of the seam.
Now you can sew the rest of that seam, pinching the folded edges together. If you stuff too firmly, this will be difficult. I like to have a bit of squish in the final product:
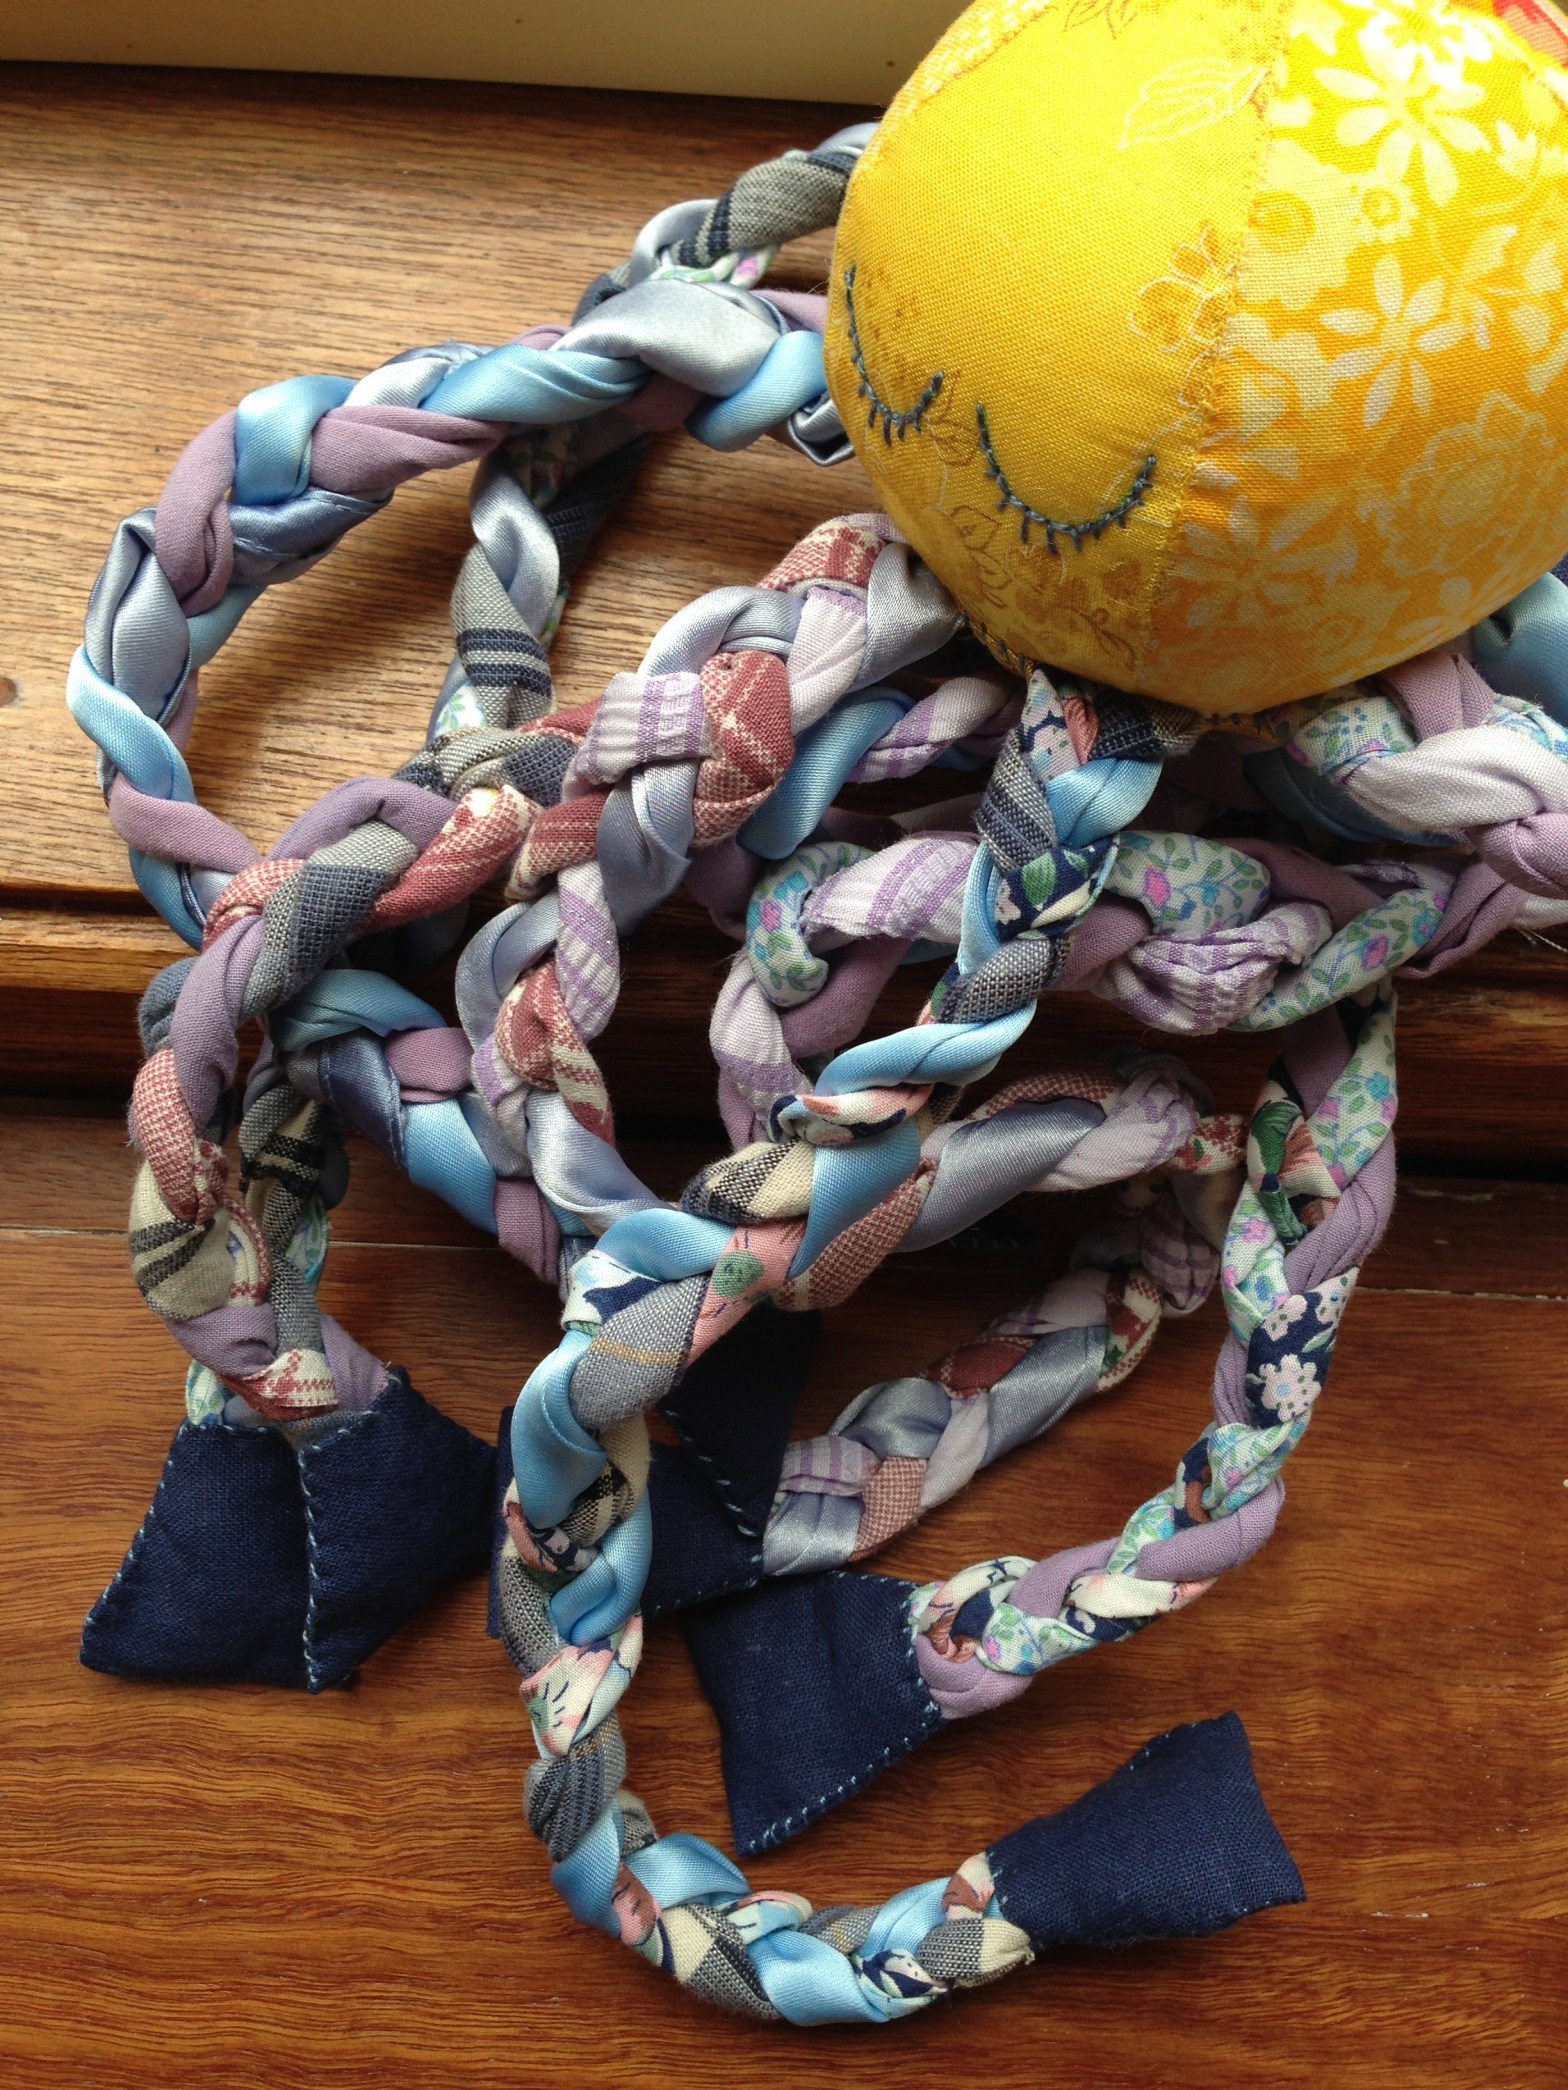
I have been making an octopus softie for Evie’s birthday coming up in early March. This is a design I came up with a couple of Christmases ago that works really well with scrappy lightweight fabrics!
I took the octopus on a tour of the house, and he found some nice quiet places to sit:
Chillin’ on the sill
Octopussy Legs
Just hangin’
I’m very pleased with how this one came out. 🙂
This little guy is completely hand sewn (why is it my softies are always a “he”?), and has some really sweet details, such as the plaited scrap fabric legs, little linen booties, and peaceful eyes.
I have a bunch of photos of the construction, and I’m very proud of my design, so I’m planning to do a series of posts on how to make one of these for yourself! Stay tuned for:
Okay, so I mentioned a while back that I had done some DIY in the kitchen, and had actual photos of some progress. This is true: yay!
Unfortunately, when I was painting my kitchen cabinets, I didn’t think of taking a “before” picture. It turns out that the part of the kitchen I painted is not a very well-photographed area of the house! (Who knew that the fridge is not very photogenic? ;))
I trawled back through over a year of photos (and came across some really cute ones of the kids!) and all I could find was this one:
William hanging out in the kitchen
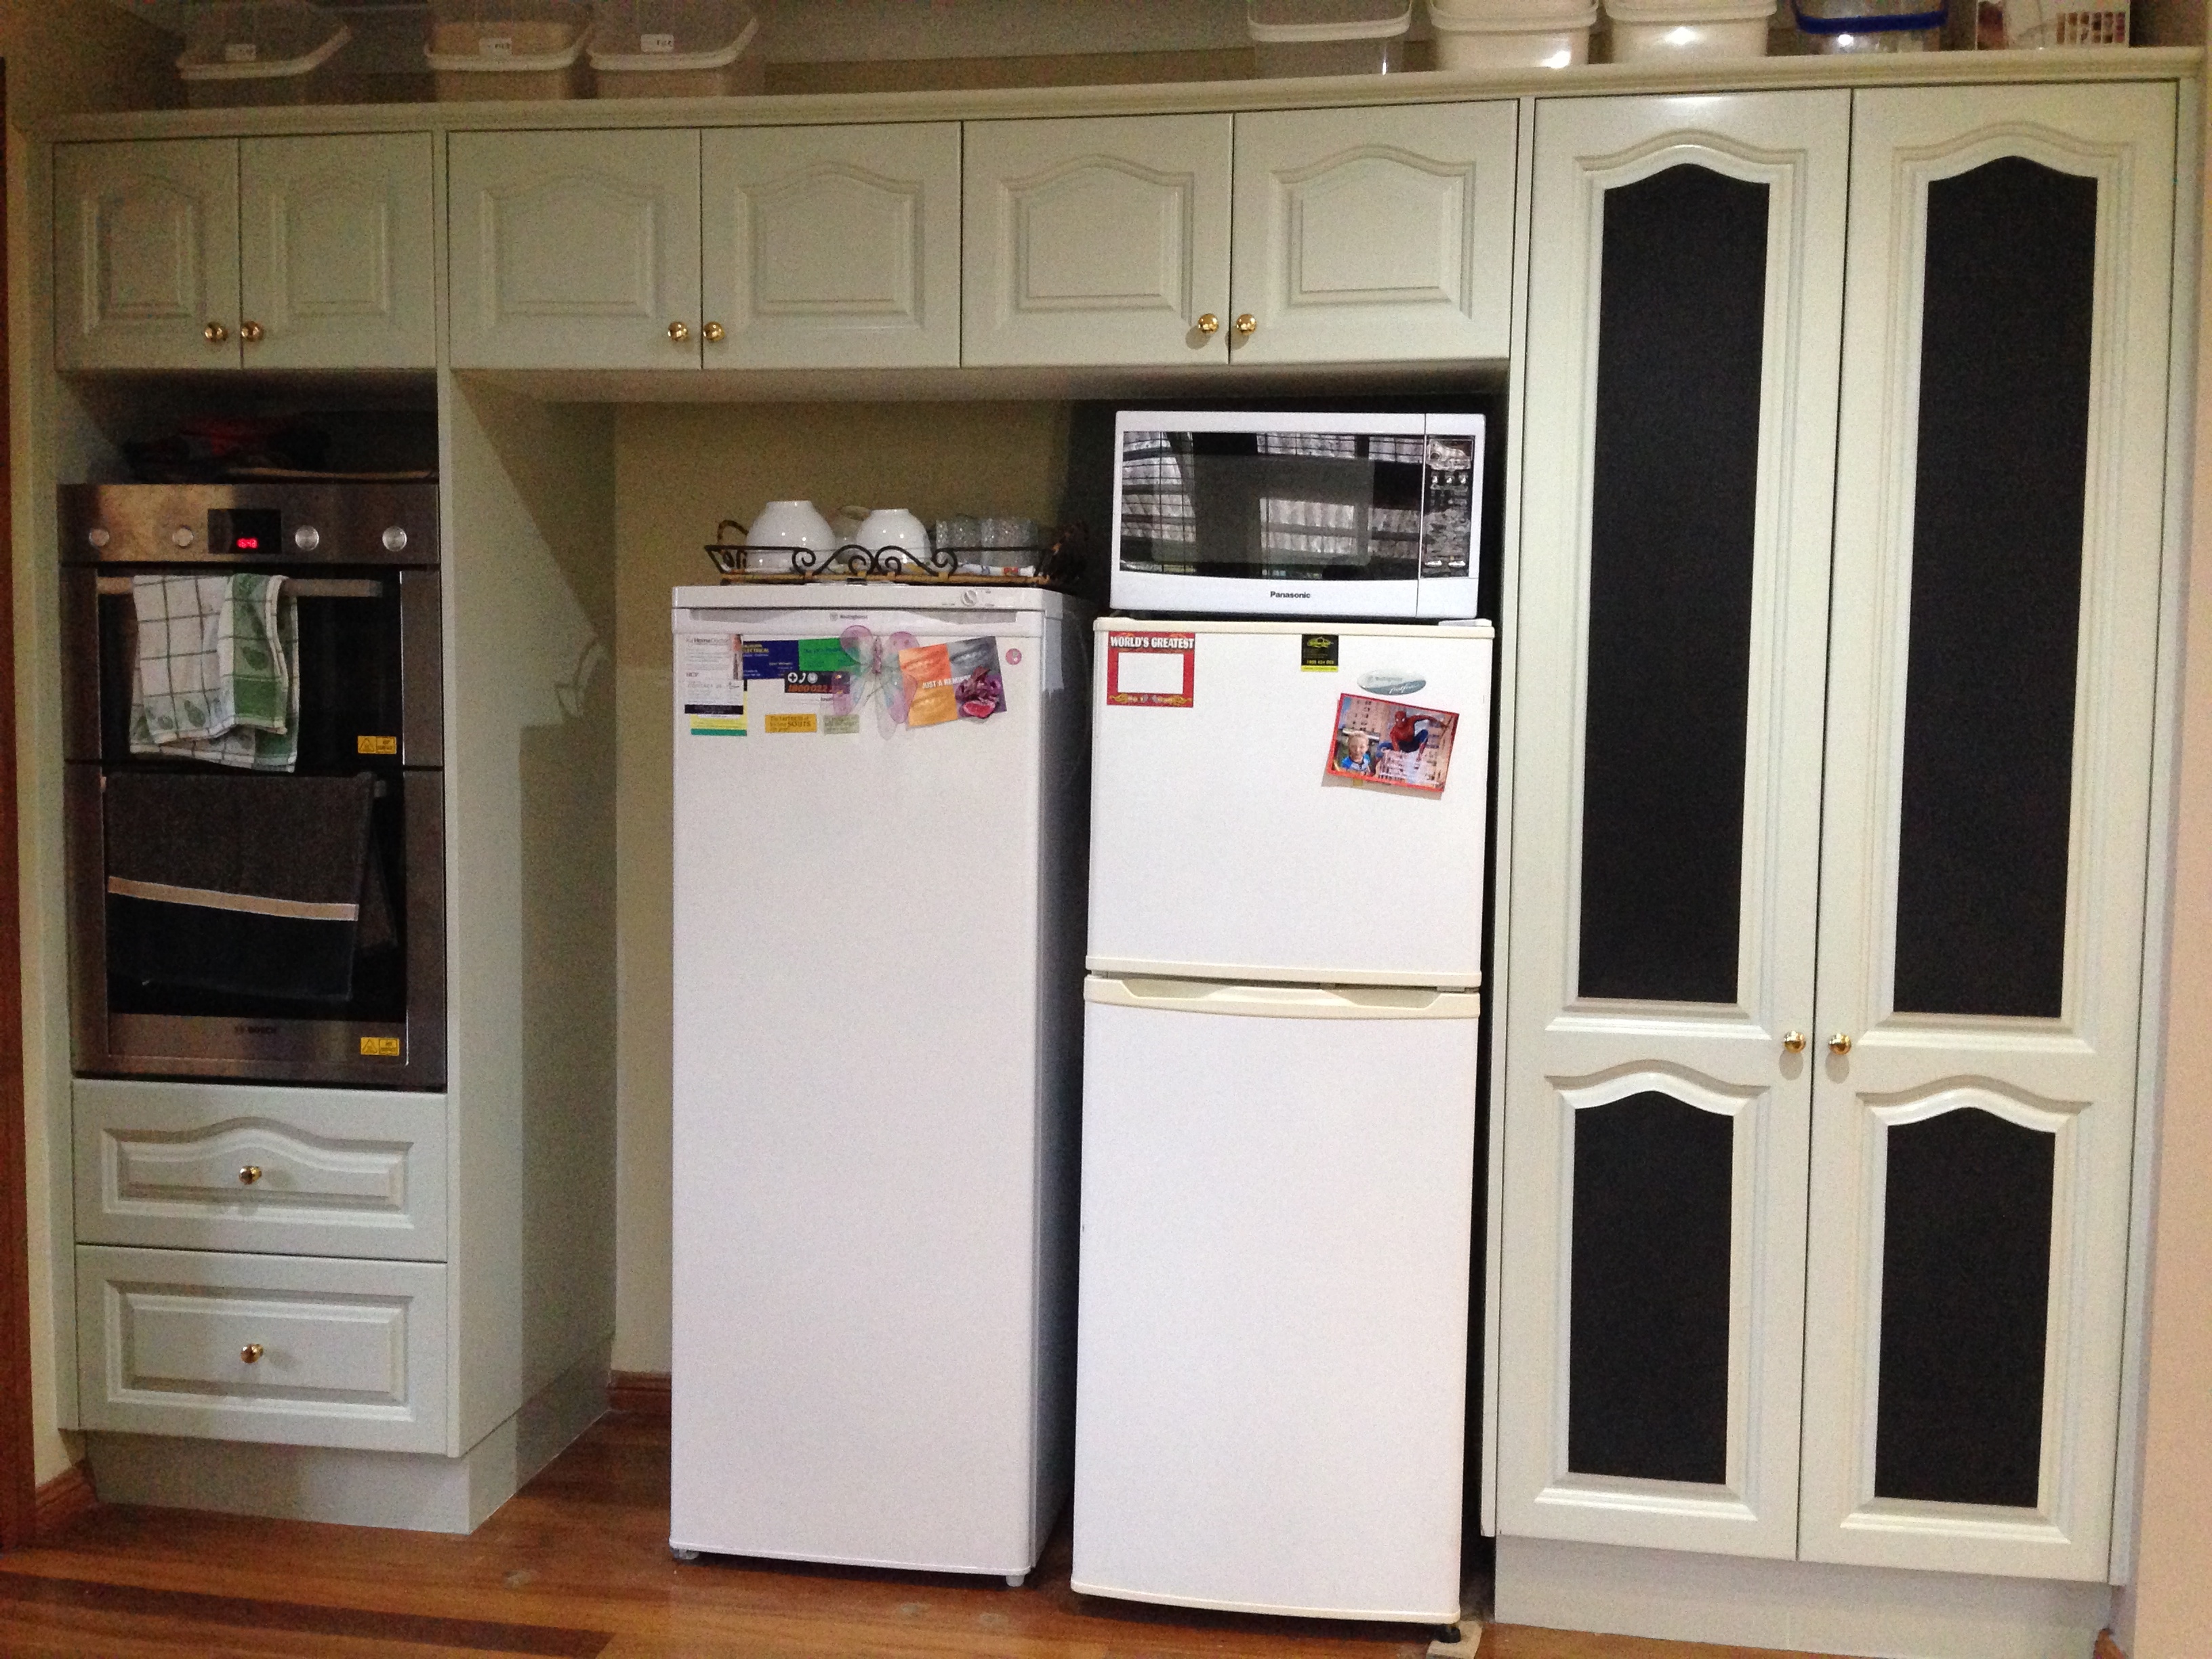
That’s my boy: what a cutie, am I right? But you’re supposed to be looking at the top right corner of the photo, where the drawers under the oven are showing. Up! Up! Right … there! Okay, so now imagine a whole wall of cupboards that wood grain colour, with a large nook for a fridge and freezer.
Here’s what it looks like after I finished the cabinets (woah, yeah, straight to the “after”!)
Cupboards painted!
That’s a lot of cabinets! Why did I pick these ones to do first?
Inconspicuous test walls
One of the first things I realised about DIY painting the kitchen cabinets was that I feared doing a bad job. It’s all very well to do a bunch of research and choose the best primer and paint combo that you think will work, but at some point, you are leaping in and destroying an existing finish. Scary, right?
The nook for the fridge and freezer provides a bunch of space I could work on that was less conspicuous than the front faces of the cabinets. It’s the same solid wood as the cabinets, only there are no mouldings to worry about, and if I didn’t get the finish properly smooth (or with drips, or uneven colour, …) then I could work on fixing it and trying again, without having done it in full view of everyone.
I was also concerned about drying time for paint, and with little kids in the house, that’s a problem! I could fence off the area using the fridge to make sure no sticky fingers got onto the finish before it dried.
Removable doors, up high
See again: small children! If I’m going to live with no cabinet doors for a goodly long while, it had better be with cabinets that the kids can’t reach into! If I did the doors under my prep area I know for a fact that the measuring cups would be in with the play dough set (or the garden), and I’d be constantly rescuing my cheese grater, mixing bowls and other stuff that is really annoying to have to retrieve and clean up all the time. 🙂
Not to mention the plastics cupboard. Oh boy, they love getting into that!
Cabinet boxes don’t need painting
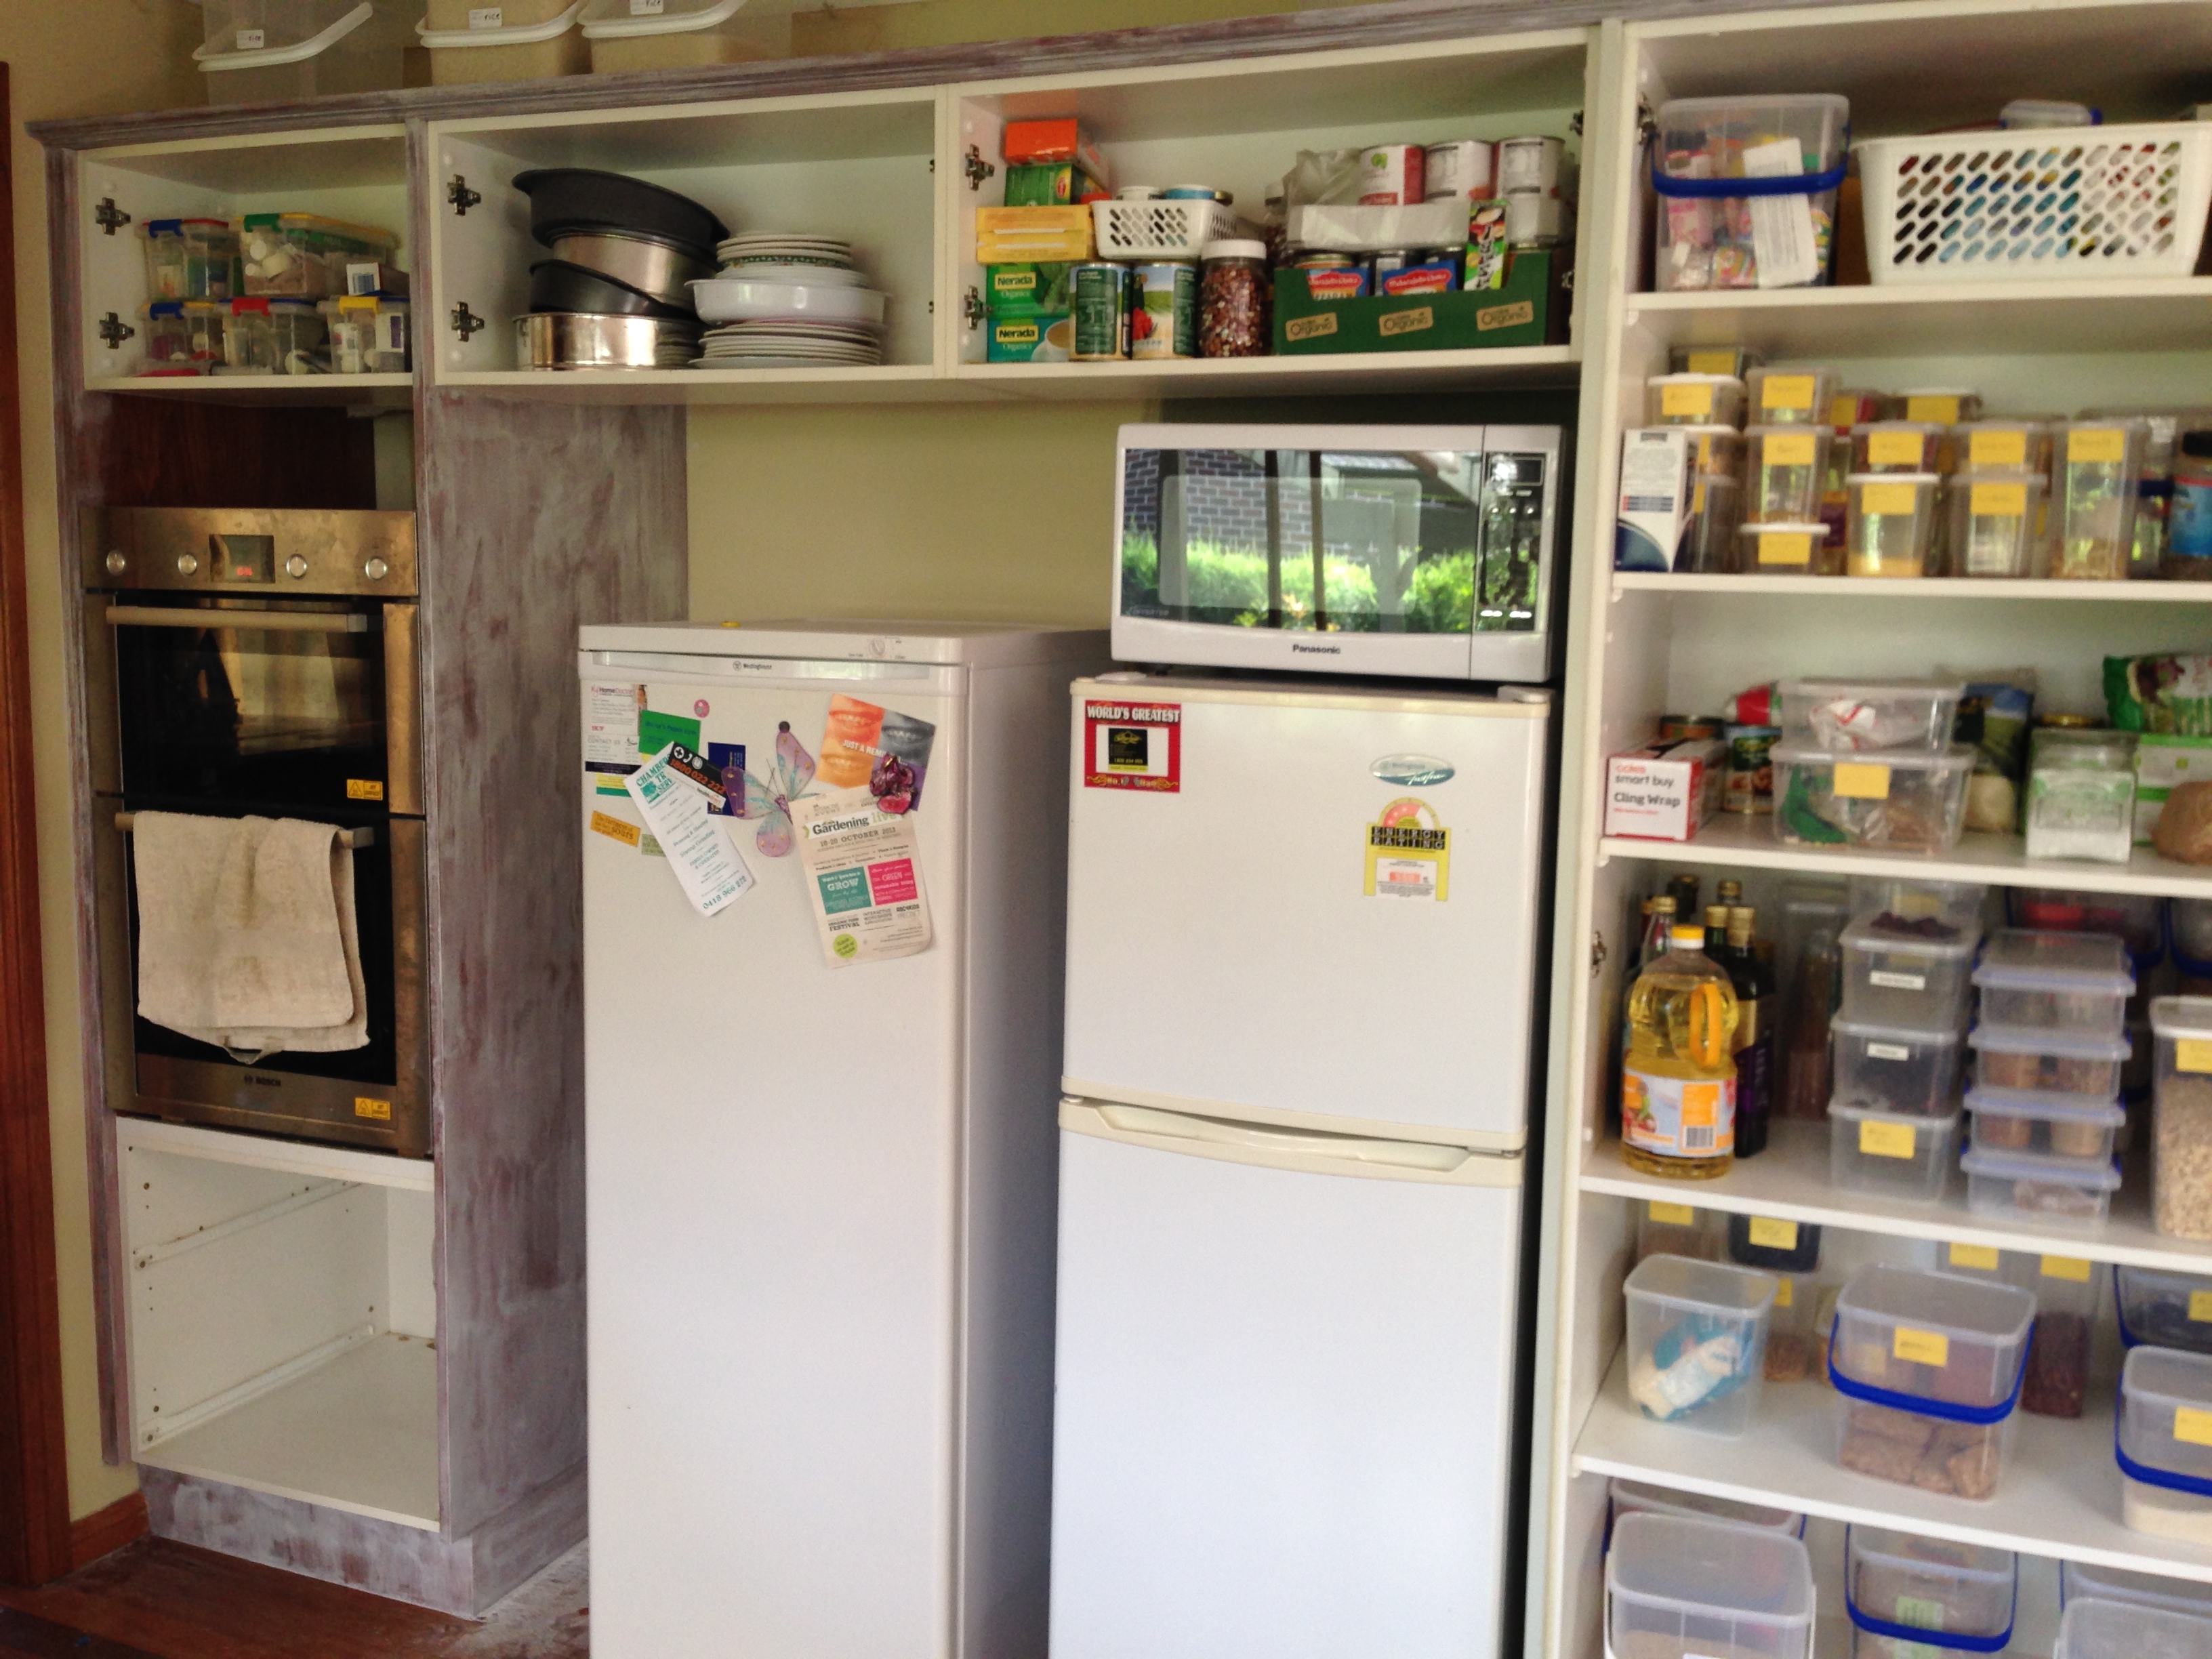
First coat of the primer goes onto the cabinet boxes.
It turns out that the cabinet boxes in this part of the kitchen are all finished with that white laminate washable stuff, so they don’t need to be painted. That’s a total win, because I don’t have to take everything out of the cupboards!
When you are using a kitchen at the same time as renovating it, this is a major factor in where to start. I didn’t want to be living with masses of clutter for the whole time it took me to complete the project!
I knew it would take a long time
A really long time. I am a full-time carer of pre-school aged children, after all! From the first photo in this series, to the last, we have one month of elapsed time. (Actually, that doesn’t seem like that long, now. It did at the time! Ha!)
This slideshow requires JavaScript.
So how did I do it?
Okay, so enough background, on to how I actually did it! 🙂
Here is a quick outline of what had to be done:
Sanding with coarse grit paper (120 grit, wet and dry)
Filling any holes with putty (next time I will also do gappy joins in the moulding as the dark cracks show with the pale coloured paint)
First coat of primer
Sanding with medium grit paper (240 grit, wet and dry)
Additional coats of primer and sanding (until the wood colour no longer showed through so much)
First coat of semi-gloss paint
Sanding with finer paper (400 grit, wet and dry)
Additional coat(s) of semi-gloss, sanding between
That’s a lot of sanding, and paint drying time! I began on the wall beside the fridge, and that worked out with a smooth enough finish that I was ready to pull the trigger on the whole project. So I waited about … a year … and then proceeded with the rest. 🙂
Sanding
Sanding block with foam and paper.
Sanding block ready to use.
I do all my sanding by hand, using an off-cut piece of wood from when we constructed the chicken coop. I cut up a bit of foam and placed it between the block and the paper, so that it had a bit of “give”. I don’t know whether this is something a pro would recommend, but it worked for me!
For the fiddly bits in the moulding, I used the same piece of foam, but I folded it up and ditched the block. I also cut the sandpaper up into little pieces so I didn’t have to wrestle with it, or have sharp folded corners scratching areas I wasn’t paying attention to. Mostly I just used my finger with an even gentle pressure to do the moulding.
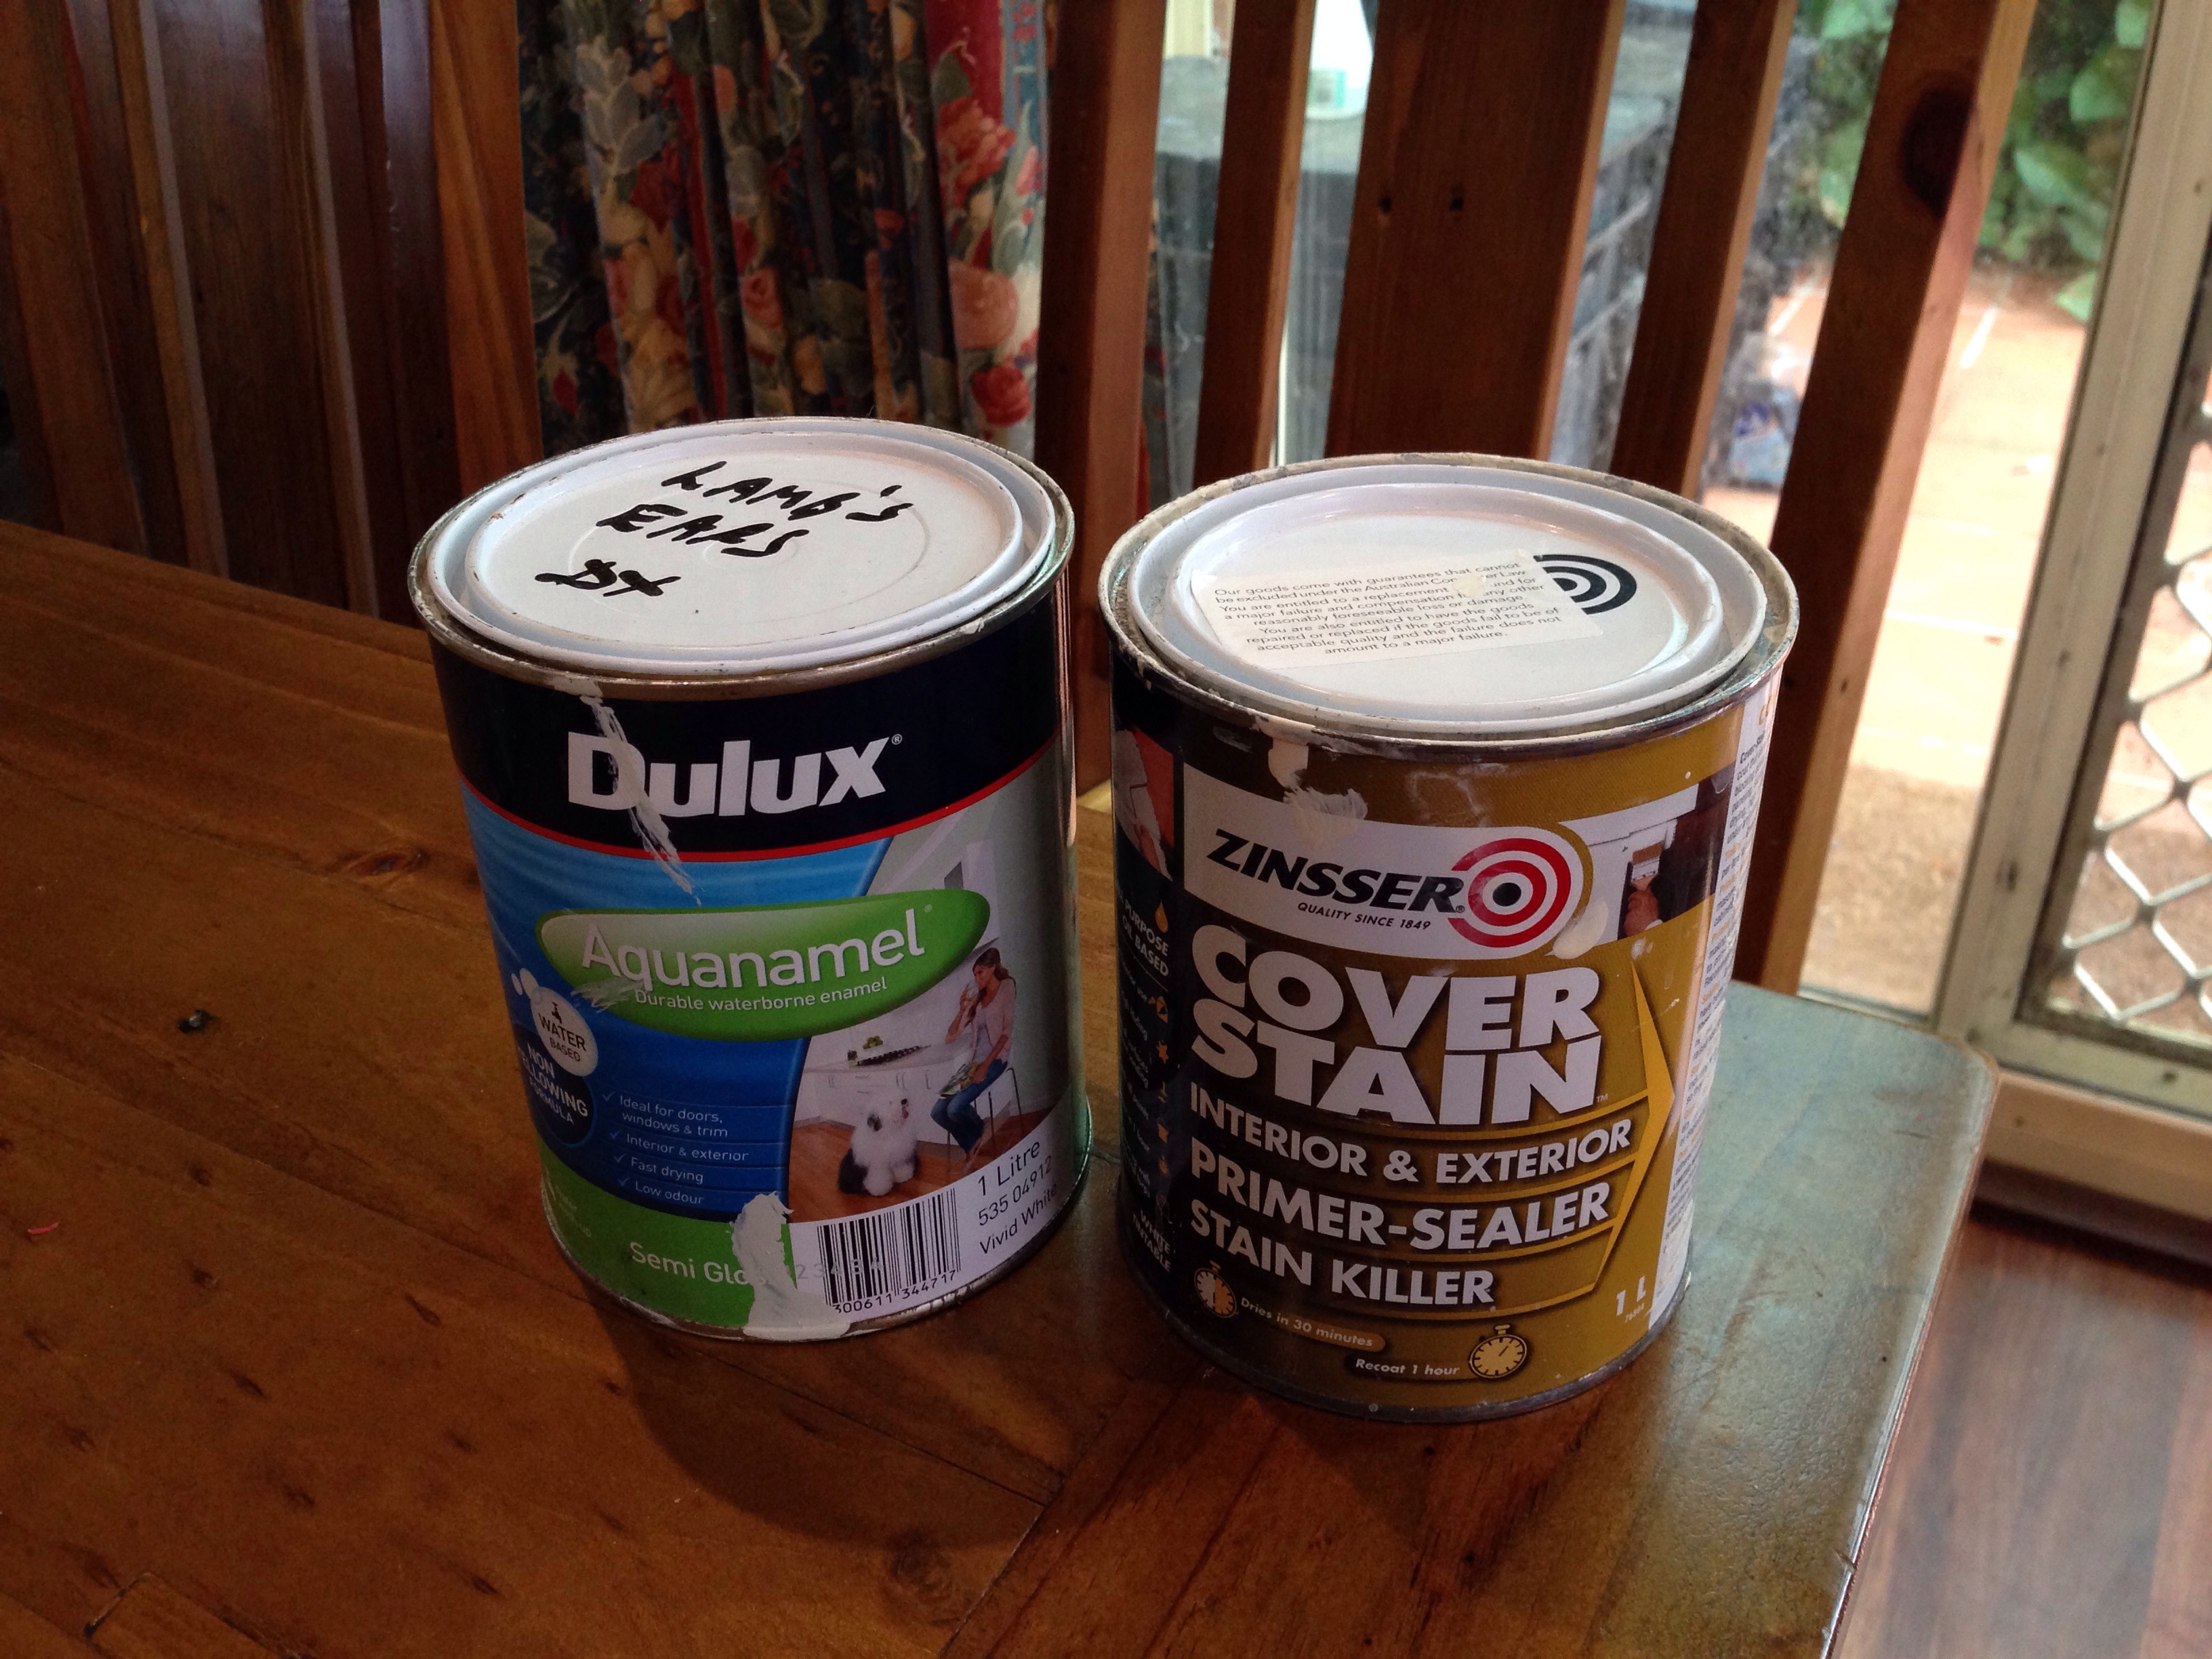
Priming
Top-coat (left) and Primer (right)
I used Zinsser “Cover Stain” primer on the advice of the hardware store. It is meant to stop the knots in your wood from bleeding through your coats of paint. I thought at the time that it meant it would cover the existing stain nicely. Well, that too!
It’s an oil-based primer, which means turps clean-up. Which is a pain! It takes ages to wash out brushes with turps, and I feel awful pouring that stuff away. But it must be done because the existing finish is almost certainly an oil-based Estapol and you can’t put water-based paint onto an oil-based finish.
This primer allows you to paint your topcoat with either an oil-base or a water-base – check your tin to make sure. 🙂
Painting
The semi-gloss paint I chose is Dulux Aquanamel. It is a water-based paint, which is vastly easier to deal with for a DIY job. There is a lot of back-and-forth over how shiny a finish you can achieve, but at the end of the day, these were the main factors in my choice:
Drying time: oil-based takes ages to dry. Ages. And long drying times mean fluff and dust are more likely to stick on. It also means that curing the paint is quicker (and I don’t want to keep small children away from low cabinets for weeks to avoid getting dents and scratches).
Stink factor: oil-based paint is stinky, and it lets off gasses for weeks and weeks. I don’t want that smell in my kitchen.
Volatile Organic Compounds (VOC): Low VOC paints are more environmentally friendly. Not brilliant, but better. Water-based paint is low VOC, but oil is not.
Easy clean up: as I said above, oil-based paints are a PITA to clean up.
Easy application: I found that my oil-based primer is a whole lot “stickier” to apply than my water-based primer. I think that goes generally for the top coats too.
No yellowing: over time, oil-based paint will yellow. I didn’t want that happening with my fairly pale top coat.
Applying the Paint
I used a brush to apply both the primer, and paint. I used different brushes for each so that I could keep the topcoat brush in the best condition I could manage. The oil-based primer is harder to clean up, and so the bristles in the brush do clump up slightly (enough that I don’t want to use it for the top coat).
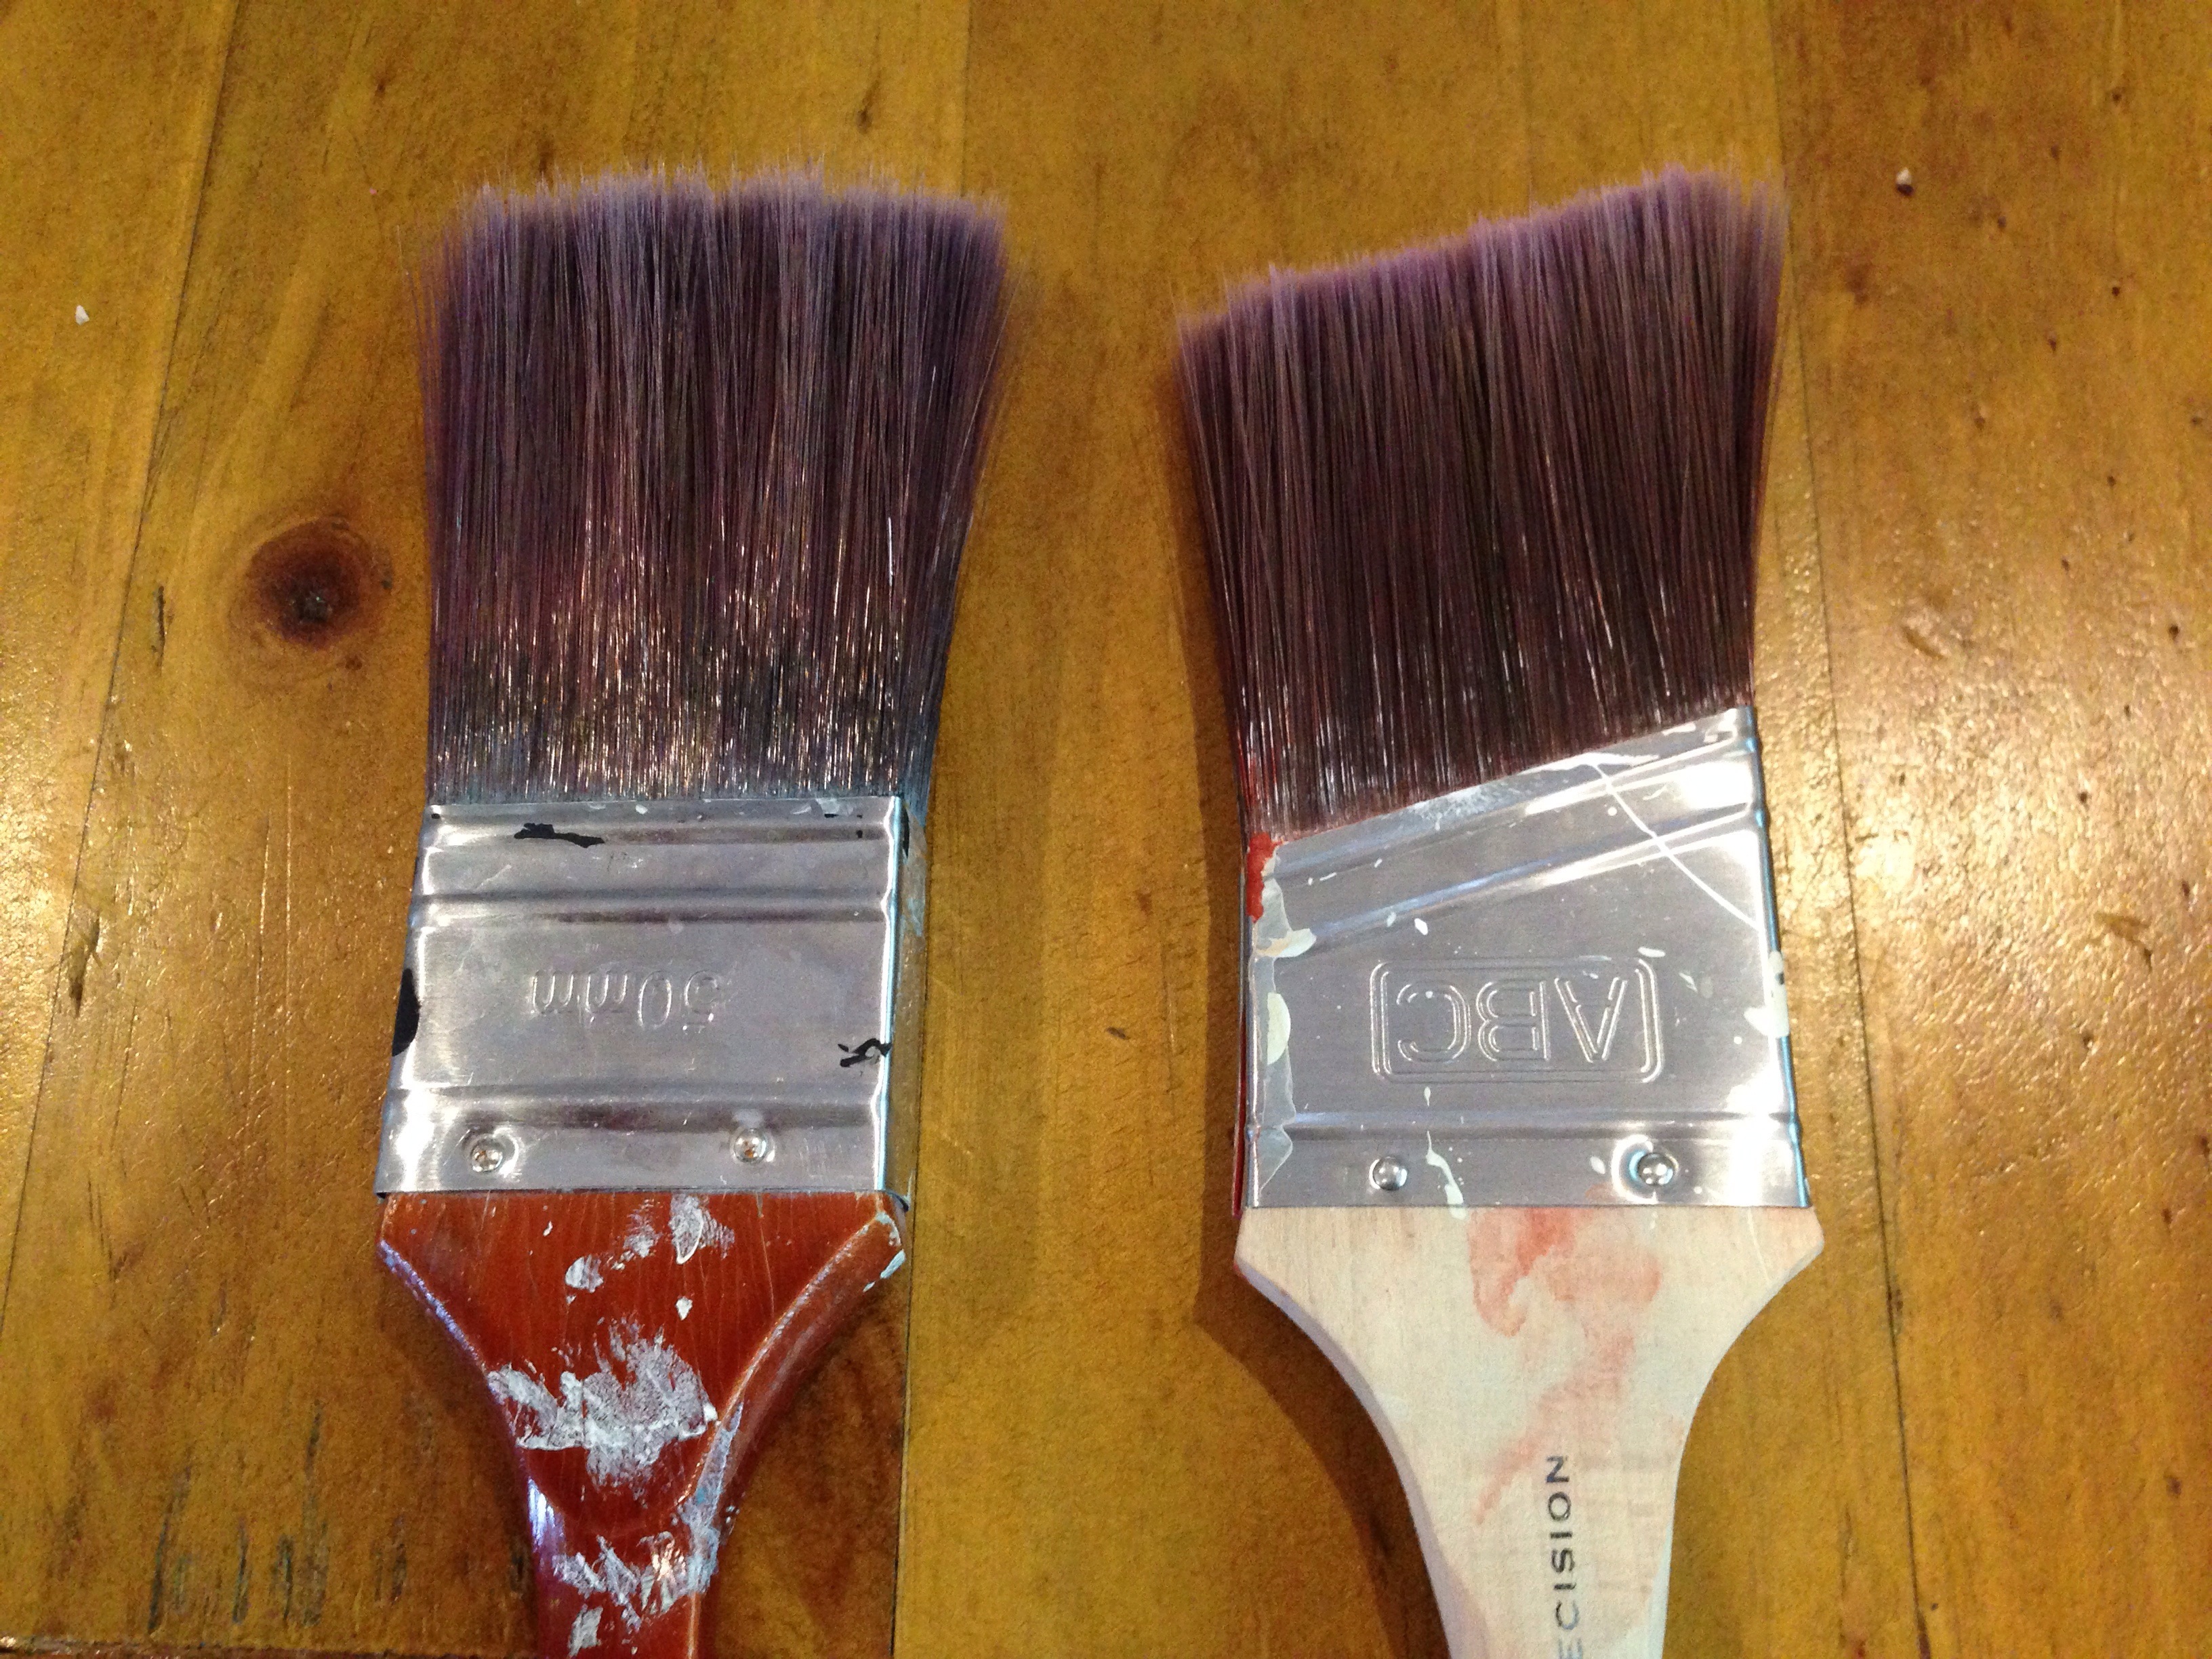
The best brush I’ve worked with so far is this one on the right:
Regular 50 mm brush (left) and angled 50 mm brush (right)
It has an angled edge, which is great for cutting-in and for moulding. I found I just painted the whole project with the one brush so I didn’t have to mess about changing them over. Previously I was using the brush on the left (natural bristles, very nice). It’s still a great brush, and the 50 mm size is perfect for my long-fingered, but not terribly strong hands.
I bought the angled brush to do the moulding on the cabinets and now I’m using it as my general go-to paint brush. It is much easier to get a straight clean line at your wall faces (ie. “cutting in”)! And I’ve done a lot of this with all the wall painting. If you need to buy a brush: an angled one is great.
Avoiding brush strokes
To avoid getting brush strokes on my cabinets I used thin applications of each coat of paint. The cabinet boxes took three thin coats of primer, then two coats of top coat. The cabinet doors took two of primer, and three of top coat. So in other words, five coats of paint.
In between each coat, I sanded. The primer doesn’t feel particularly smooth so I think I took off a little too much primer initially, trying to achieve a really glossy smooth finish: this isn’t going to happen! That’s probably why the cabinet boxes took three coats of primer.
The doors were more difficult than the flat cabinet boxes, obviously, but not due to the moulding. That was just a bit fiddly. I used this excellent DIY blog post as my technique for putting the paint onto the door fronts. The hardest ones were the big pantry doors because:
I was using blackboard paint as well as semi-gloss, and that meant taping things off.
Their size meant I had to work really fast to maintain a wet edge over all the surfaces. I managed to do each coat on the doors in one gulp, by just being really quick.
General tips
Okay, so that’s most of the detail involved, and by now you are probably thinking “Will this post ever end ??”
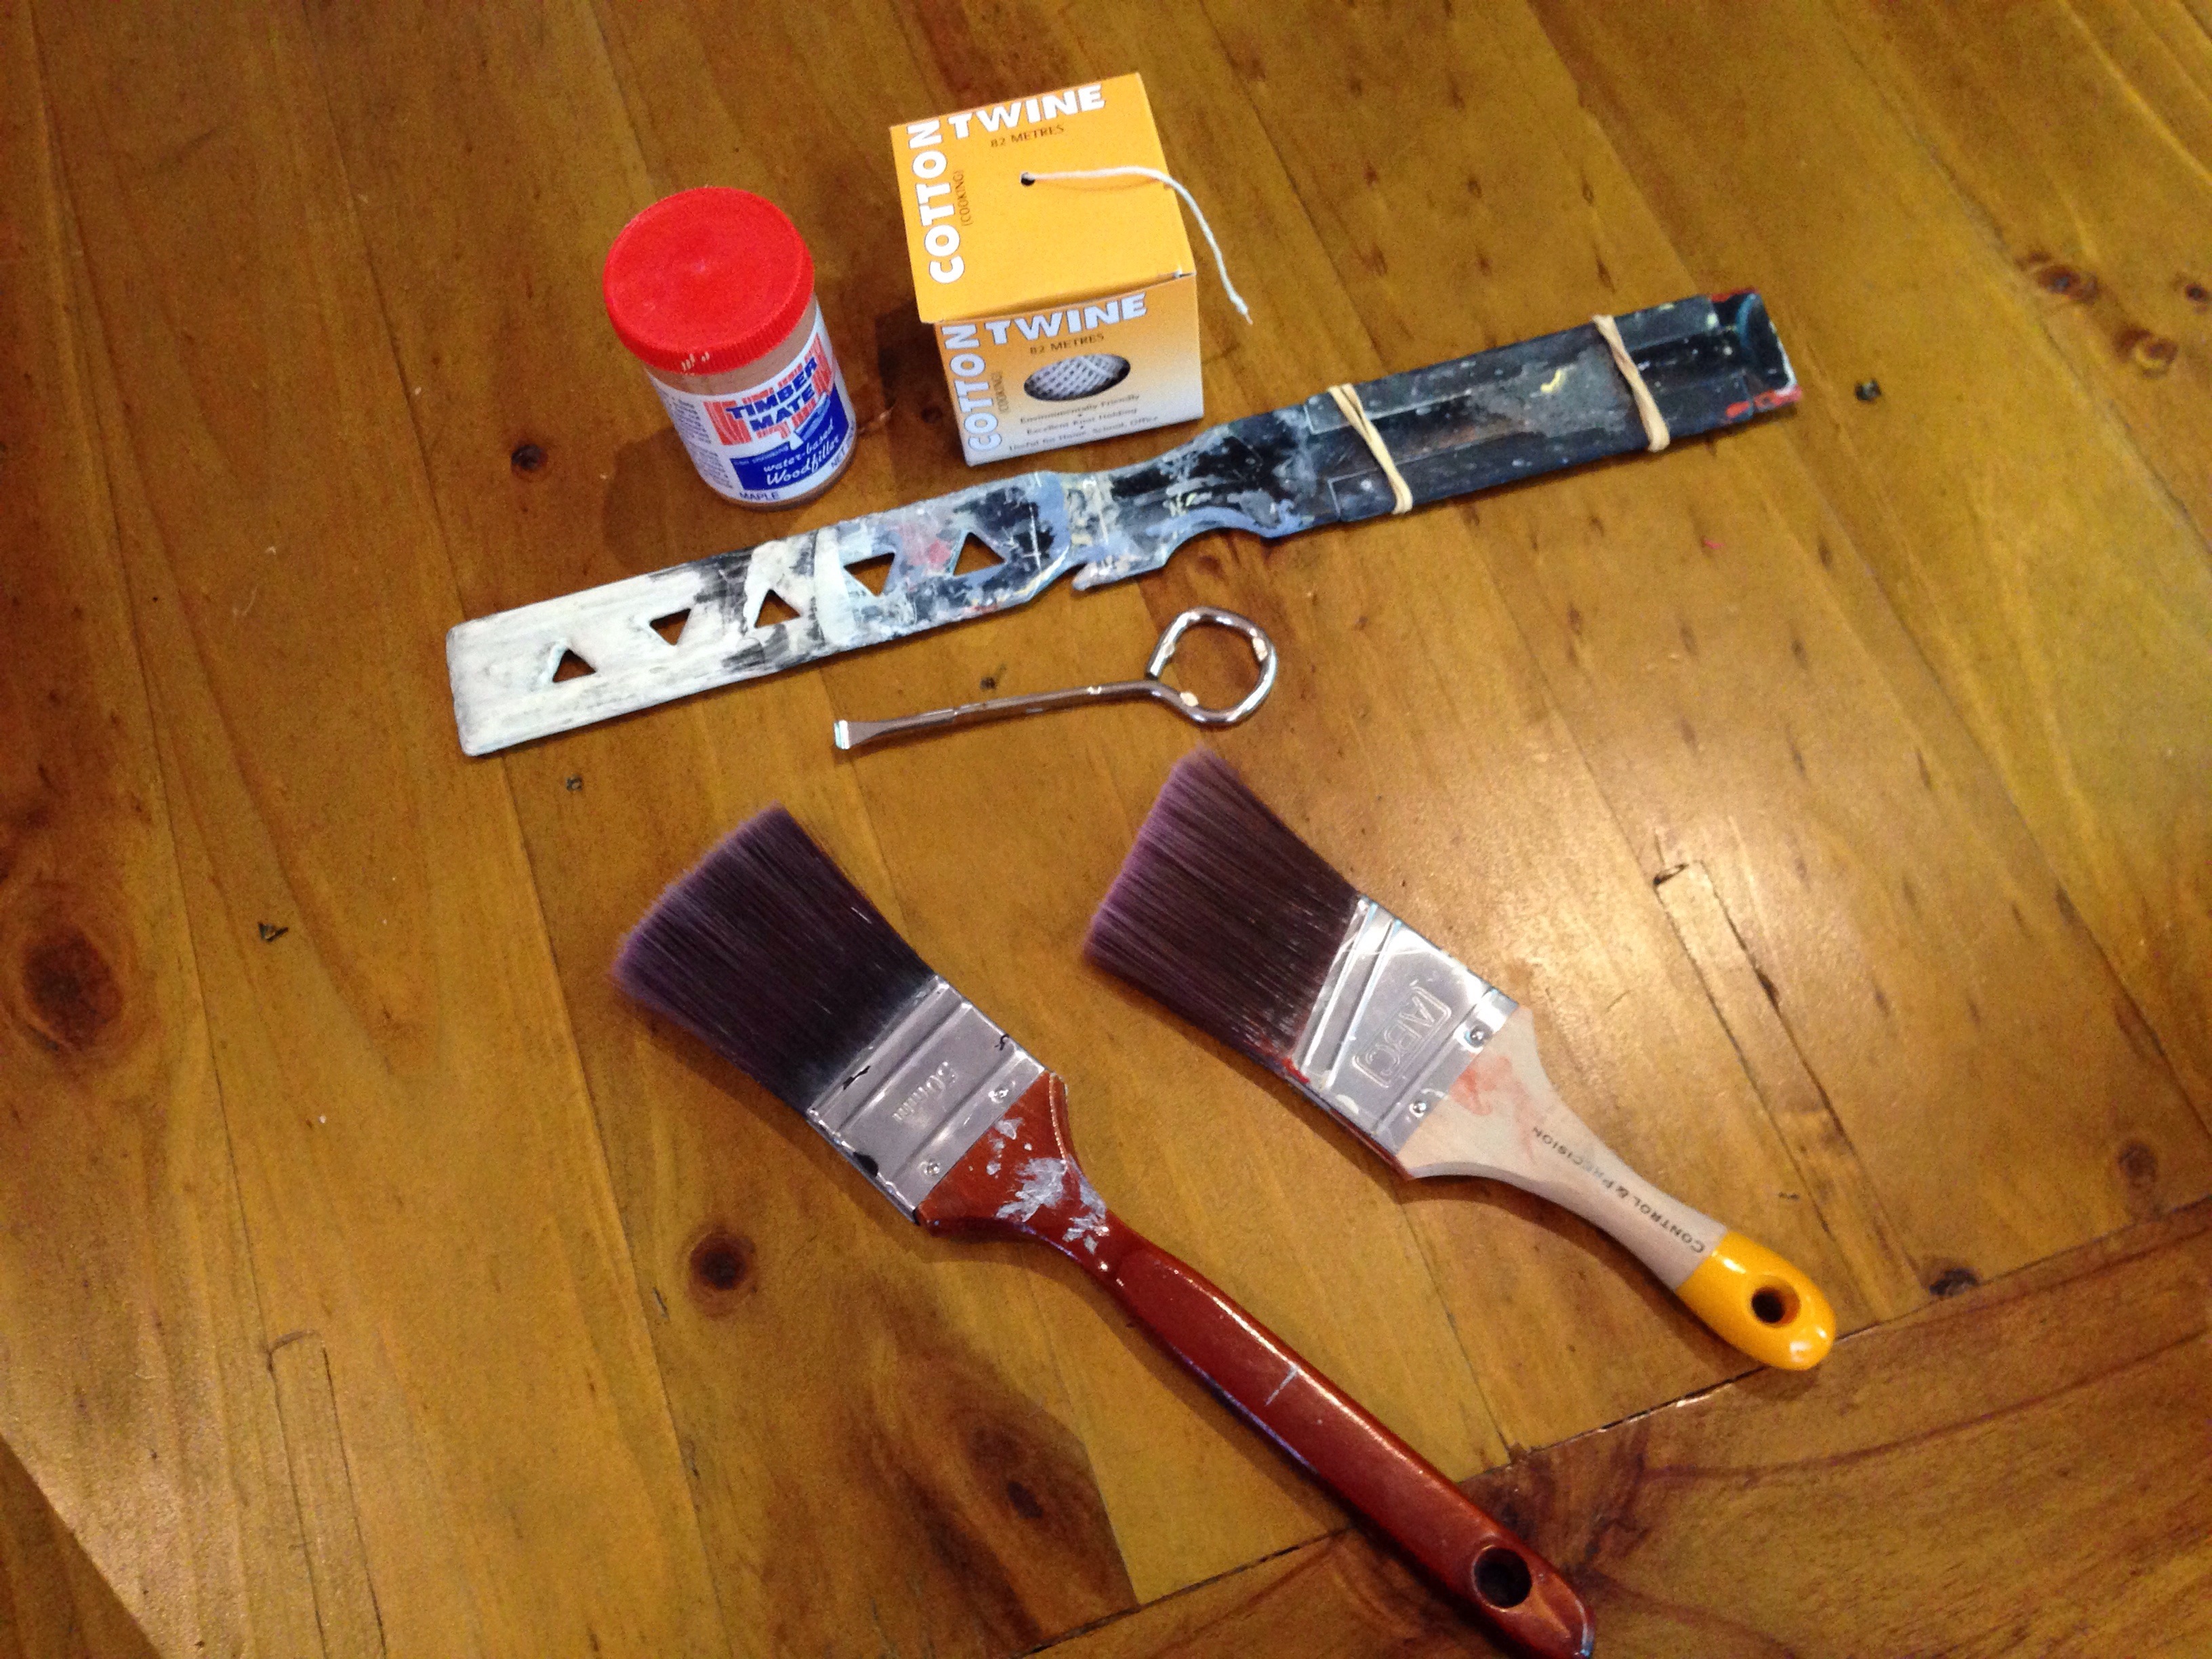
Just a couple of tips, relating to tools:
Wood filler, string, paint stirrer, paint can opener, brushes.
Here you can see my paint stirrer: awesome tool. Better than a stick! The holes mean you don’t get splash-up and squelching (technical terms) when stirring paint. One day, I might get a paint-stirrer attachment for our electric drill. But for now, this works just fine!
You can also see the paint-can opener (the metal thing with a loop). Get one of these. A couple of bucks of pure awesome. I won’t destroy a paint tin again, it is so easy to open my paint.
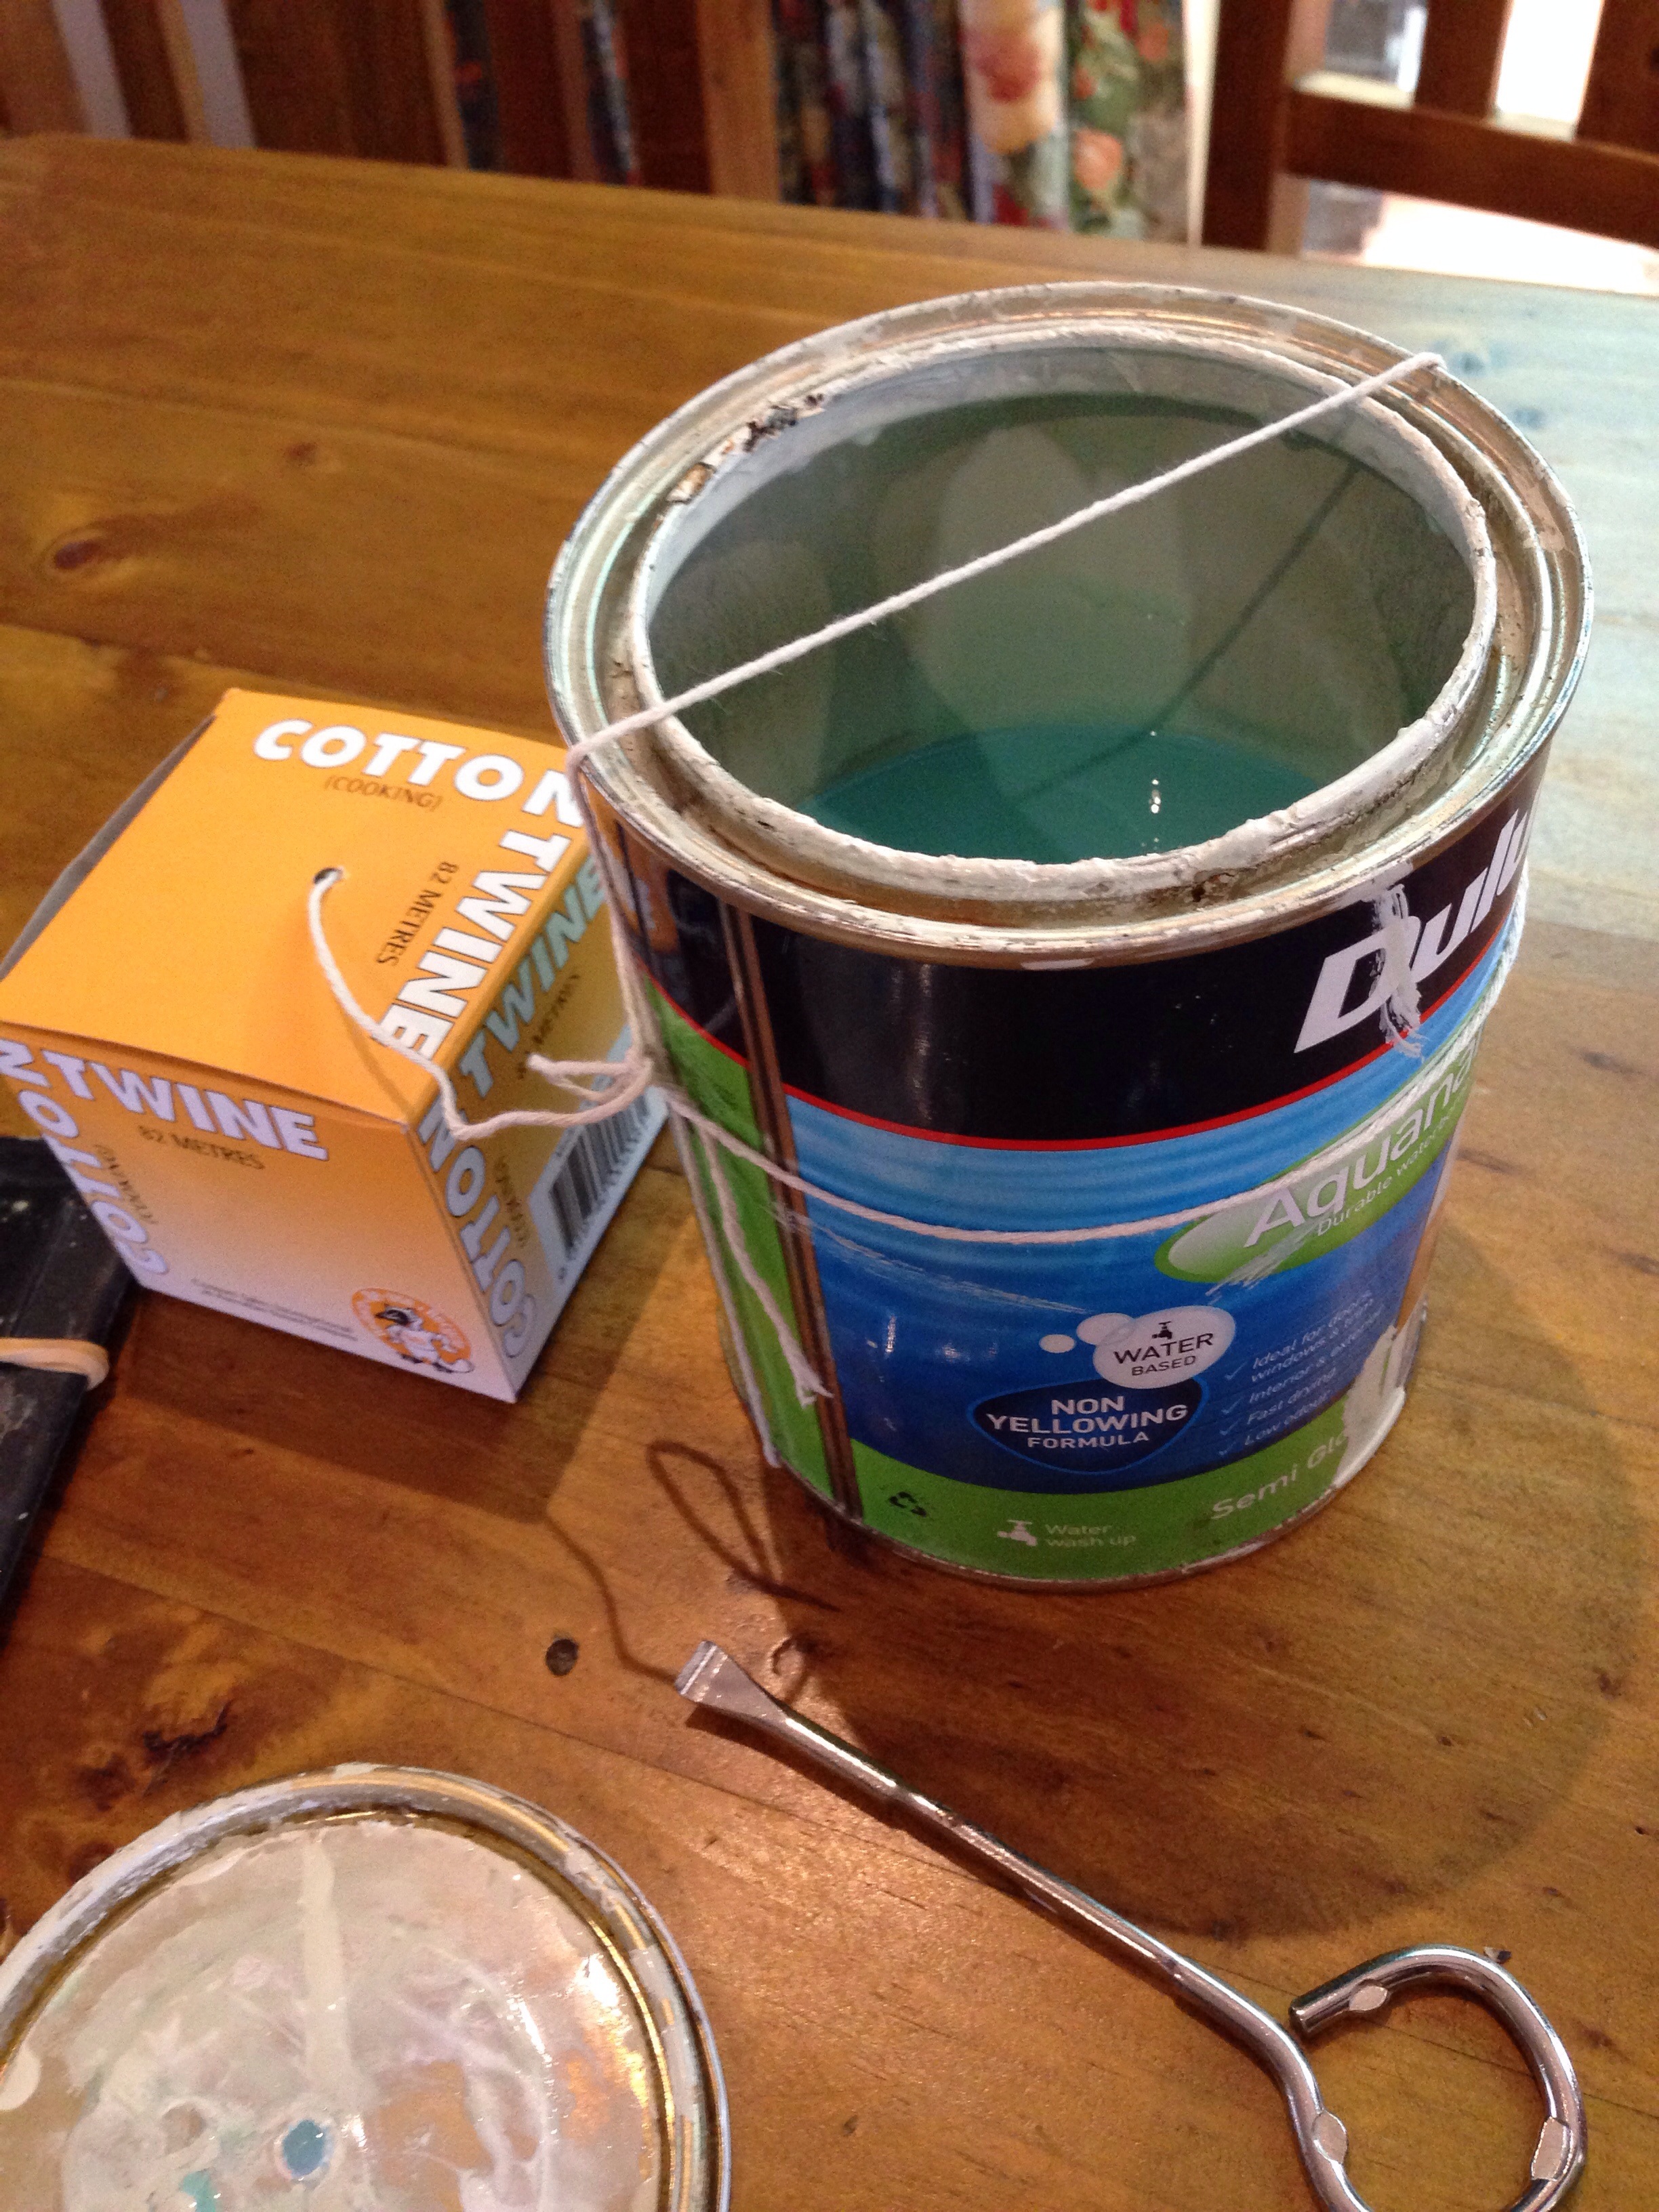
String? Yes: here’s what you do with the string:
String tied onto paint can.
It doesn’t have to be tight like a tight-rope, but this is a really great way to wipe excess paint from your brush without getting drips into the rim of your can (and making it difficult to unseal again, or taking ages to clean up properly when you put it away … because we all know, we never really do that, do we?)
(BTW, that’s what the paint looks like without stirring – quite blue, huh? I didn’t bother stirring the paint for this photo, but you should stir yours, obviously :))
And that’s it, for painting cabinets: for now. So far the finish has held up really well: no dents or dings or paint flaking off. The blackboard cleans up nicely and has a lovely smooth finish (with a matt sheen). Now I have to steel myself for phase two, which is painting the other cabinets!
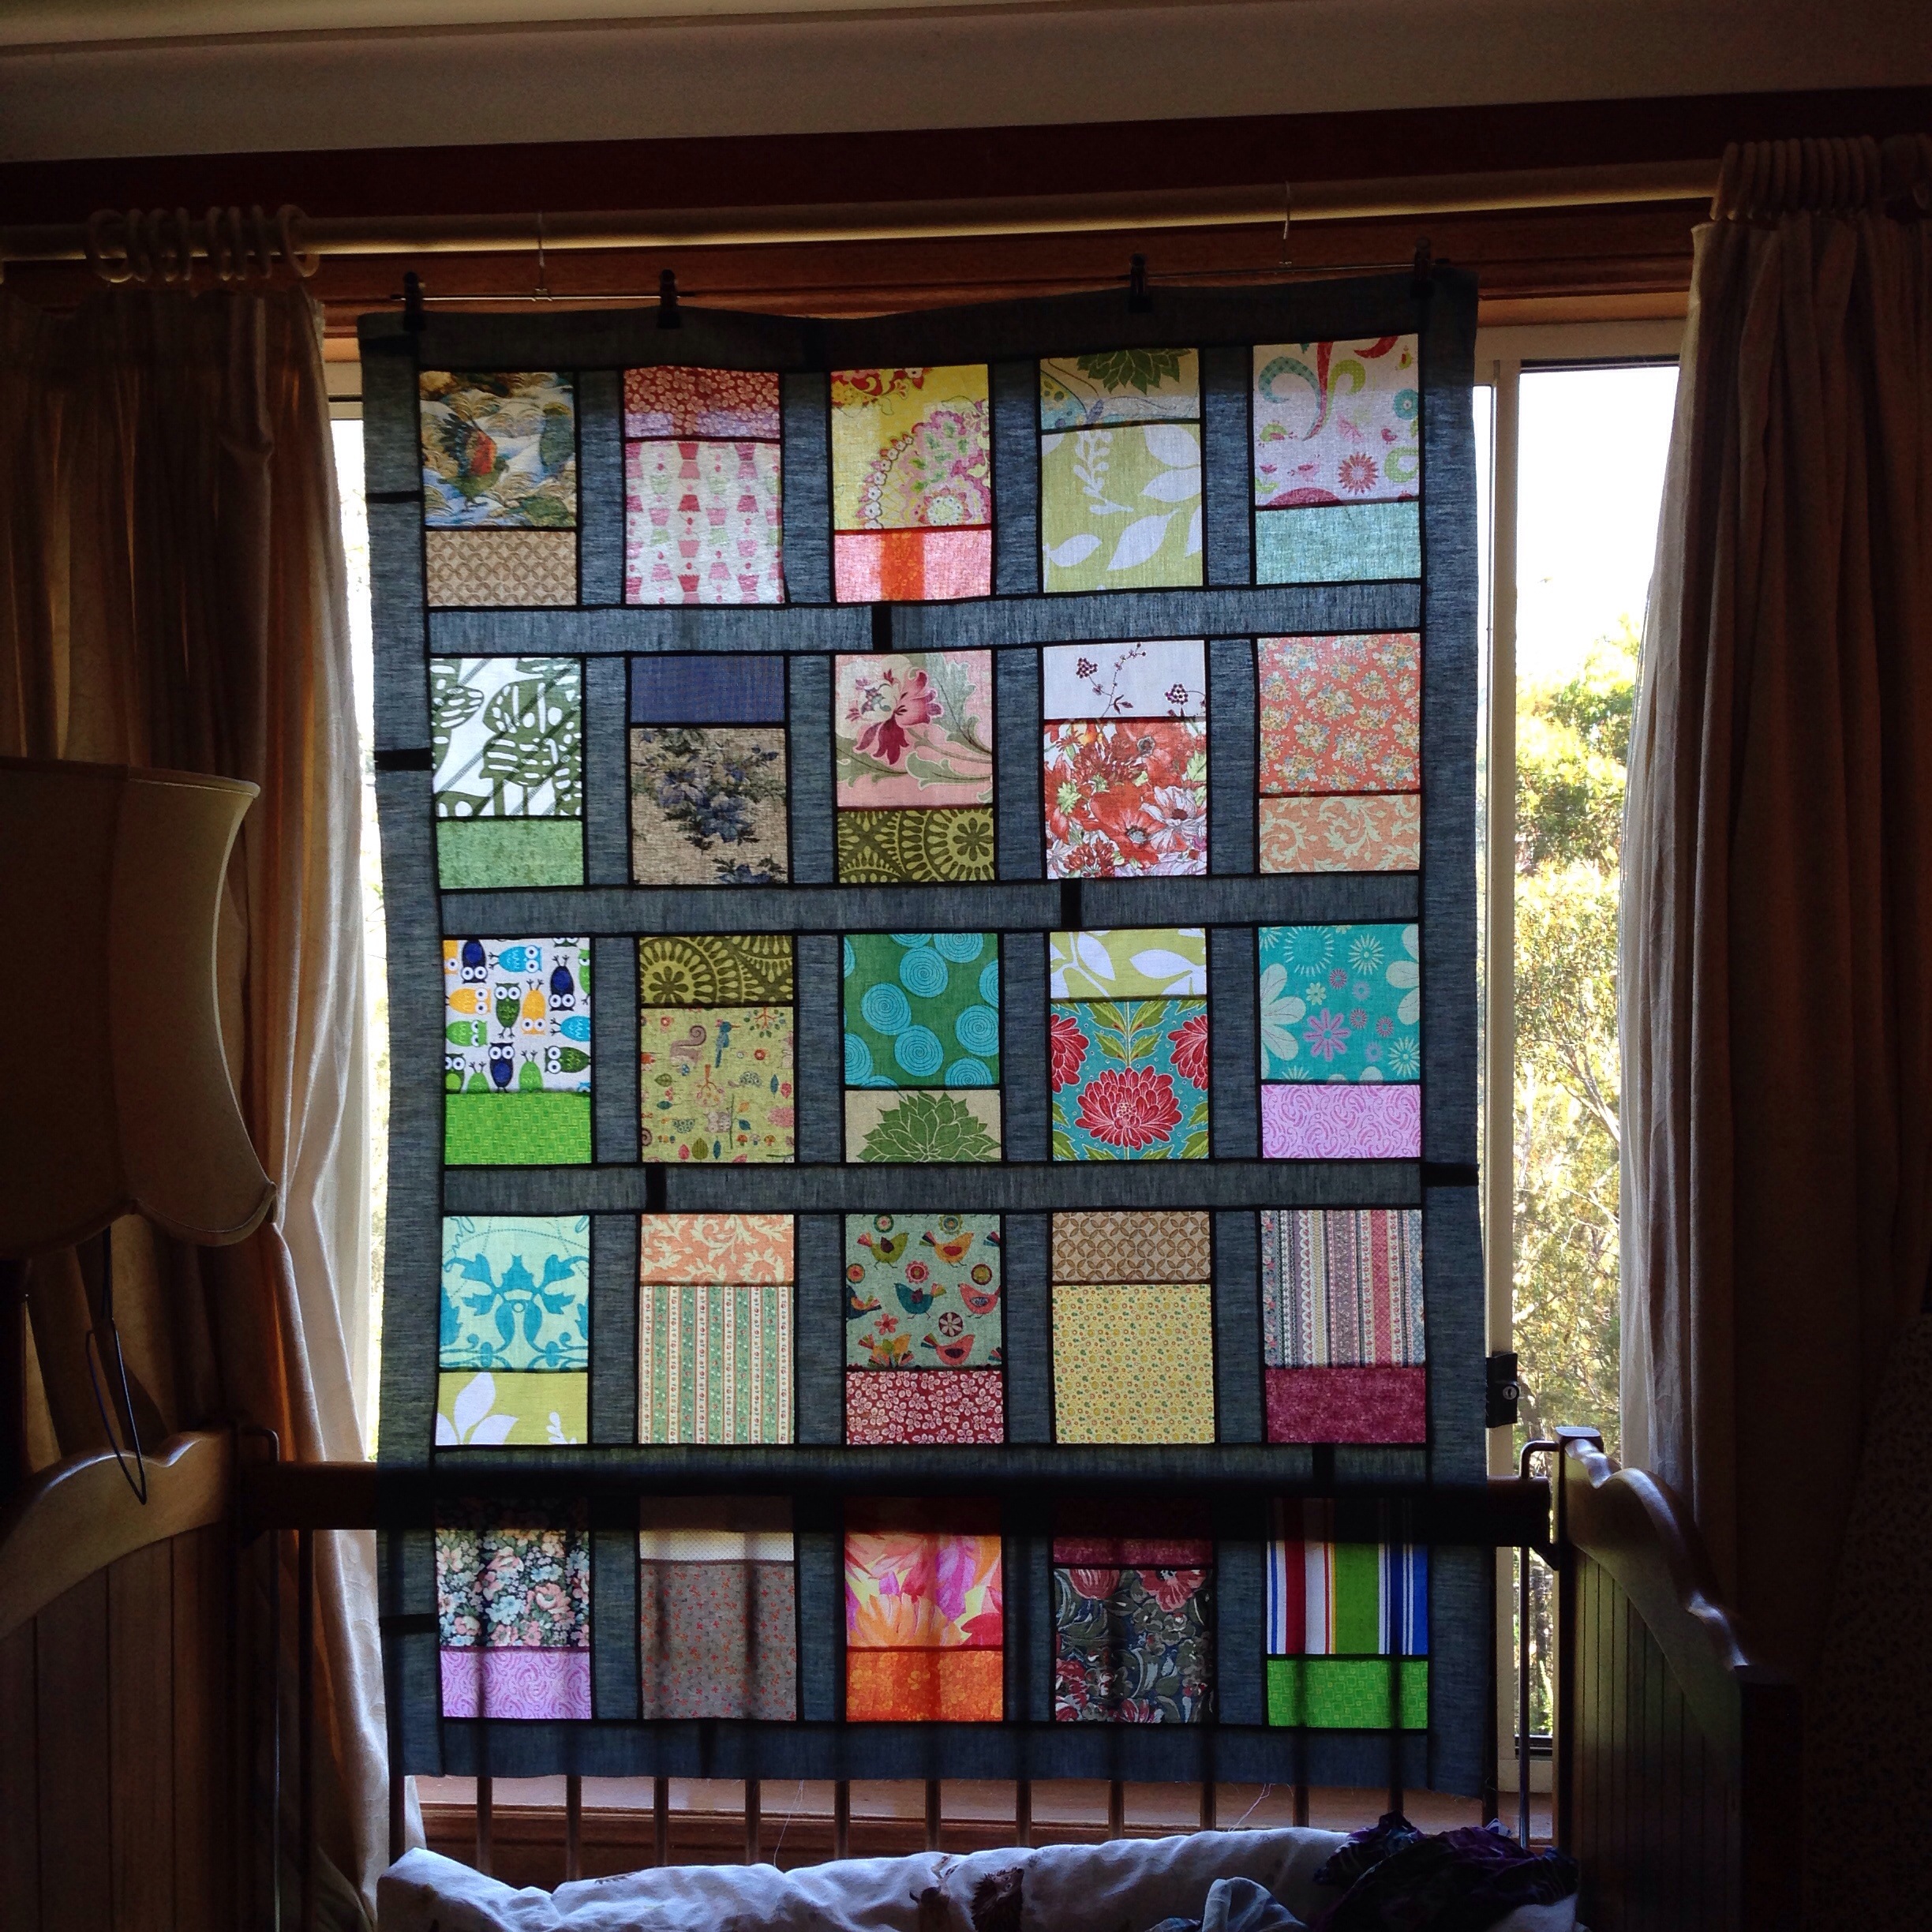
I’m too proud of my new “Windows” quilt top to be done with it just yet! Today I’d like to share a tutorial on how to piece this for yourself. 🙂
First up, I should mention that this is not my original design. I was inspired by this quilt I spotted on Pinterest, which I found when I went looking for grey sashing inspiration. I knew I wanted to use up the grey, and this was a really great idea!
My quilt is lap sized, but you could make this any size you want, really. You just need to add more or less columns or rows (or change the size of your starting squares).
First up, materials. To replicate mine, you will need:
38 squares, each 6.5 x 6.5 inches. I used different prints for each square, but you could easily use duplicates.
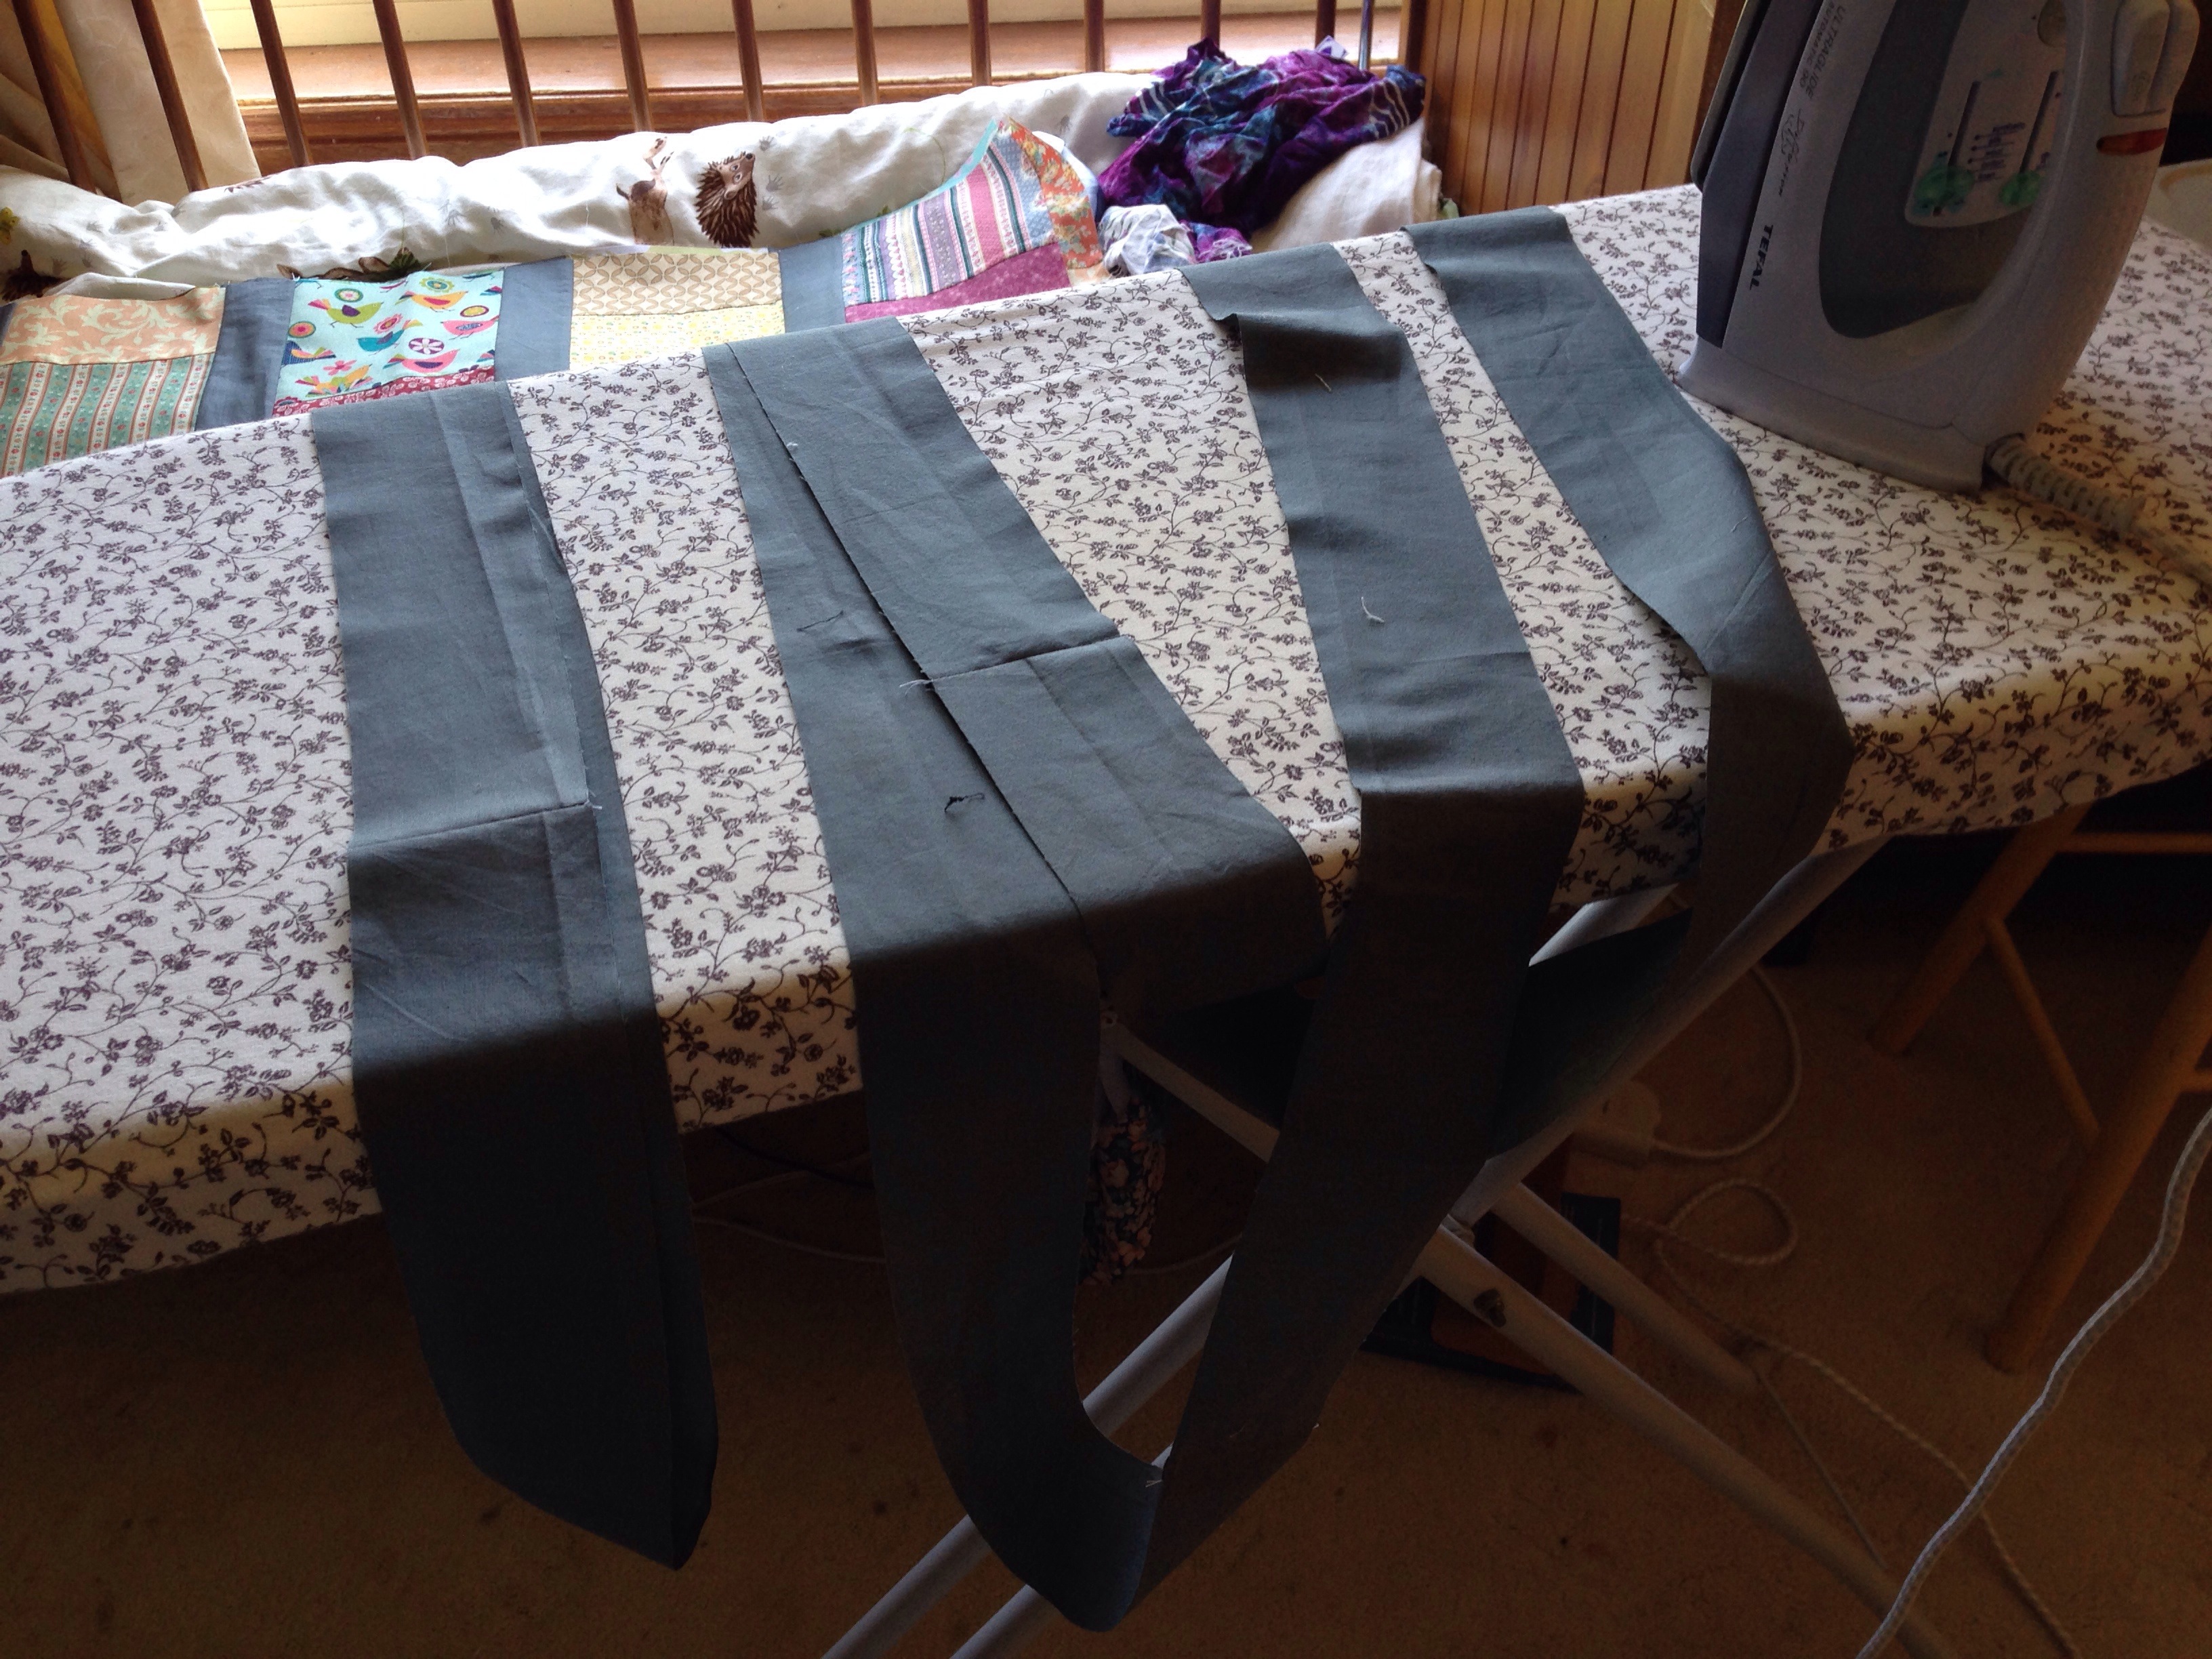
Sashing strips, 2.5 inches wide. I made this quilt specifically to use the dark grey sashing, but use whatever colour you like!
This will make a finished quilt top that measures approximately 42″ x 57″. You will have a spare “window” block left over that you could use on the backing, if you like.
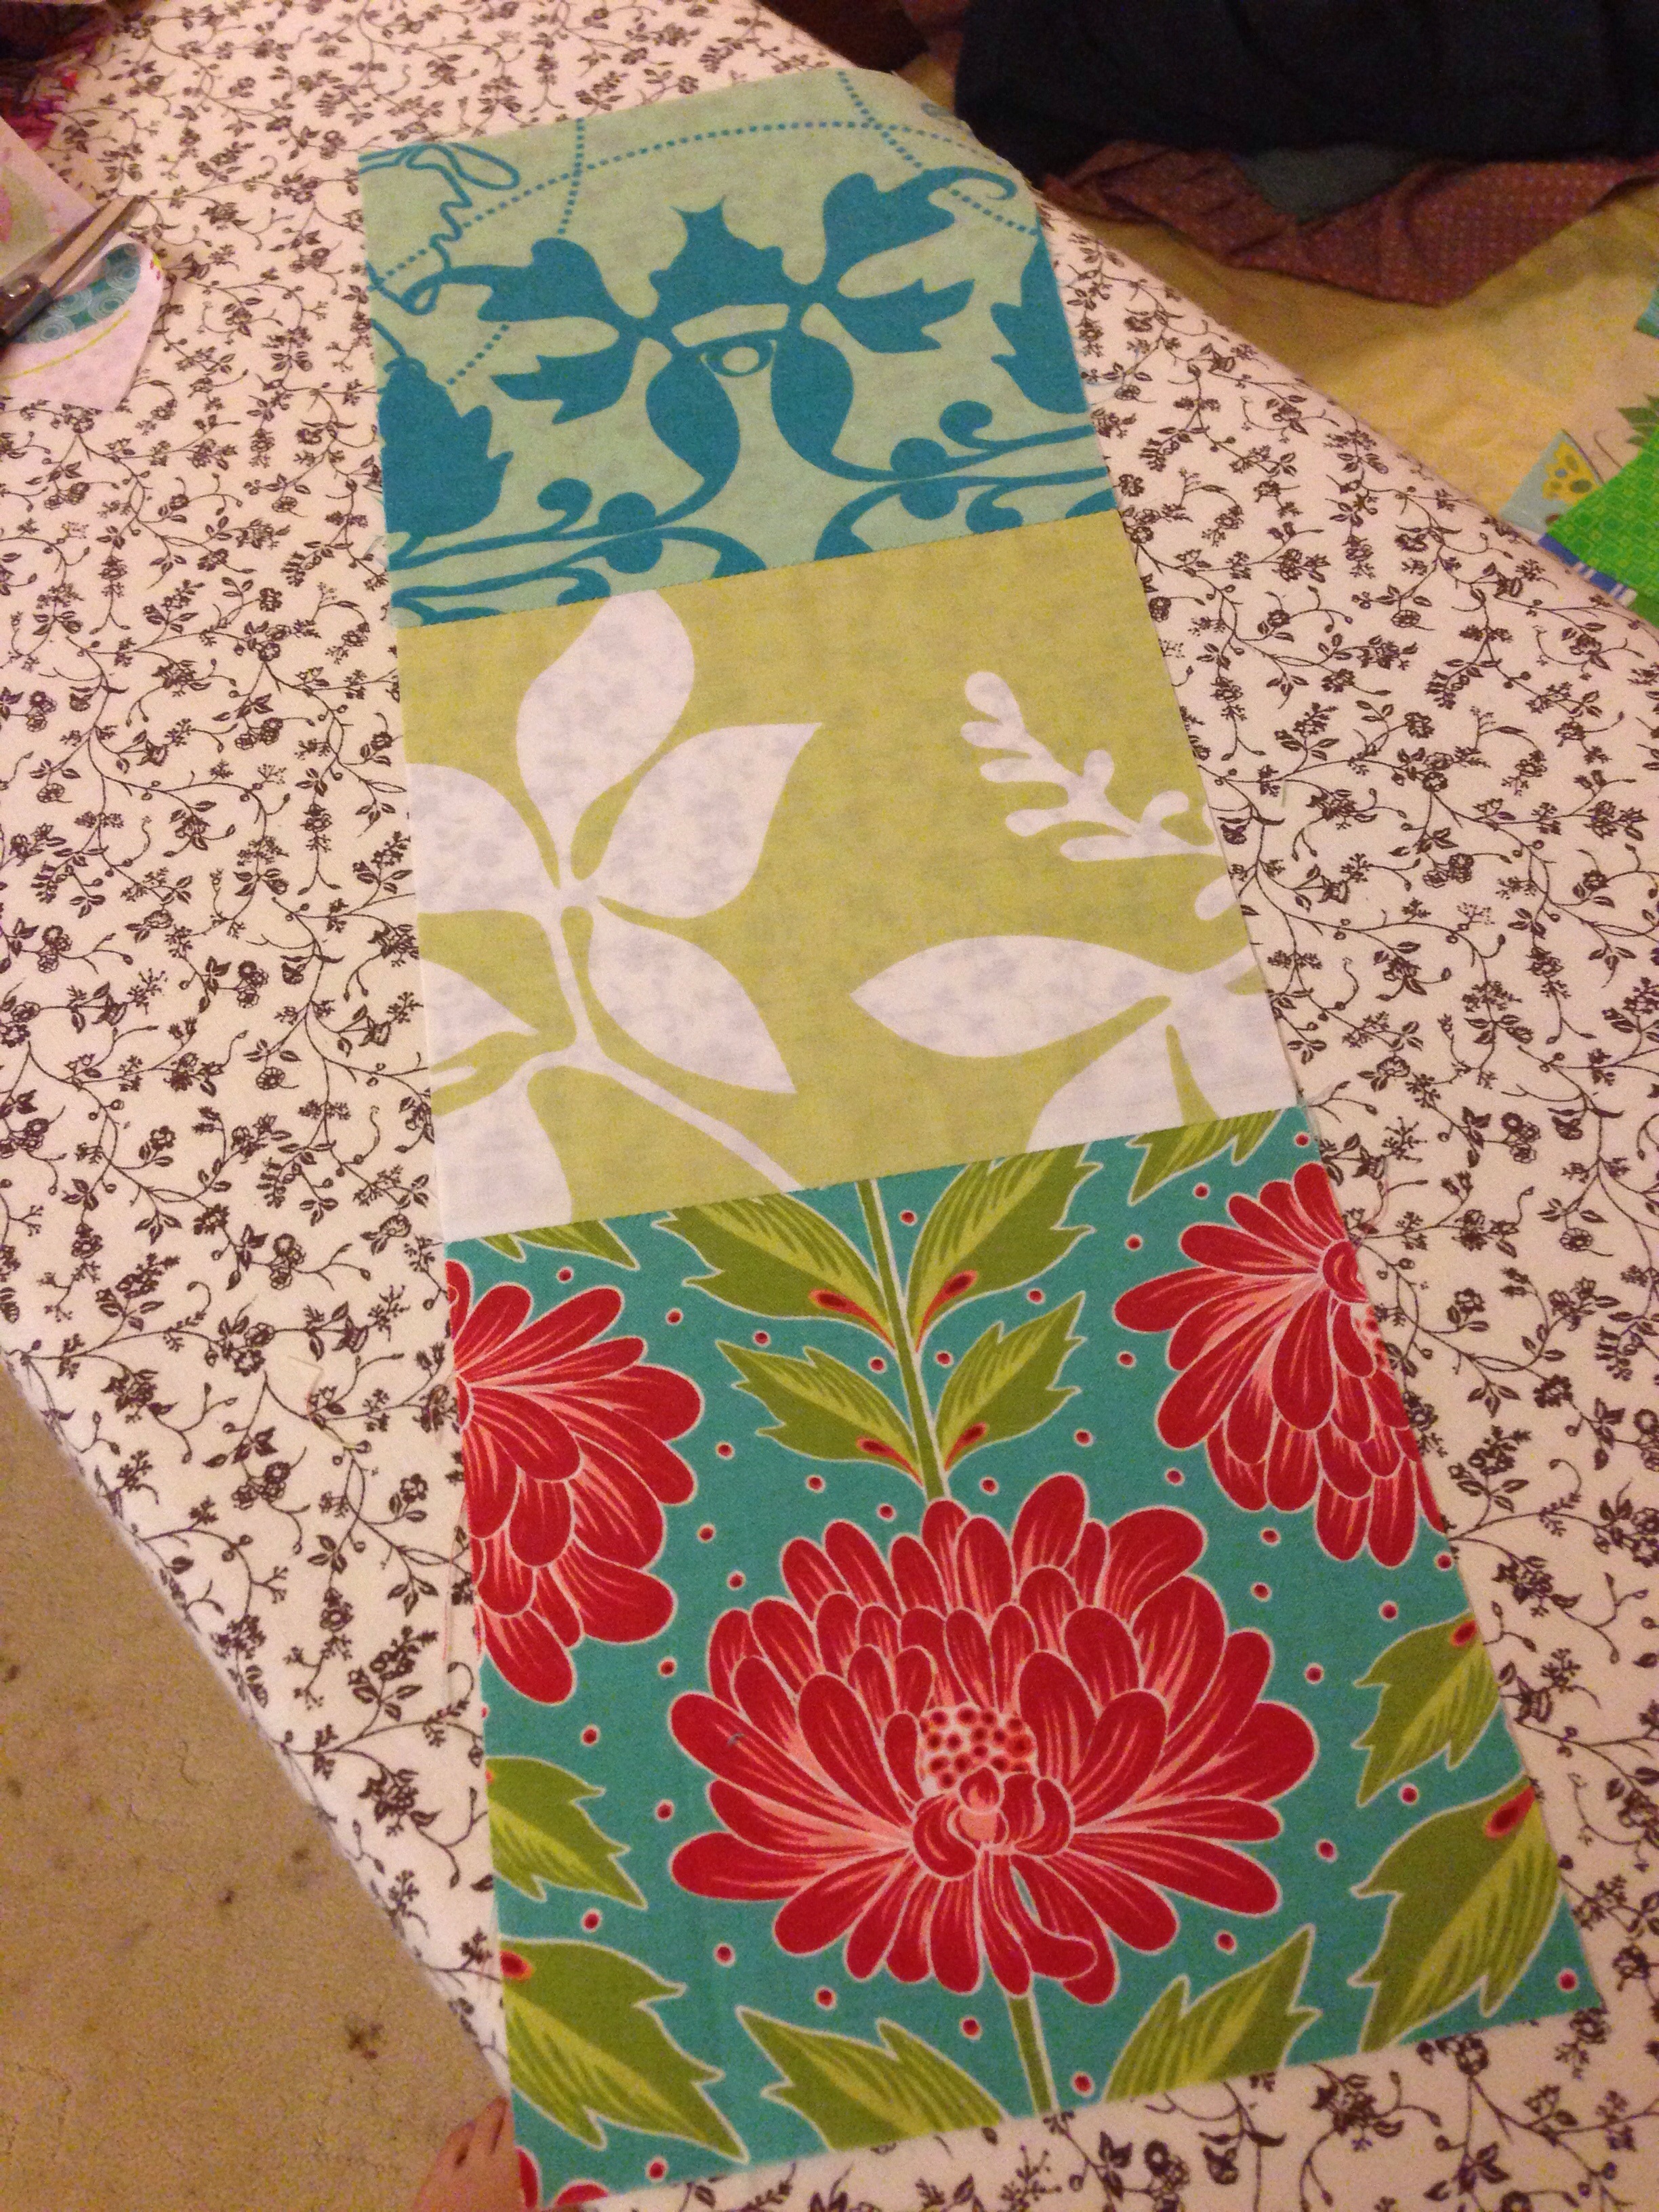
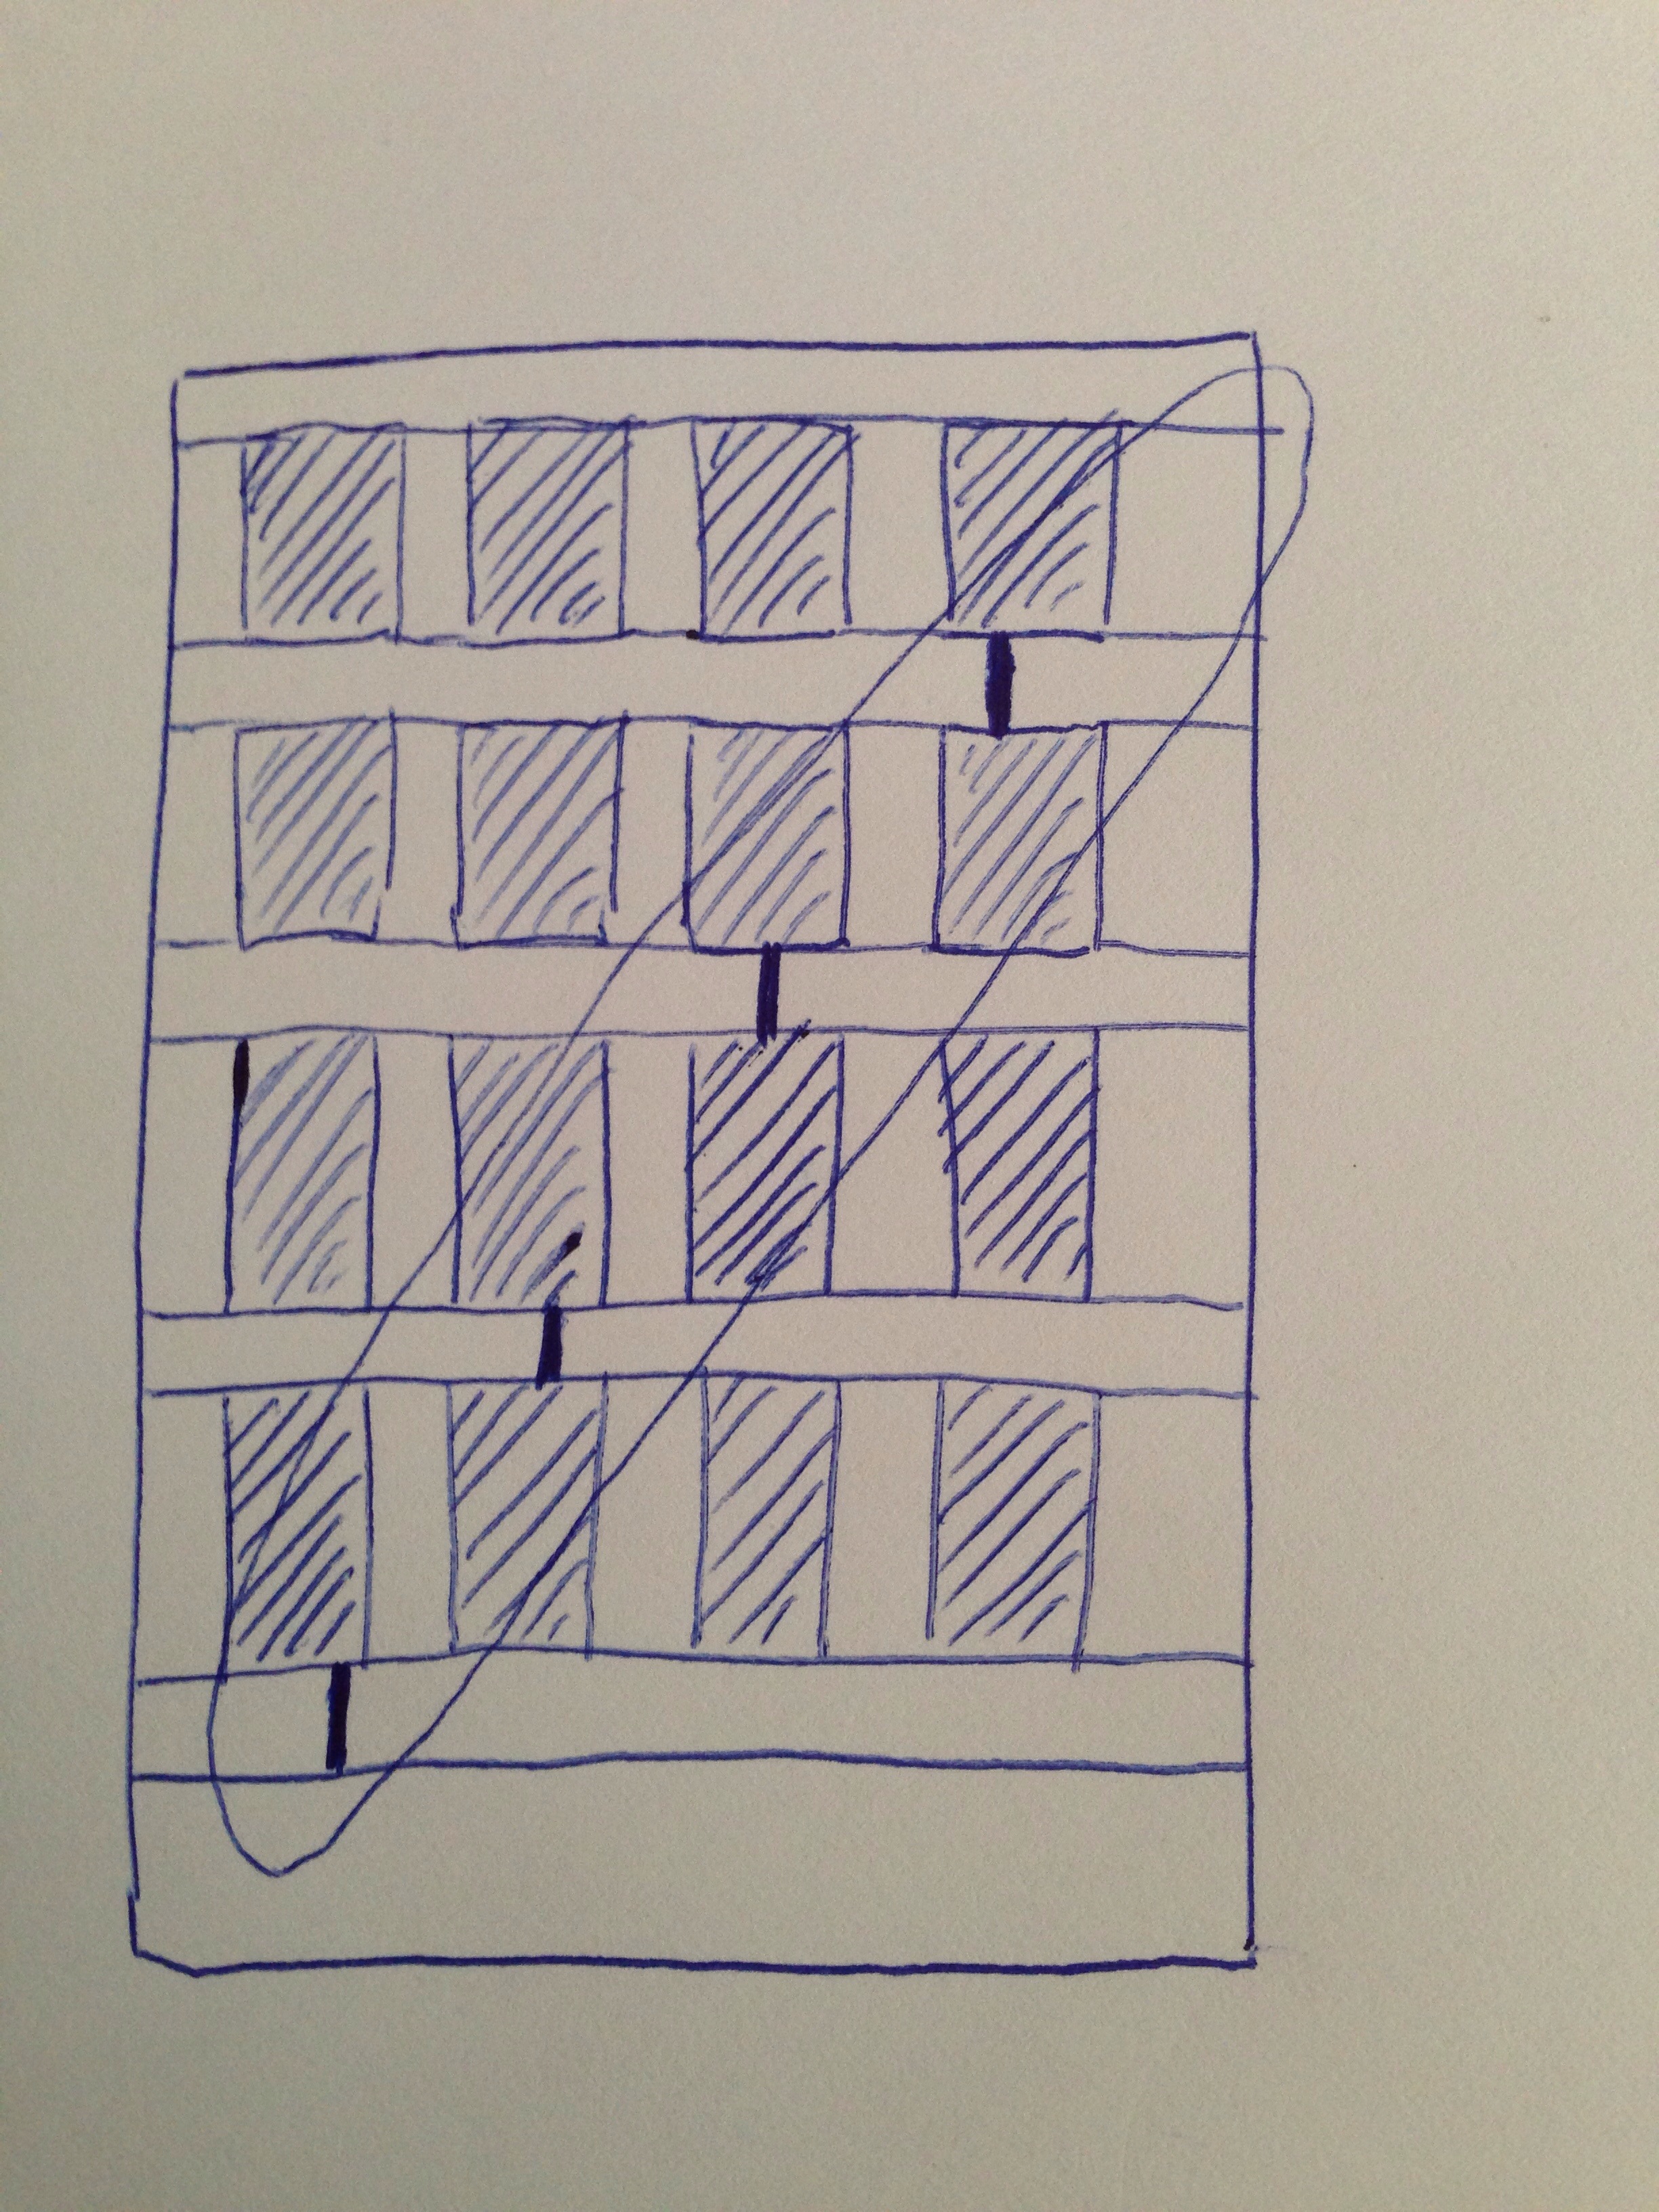
The layout of this quilt is pretty simple: each block uses one whole square, and one half square. That means you can do two blocks at once, using a group of three squares.
Three squares sewn vertically can be cut to make two finished blocks.
I decided to use a five-by-five block layout (just like the inspiration source), for a total of 25 blocks. To make my life easier, I chose to make 26 blocks, because this is divisible by two. I arranged my fabrics into groups of three, remembering that the middle print will be cut in half. I tried to avoid any big prints or obvious motifs in the middle square because they work better as a whole.
I then cut out my fabrics into the squares, keeping them grouped by three. The idea is to sew them together vertically, so you have three squares:
Three squares pieced vertically.
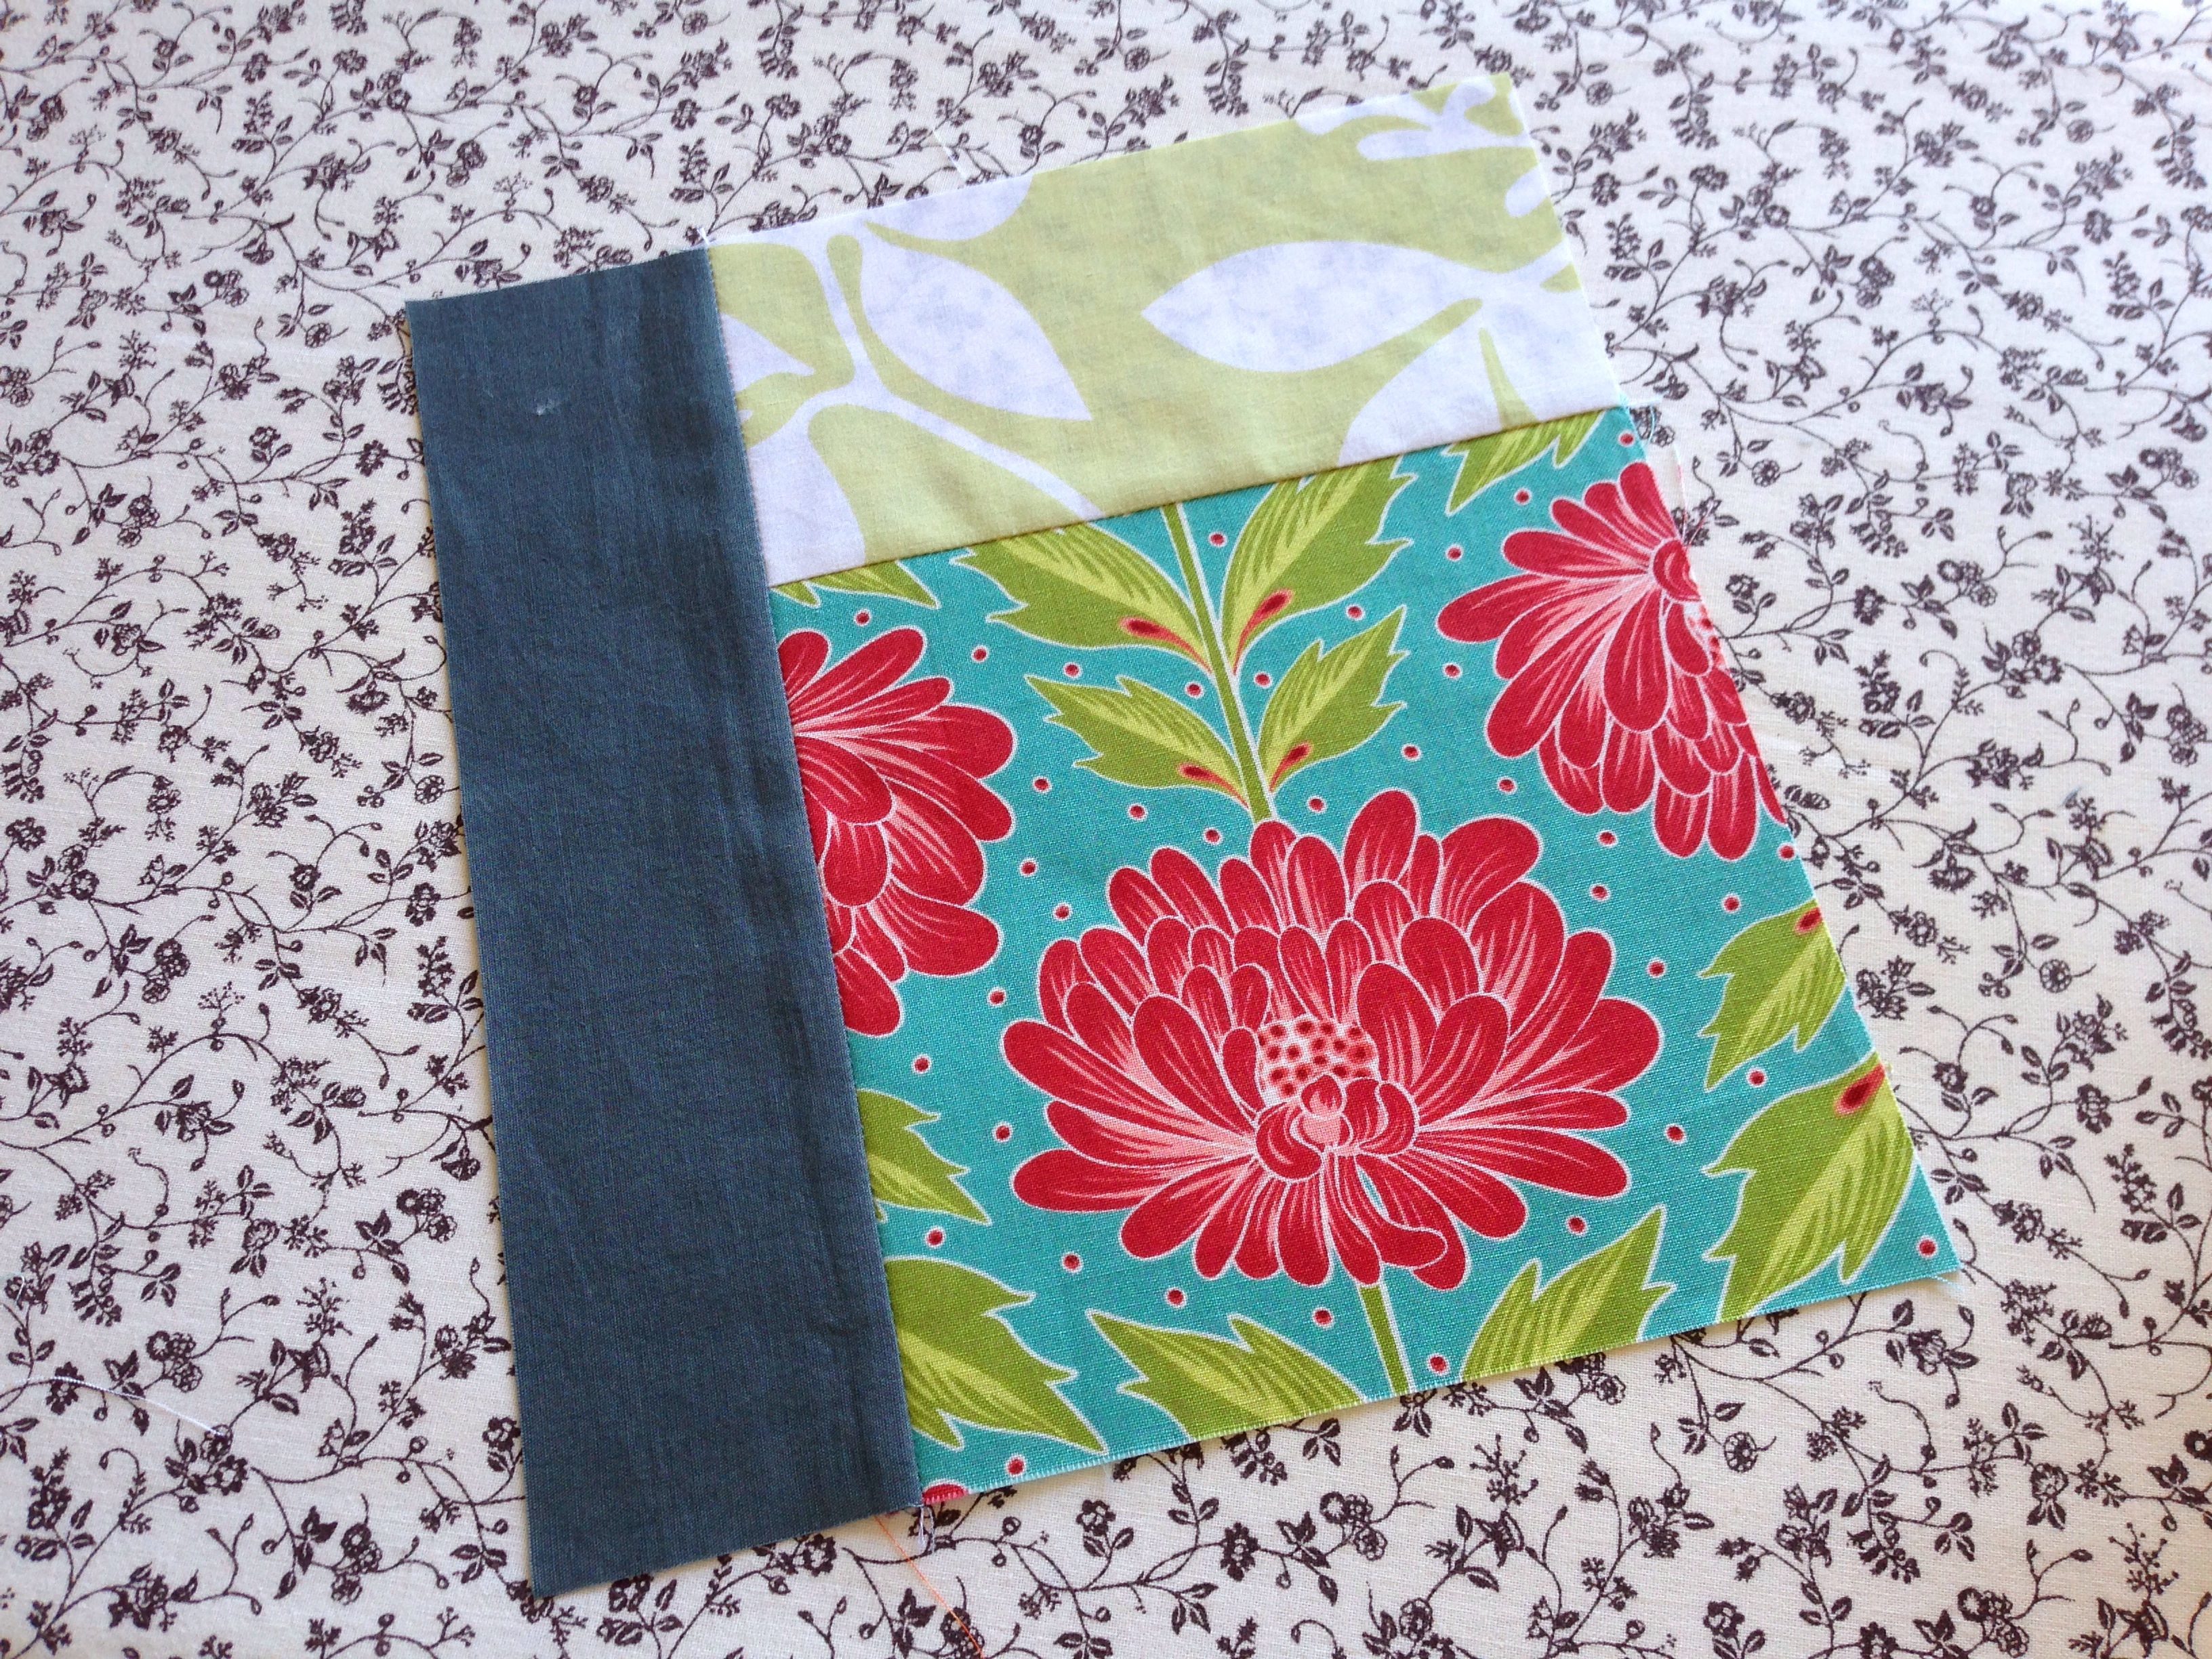
Then you cut across the middle square at 3″ across, making two blocks at once:
Squaring up the middle square.
Cut across the middle square to make two blocks
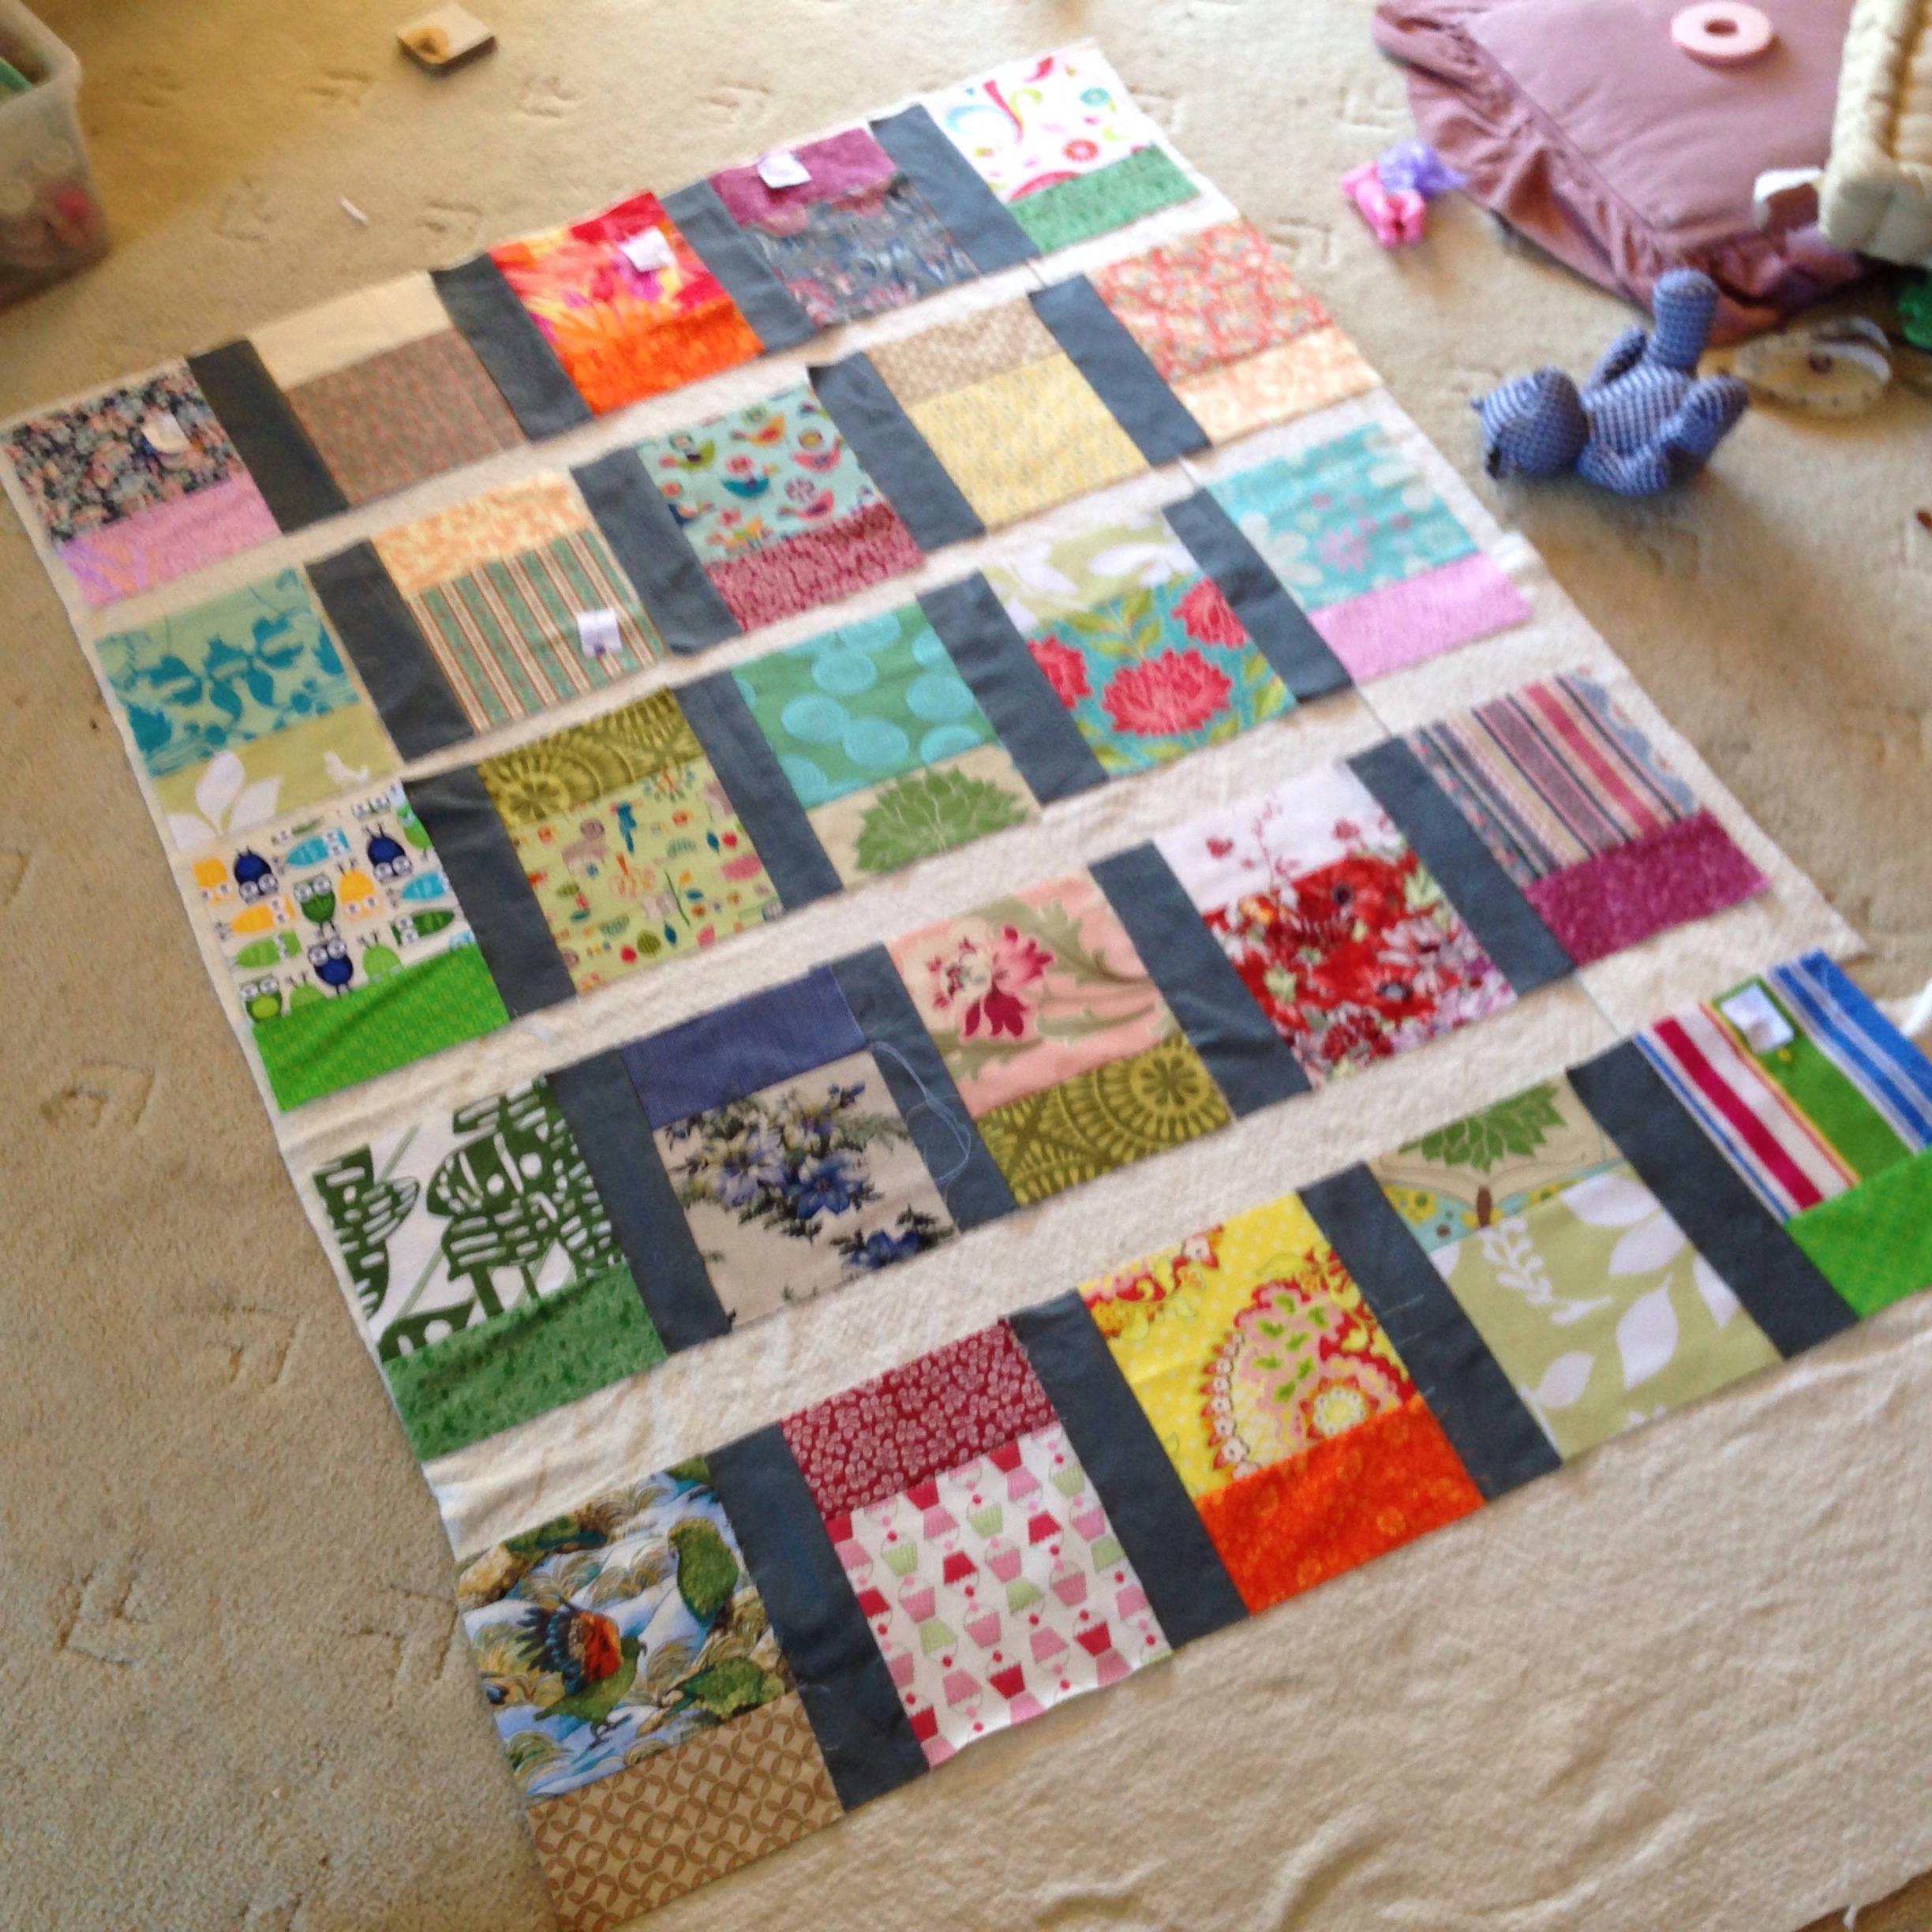
Once you have done this 13 times, you should have 26 blocks. One will be a spare! Then you can have some fun with the layout:
First attempt at a layout.
Layout I chose to assemble
I chose to alternate between “skinny up” and “skinny down” across the row.
When adding the sashing, I first put a strip of grey fabric down the left hand side of each block (if I do this again, I will use the right hand side instead, because I’m right handed):
Grey sashing added to the left of the block.
Once each block in the row had a grey piece, I laid them out again to make sure things were still looking sensible:
Double checking the layout with the intended batting.
I’m glad I did this, because when I was piecing, I had fiddled with several trios and changed which was the “middle” square. This meant some blocks were now the wrong way up! I had to re-do the layout to make sure I was consistently starting each row with “skinny down”, and alternating correctly. That’s the kind of thing that would really annoy me if I went ahead and discovered it at the end!
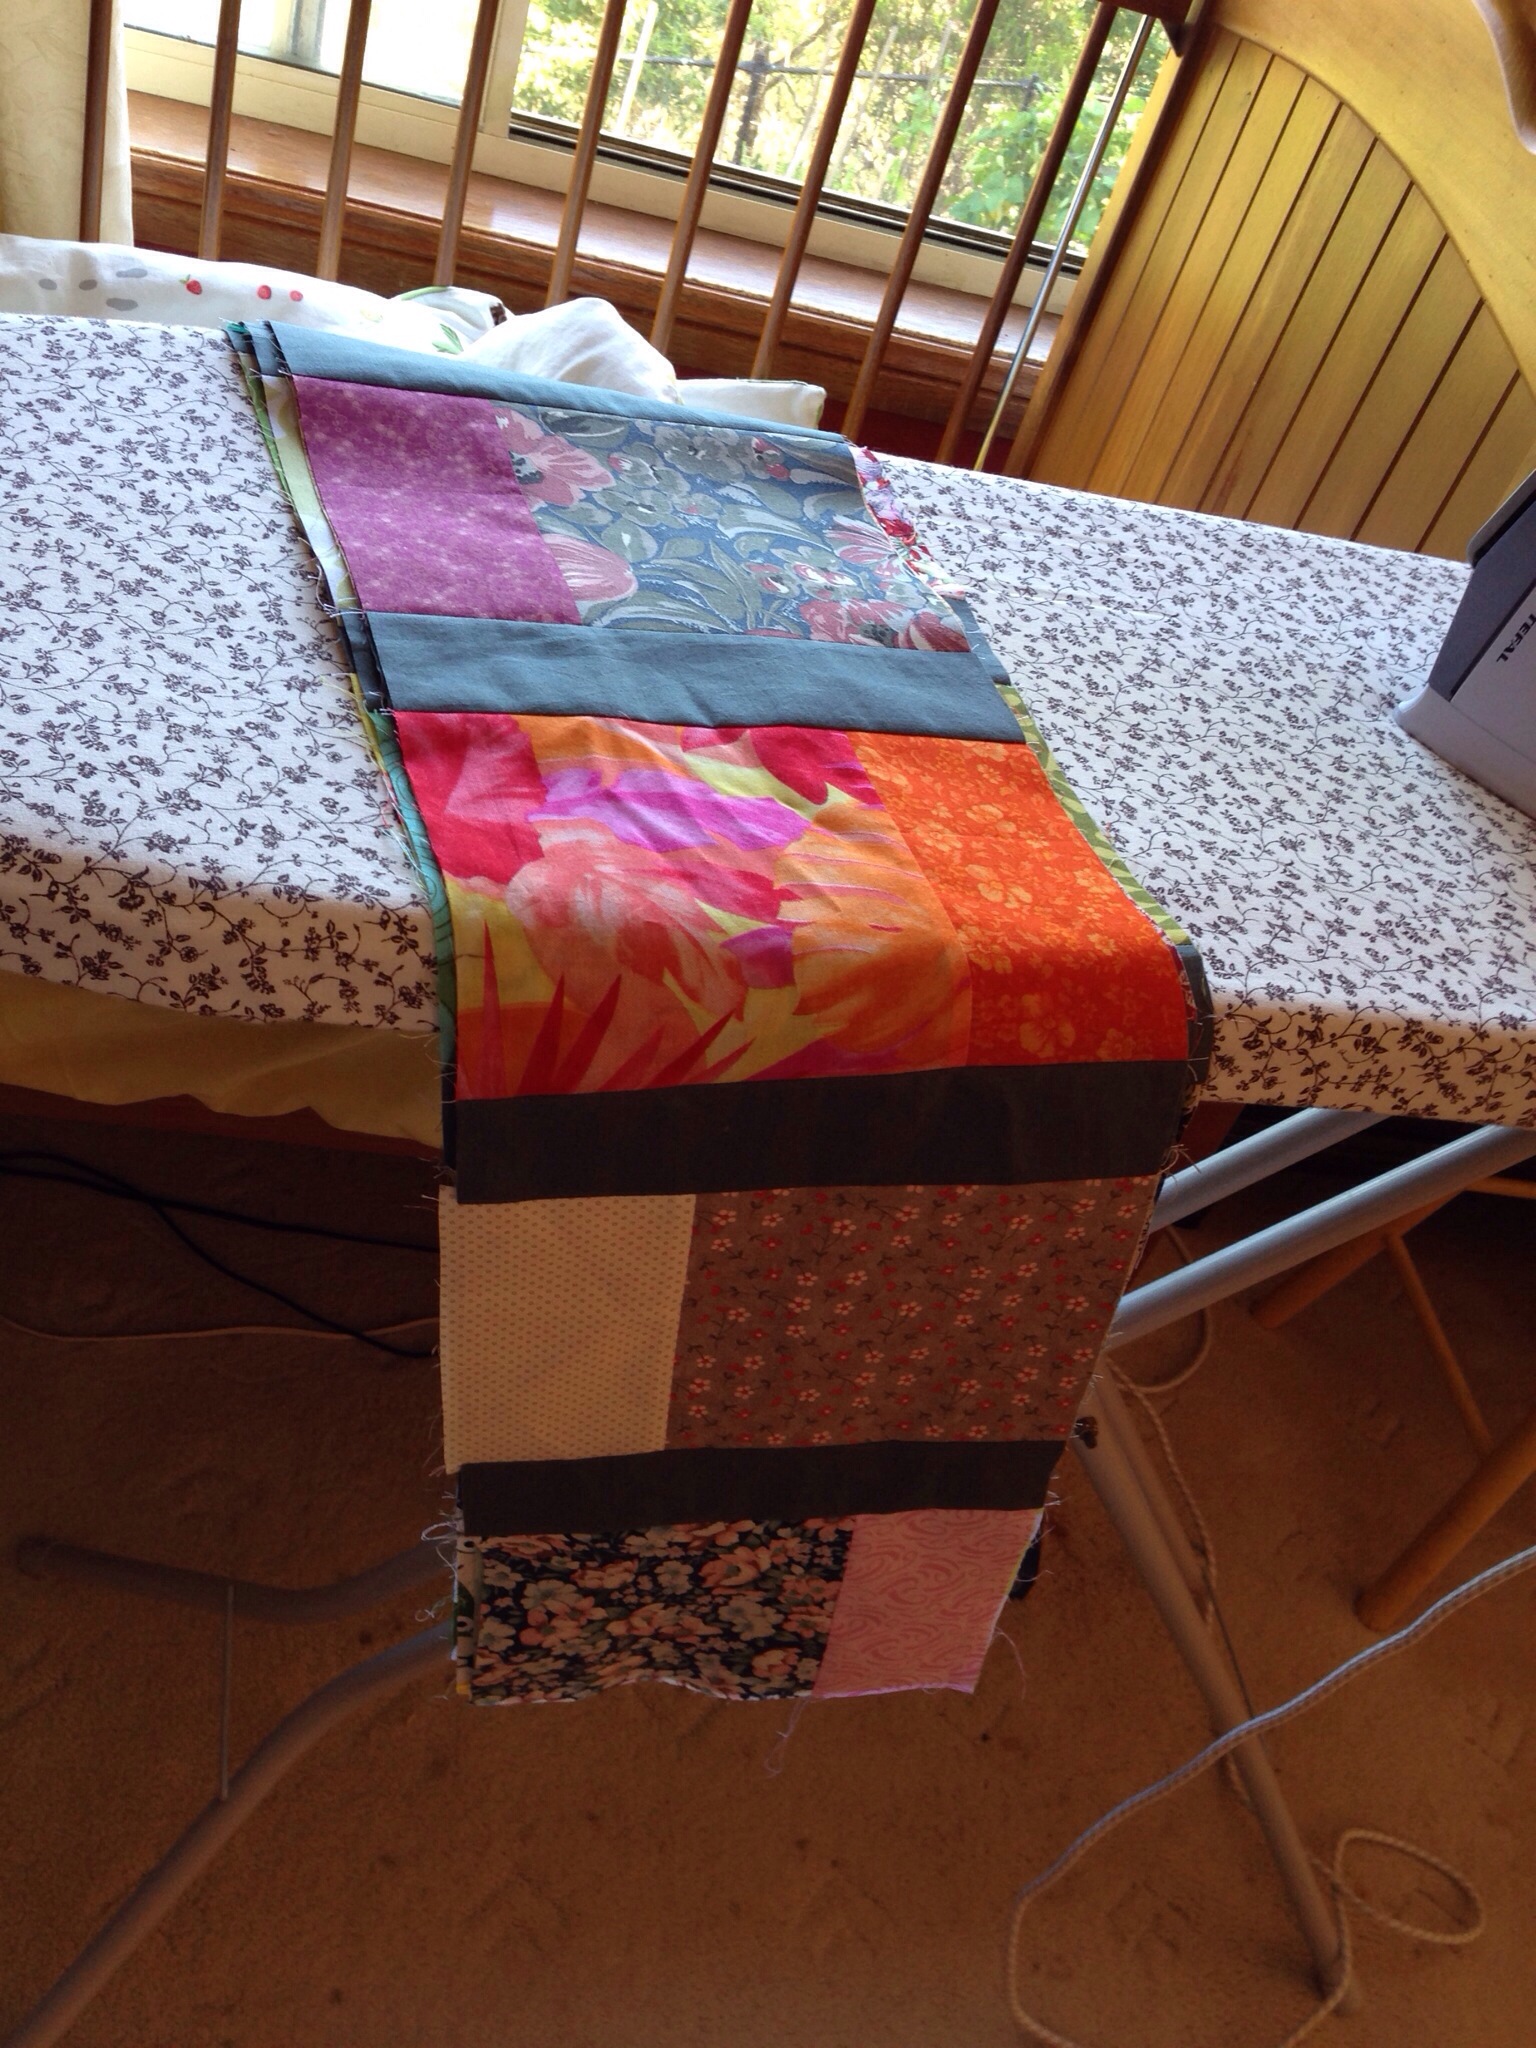
Once I was happy with the layout, I joined my blocks together in each row:
Rows of blocks joined up
Then I added a final strip of sashing to the end of the row (making both ends match).
Now it came time to join my rows together with some horizontal sashing. I decided to make things simple for myself and just create one enormously long piece of grey sashing that I could cut to the correct length:
Shortcut sashing: piecing a long strip made it quick to cut and add sashing.
I then laid each row onto my ironing board, laid some sashing on top, and pressed them together. At this point I started using pins (normally I just let the iron “stick” the pieces together and sew with both of my hands, but that works only for shorter seams, and non-slippery fabrics). Because I had piece my sashing before hand, I let the seam fall onto the row wherever it needed to:
The seam falls just to the right of the vertical on this row.
I flipped my sashing from side to side so I didn’t get a diagonal line of seams marching down the quilt top. I can’t think of a better way to describe this without a dodgy diagram, so here is what I was trying to avoid:
I didn’t want to have an obvious diagonal line of seams in my sashing.
It turned out that the dark sashing hid the seams very well, so I needn’t have worried. 🙂
Once each row had some sashing I sewed all the rows together into one big quilt top, put a strip of sashing down each vertical edge, and I was done!
Finished quilt top, all rows seamed together.
Of course, finishing the quilt top is not the same as finishing the quilt! You may be interested in how I finished this off!
Today I’d like to share with you how I make my yoghurt, using fresh milk.
This is not the first method I’ve used: a long while ago now a friend in my Mothers’ group revealed she made yoghurt using a system she bought at our supermarket, and I was intrigued. Turns out, you can buy a yoghurt-making kit at Coles! Who knew?
So I did. The kit is basically a thermos with a 1 Litre capacity flask that sits inside it. You tip in a sachet of powdered milk and yoghurt culture, and then add water. Stir it up and stick it into the thermos with some boiled water, and some hours later you have yoghurt! It really is that easy.
But I wanted to make my yoghurt from organic fresh milk, not from powdered milk of some random unknown origin. And the sachets are more expensive than using fresh milk, too. (Although they are cheaper than buying ready-made yoghurt!)
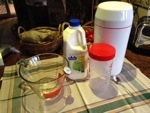
Thermos, flask and Pyrex jug for making yoghurt.
To make yoghurt using fresh milk, I need to take a little bit more care, and more time. Here are the basic things to remember:
Good hygiene. This is important because when making yoghurt you incubate “yoghurt culture” (ie. good bacteria) and you can also incubate bad bacteria if you happen to add some yourself with unwashed hands or utensils. This goes for making yoghurt with any method. I don’t sterilise my equipment, but other people do. I wash everything with soapy water and scald with hot water before I use it.
You will need a thermometer. You don’t really want to guess when the milk is hot enough, or cool enough, or you could end up with yoghurt that doesn’t set properly.
There is a lot of waiting, so schedule it. Either start in the morning, or just after dinner time. It takes about two hours for the milk to heat and then cool again, at which point the yoghurt must sit for a further eight or so hours. So, if you start at 10 am, expect yoghurt at about 8 pm. There is not much you have to do, there is just a lot of waiting.
Step One: Pre-heat your milk.
Pre-heating the milk is basically pasteurising, but I think it changes the milk so that it is more likely to set into firmer yoghurt. I heat mine to 90 degrees Celcius (90 °C), which is just short of boiling. (Please note: Celcius! I will use Celcius throughout, and if you want Fahrenheit instead you need to convert. Otherwise you will not have the milk hot enough.)
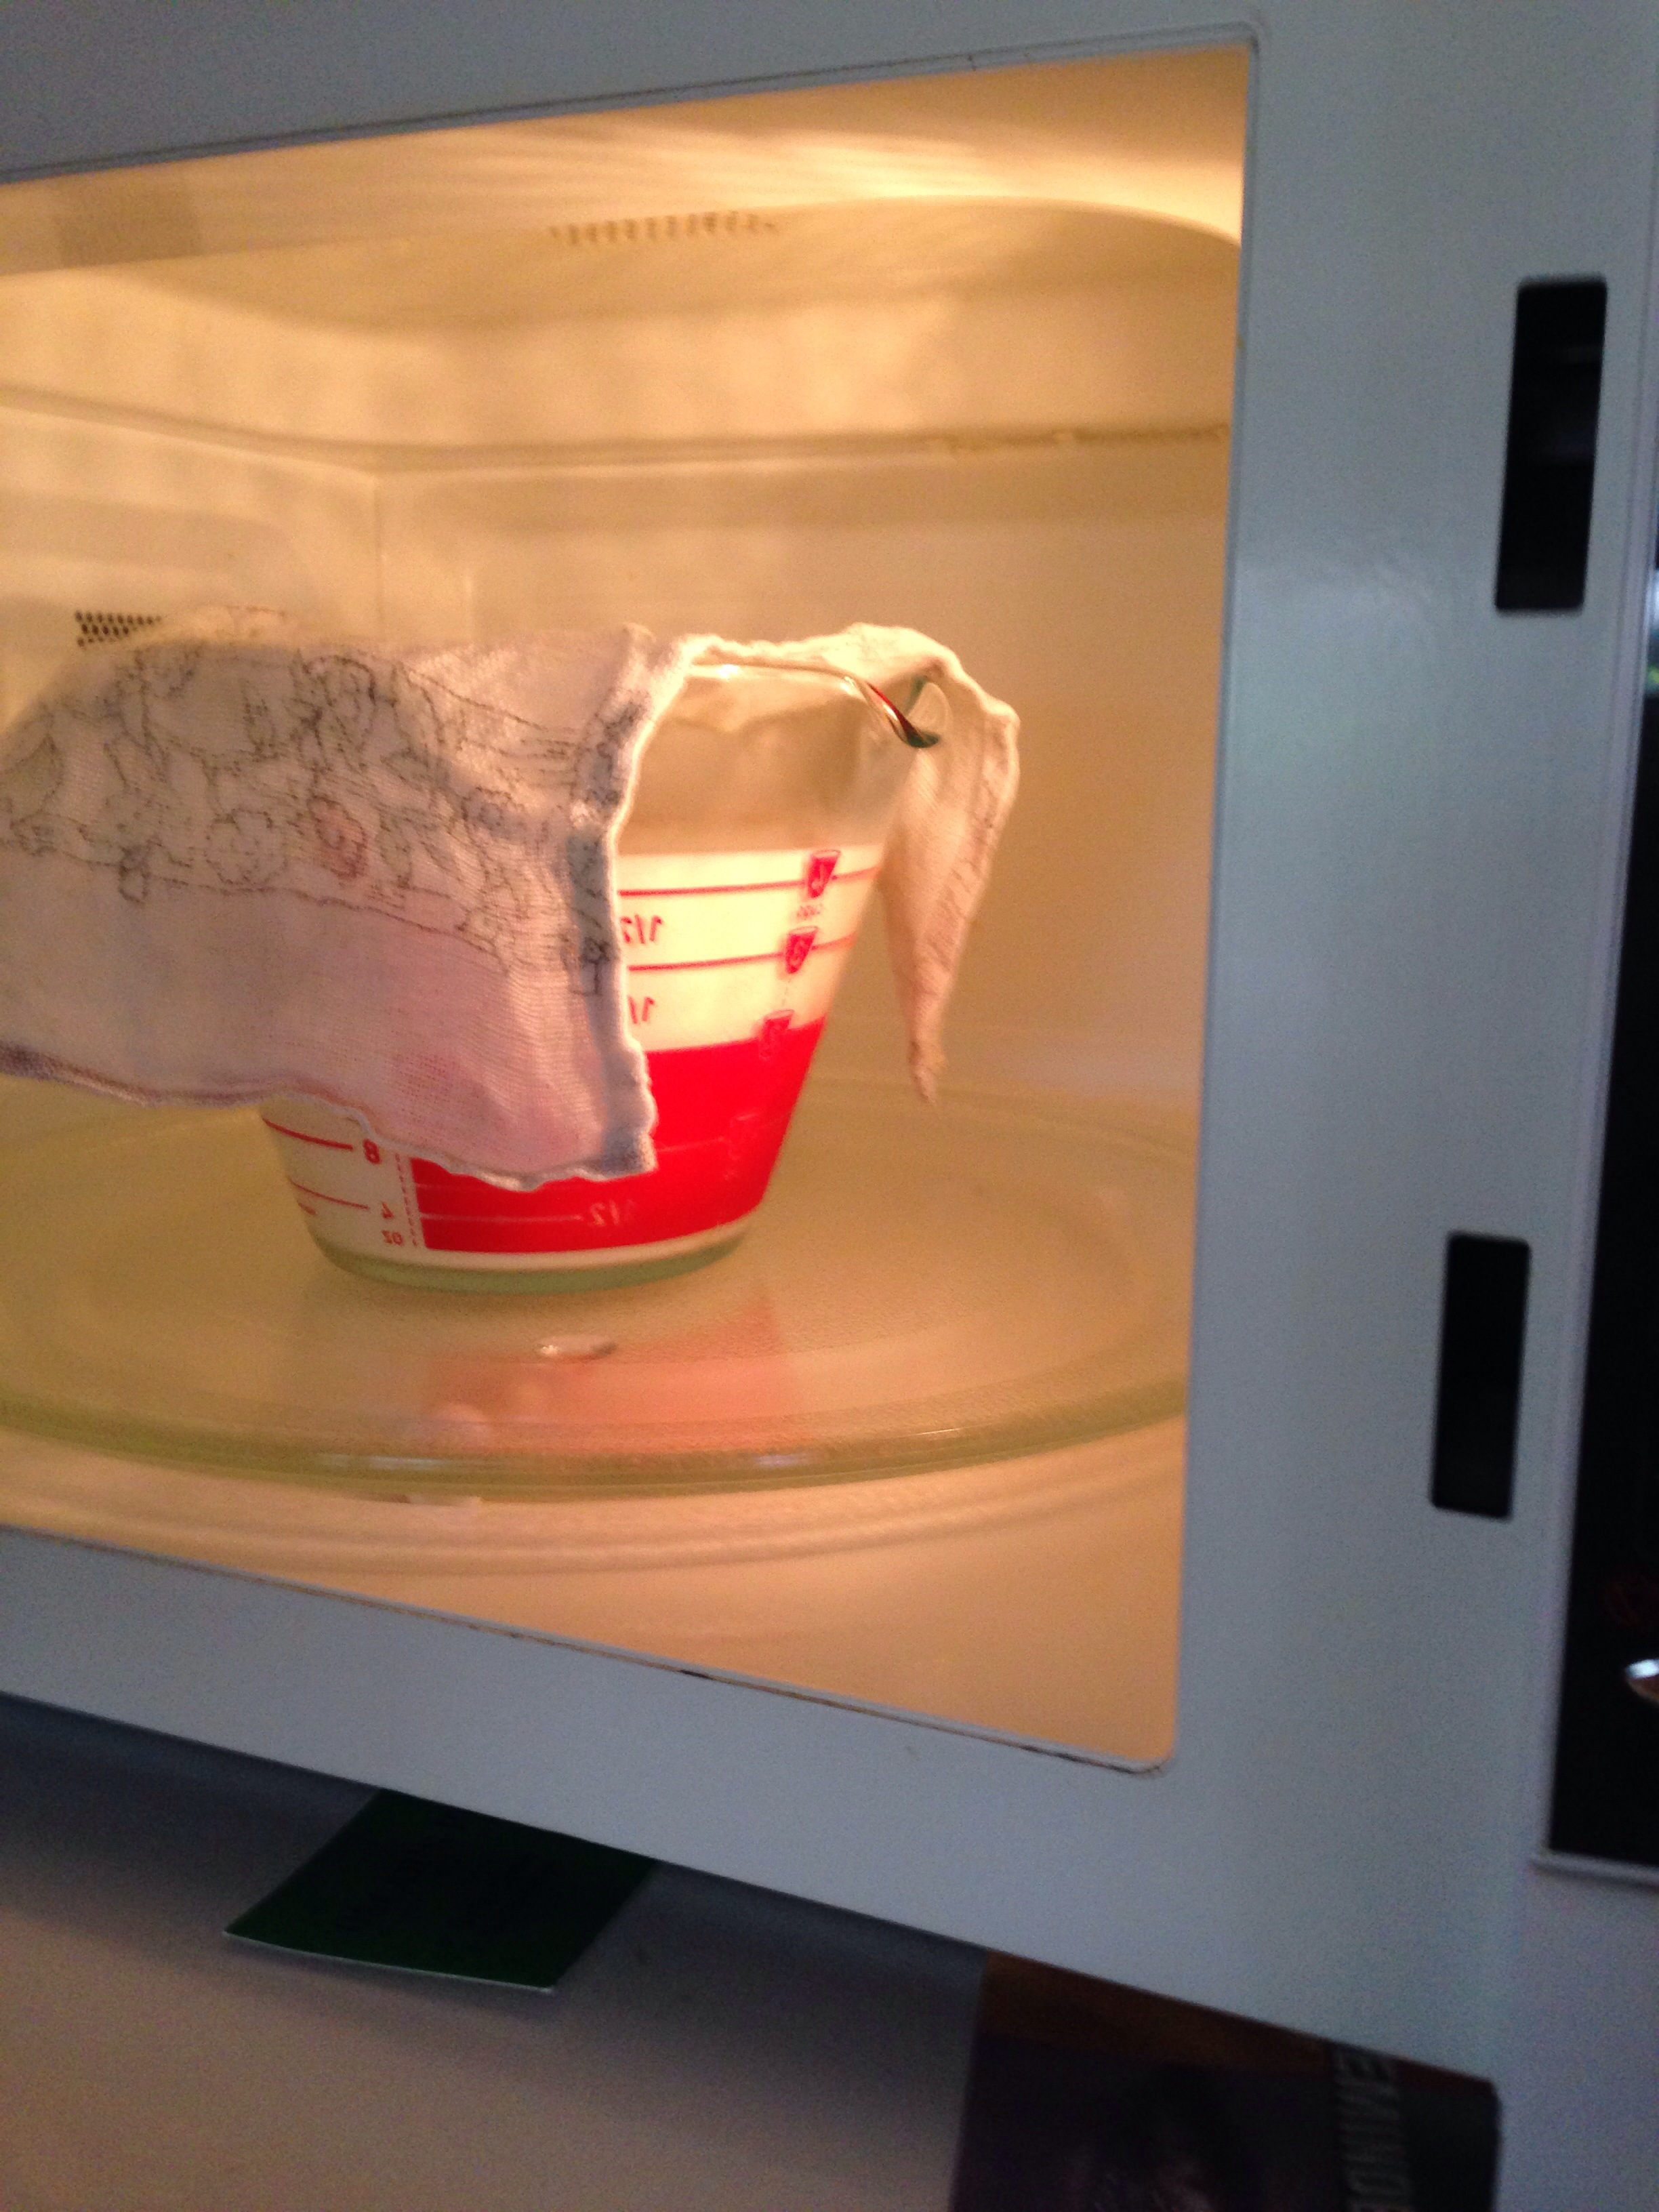
Heating the milk in the microwave
I do this in my microwave! Much easier than on the stove because I don’t have to keep stirring (milk will stick to your pan if you heat too quickly or don’t stir). 1 Litre of milk takes ten minutes to get to 80 °C, then a further two minutes to get to 90 °C (I check part way through because my microwave has a button that sets for 10 minutes). Your times may vary if you have a more or less powerful microwave, so test your temperature every five minutes to be sure.
After ten minutes, at 80 °C.
Heated to 90 °C.
Step Two: Wait until the milk is back to blood temperature.
Blood temperature is 37 °C, so I leave my thermometer in the milk, sitting (covered) on the bench until it gets to just under 40 on my dial. This step is important because if the milk is too hot, you will kill the yoghurt culture, and your yoghurt won’t set.
Once cool, I remove the skin from the milk
Ready, at 40 °C, and all stirred up!
Step Three: Add culture.
Now it’s time to add some yoghurt culture. There are two ways I do this:
Using 1/4 cup of very fresh yoghurt. Use yoghurt that is really fresh, or the culture will have died off. Any yoghurt will do, even flavoured. Pick something you actually like the flavour of! I would use a bit of organic greek yoghurt, which is unflavoured. 🙂
With a purchased powdered yoghurt culture. This is the main way I do it, since I frequently don’t have any fresh yoghurt left when I go to make more (yoghurt can last for over a week in our house, or it gets eaten up straight away!). I store mine in the freezer.
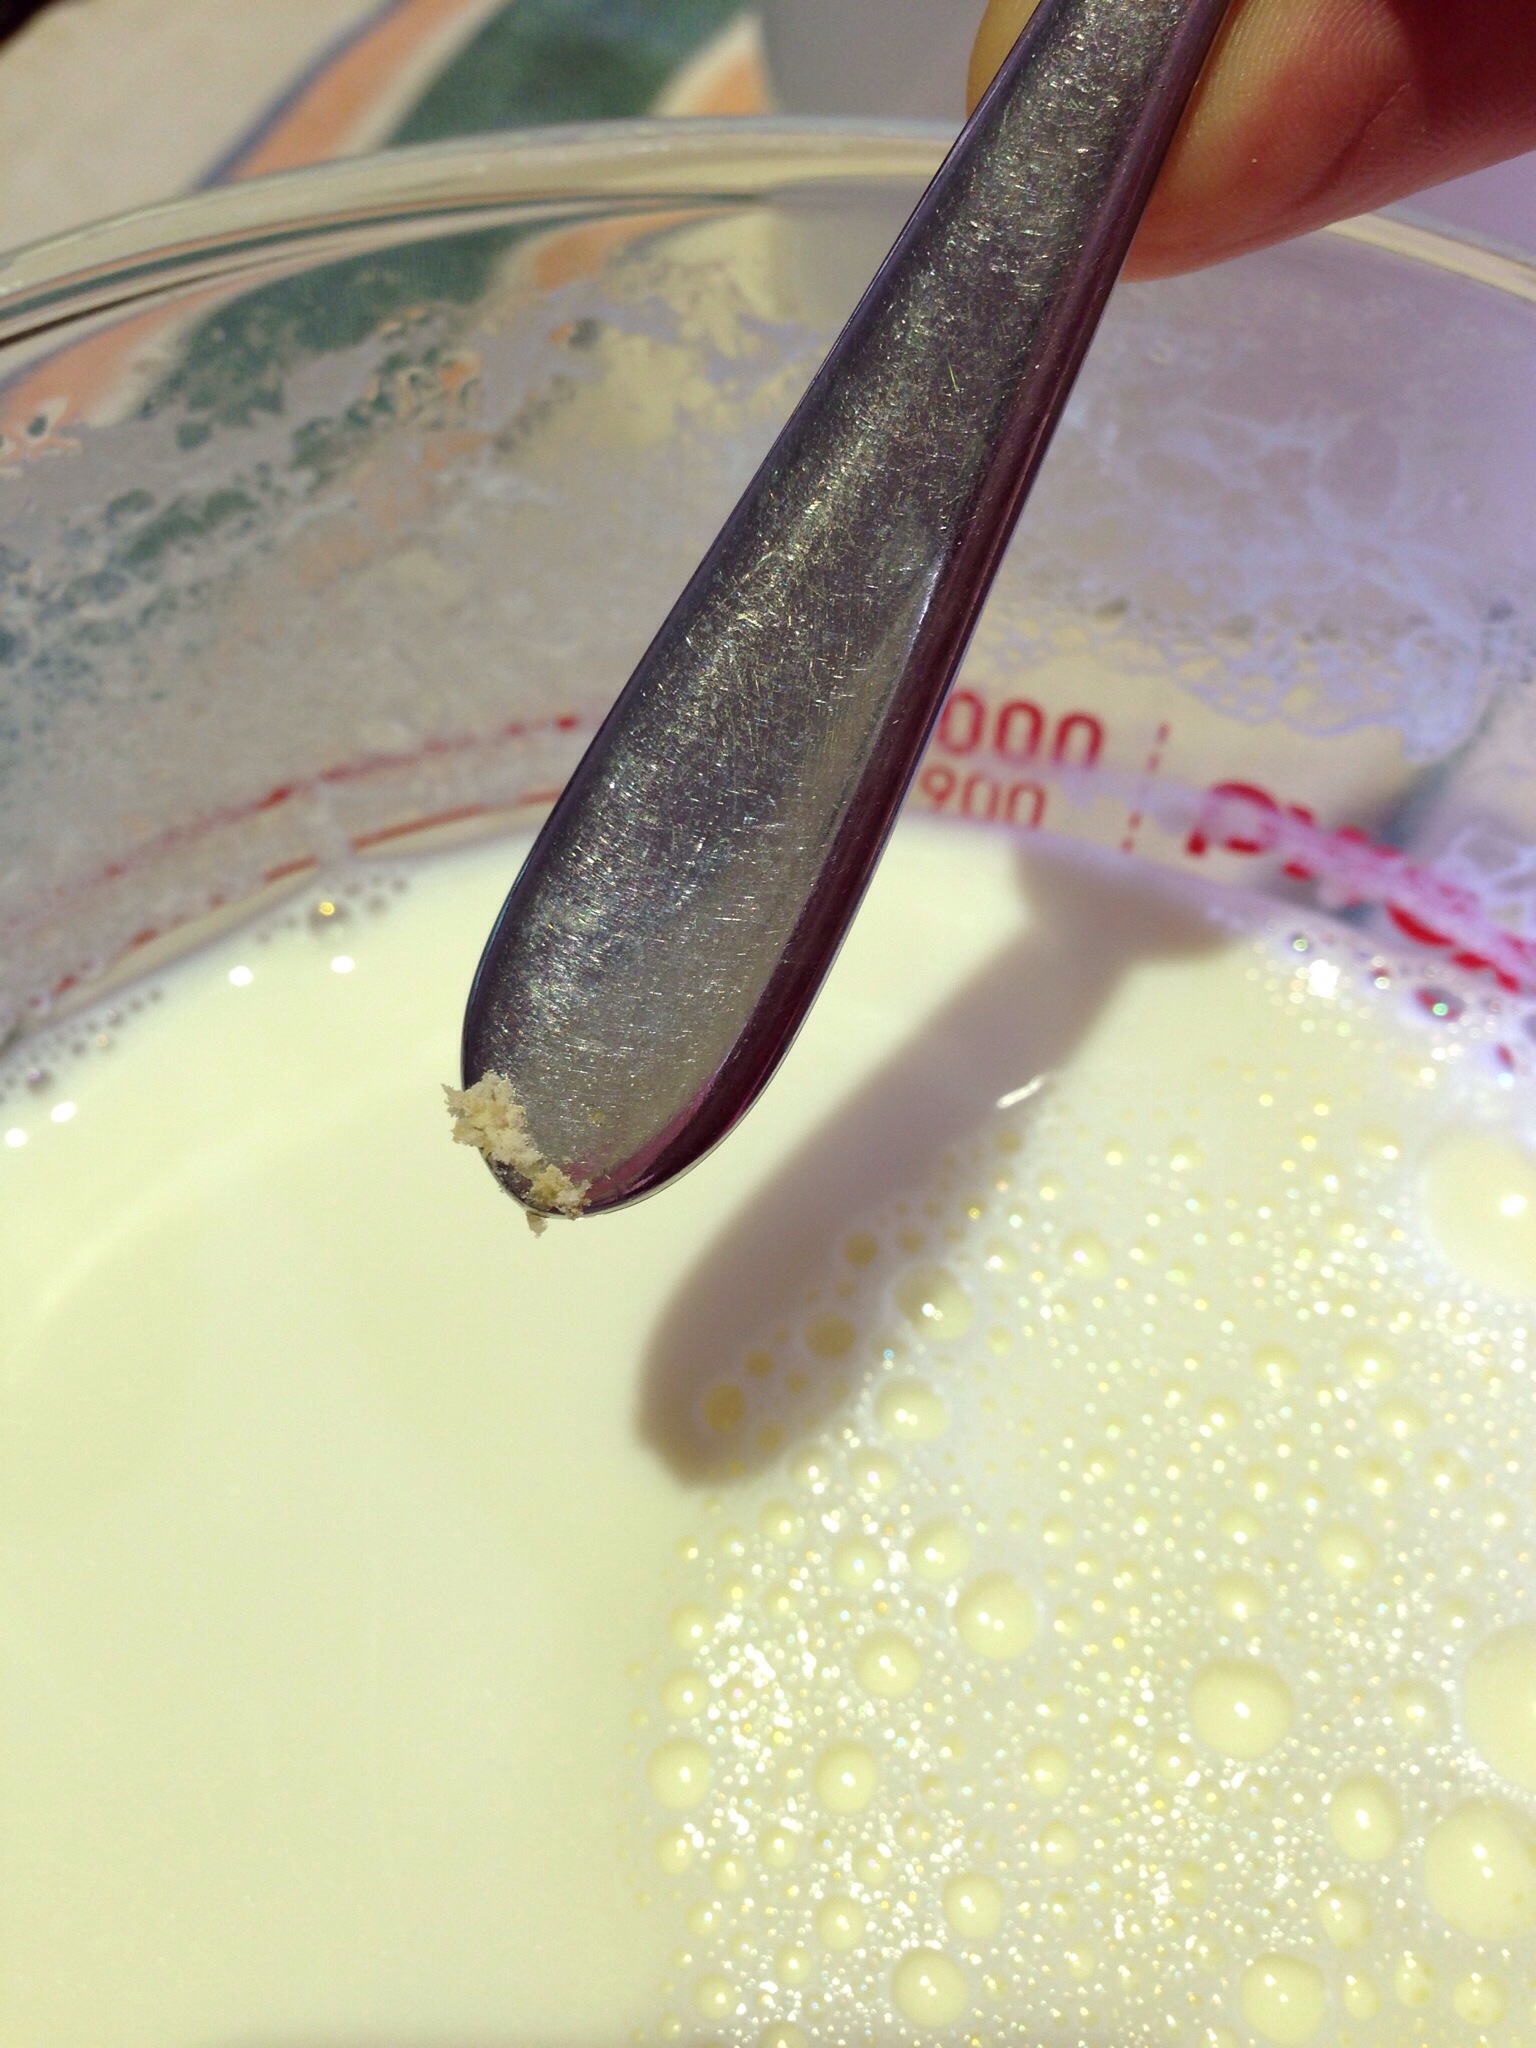
Whichever way you choose, you should stir the culture in thoroughly to your milk. Today I’m adding the purchased culture (I use the tiniest, tiniest, amount of this stuff, you can barely see it in the pictures). I stir it through using my thermometer to avoid adding more bacteria to the yoghurt.
Adding powdered yoghurt culture
Step Four: Wait for 6 to 8 hours.
Finally all that remains is to let the yoghurt sit at blood temperature, unmolested, for about six to eight hours.
To keep the yoghurt at the right temperature, I use the same thermos system I purchased from the supermarket. I add boiling water to the thermos, but I make sure the water won’t come into contact with the flask at all (I don’t want to kill my culture by heating the sides of the milk too hot!). Then I place the flask into the thermos and seal it up. Easy.
First I add boiled water to the thermos.
Then I place the flask inside and seal it up.
Other people wrap it up in towels to insulate it, or even bubble wrap, or sealed an esky (“cooler”) with a bottle of boiled water, or in a box stuffed tight with hay … any way you can insulate your milk will work if you are in a warmish climate (most kitchens are warm enough for this). There are also special yoghurt warmers which can plug into the electricity and keep it at exactly the right temperature. I prefer to go grid-free to save electricity, and in case of a blackout!
The yoghurt wants to sit unmolested, so don’t leave it somewhere you have to move it around, or anywhere it will be jostled.
In about eight hours, open the flask carefully and check the top. If you used full cream milk like I do, chances are the top will be yellowish with a fairly firm top. This is the cream floated to the top, and turned yoghurt (yum!). I have learned that my yoghurt is now ready at this time, but if you’re not sure, gently tip the flask sideways so you can see how thick the yoghurt has become. Leave it longer if you want a more “sour” yoghurt (growing more culture eats up the sugars in the milk).
I re-seal my flask and leave it overnight in the fridge to harden up before I drain the yoghurt (optional), or before we eat it. If your yoghurt is still sloppy after you have chilled it, then it hasn’t properly set. Chances are there was not enough live culture to convert your milk to yoghurt. Did it get too hot? Was your starter yoghurt or culture too old?
I’ve only had this happen twice (in a row!) and I worked out it that I had tainted my powdered culture. It had clumped together and I guess was just out-competed by other bacteria. I threw that batch away and started next time with fresh stuff.
Update: I’ve just checked on my yoghurt to take a final picture for you, and guess what? It didn’t set!! Boohoo. It is thicker, but still milky, so I must not have used enough started culture after all. I’ve given it a bigger dose, and mixed it in. The temperature was still at 37 °C, so I just refreshed the thermos and I’ve set another timer for three hours. Typical! I’ll update again in a few hours and let you know if it worked. 🙂
Another update: Three hours later, and it set, with a vengeance! I’ve never had the yoghurt curd separate from the whey before. Check it out:
The yoghurt is separating from the whey!
Never seen this before.
I’m tilting the yoghurt container to try to show you how there is a white solid core (curd), with a clear yellow liquid (whey). I’ll be amazed to see how firm this is tomorrow after chilling. Wow.
My kids ask for food at seemingly random times of the day. If you have kids, you probably know that feeding the small ones can be a really frustrating experience! Sometimes you make a huge effort to try to tempt their appetite, and they refuse to even look at it, at other times you slap something together and it gets devoured. It’s never the same twice!
Making lunch amusing with some olive goggly eyes!
So, if you have kids like mine, maybe you also struggle with what to give them, and when. I suspect snacks are my main problem. If I let them eat afternoon tea, the dinner is often spoiled. But I don’t want to starve them and have them nag me all afternoon.
So I have “eat anytime” snacks. My favourites are:
a bowl of frozen peas
a raw carrot
a handful of dried cranberries
raw mushrooms
Basically, if its a vegetable, they can have it! I figure if they “spoil” their tea eating vegetables, then it’s a win (unless I’m trying to get them to eat a sit-down meal or try something new). It does mean they are “grazing”, though.
I try not to give them too much fruit. Dried cranberries are the favourite thing to eat round here, if you’re under five. I have had to put the dried fruit up high where they can’t help themselves. I had a few incidents where an entire packet of dried apricots was gobbled by Mr 4 years old before breakfast. That’s not pretty!
Fruit and veg snacks
Fruit: rationed!
Do you have any rules for snacks? Do you have a sit-down meal for lunch and dinner? I have a hard time with this because dinner times are so staggered in my household. Sometimes I have three dinner times because Stephen works so late. Does anyone else struggle with this?
Summer time in our garden is always full of life! There are some flowers, and a lot of seeds forming at the moment. Here is a photo selection of interesting things happening this week. 🙂
Ants crawling in the pumpkin flowers
A Jap Pumpkin, still growing
The Leek flowers are spent and the seed is forming
Ferny Asparagus foliage
Basil flowering and beginning to set seed
Tagasaste, or Tree Lucerne
Turmeric flower spike
Lacewing eggs under a leaf
A flowering gum tree (I think!)
Pumpkin vine establishing next to our compost bin!
Is it just me, or when you are putting the binding onto your quilt, do you feel like there are five corners instead of four?? 🙂
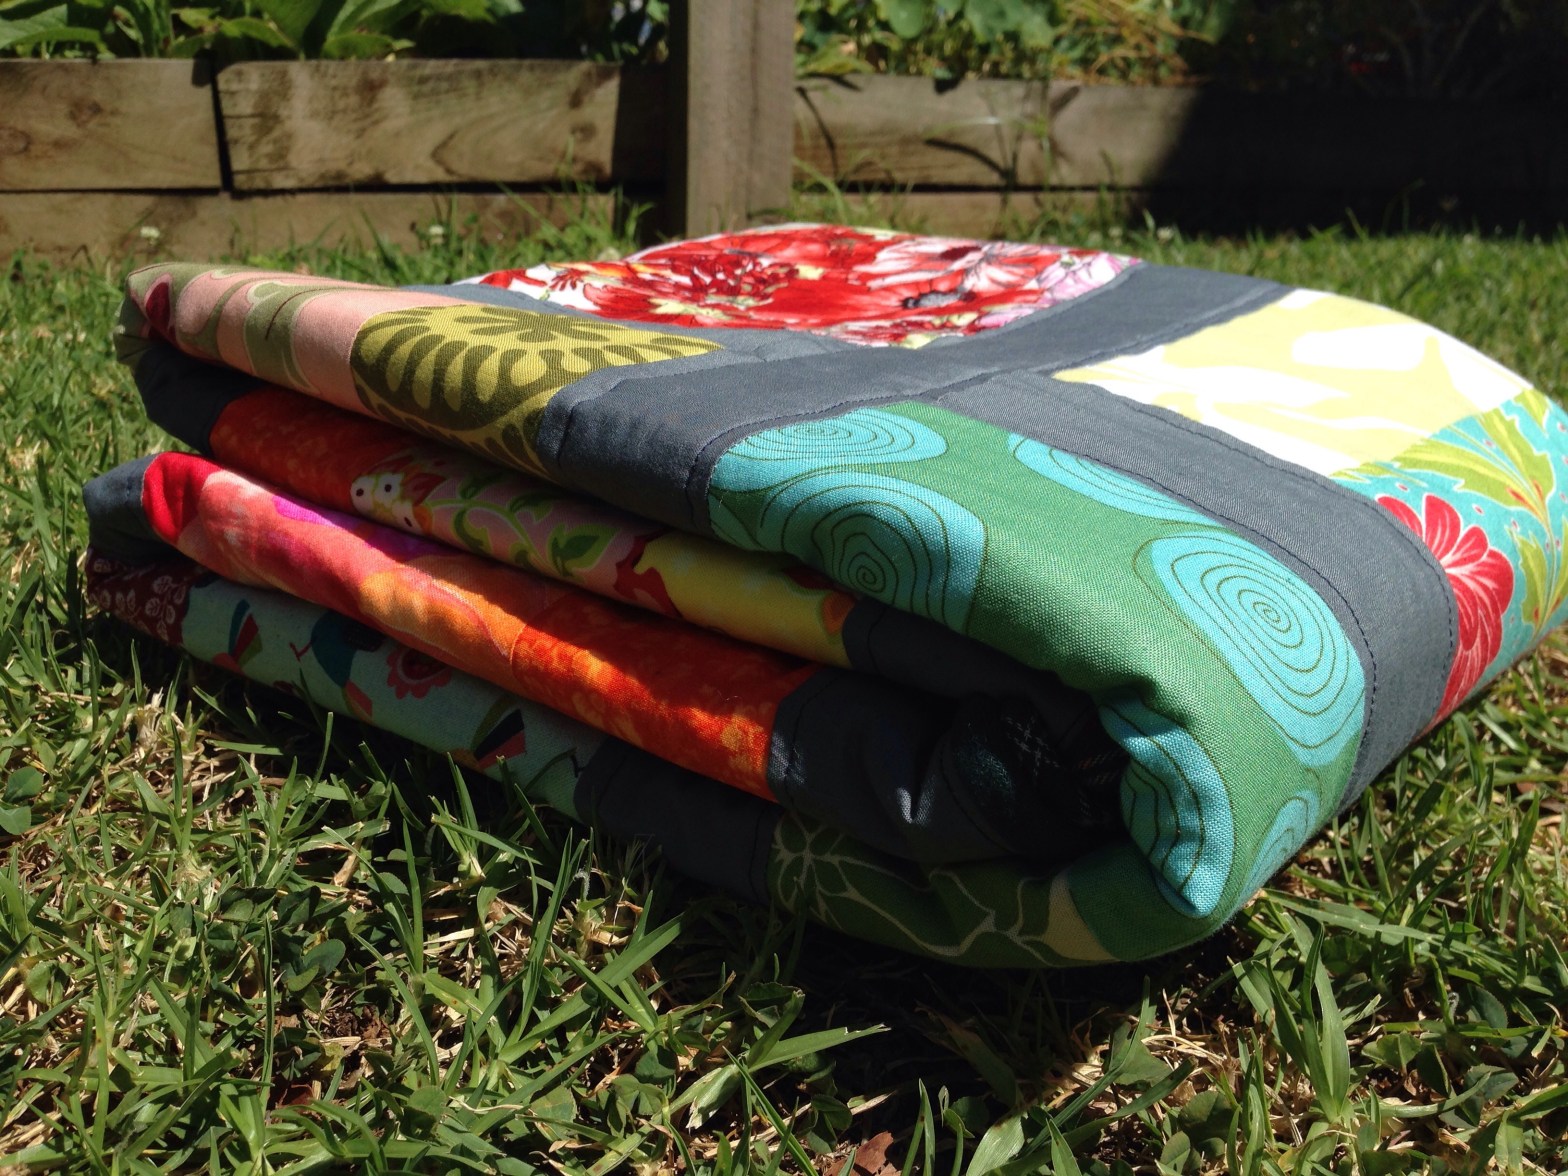
So finally, it is finished. I am so pleased with this quilt that I can’t bear to send it away in the post today! I’m going to hang onto it over the weekend and show it off to my parents, when they come to stay. Too snuggly!
I decided to quilt this one by outlining each “window” in a slightly wonky way. Just straight lines on top of the sashing, in navy thread. The binding is so soft! I tried a flannelette plaid, and it worked out really well. 🙂
You may be interested in where I sourced my fabrics for this quilt (and other projects). The backing is a curtain panel I picked up on the kerbside, during a council cleanup. I think it works so much better as a quilt back for a young boy, don’t you?
I have also posted a tutorial on how I pieced this quilt top. A good project for a beginner quilt. 🙂
I went a bit crazy taking pictures outside, so prepare for a photo fiesta!
Label reads: May this quilt be a window to your dreams!