
Okay, so I mentioned a while back that I had done some DIY in the kitchen, and had actual photos of some progress. This is true: yay!
Unfortunately, when I was painting my kitchen cabinets, I didn’t think of taking a “before” picture. It turns out that the part of the kitchen I painted is not a very well-photographed area of the house! (Who knew that the fridge is not very photogenic? ;))
I trawled back through over a year of photos (and came across some really cute ones of the kids!) and all I could find was this one:

That’s my boy: what a cutie, am I right? But you’re supposed to be looking at the top right corner of the photo, where the drawers under the oven are showing. Up! Up! Right … there! Okay, so now imagine a whole wall of cupboards that wood grain colour, with a large nook for a fridge and freezer.
Here’s what it looks like after I finished the cabinets (woah, yeah, straight to the “after”!)
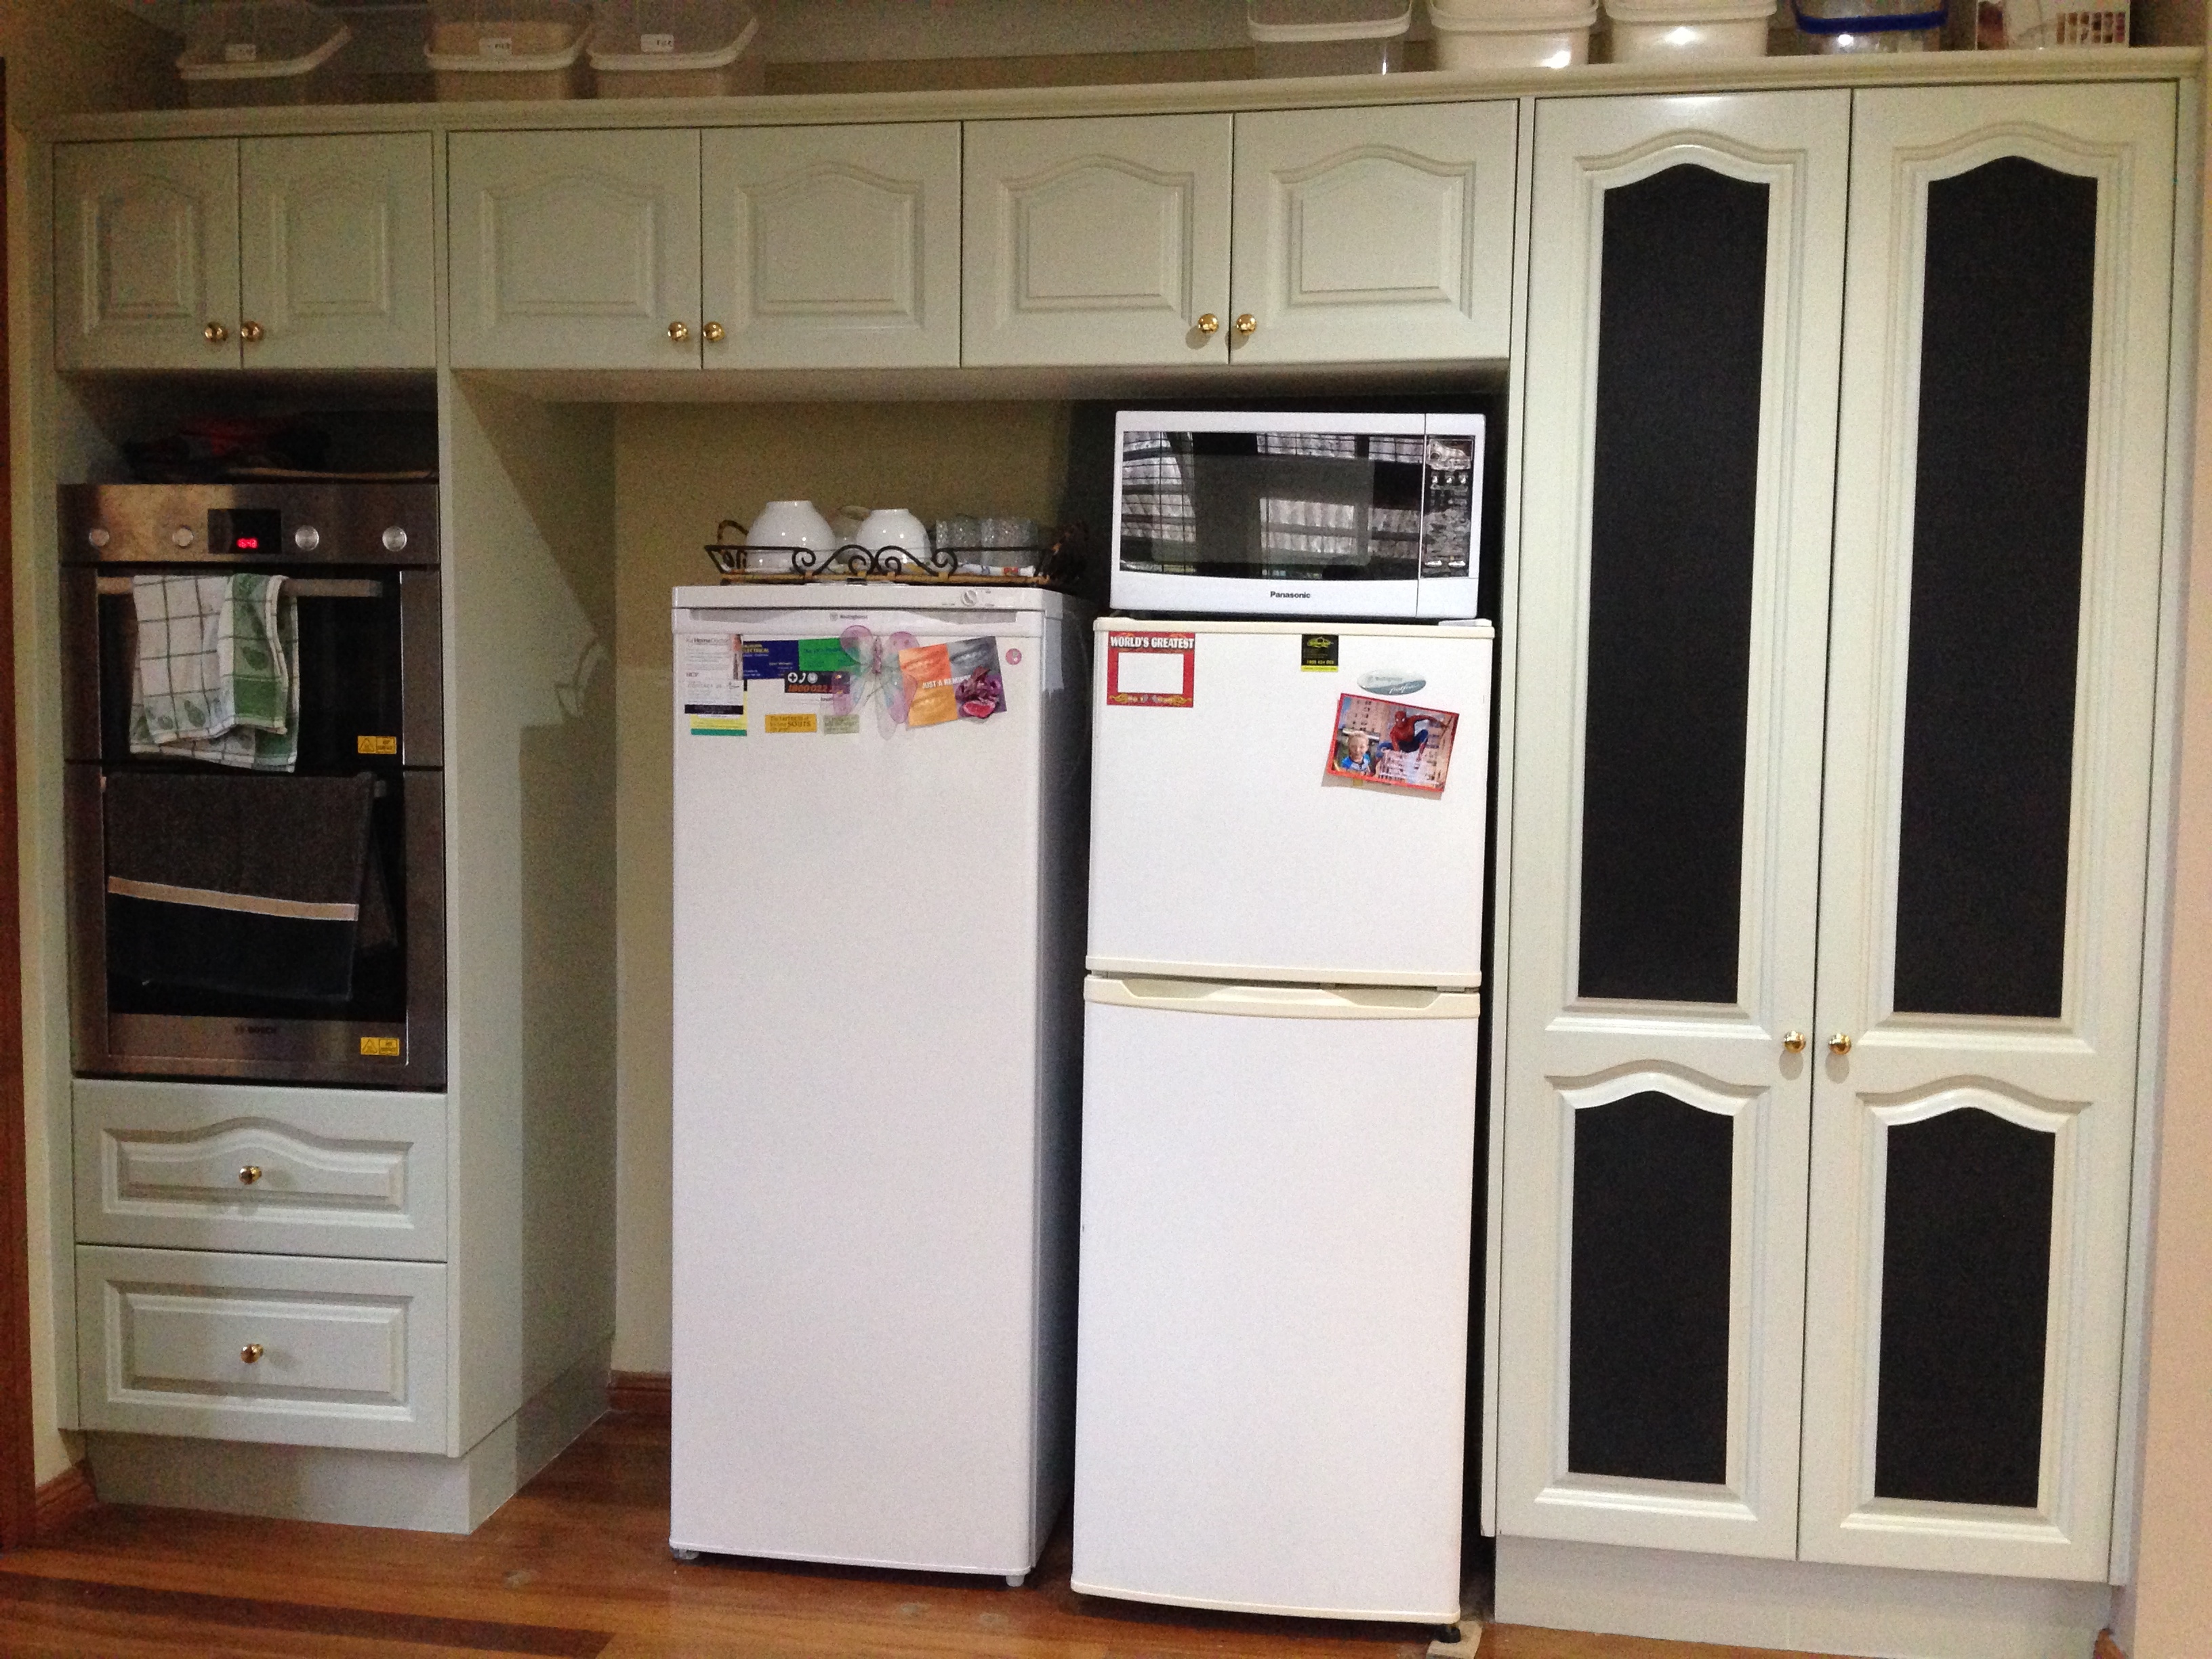
That’s a lot of cabinets! Why did I pick these ones to do first?
Inconspicuous test walls
One of the first things I realised about DIY painting the kitchen cabinets was that I feared doing a bad job. It’s all very well to do a bunch of research and choose the best primer and paint combo that you think will work, but at some point, you are leaping in and destroying an existing finish. Scary, right?
The nook for the fridge and freezer provides a bunch of space I could work on that was less conspicuous than the front faces of the cabinets. It’s the same solid wood as the cabinets, only there are no mouldings to worry about, and if I didn’t get the finish properly smooth (or with drips, or uneven colour, …) then I could work on fixing it and trying again, without having done it in full view of everyone.
I was also concerned about drying time for paint, and with little kids in the house, that’s a problem! I could fence off the area using the fridge to make sure no sticky fingers got onto the finish before it dried.
Removable doors, up high
See again: small children! If I’m going to live with no cabinet doors for a goodly long while, it had better be with cabinets that the kids can’t reach into! If I did the doors under my prep area I know for a fact that the measuring cups would be in with the play dough set (or the garden), and I’d be constantly rescuing my cheese grater, mixing bowls and other stuff that is really annoying to have to retrieve and clean up all the time. 🙂
Not to mention the plastics cupboard. Oh boy, they love getting into that!
Cabinet boxes don’t need painting
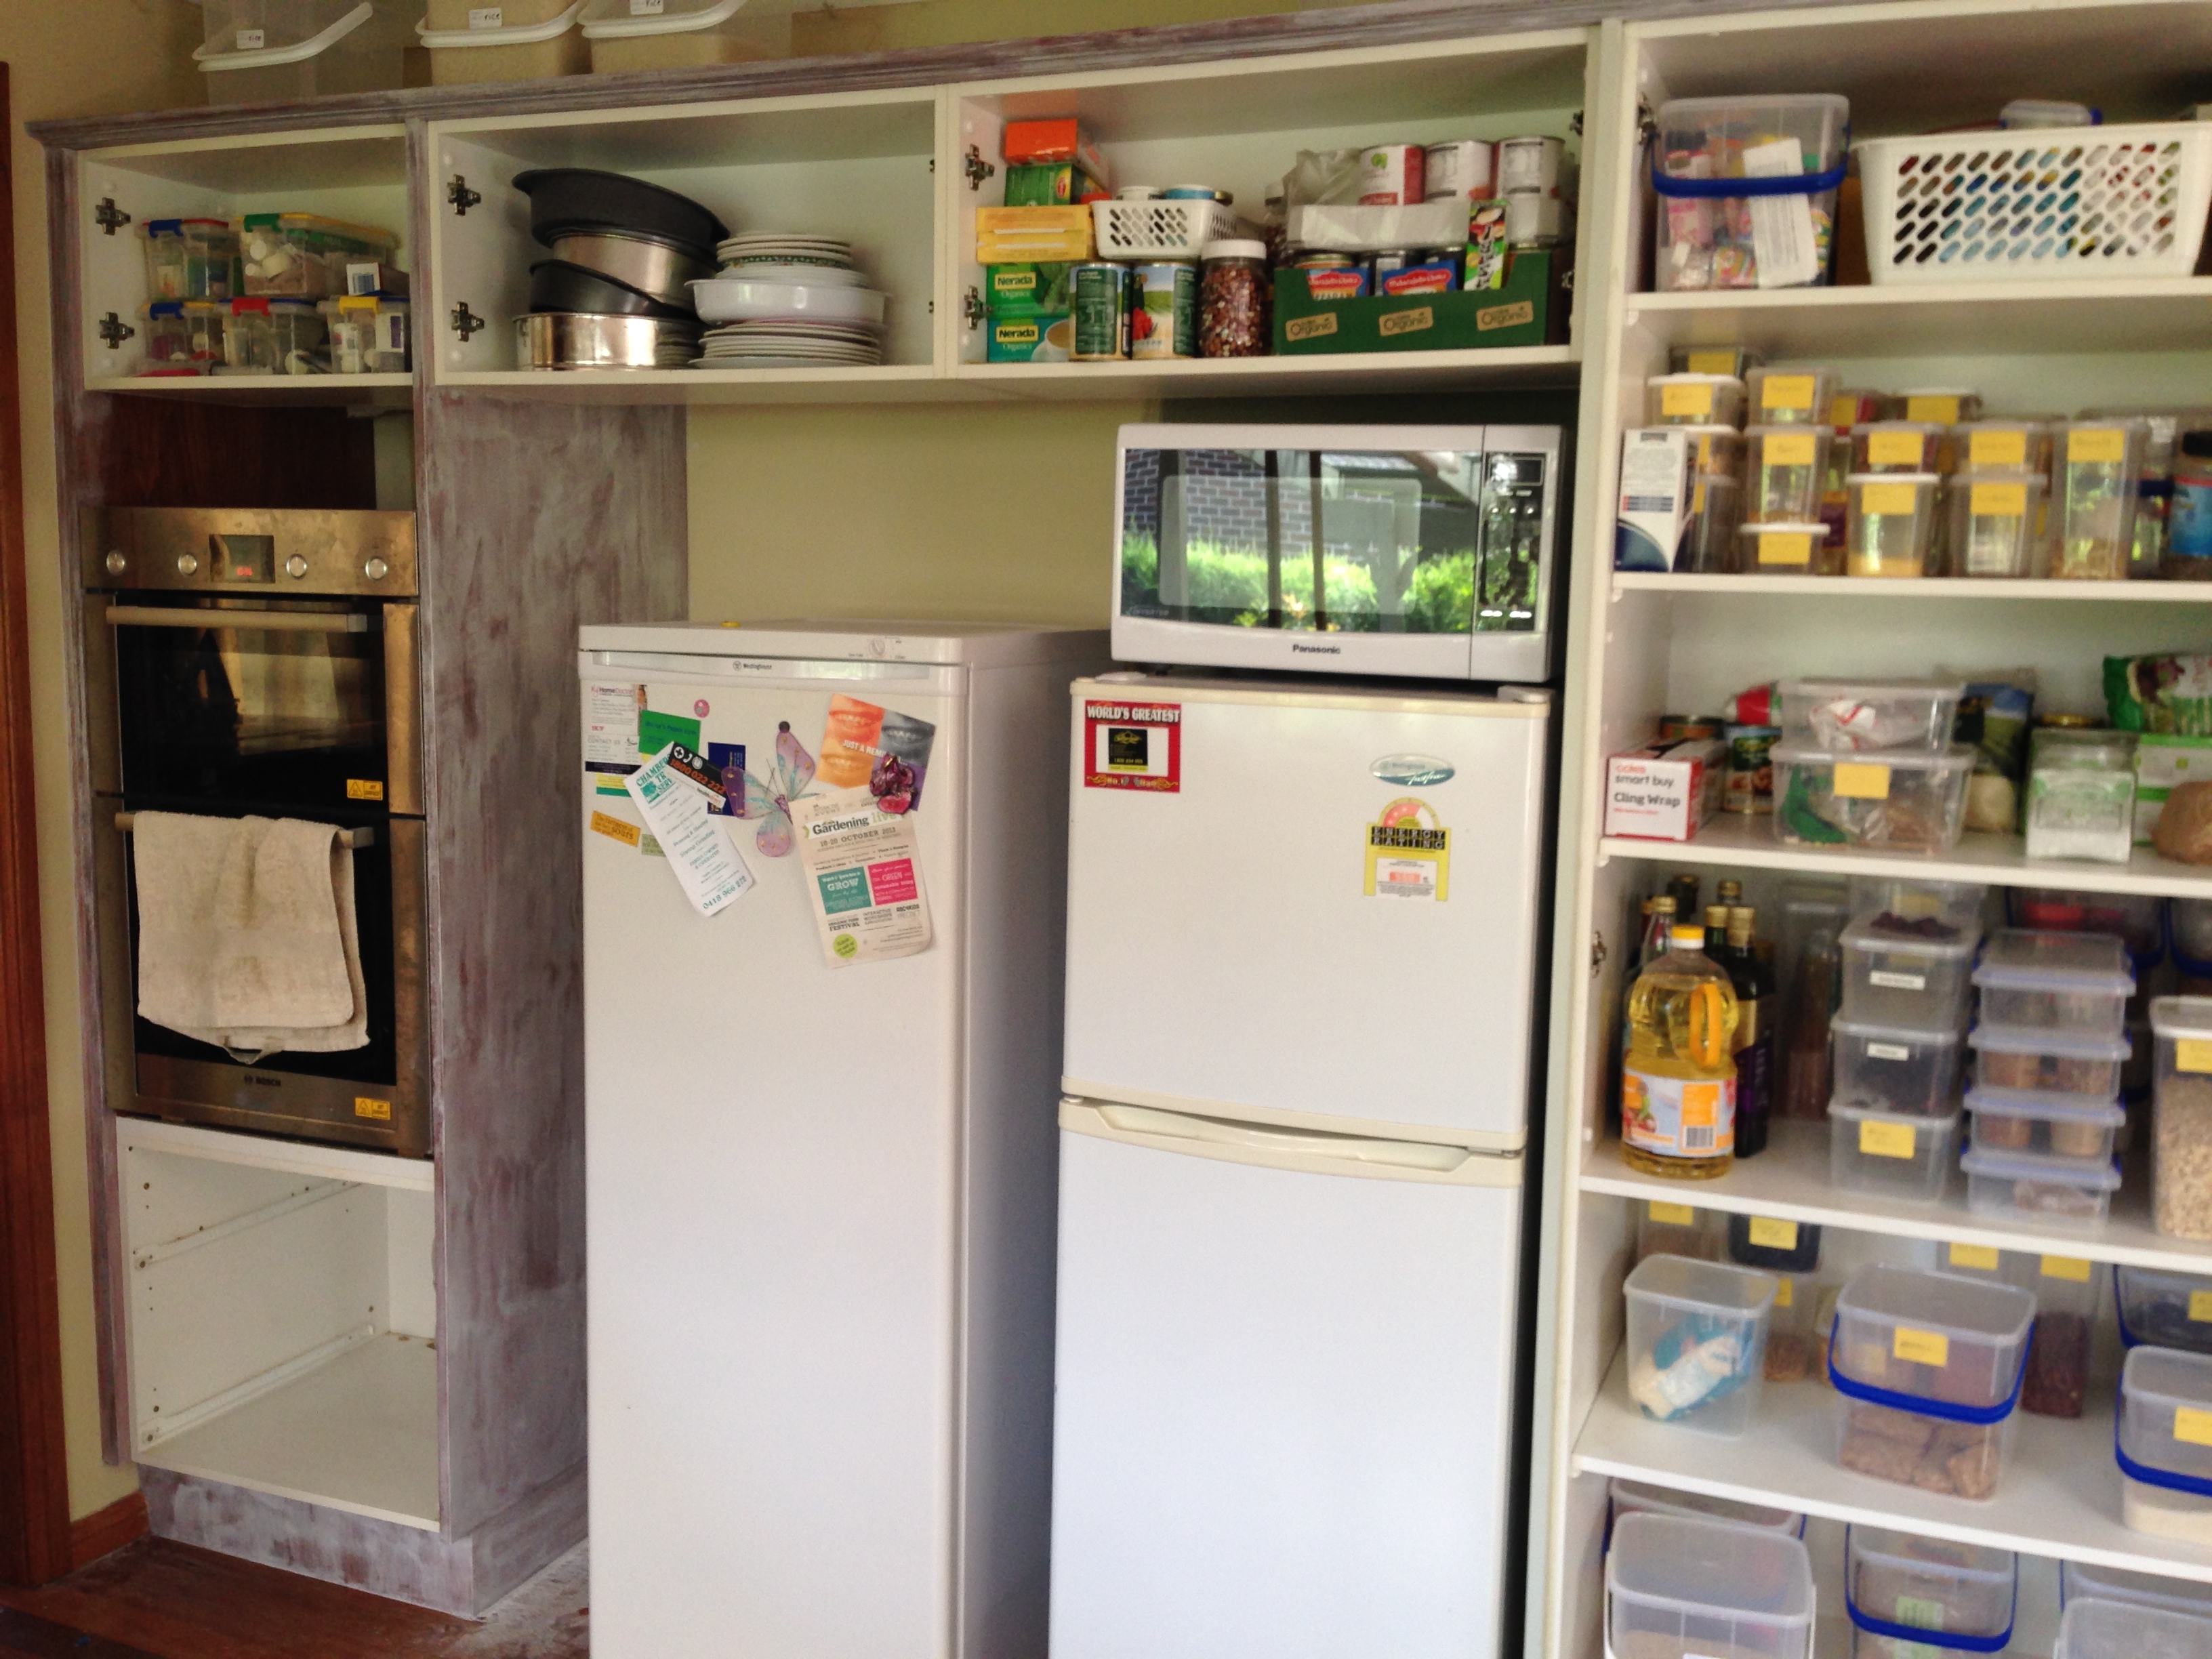
It turns out that the cabinet boxes in this part of the kitchen are all finished with that white laminate washable stuff, so they don’t need to be painted. That’s a total win, because I don’t have to take everything out of the cupboards!
When you are using a kitchen at the same time as renovating it, this is a major factor in where to start. I didn’t want to be living with masses of clutter for the whole time it took me to complete the project!
I knew it would take a long time
A really long time. I am a full-time carer of pre-school aged children, after all! From the first photo in this series, to the last, we have one month of elapsed time. (Actually, that doesn’t seem like that long, now. It did at the time! Ha!)
So how did I do it?
Okay, so enough background, on to how I actually did it! 🙂
Here is a quick outline of what had to be done:
- Sanding with coarse grit paper (120 grit, wet and dry)
- Filling any holes with putty (next time I will also do gappy joins in the moulding as the dark cracks show with the pale coloured paint)
- First coat of primer
- Sanding with medium grit paper (240 grit, wet and dry)
- Additional coats of primer and sanding (until the wood colour no longer showed through so much)
- First coat of semi-gloss paint
- Sanding with finer paper (400 grit, wet and dry)
- Additional coat(s) of semi-gloss, sanding between
That’s a lot of sanding, and paint drying time! I began on the wall beside the fridge, and that worked out with a smooth enough finish that I was ready to pull the trigger on the whole project. So I waited about … a year … and then proceeded with the rest. 🙂
Sanding


I do all my sanding by hand, using an off-cut piece of wood from when we constructed the chicken coop. I cut up a bit of foam and placed it between the block and the paper, so that it had a bit of “give”. I don’t know whether this is something a pro would recommend, but it worked for me!
For the fiddly bits in the moulding, I used the same piece of foam, but I folded it up and ditched the block. I also cut the sandpaper up into little pieces so I didn’t have to wrestle with it, or have sharp folded corners scratching areas I wasn’t paying attention to. Mostly I just used my finger with an even gentle pressure to do the moulding.
Priming
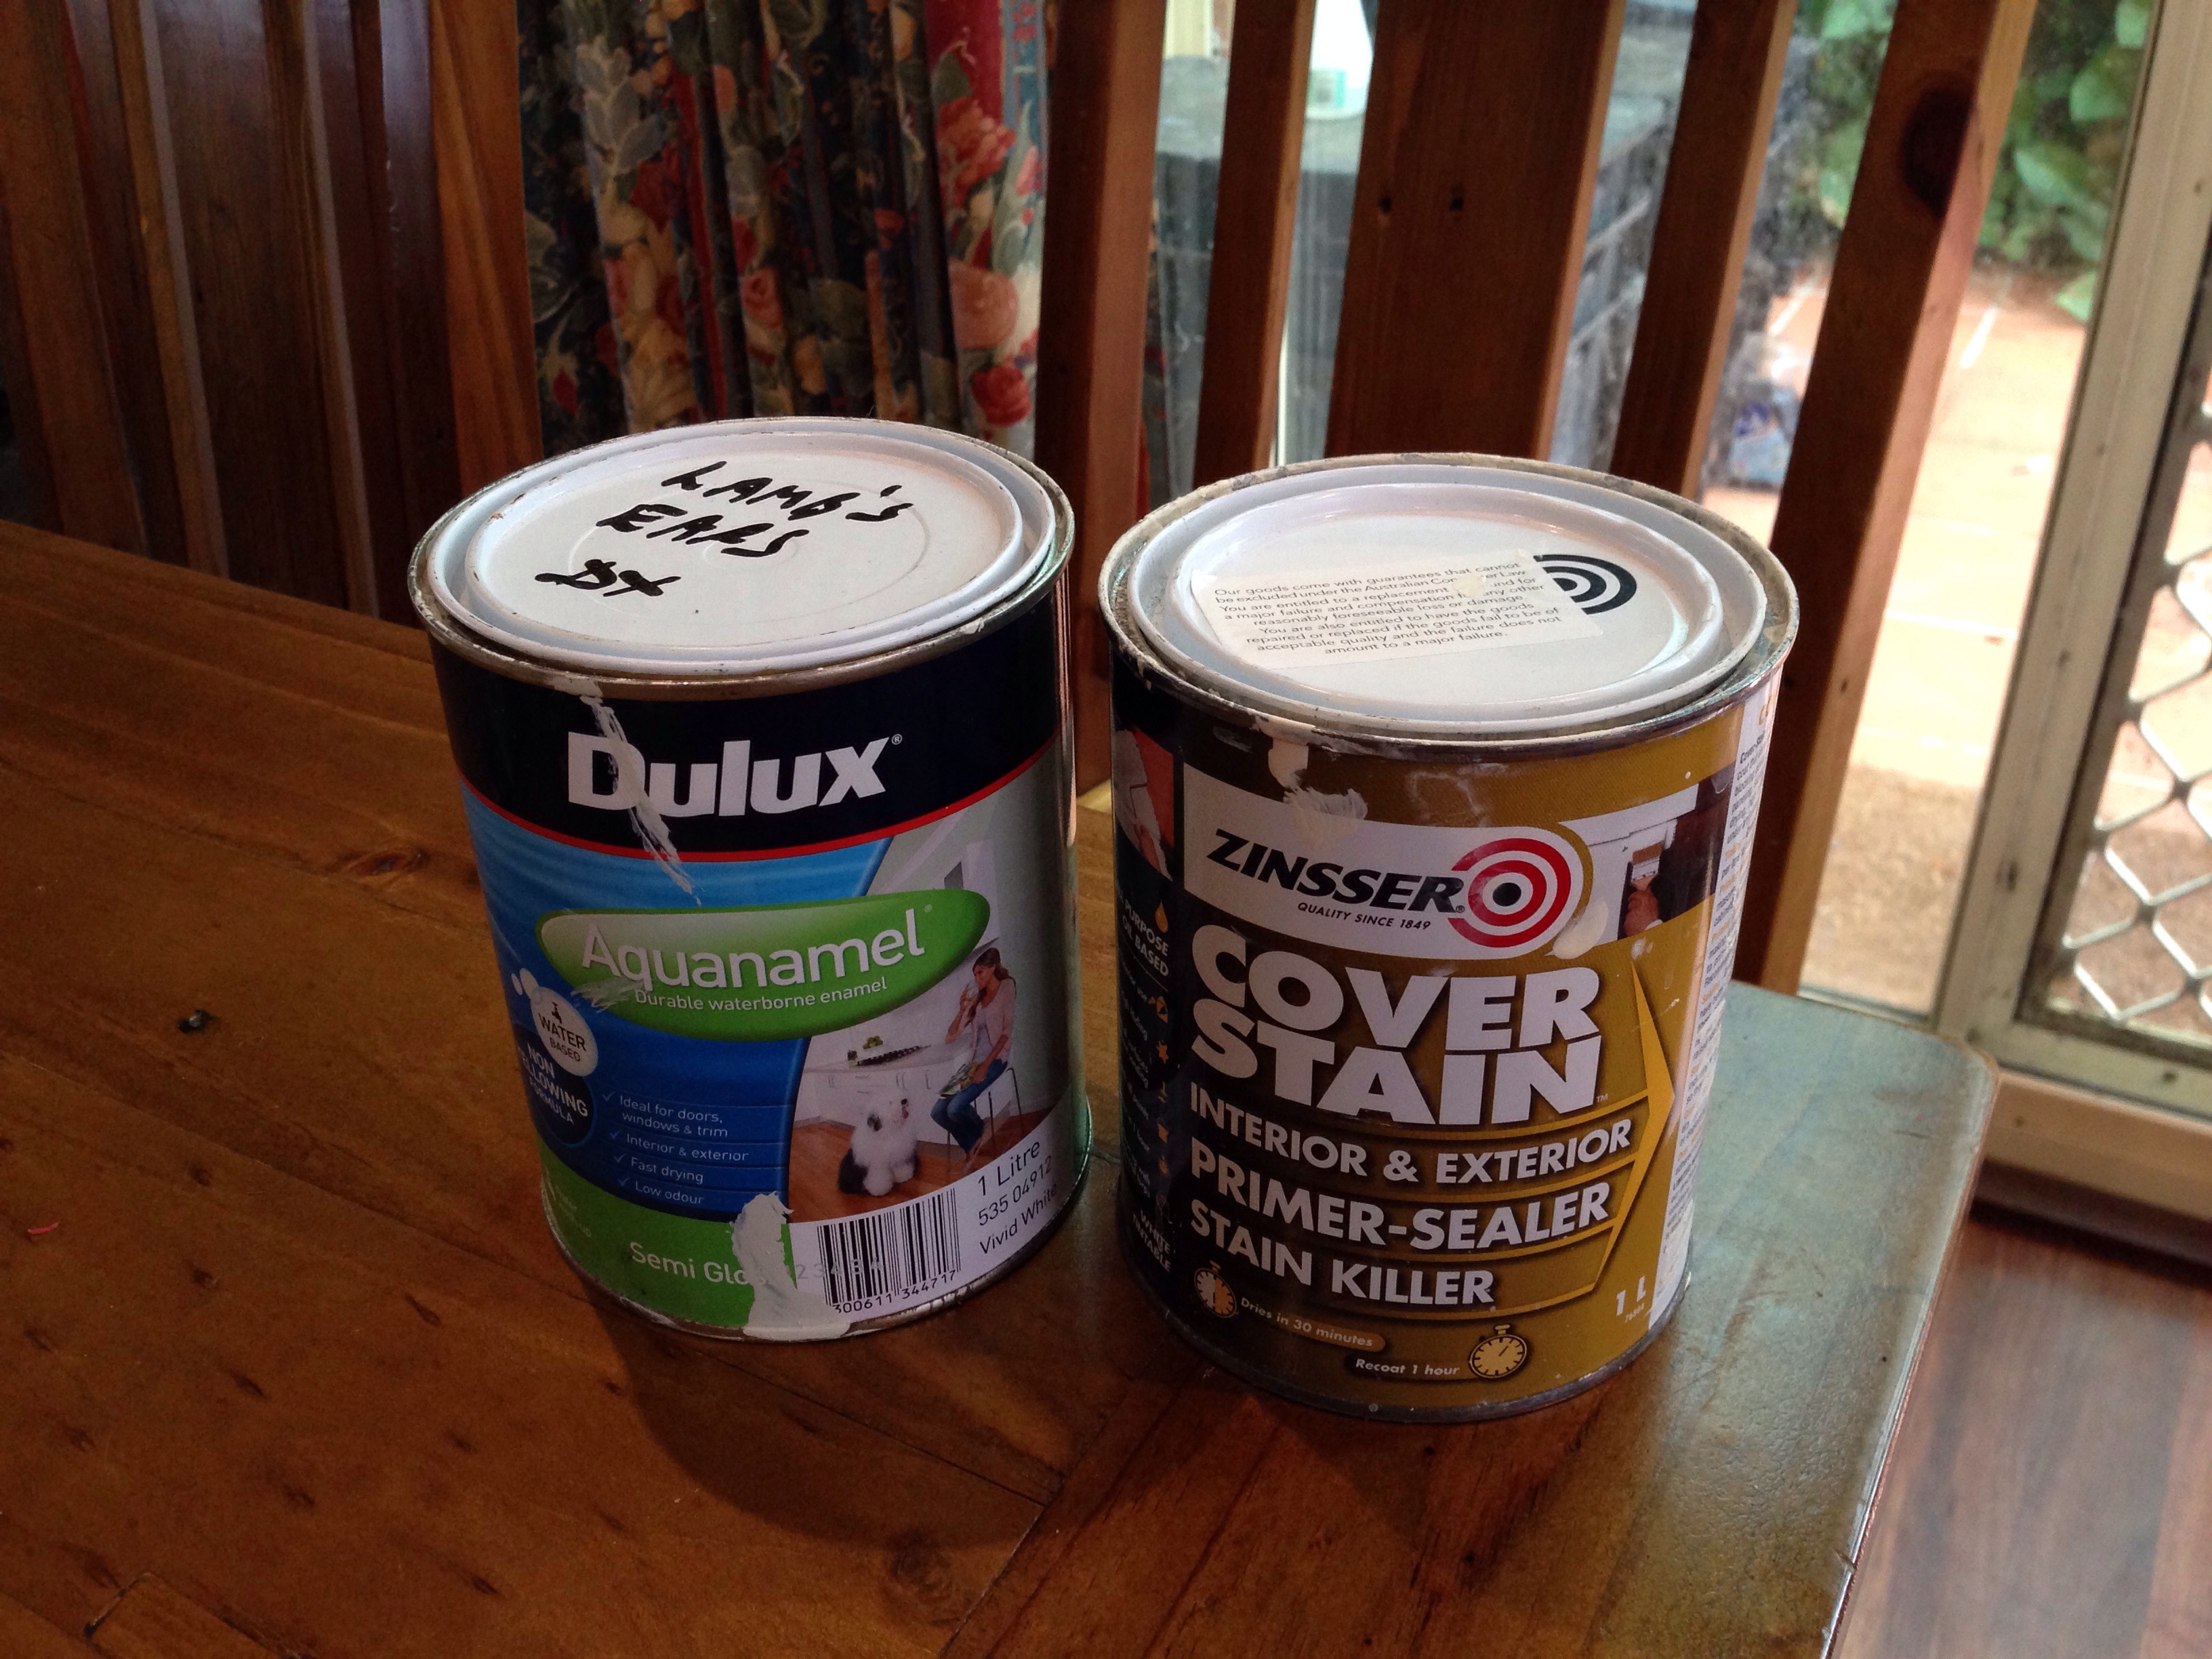
I used Zinsser “Cover Stain” primer on the advice of the hardware store. It is meant to stop the knots in your wood from bleeding through your coats of paint. I thought at the time that it meant it would cover the existing stain nicely. Well, that too!
It’s an oil-based primer, which means turps clean-up. Which is a pain! It takes ages to wash out brushes with turps, and I feel awful pouring that stuff away. But it must be done because the existing finish is almost certainly an oil-based Estapol and you can’t put water-based paint onto an oil-based finish.
This primer allows you to paint your topcoat with either an oil-base or a water-base – check your tin to make sure. 🙂
Painting
The semi-gloss paint I chose is Dulux Aquanamel. It is a water-based paint, which is vastly easier to deal with for a DIY job. There is a lot of back-and-forth over how shiny a finish you can achieve, but at the end of the day, these were the main factors in my choice:
- Drying time: oil-based takes ages to dry. Ages. And long drying times mean fluff and dust are more likely to stick on. It also means that curing the paint is quicker (and I don’t want to keep small children away from low cabinets for weeks to avoid getting dents and scratches).
- Stink factor: oil-based paint is stinky, and it lets off gasses for weeks and weeks. I don’t want that smell in my kitchen.
- Volatile Organic Compounds (VOC): Low VOC paints are more environmentally friendly. Not brilliant, but better. Water-based paint is low VOC, but oil is not.
- Easy clean up: as I said above, oil-based paints are a PITA to clean up.
- Easy application: I found that my oil-based primer is a whole lot “stickier” to apply than my water-based primer. I think that goes generally for the top coats too.
- No yellowing: over time, oil-based paint will yellow. I didn’t want that happening with my fairly pale top coat.
Applying the Paint
I used a brush to apply both the primer, and paint. I used different brushes for each so that I could keep the topcoat brush in the best condition I could manage. The oil-based primer is harder to clean up, and so the bristles in the brush do clump up slightly (enough that I don’t want to use it for the top coat).
The best brush I’ve worked with so far is this one on the right:
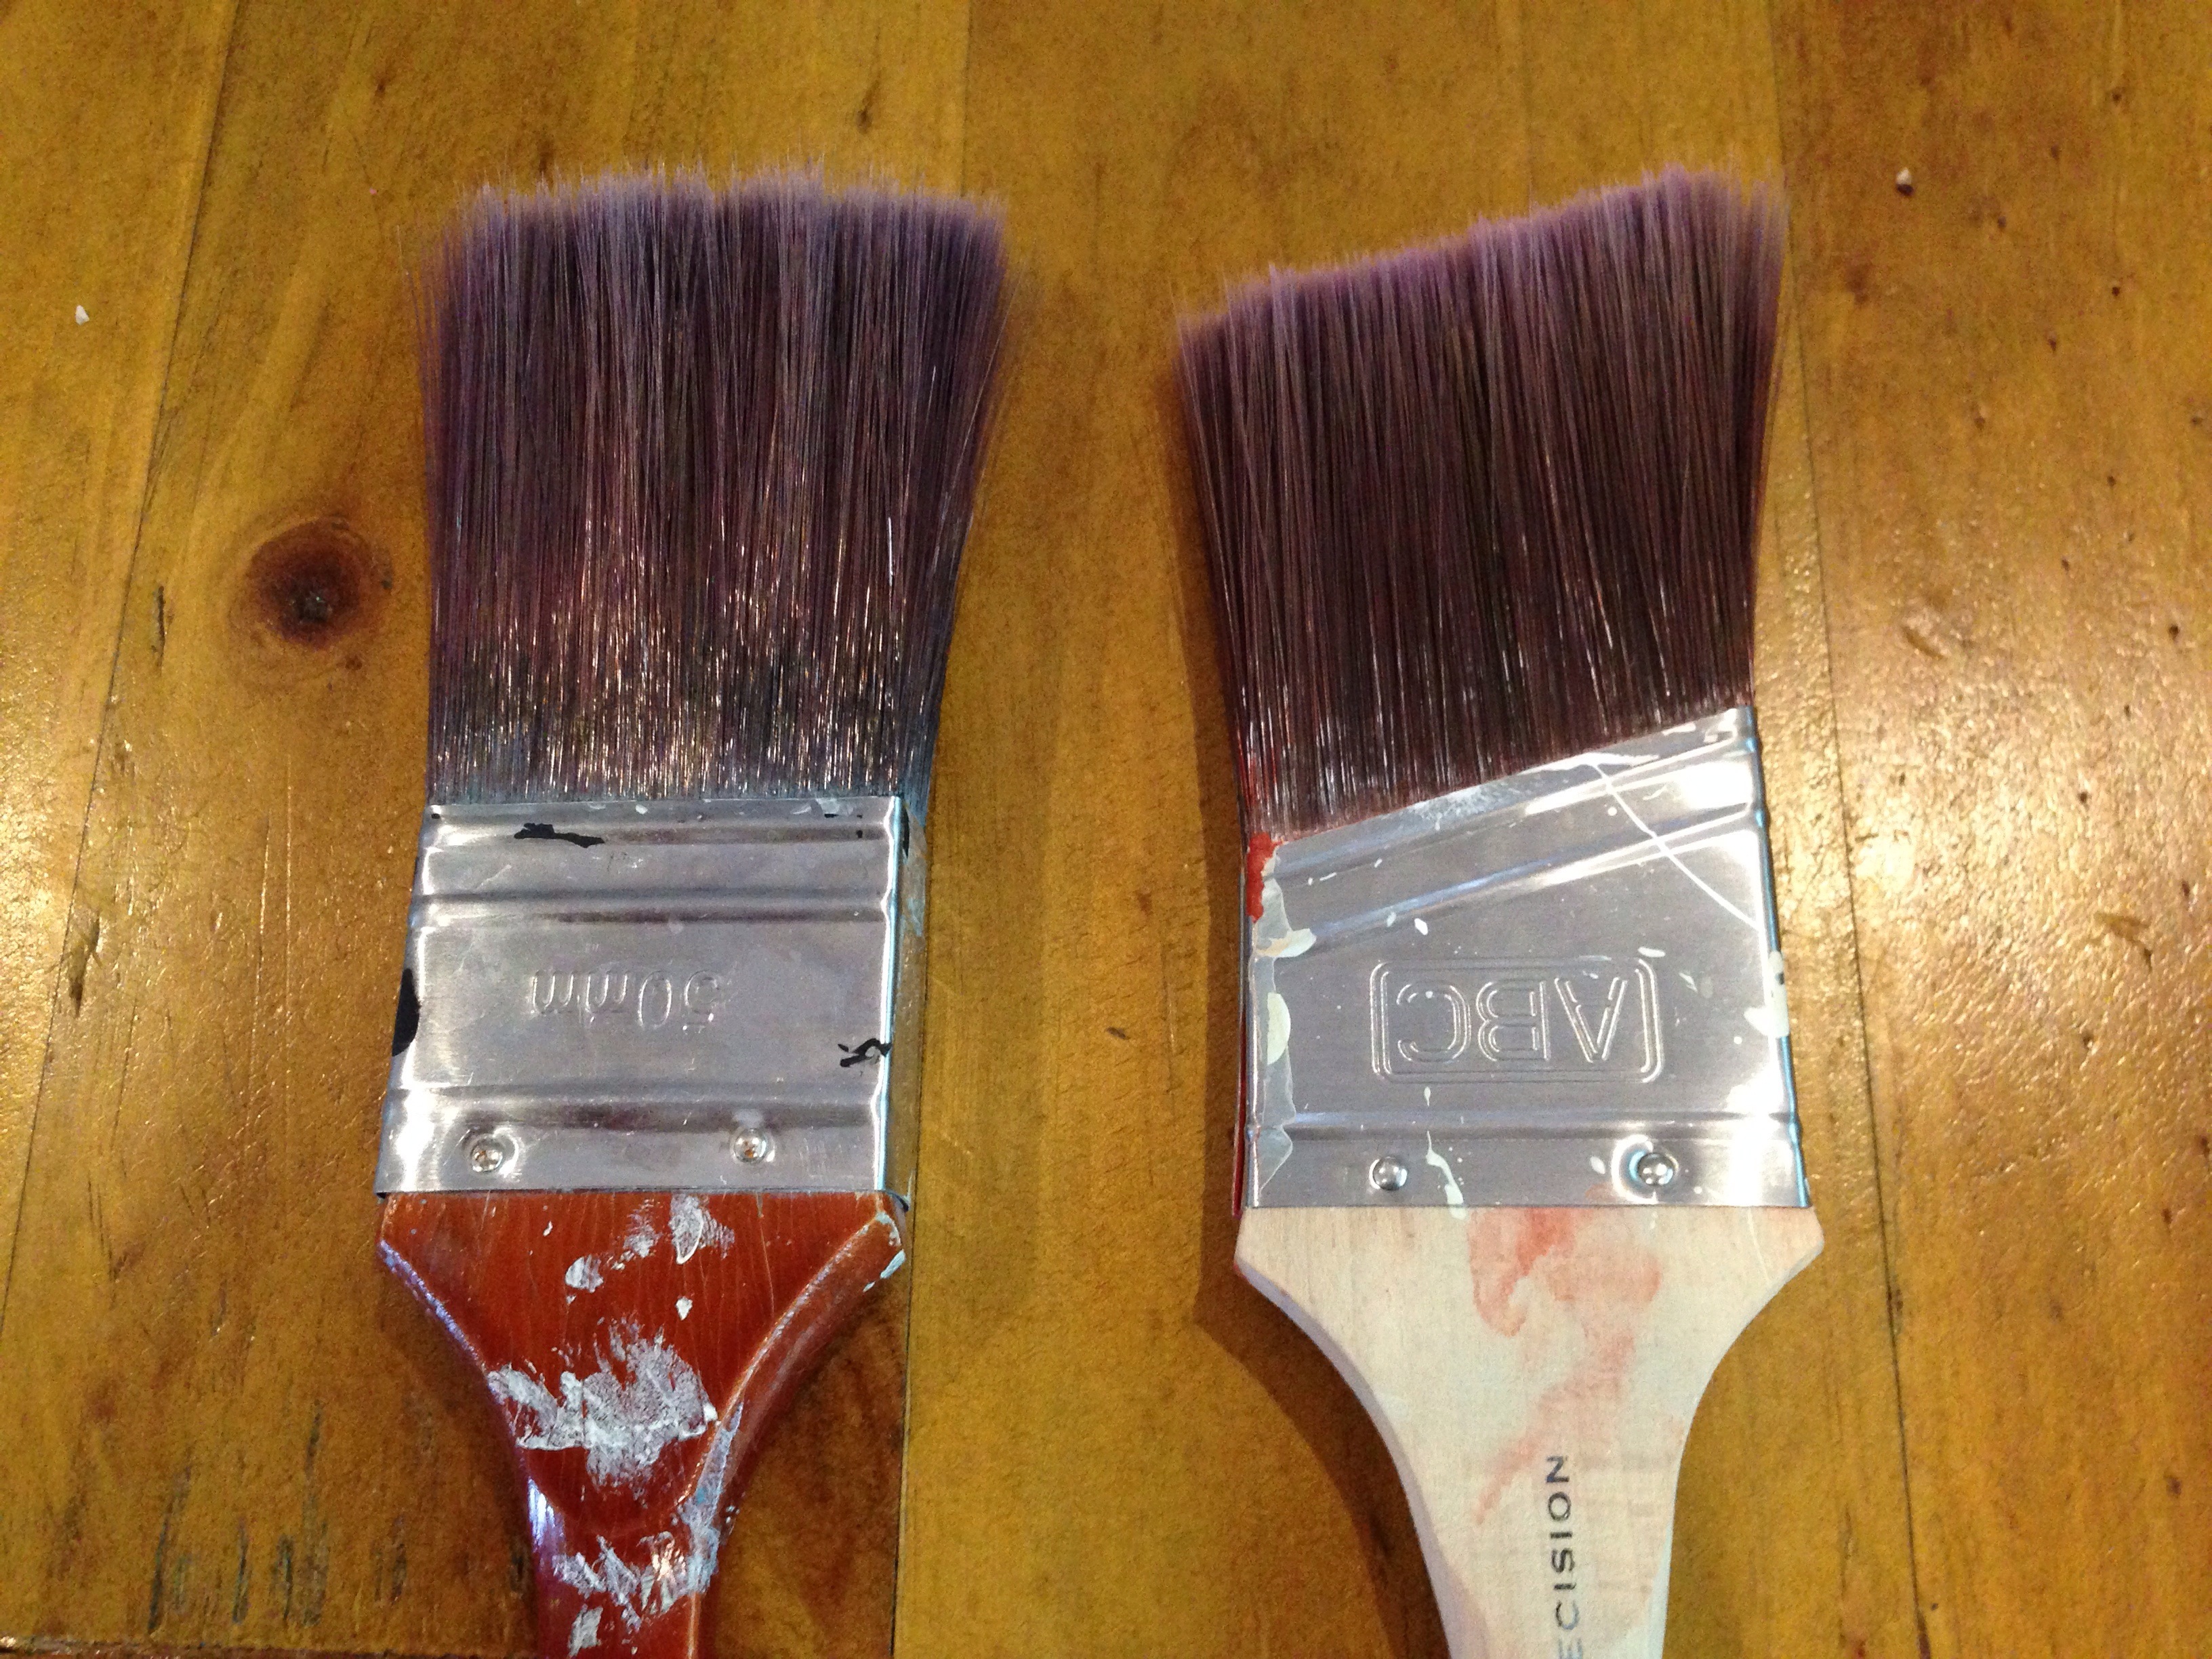
It has an angled edge, which is great for cutting-in and for moulding. I found I just painted the whole project with the one brush so I didn’t have to mess about changing them over. Previously I was using the brush on the left (natural bristles, very nice). It’s still a great brush, and the 50 mm size is perfect for my long-fingered, but not terribly strong hands.
I bought the angled brush to do the moulding on the cabinets and now I’m using it as my general go-to paint brush. It is much easier to get a straight clean line at your wall faces (ie. “cutting in”)! And I’ve done a lot of this with all the wall painting. If you need to buy a brush: an angled one is great.
Avoiding brush strokes
To avoid getting brush strokes on my cabinets I used thin applications of each coat of paint. The cabinet boxes took three thin coats of primer, then two coats of top coat. The cabinet doors took two of primer, and three of top coat. So in other words, five coats of paint.
In between each coat, I sanded. The primer doesn’t feel particularly smooth so I think I took off a little too much primer initially, trying to achieve a really glossy smooth finish: this isn’t going to happen! That’s probably why the cabinet boxes took three coats of primer.
The doors were more difficult than the flat cabinet boxes, obviously, but not due to the moulding. That was just a bit fiddly. I used this excellent DIY blog post as my technique for putting the paint onto the door fronts. The hardest ones were the big pantry doors because:
- I was using blackboard paint as well as semi-gloss, and that meant taping things off.
- Their size meant I had to work really fast to maintain a wet edge over all the surfaces. I managed to do each coat on the doors in one gulp, by just being really quick.
General tips
Okay, so that’s most of the detail involved, and by now you are probably thinking “Will this post ever end ??”
Just a couple of tips, relating to tools:
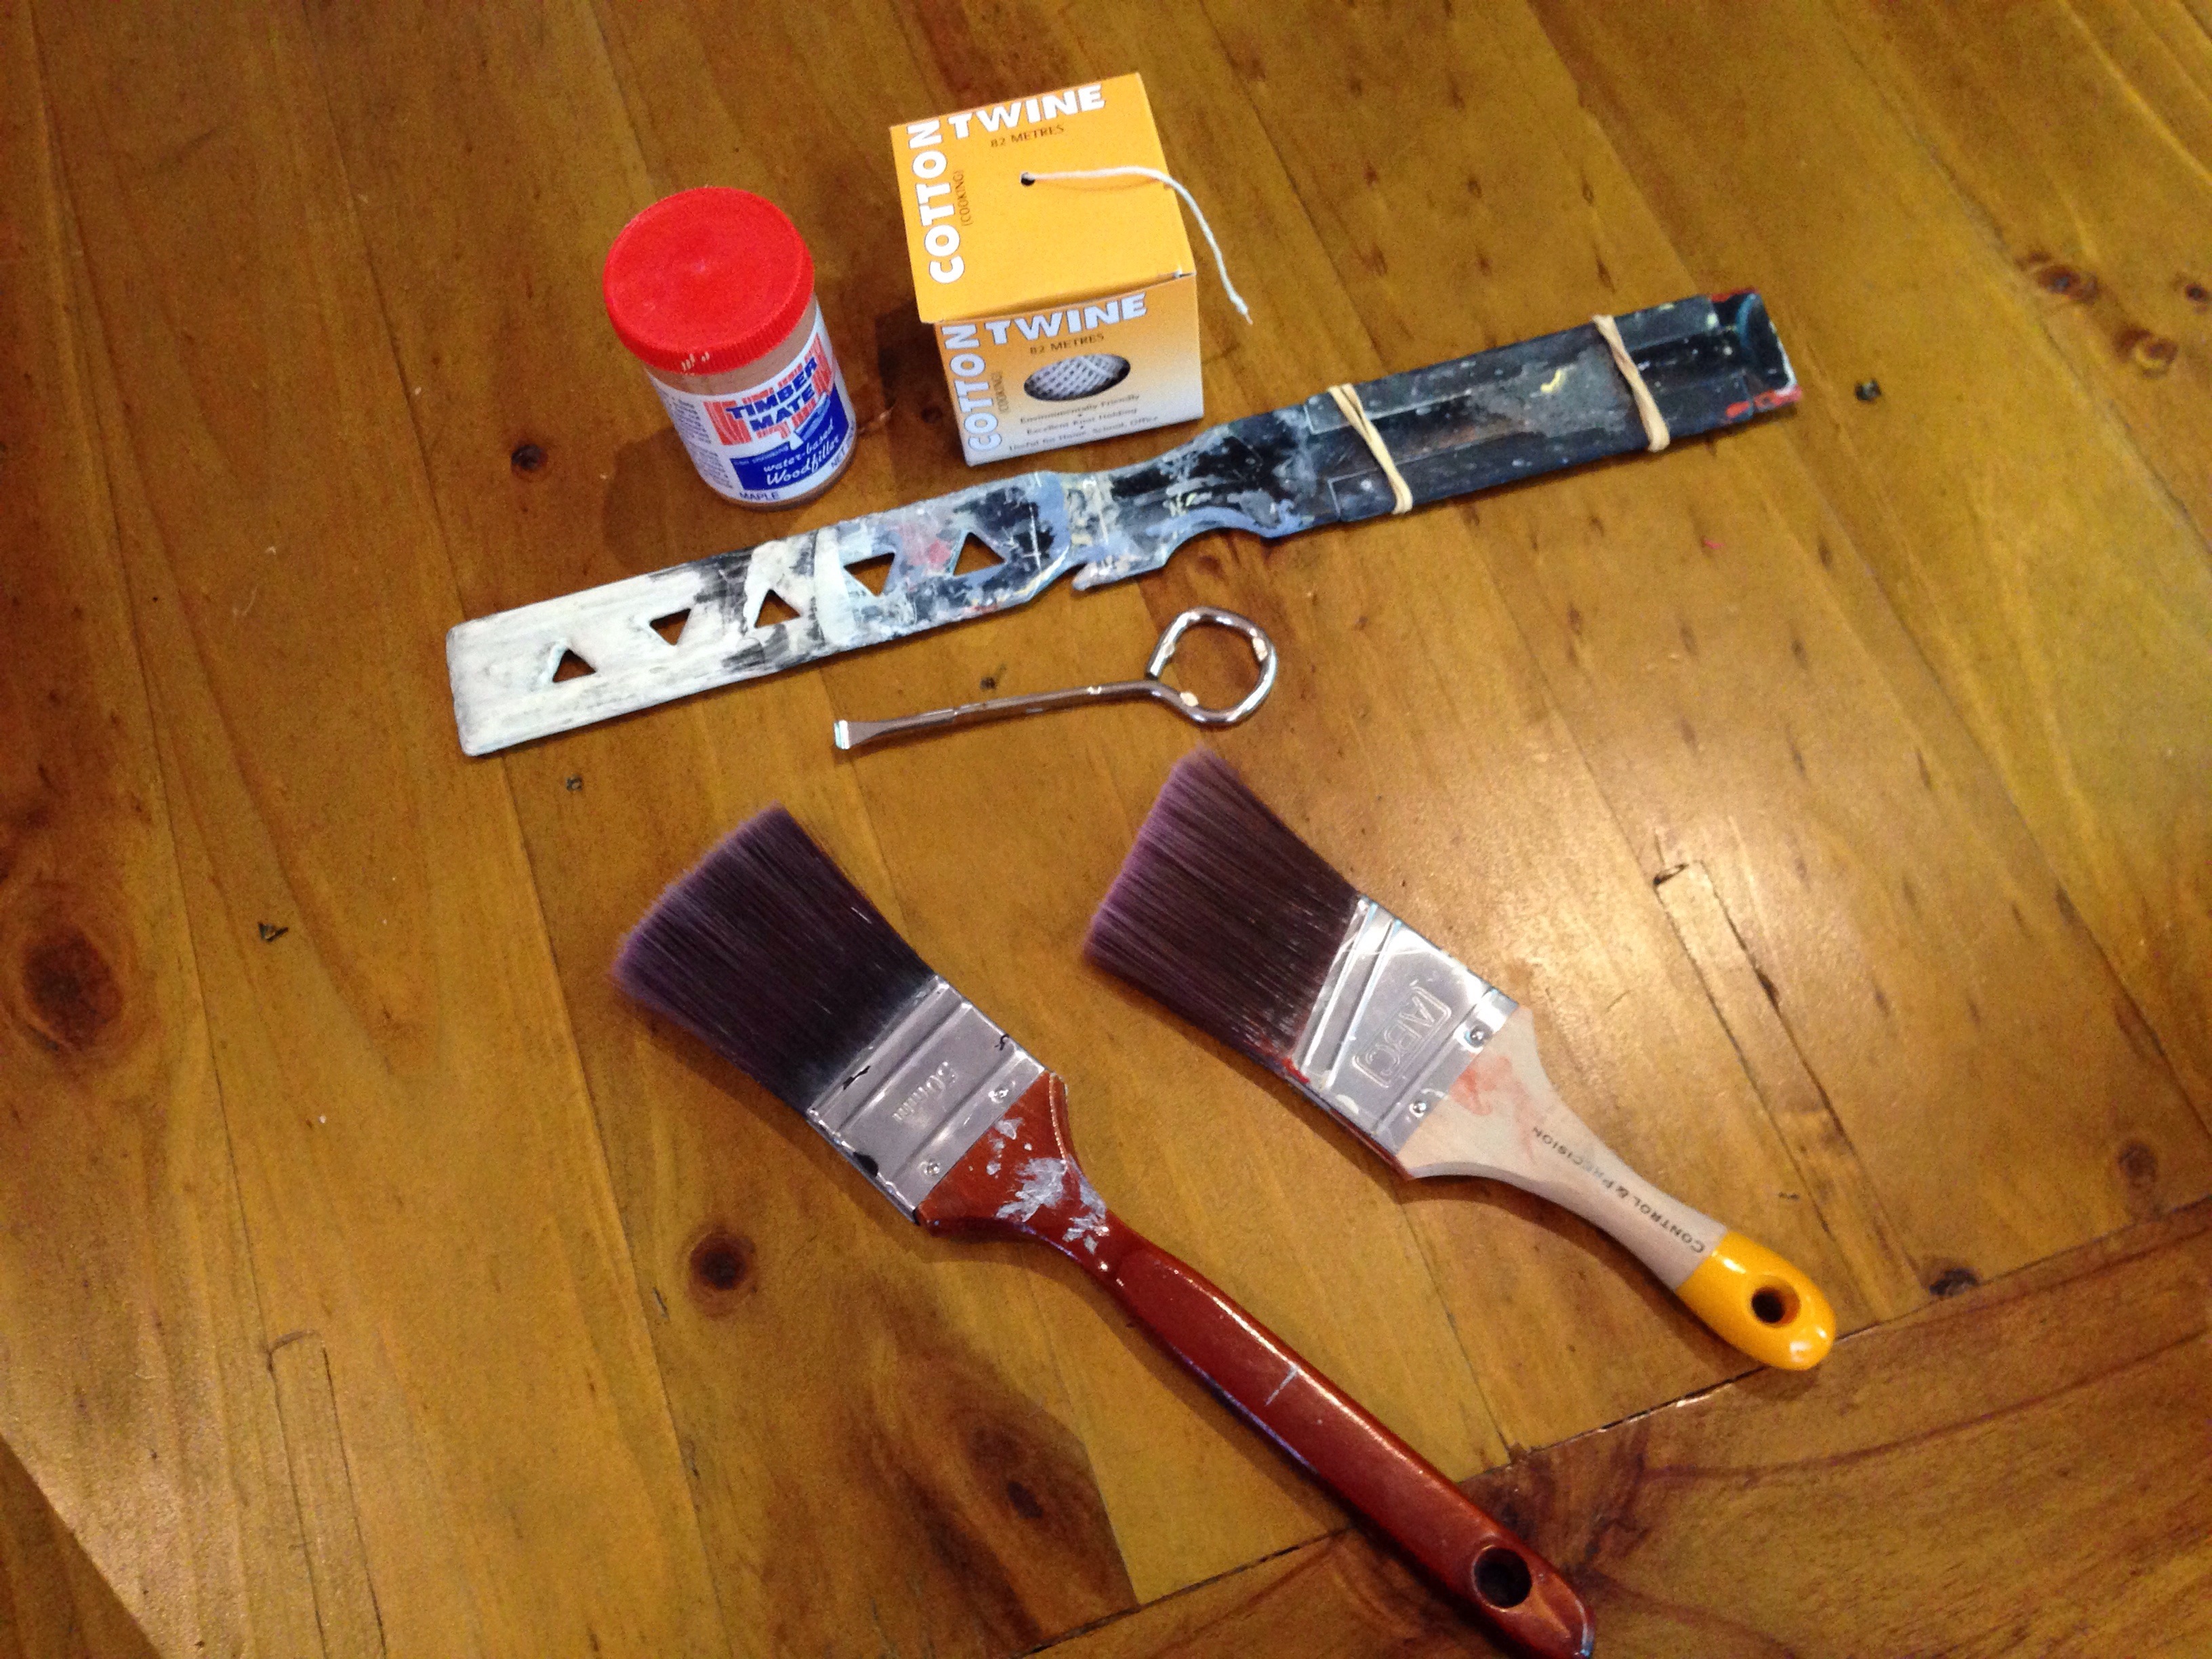
Here you can see my paint stirrer: awesome tool. Better than a stick! The holes mean you don’t get splash-up and squelching (technical terms) when stirring paint. One day, I might get a paint-stirrer attachment for our electric drill. But for now, this works just fine!
You can also see the paint-can opener (the metal thing with a loop). Get one of these. A couple of bucks of pure awesome. I won’t destroy a paint tin again, it is so easy to open my paint.
String? Yes: here’s what you do with the string:
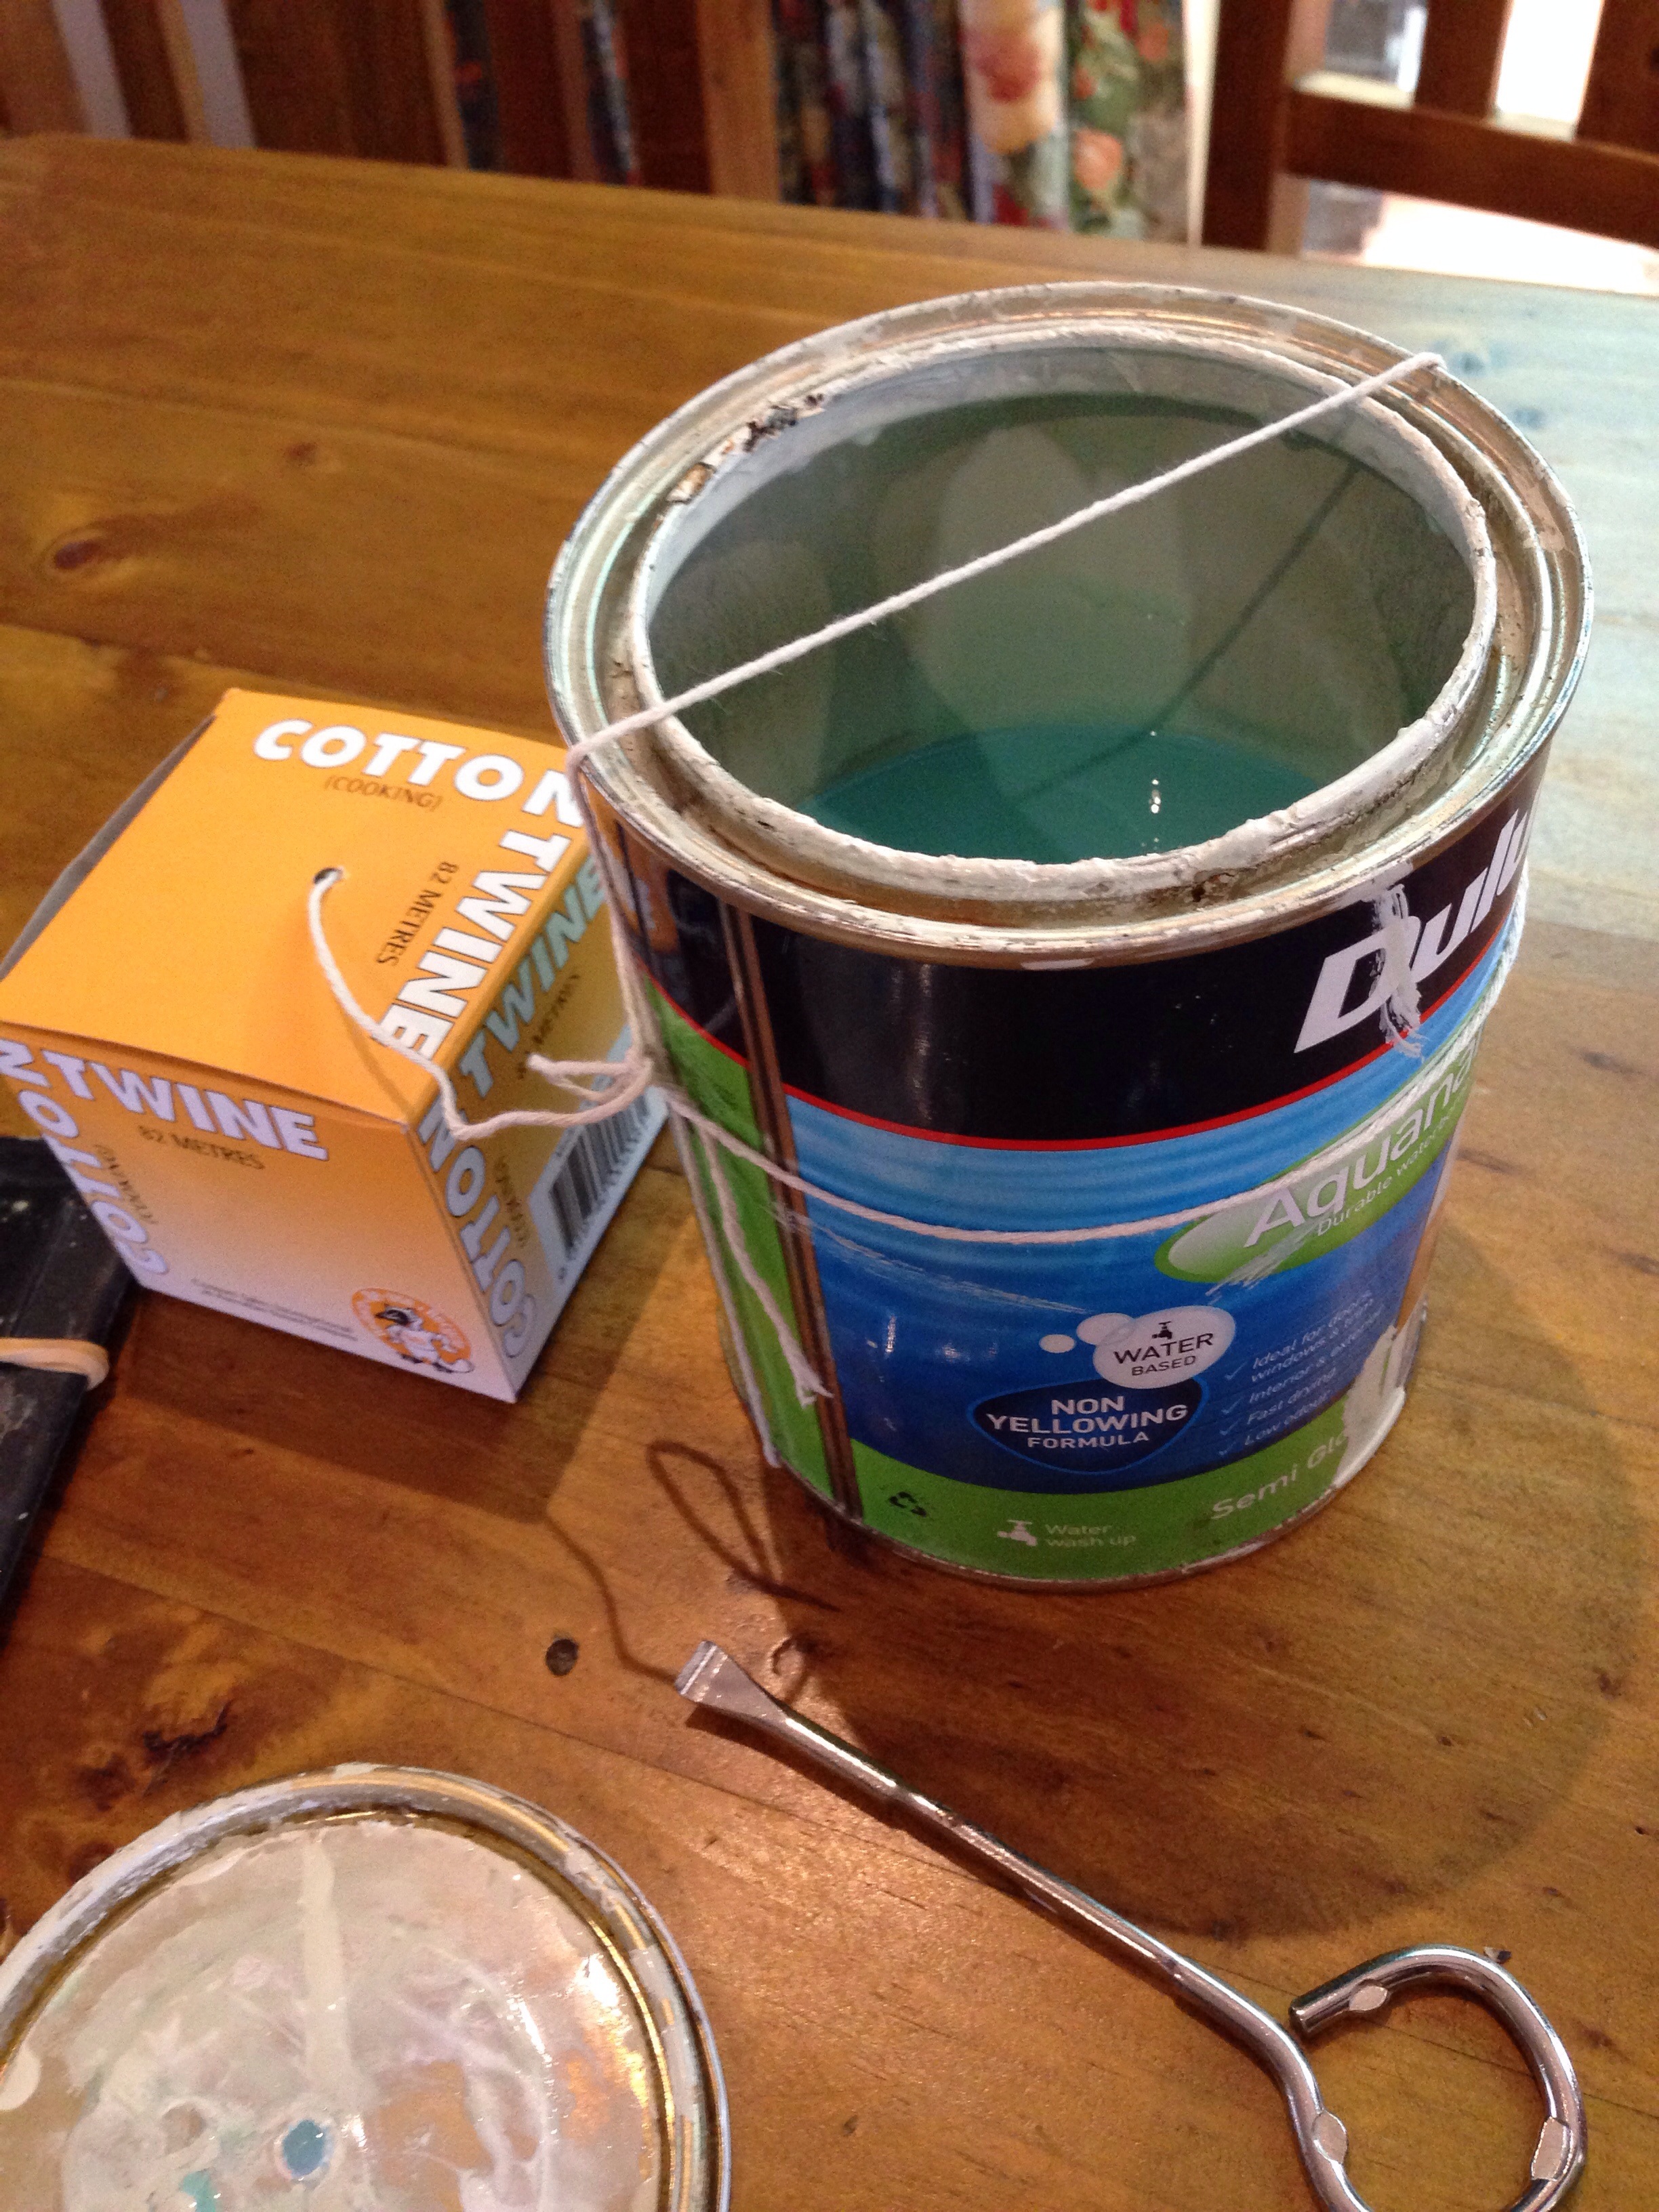
It doesn’t have to be tight like a tight-rope, but this is a really great way to wipe excess paint from your brush without getting drips into the rim of your can (and making it difficult to unseal again, or taking ages to clean up properly when you put it away … because we all know, we never really do that, do we?)
(BTW, that’s what the paint looks like without stirring – quite blue, huh? I didn’t bother stirring the paint for this photo, but you should stir yours, obviously :))
And that’s it, for painting cabinets: for now. So far the finish has held up really well: no dents or dings or paint flaking off. The blackboard cleans up nicely and has a lovely smooth finish (with a matt sheen). Now I have to steel myself for phase two, which is painting the other cabinets!
