
I’m too proud of my new “Windows” quilt top to be done with it just yet! Today I’d like to share a tutorial on how to piece this for yourself. 🙂
First up, I should mention that this is not my original design. I was inspired by this quilt I spotted on Pinterest, which I found when I went looking for grey sashing inspiration. I knew I wanted to use up the grey, and this was a really great idea!
My quilt is lap sized, but you could make this any size you want, really. You just need to add more or less columns or rows (or change the size of your starting squares).
First up, materials. To replicate mine, you will need:
- 38 squares, each 6.5 x 6.5 inches. I used different prints for each square, but you could easily use duplicates.
- Sashing strips, 2.5 inches wide. I made this quilt specifically to use the dark grey sashing, but use whatever colour you like!
This will make a finished quilt top that measures approximately 42″ x 57″. You will have a spare “window” block left over that you could use on the backing, if you like.
The layout of this quilt is pretty simple: each block uses one whole square, and one half square. That means you can do two blocks at once, using a group of three squares.
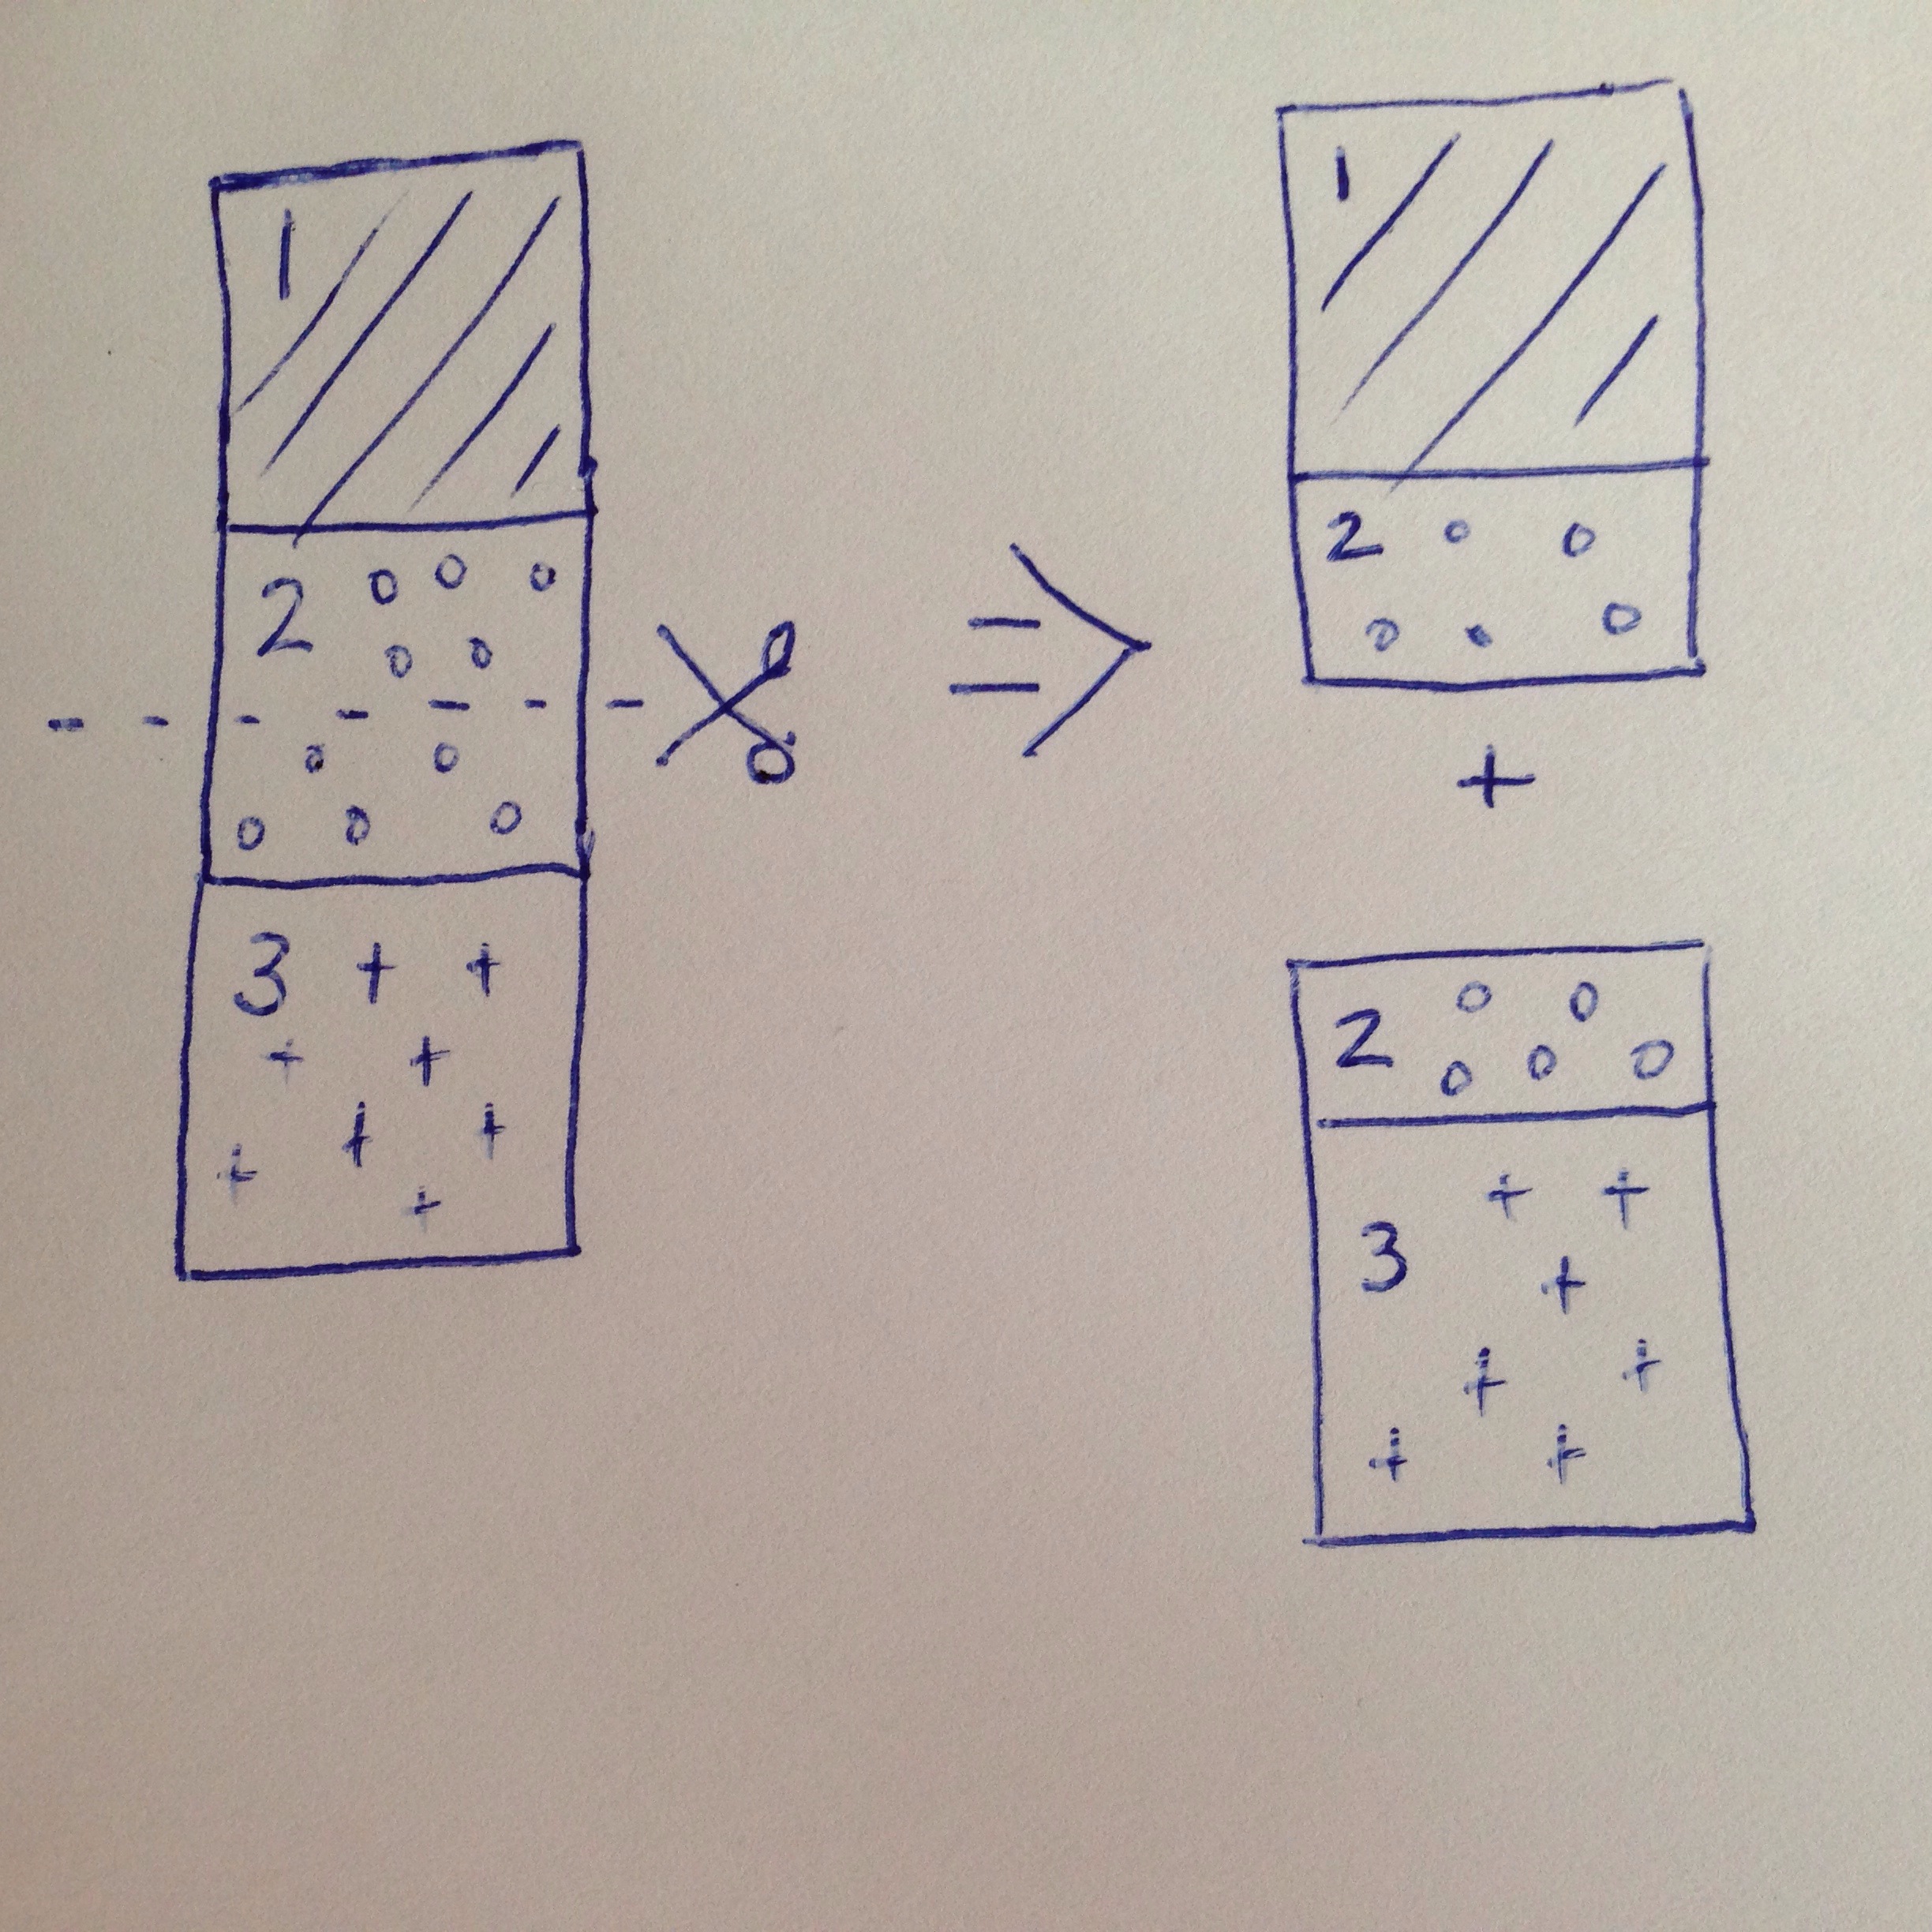
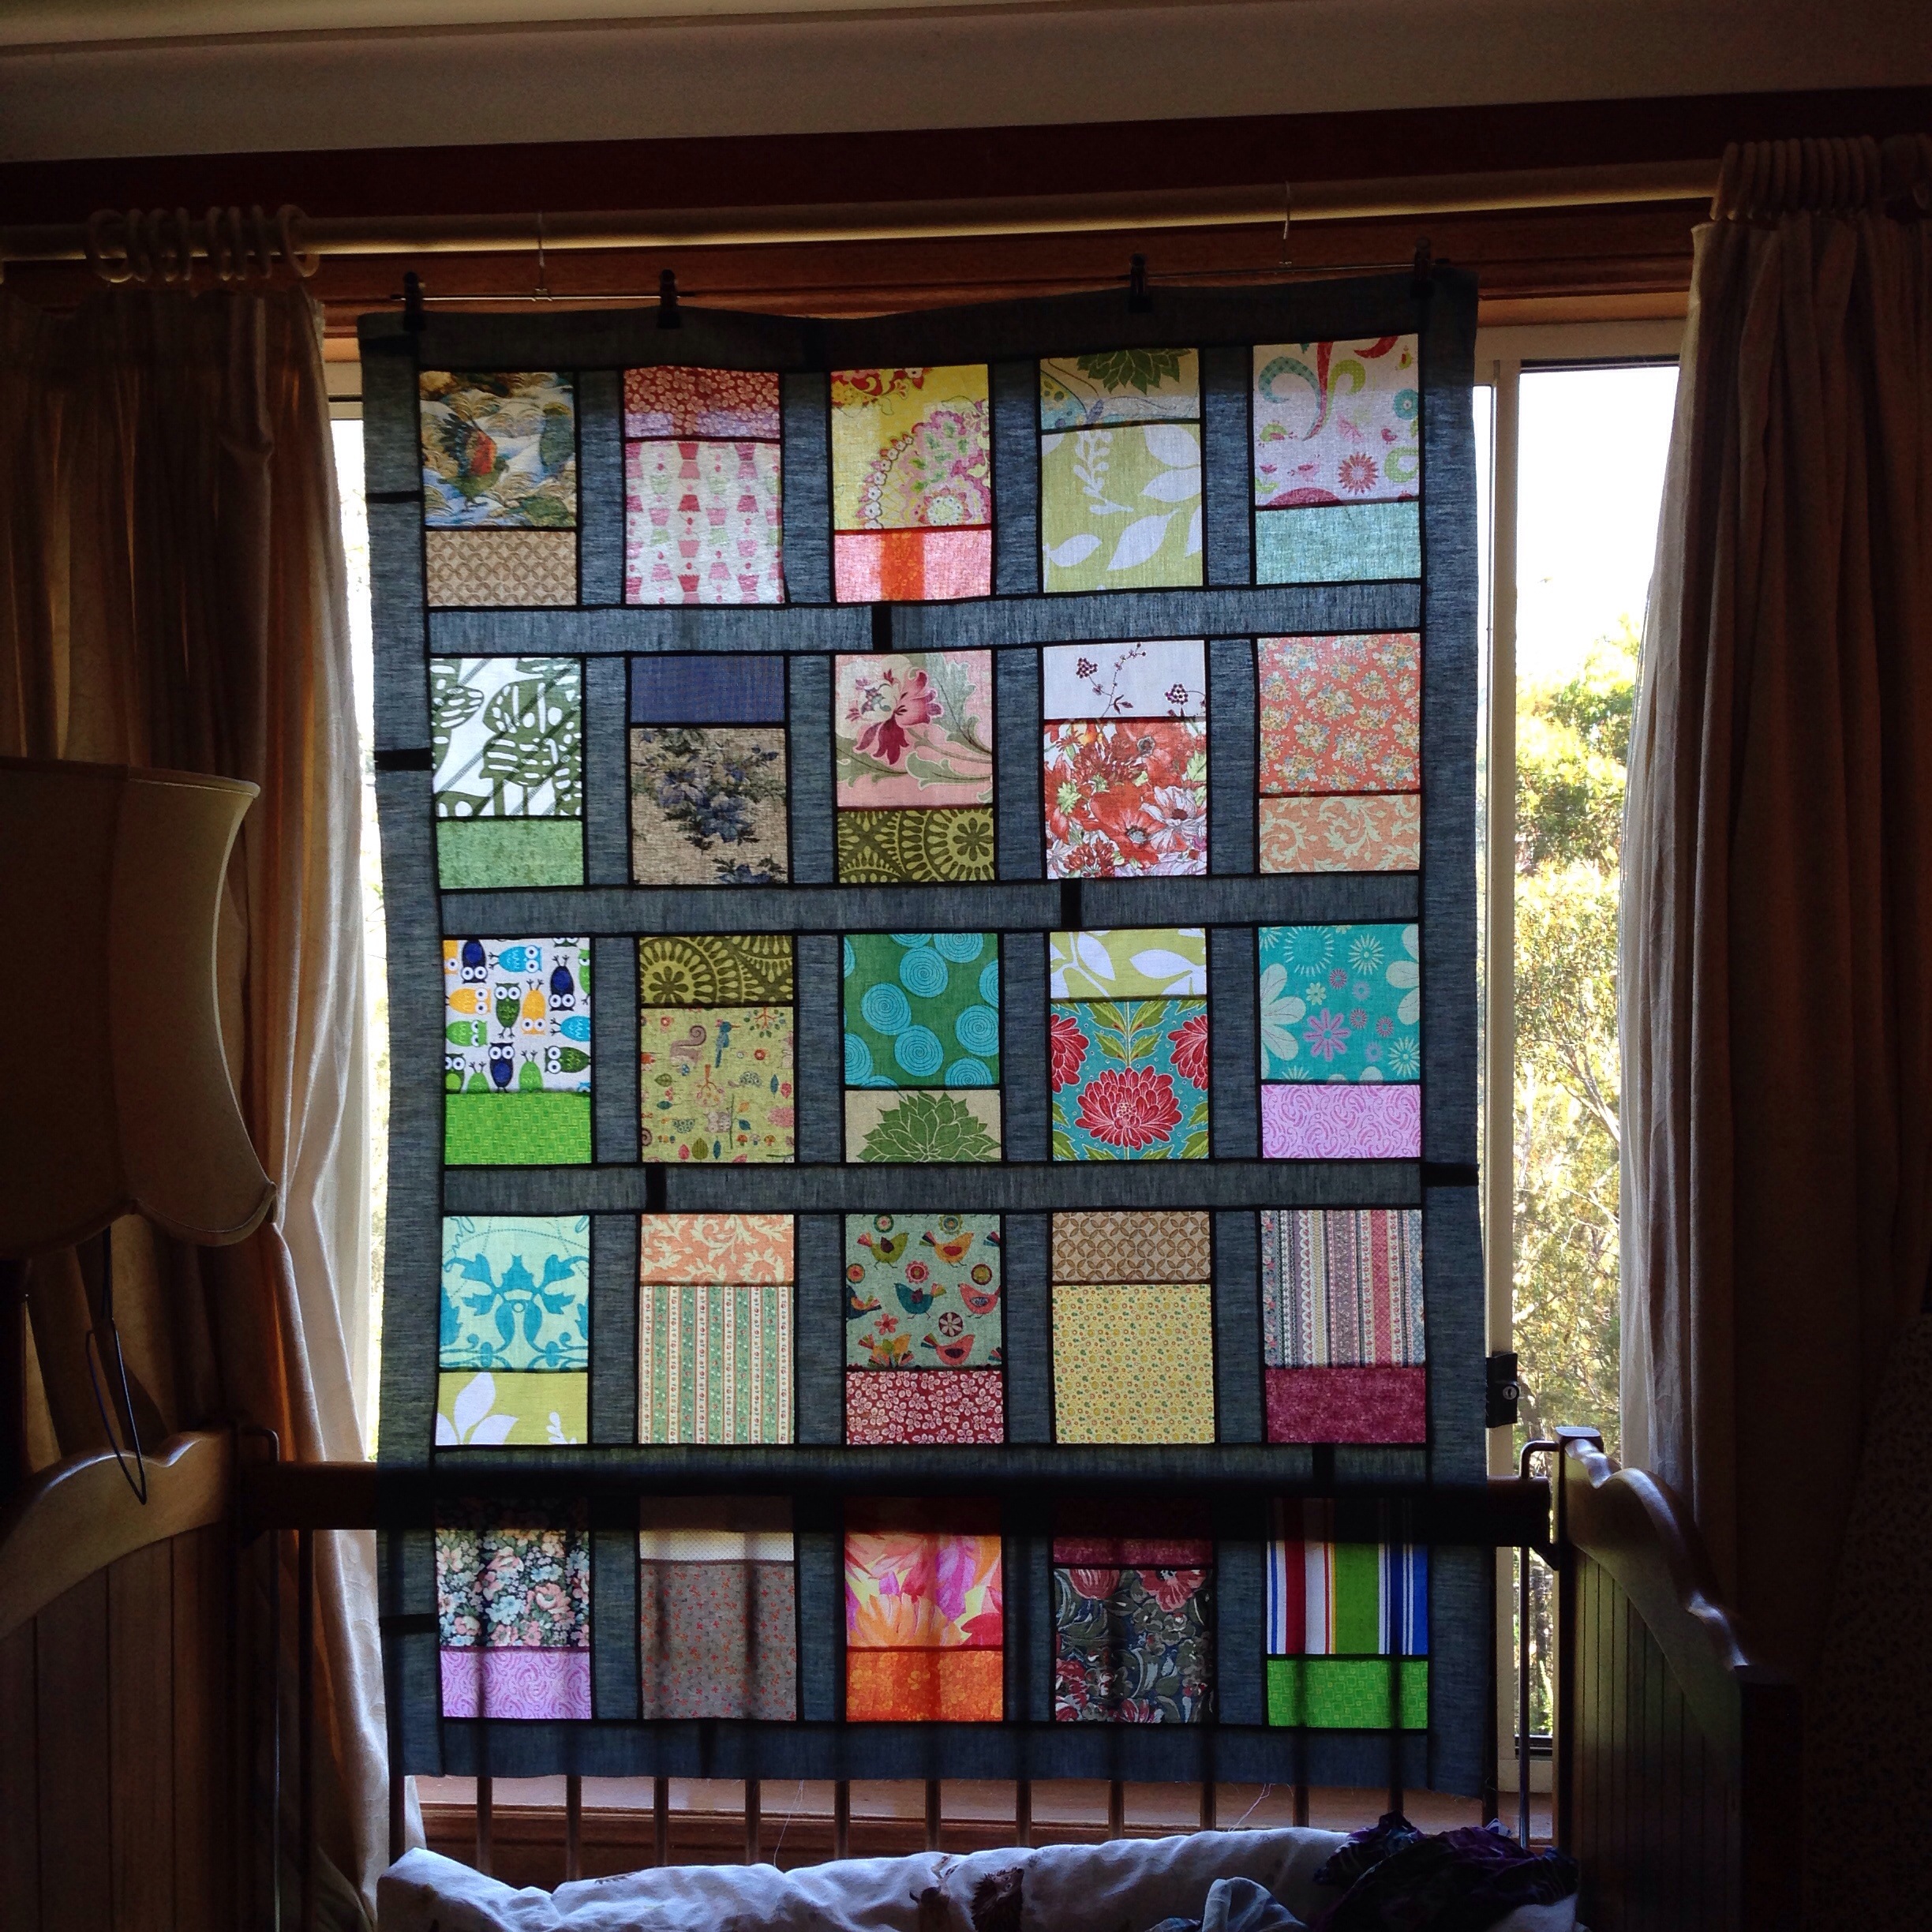
I decided to use a five-by-five block layout (just like the inspiration source), for a total of 25 blocks. To make my life easier, I chose to make 26 blocks, because this is divisible by two. I arranged my fabrics into groups of three, remembering that the middle print will be cut in half. I tried to avoid any big prints or obvious motifs in the middle square because they work better as a whole.
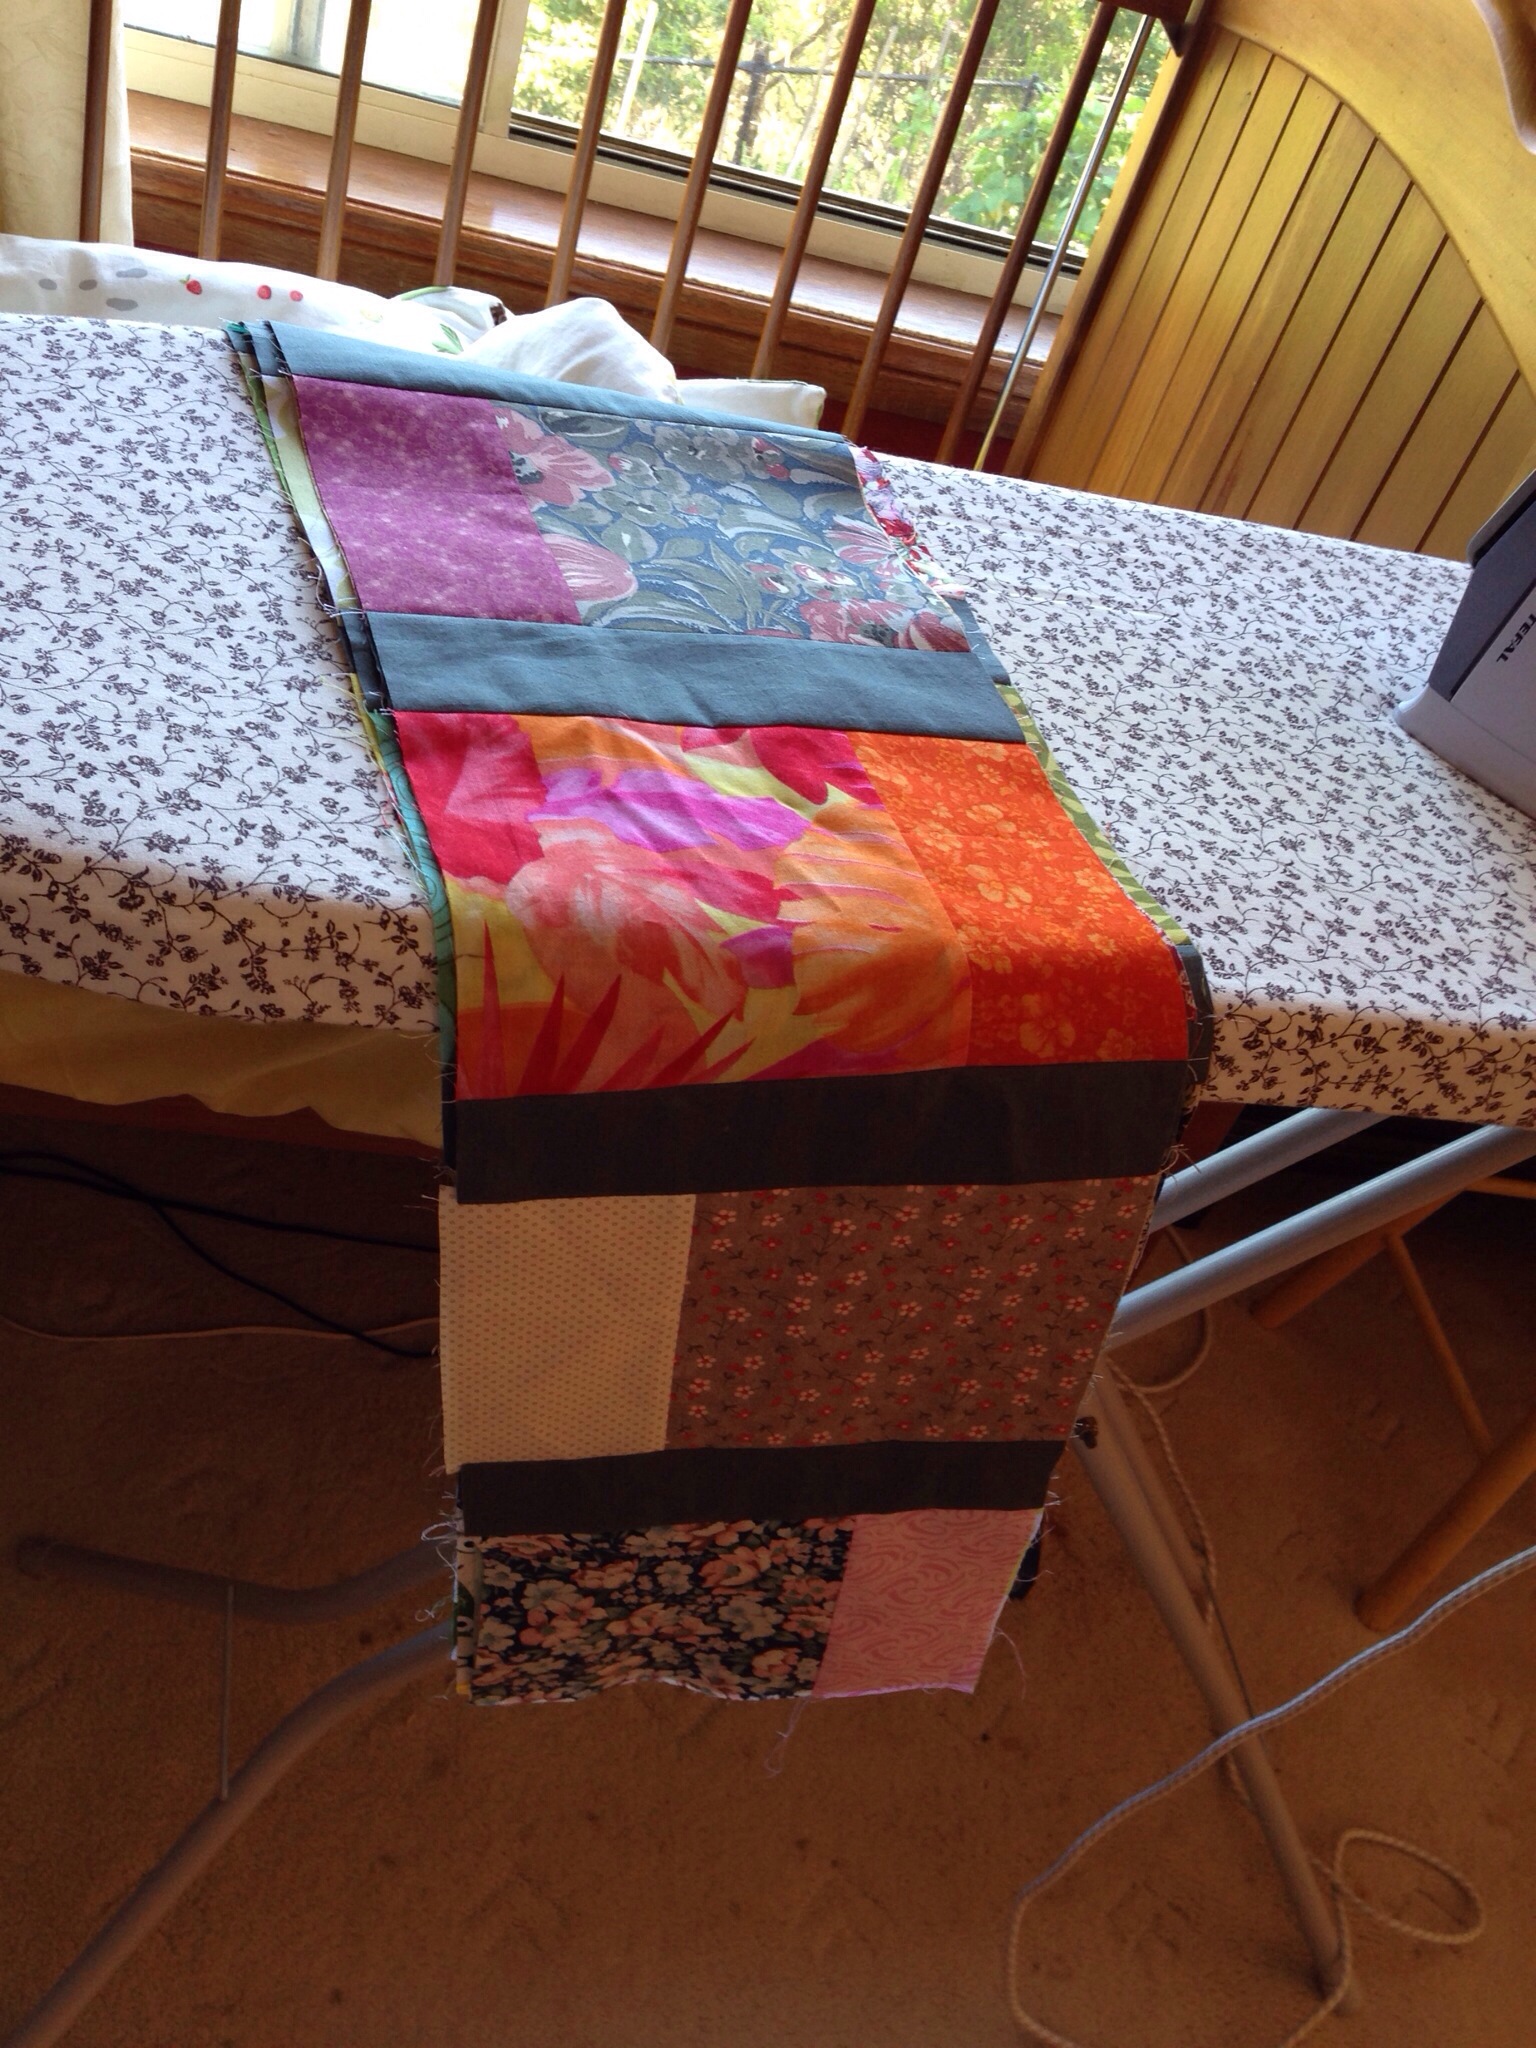
I then cut out my fabrics into the squares, keeping them grouped by three. The idea is to sew them together vertically, so you have three squares:
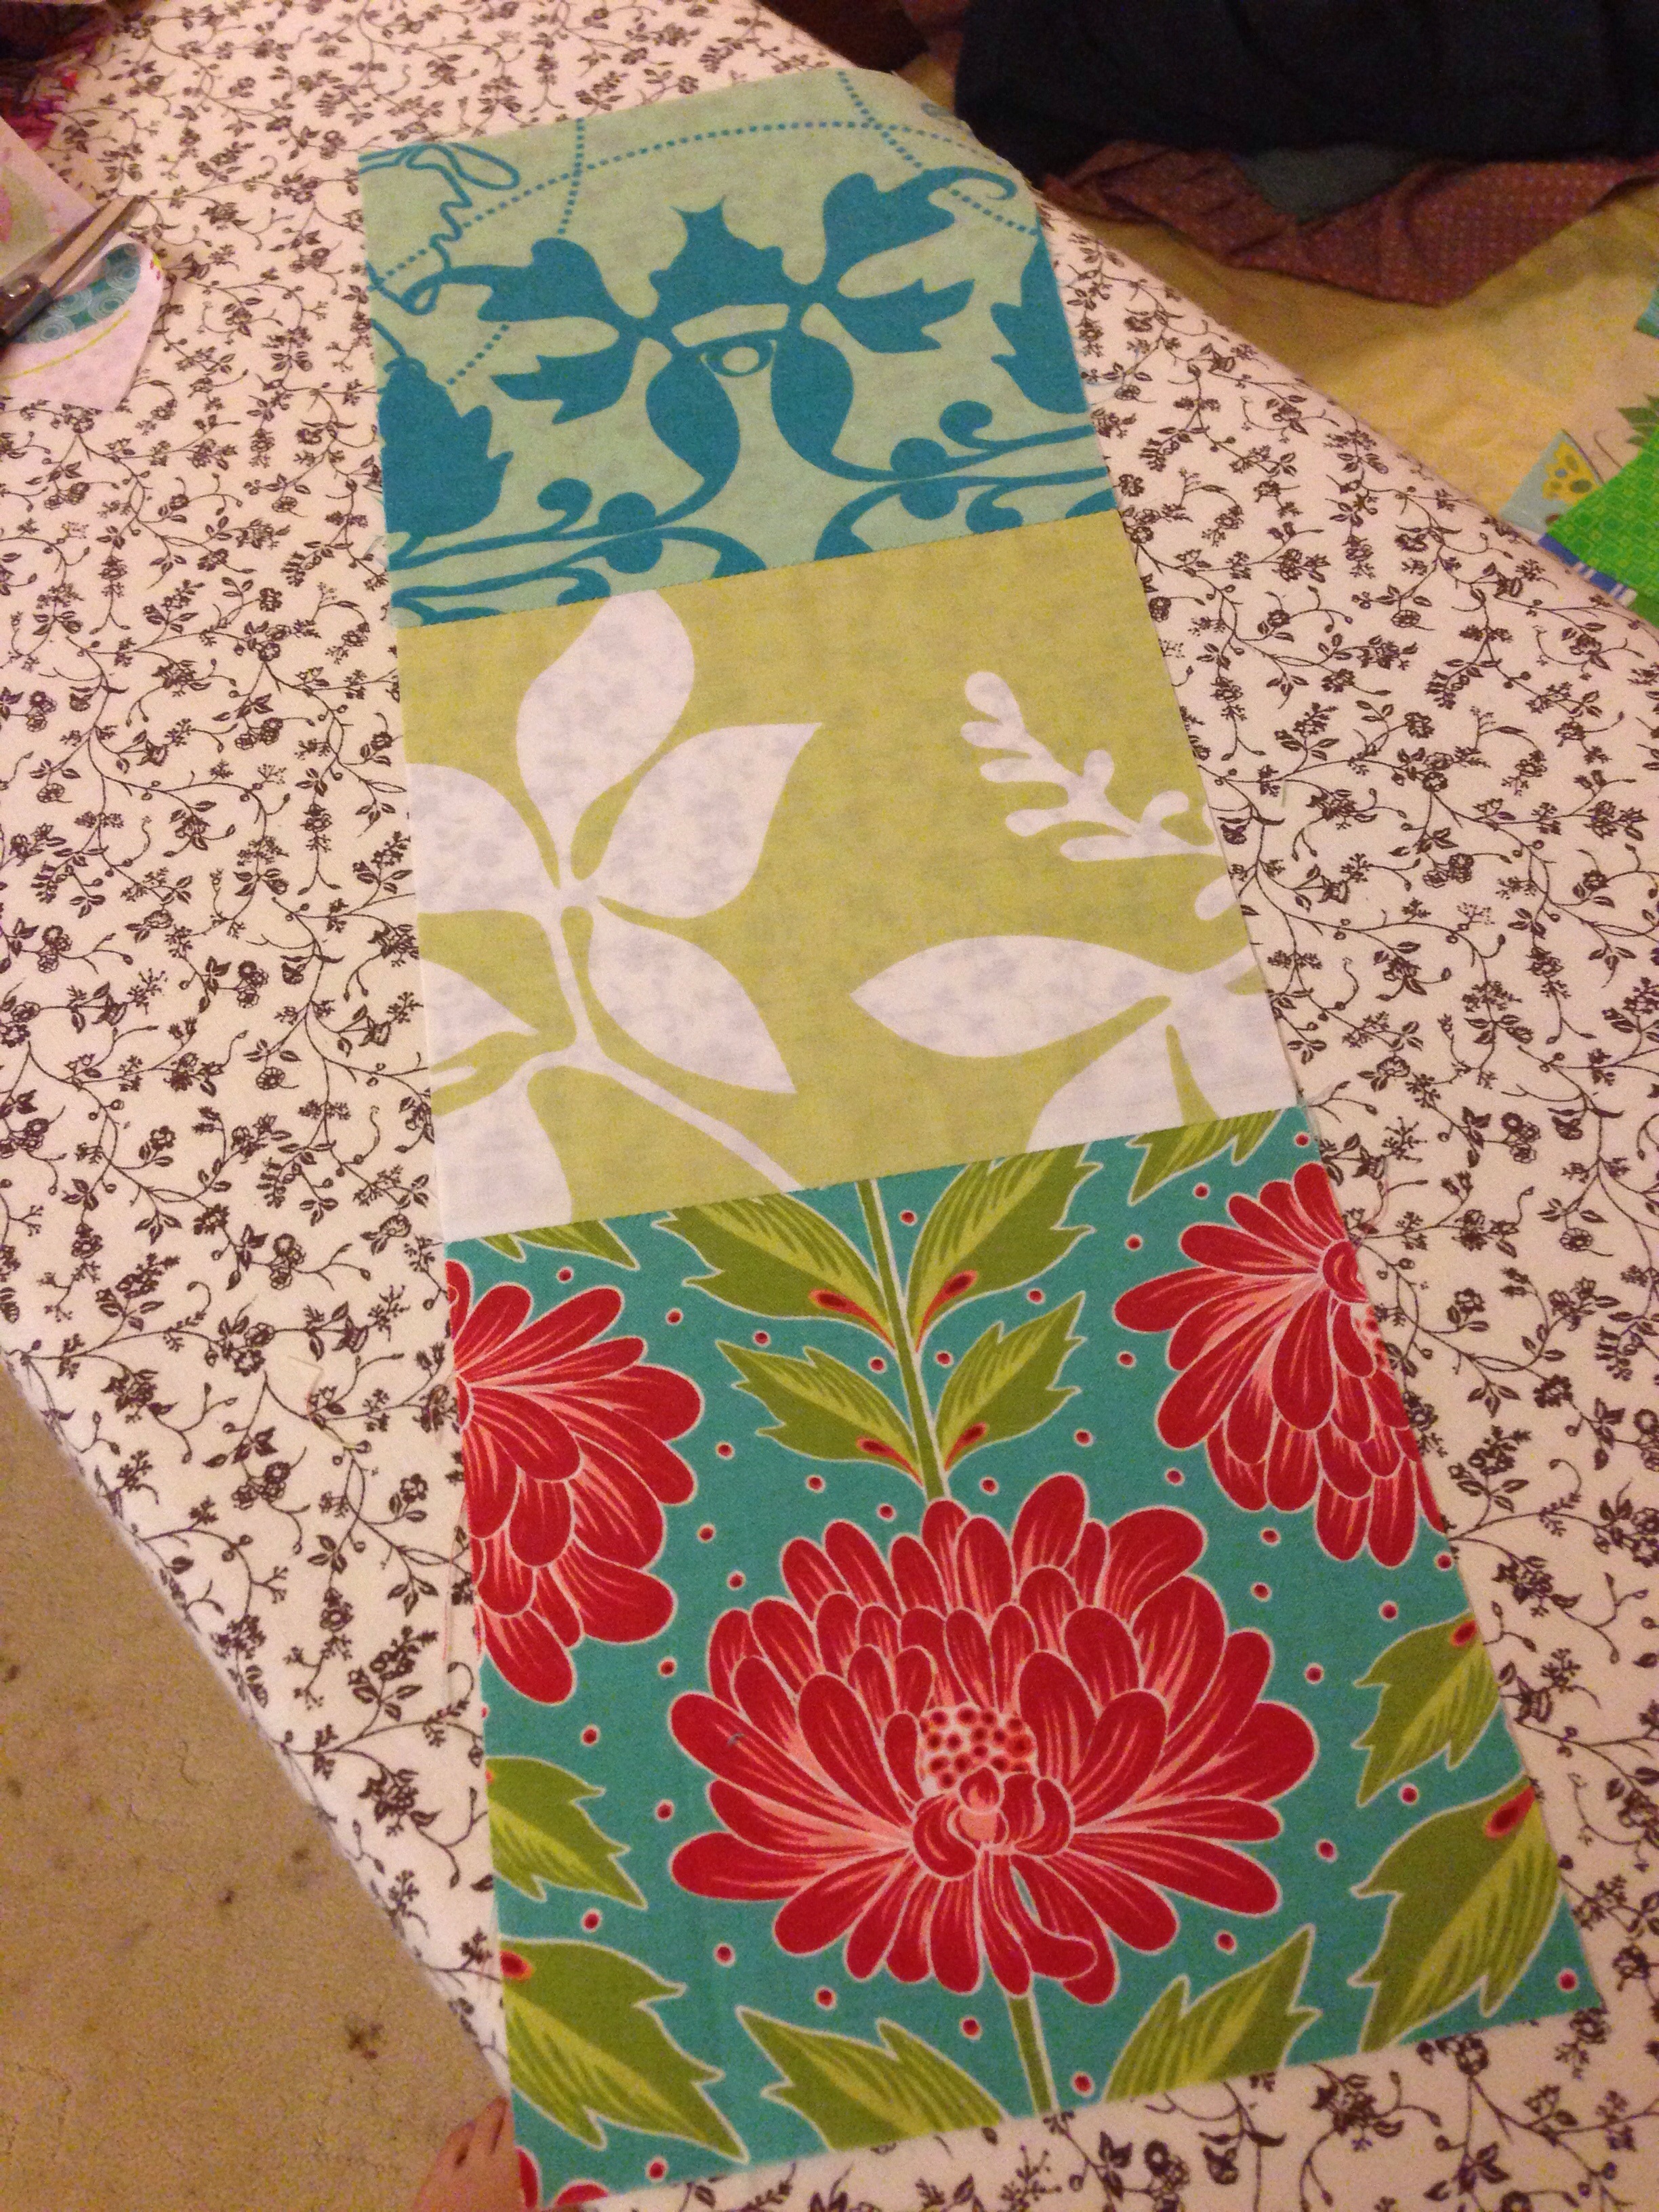
Then you cut across the middle square at 3″ across, making two blocks at once:


Once you have done this 13 times, you should have 26 blocks. One will be a spare! Then you can have some fun with the layout:


I chose to alternate between “skinny up” and “skinny down” across the row.
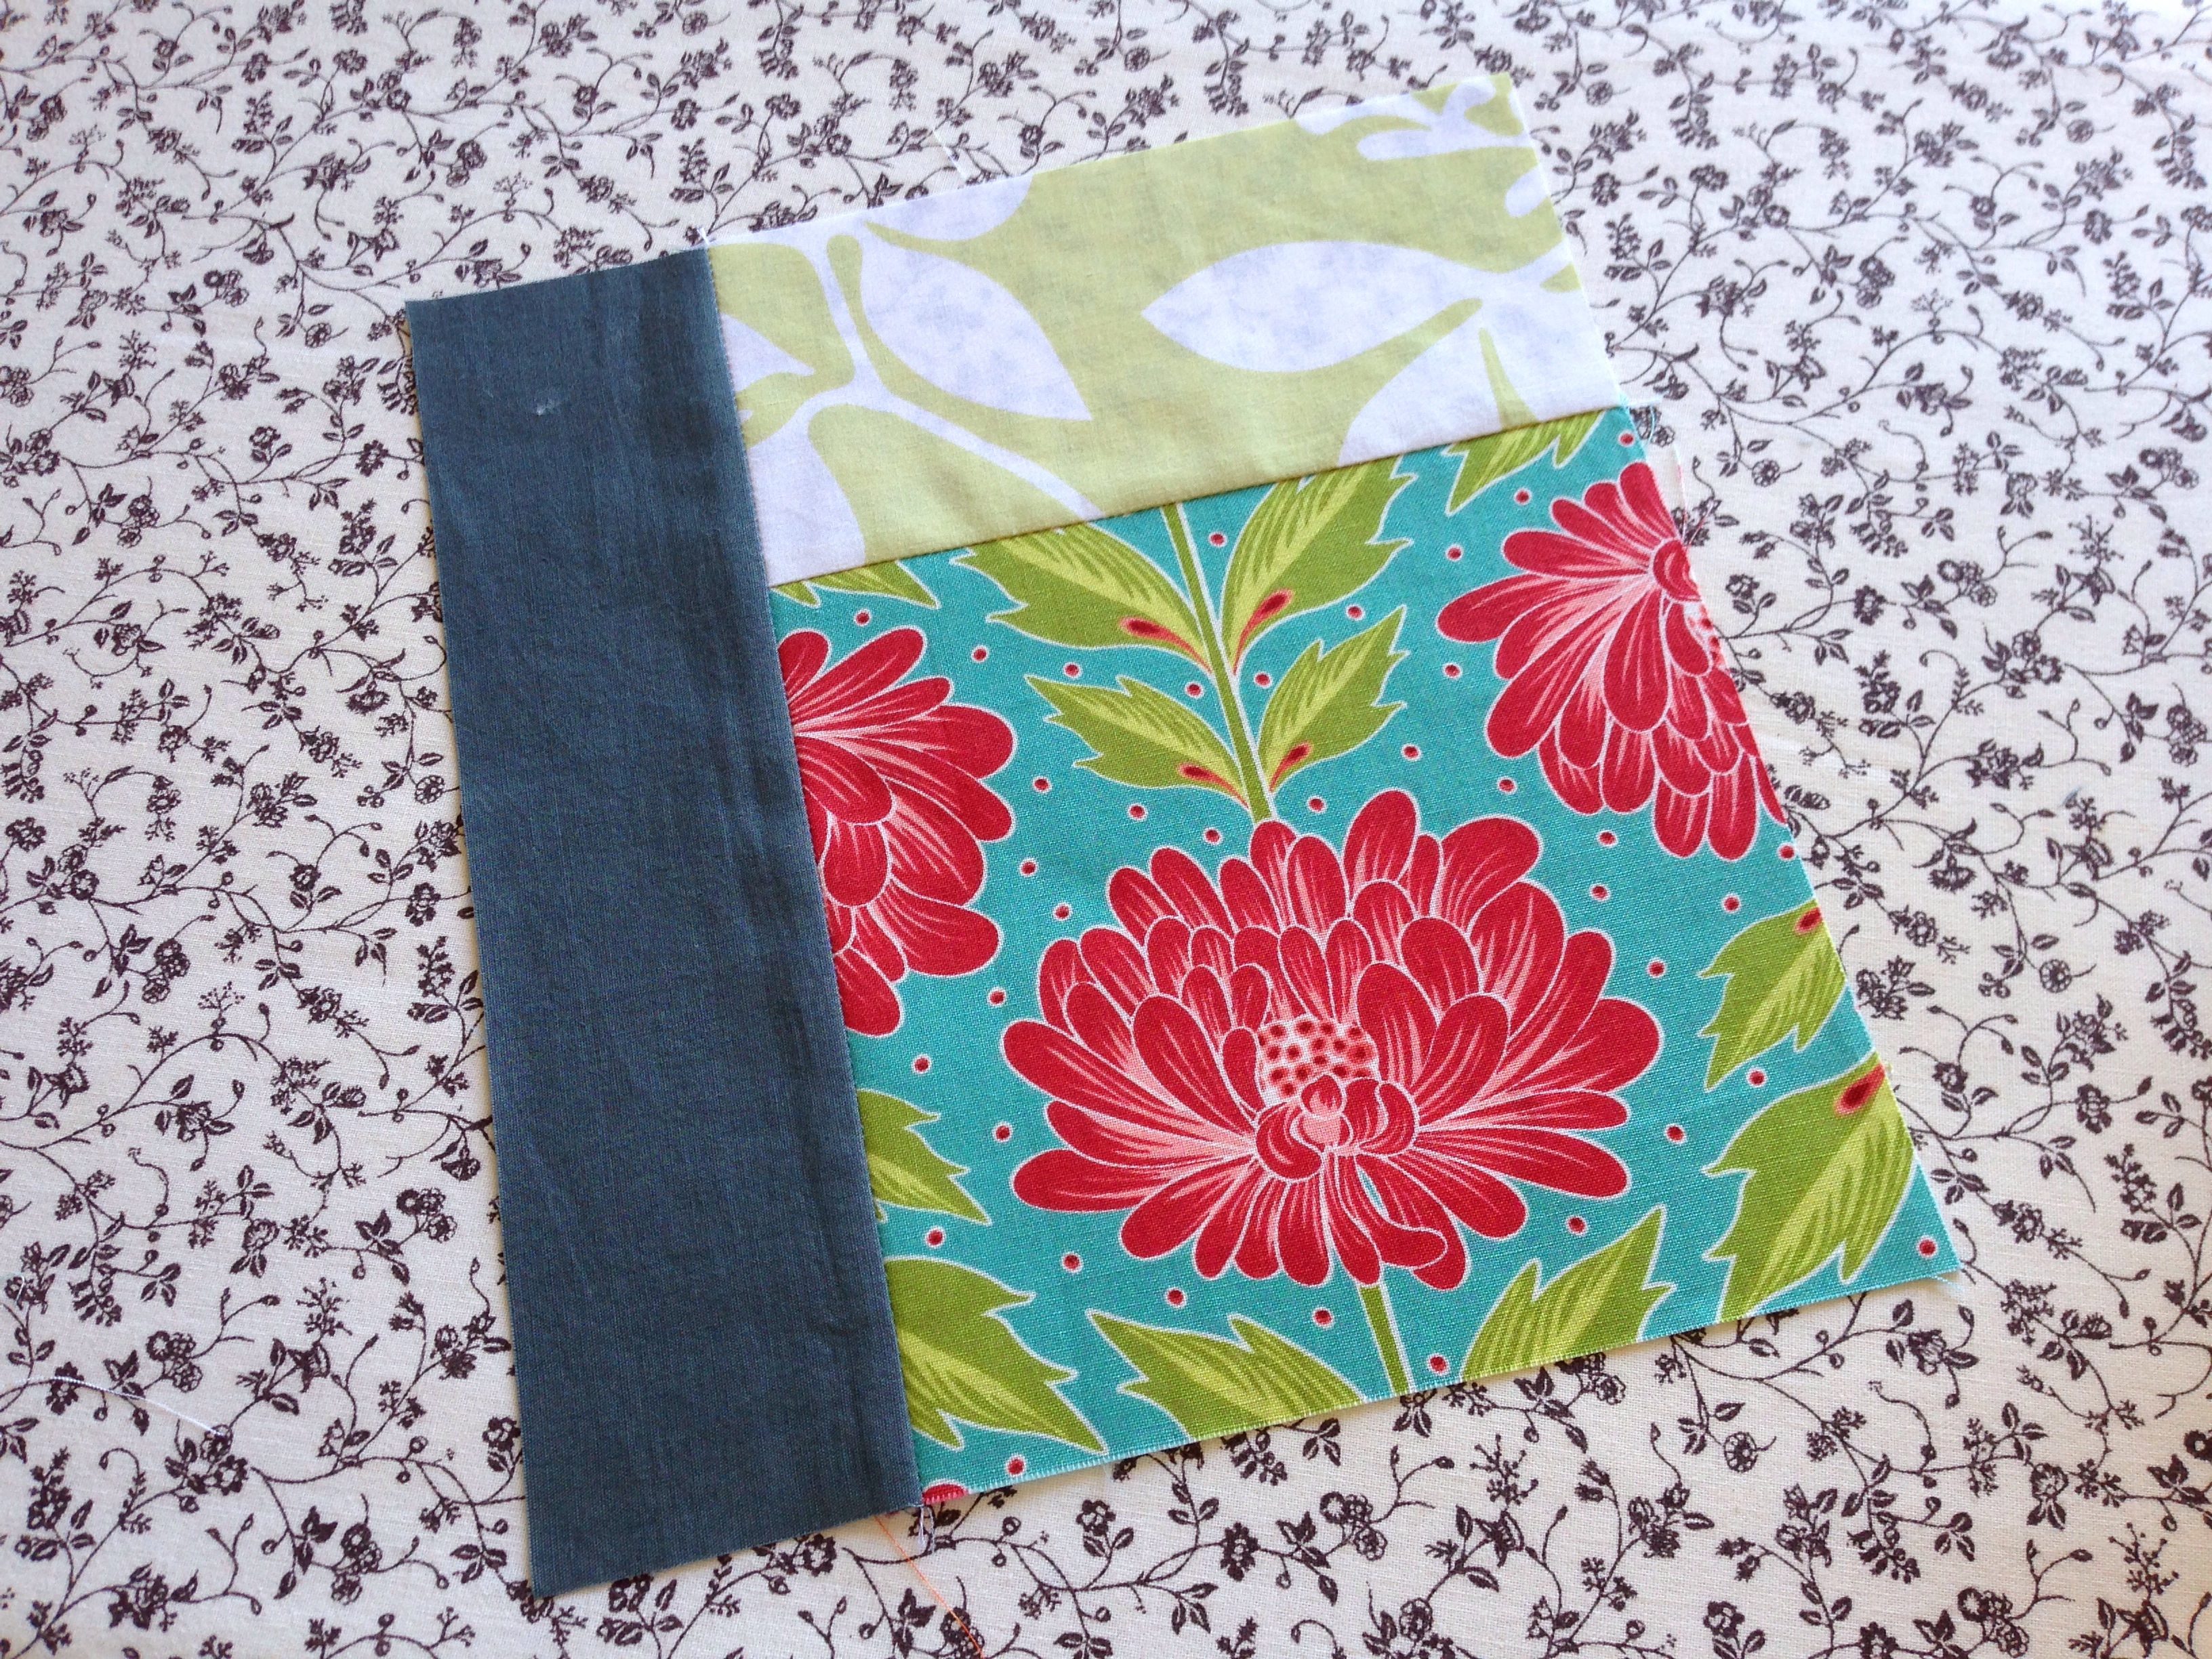
When adding the sashing, I first put a strip of grey fabric down the left hand side of each block (if I do this again, I will use the right hand side instead, because I’m right handed):
Once each block in the row had a grey piece, I laid them out again to make sure things were still looking sensible:
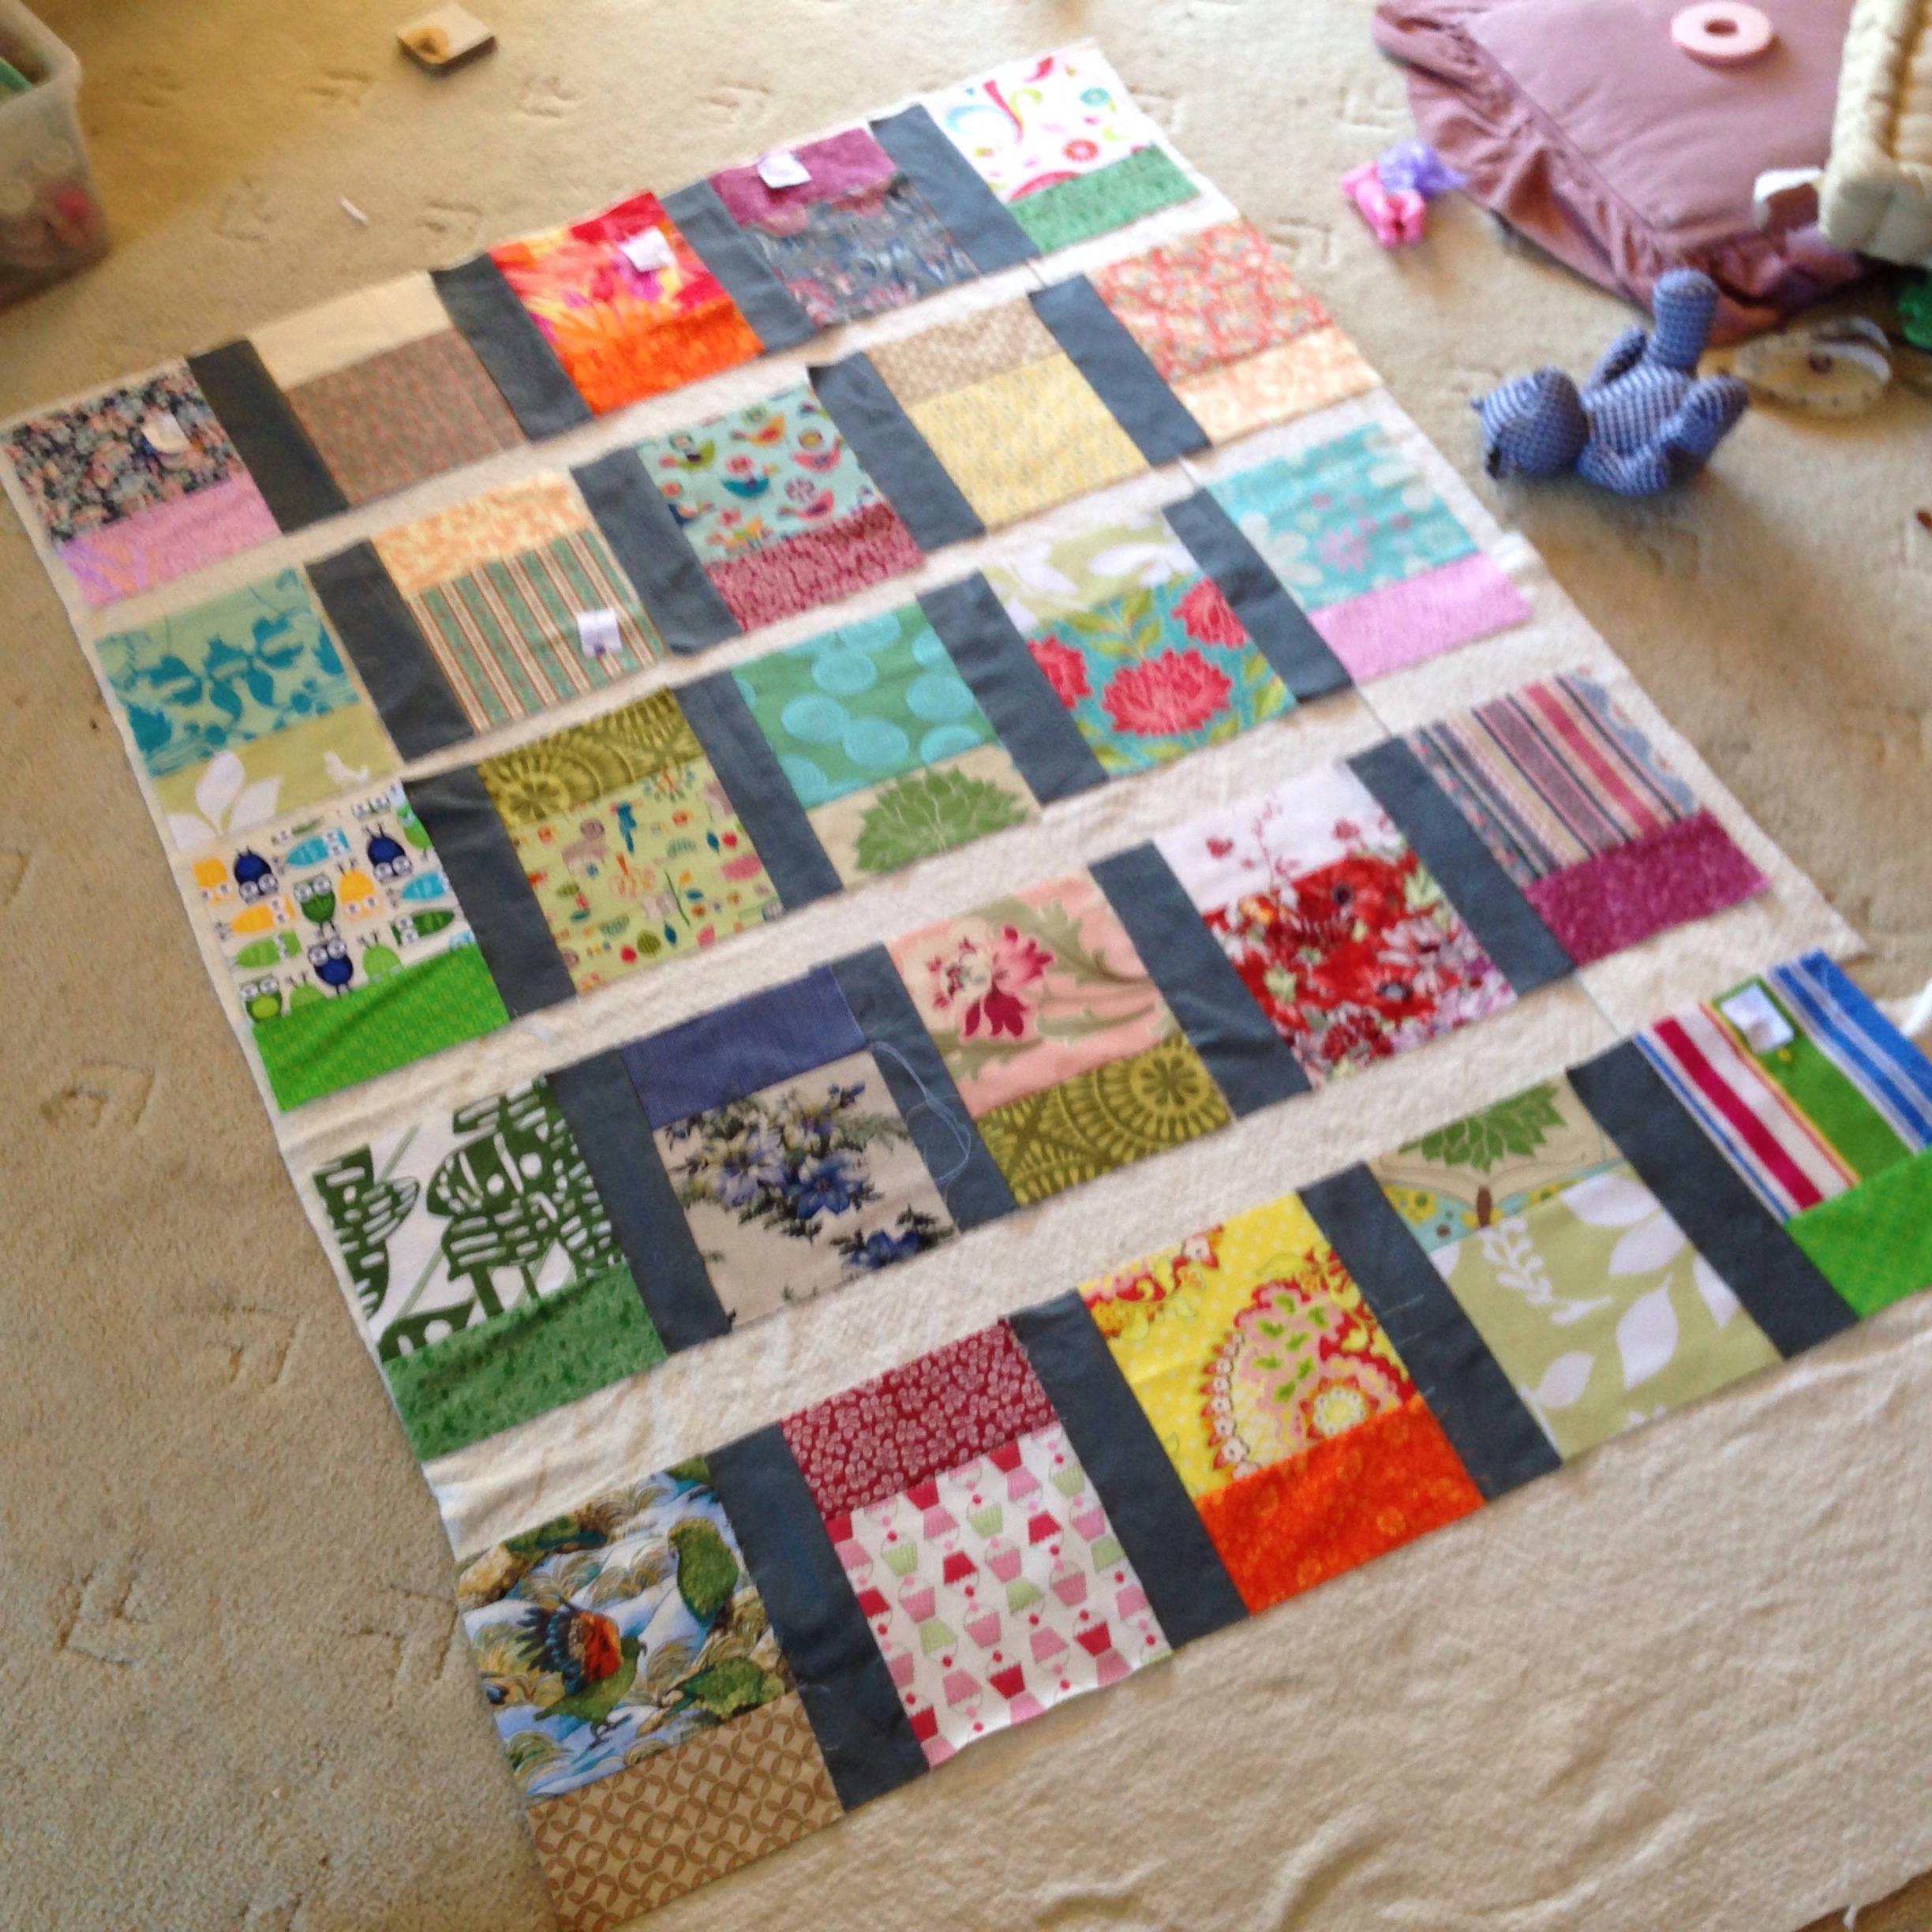
I’m glad I did this, because when I was piecing, I had fiddled with several trios and changed which was the “middle” square. This meant some blocks were now the wrong way up! I had to re-do the layout to make sure I was consistently starting each row with “skinny down”, and alternating correctly. That’s the kind of thing that would really annoy me if I went ahead and discovered it at the end!
Once I was happy with the layout, I joined my blocks together in each row:
Then I added a final strip of sashing to the end of the row (making both ends match).
Now it came time to join my rows together with some horizontal sashing. I decided to make things simple for myself and just create one enormously long piece of grey sashing that I could cut to the correct length:
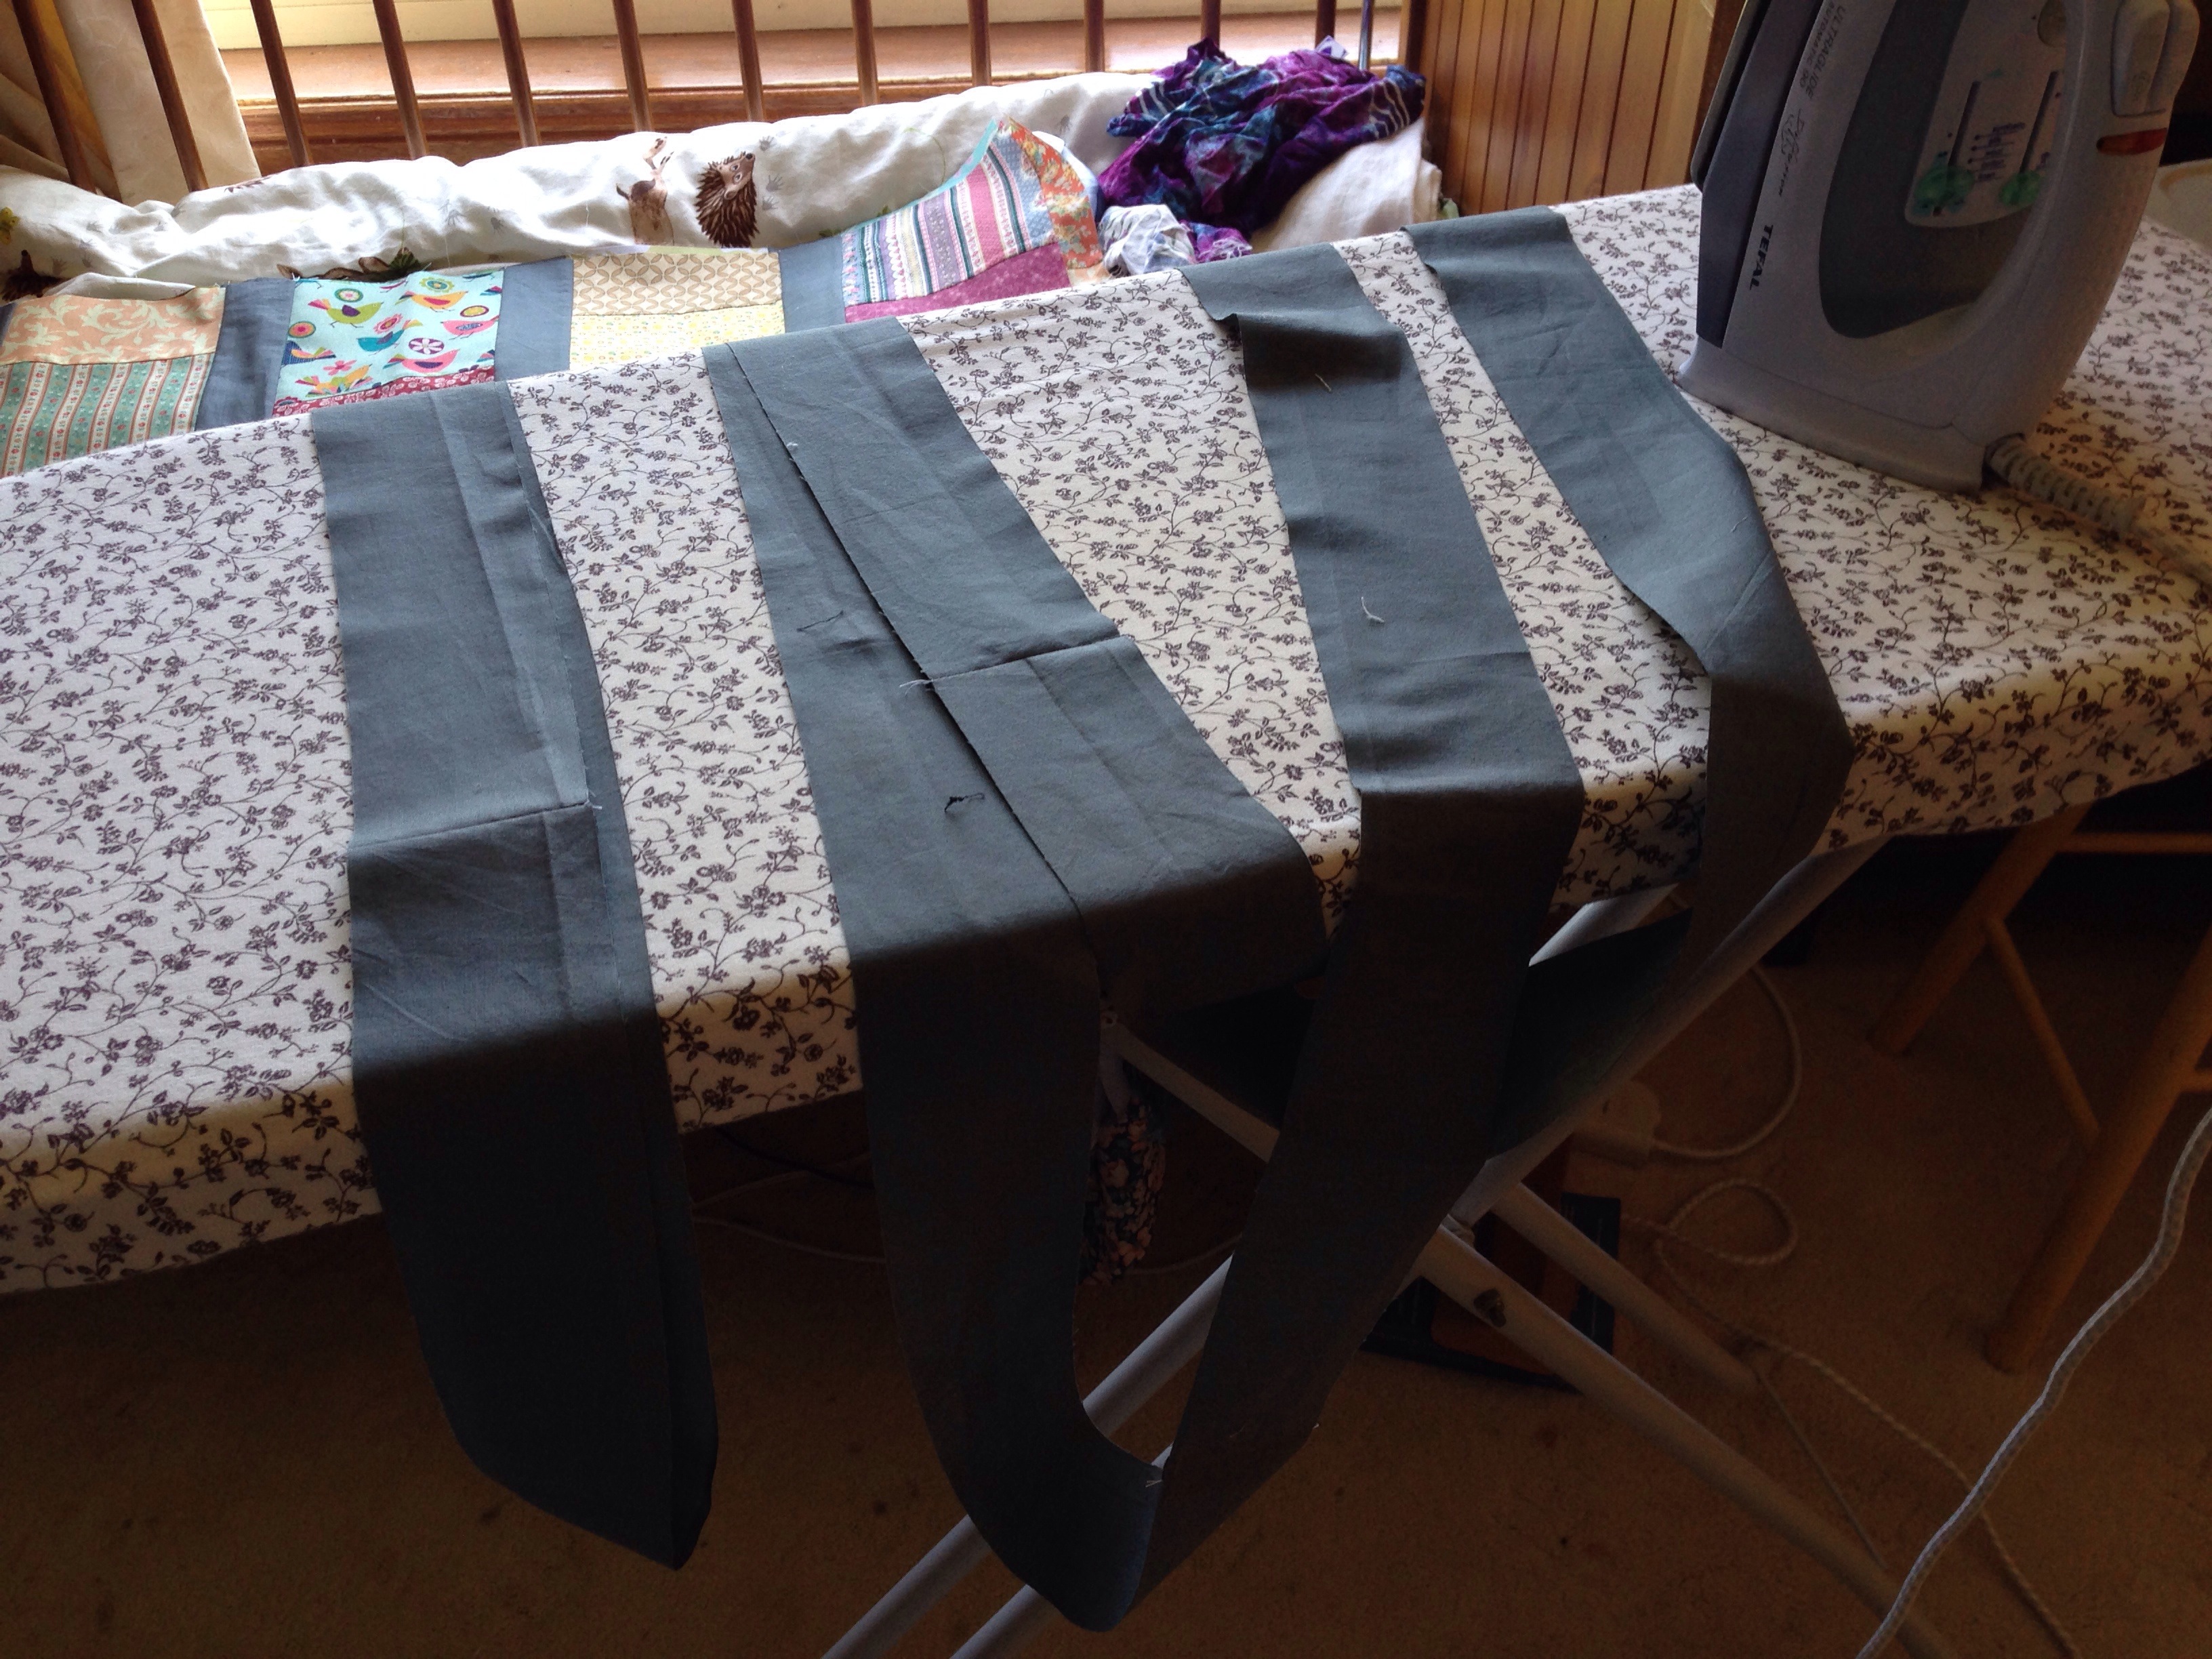
I then laid each row onto my ironing board, laid some sashing on top, and pressed them together. At this point I started using pins (normally I just let the iron “stick” the pieces together and sew with both of my hands, but that works only for shorter seams, and non-slippery fabrics). Because I had piece my sashing before hand, I let the seam fall onto the row wherever it needed to:

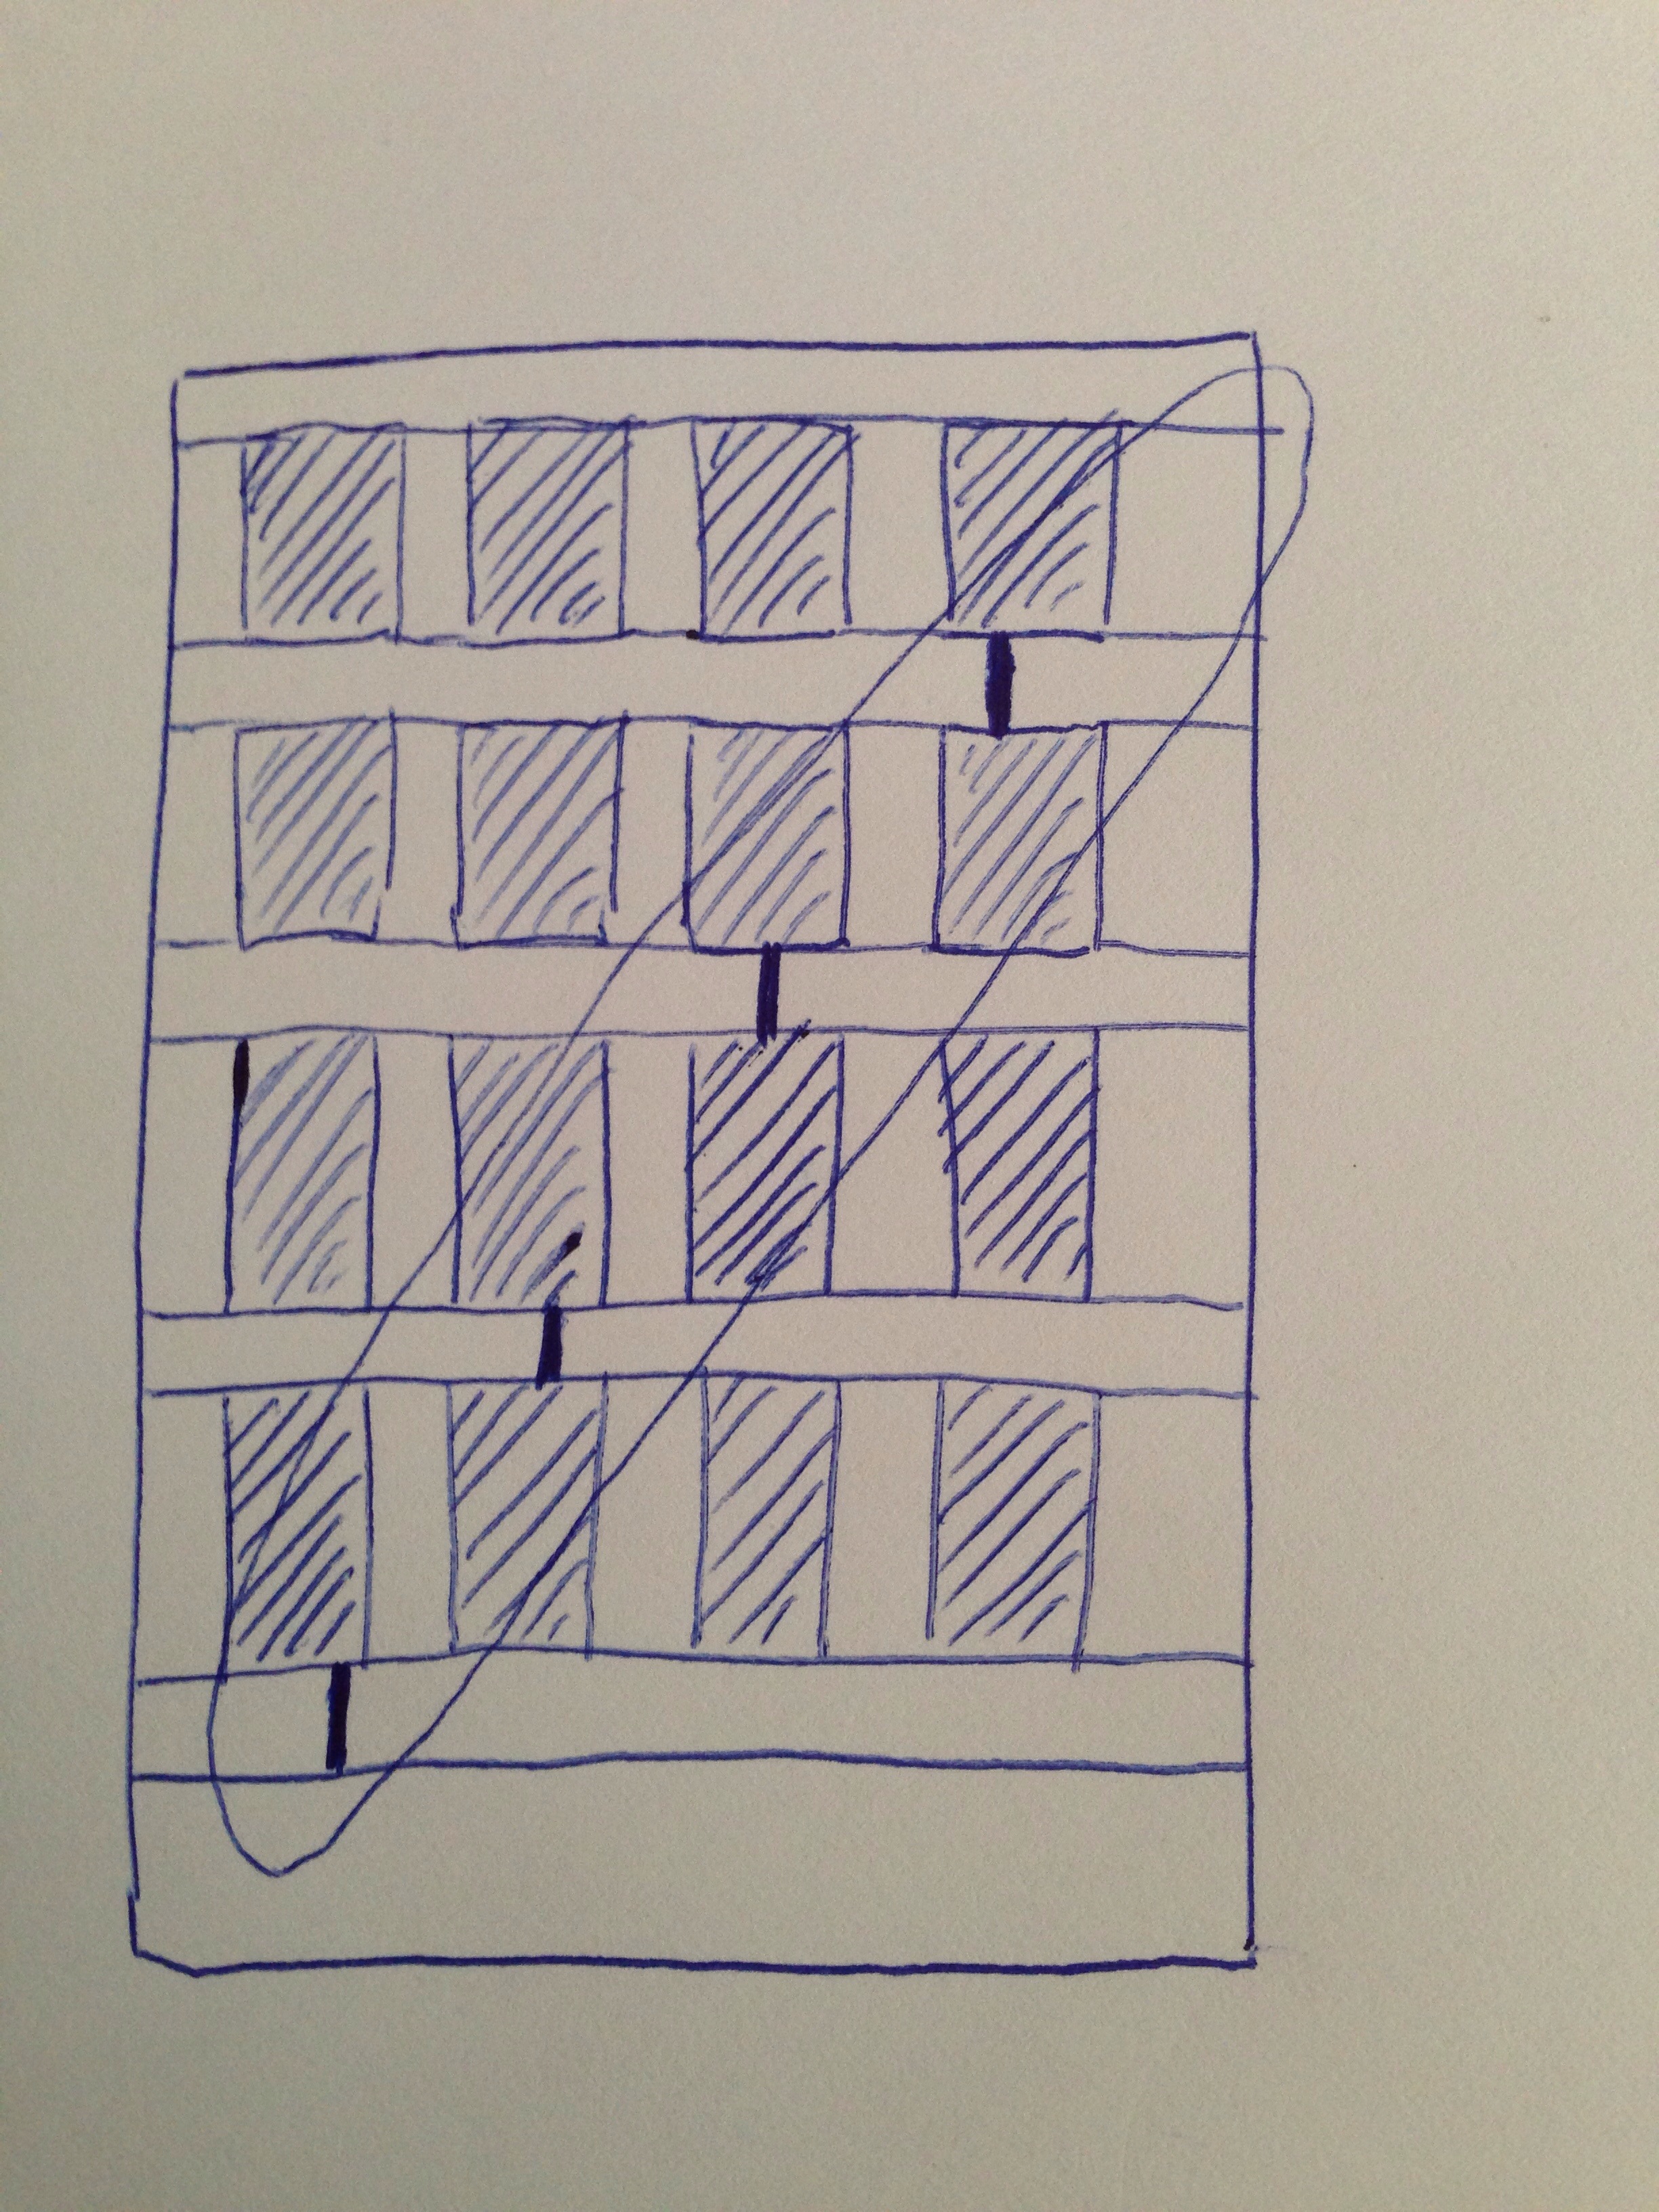
I flipped my sashing from side to side so I didn’t get a diagonal line of seams marching down the quilt top. I can’t think of a better way to describe this without a dodgy diagram, so here is what I was trying to avoid:
It turned out that the dark sashing hid the seams very well, so I needn’t have worried. 🙂
Once each row had some sashing I sewed all the rows together into one big quilt top, put a strip of sashing down each vertical edge, and I was done!
Of course, finishing the quilt top is not the same as finishing the quilt! You may be interested in how I finished this off!
