
Welcome to the final instalment in my tutorial series: making a softie octopus. 🙂 So far we have:
Now we are going to finish off with some scrap booties!
In previous projects I have used denim cut from old jeans, but this time I had some leftover blue linen which I thought would make a nice change. The material was easier to work with as it wasn’t as stiff, so I’d recommend a medium weight fabric as a first choice for the booties.
Step One: Cut and Fold
Take a long narrow strip of leftover fabric and cut it to 22 x 4 inches. Fold this in half lengthwise, and press flat. Then fold the long raw edges in by at least a 1/4 inch, and press them, too:
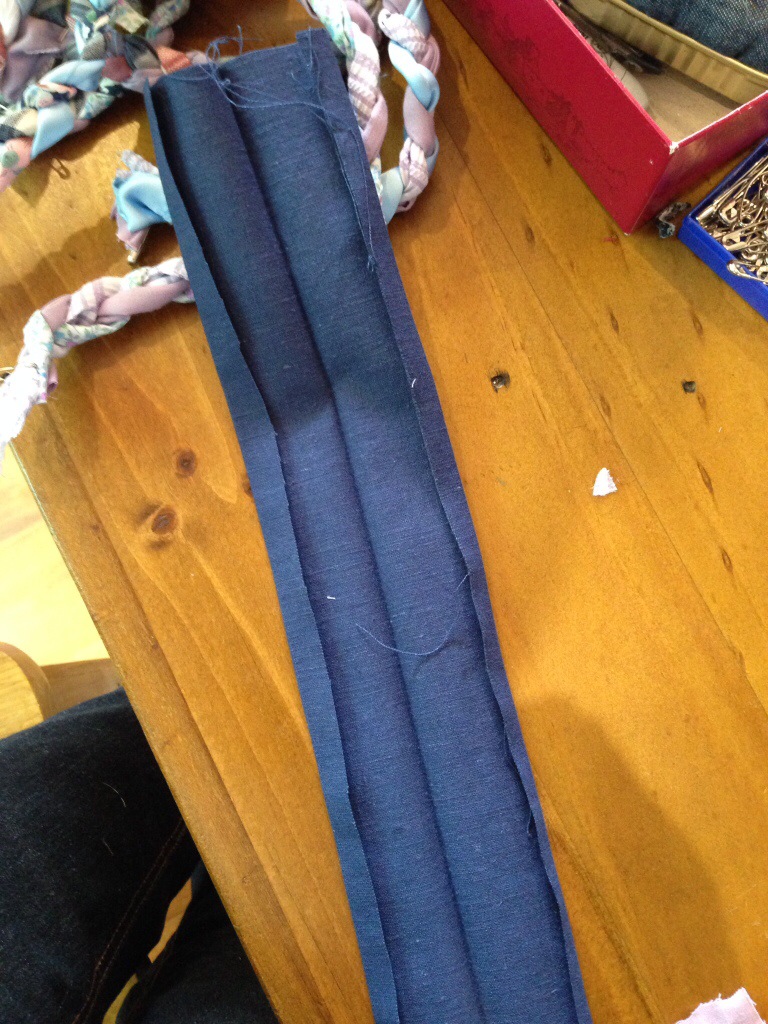
Cut this long strip into 8 equal parts, so that each folded strip is now 2 3/4 inches wide:
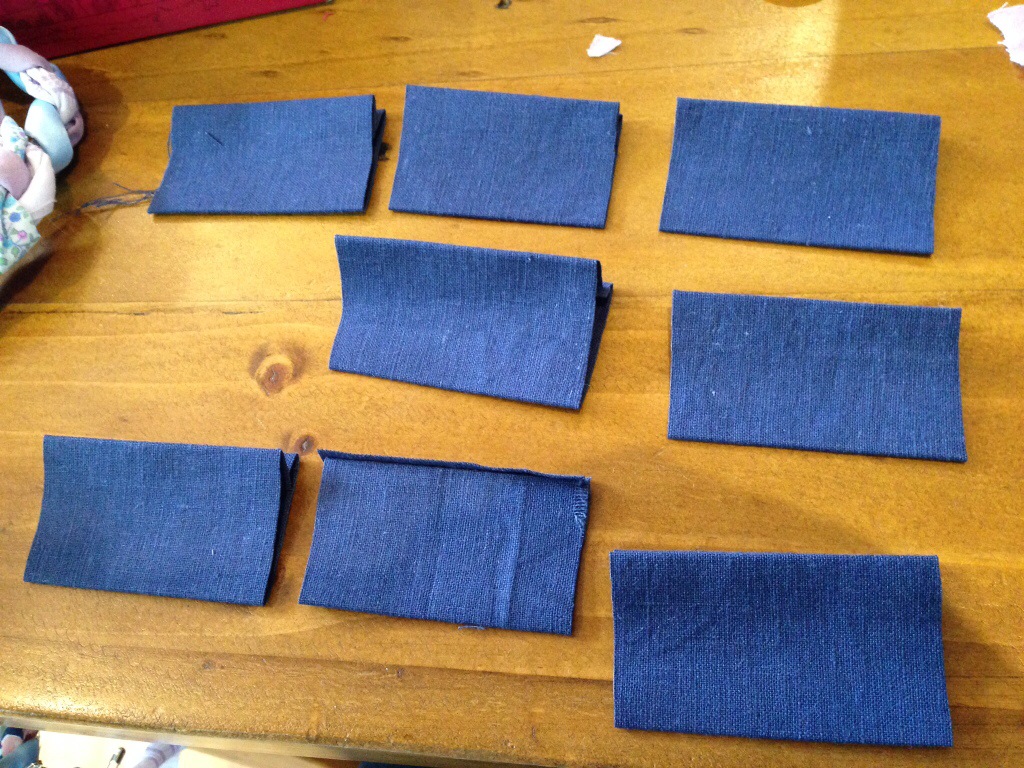
Each one of these will make a bootie. If you don’t have a long thin scrap, you can instead cut 8 strips that are 2 3/4 x 4 inches, (fold the short edges in this case). This is just a little more fiddling, so I took advantage of having one long piece.
You could also do each bootie a different colour, if you liked!
Step Two: Origami
Take one of your pressed bootie pieces and place it behind the end of a plaited leg:
Make sure the middle fold is lower than the raw ends of the plait (trim if necessary), and that the top folded edge is going around a firmly plaited part. Ultimately you are going to fold up the bottom part over the end of the plait to enclose all that mess.
Fold one corner over, on a slight diagonal, and then the other:
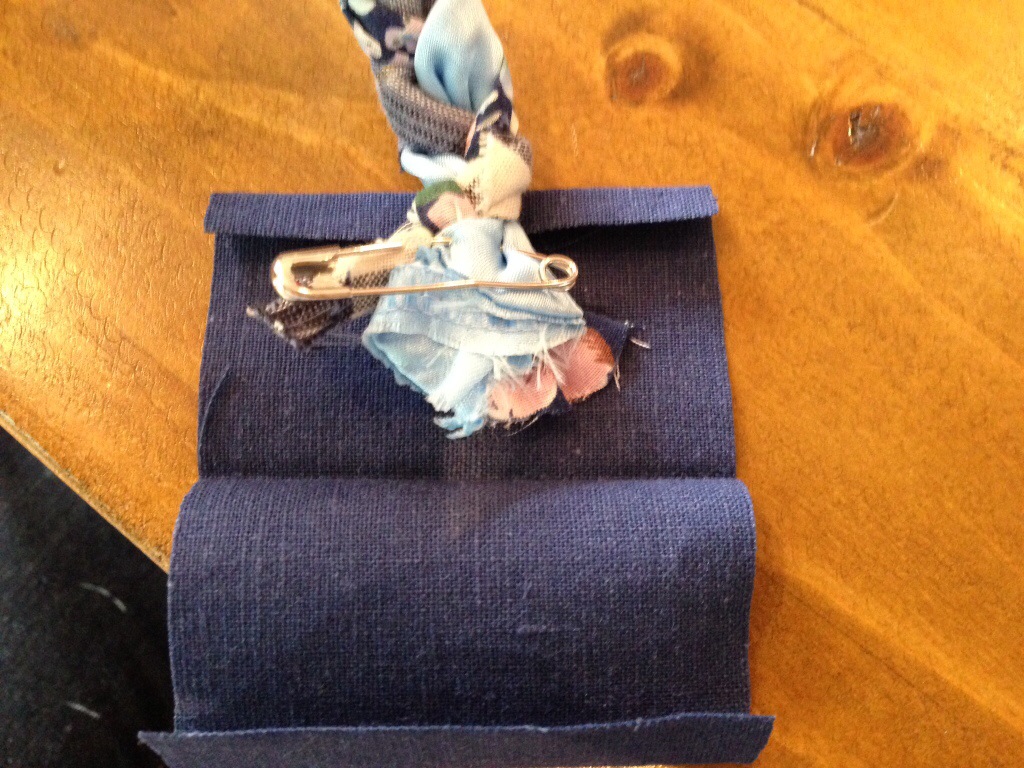
You may like to remove the safety pin first, and pinch the whole lot together so the plait doesn’t come undone. Or, you could remove the safety pin after tacking down your folded corners:
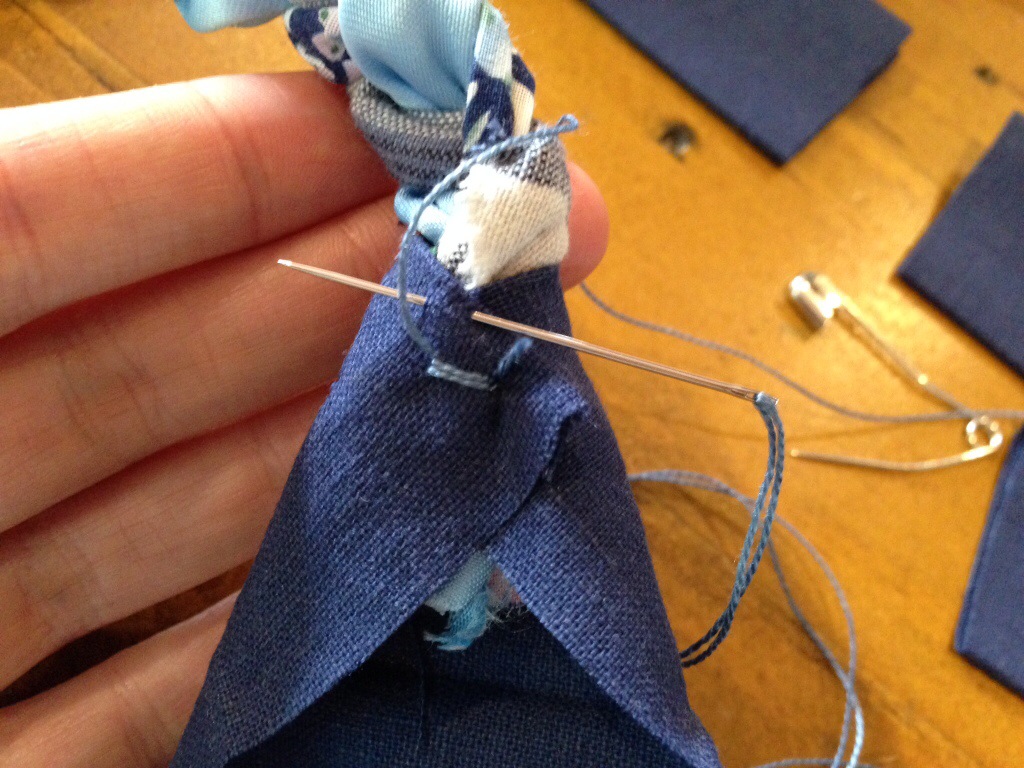
I used no. 8 perle cotton for decorative effect, but you could match the fabric with regular sewing thread if you liked.
Stitch a few times in place to get the thread anchored, and then catch up both bootie corners, and maybe a little fabric from the plait. Don’t cut the thread off just yet, we will sew the edges of the bootie with it once we’ve folded it up.
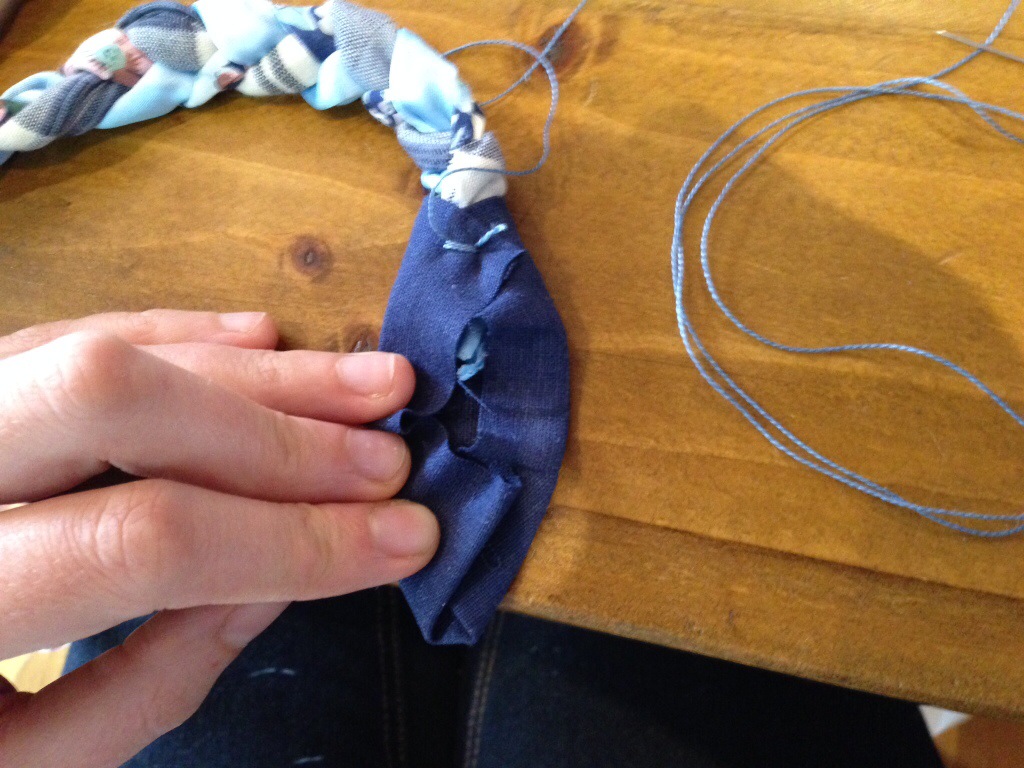
You now have a little ‘cape’ around the end of the plait: make sure the neck of the cape is folded tightly enough that the ends of the plait won’t slip around whilst you work.
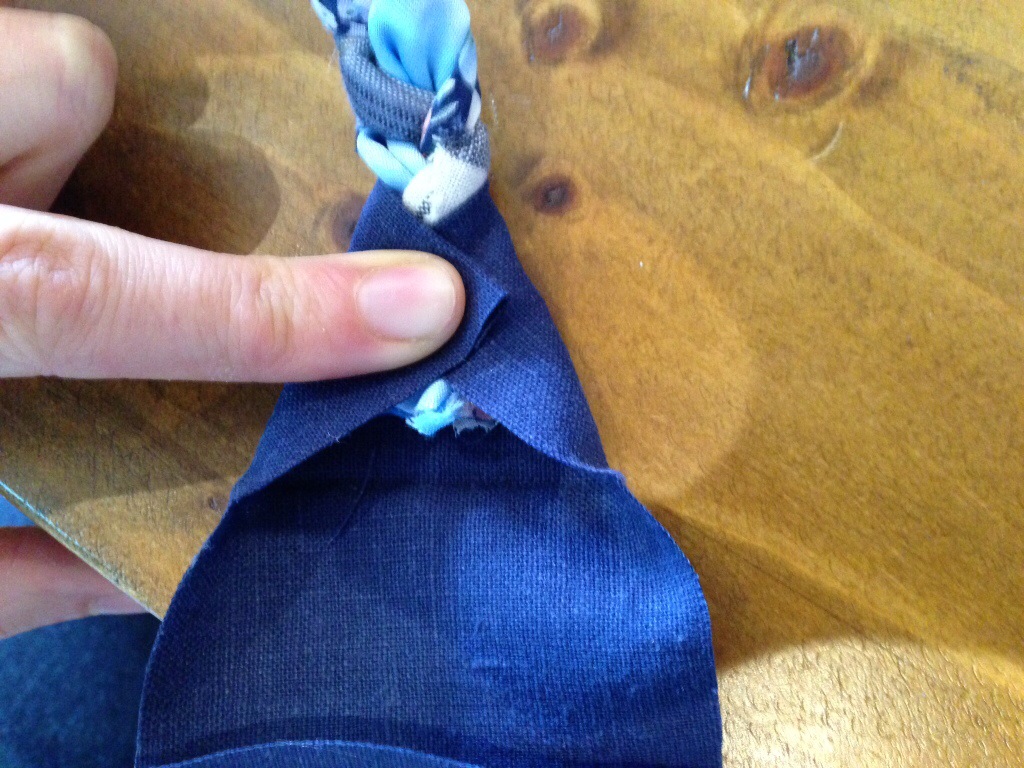
Next we do some folding at the bottom of the bootie. Make another diagonal fold on the right hand side that is a similar angle to what you did at the top:

Squish the pointy bit at the right hand side (where the middle fold is) down flat so that the raw edges are all facing to the left.
Now you do the same thing to the left hand side, to match:
There should be a little flat section along the bottom: make this about as wide as the width of your plait.
Now fold the bottom of the bootie up along the middle fold line to meet the neck of your little ‘cape’, like so:
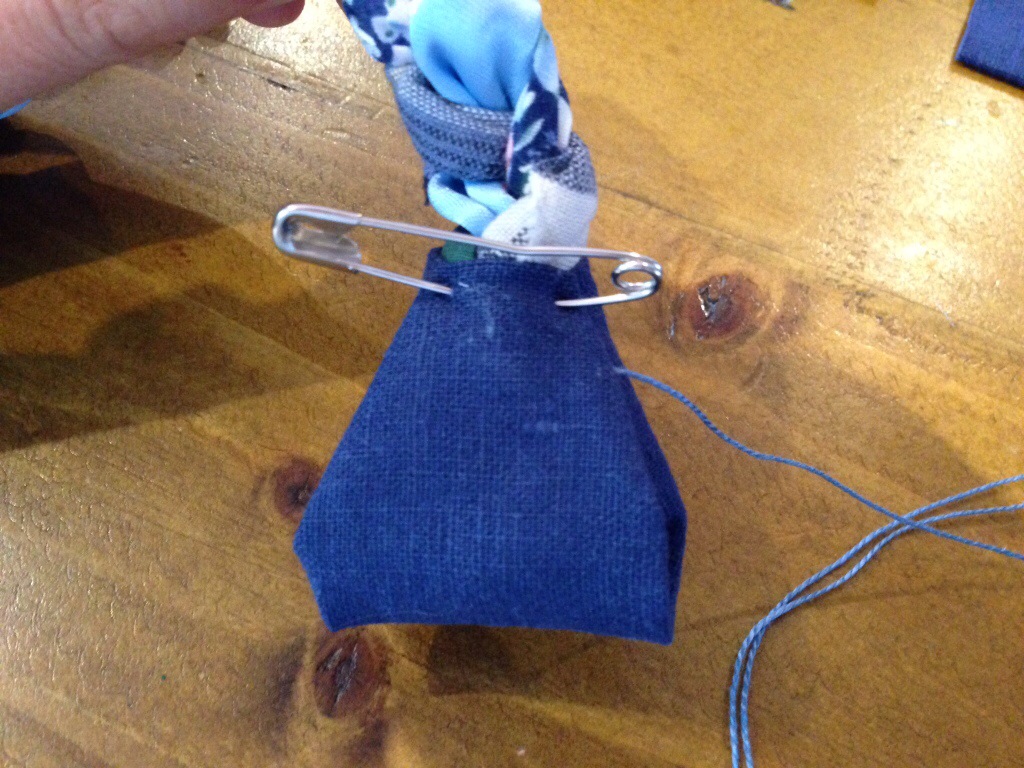
I pinned mine with a safety pin so I could sew it up without pricking myself.
You see how the flat part is now covering the tacked fold? You can fiddle about with the angles of your bottom folds to make sure it looks right when folded up. You quickly get the hang of this after the first couple of times!
Step Three: Sew it up
Take your needle up again and put it through the bottom corner of your bootie, from the inside, facing out. Now whip stitch around the edge of the bootie, working your way up to the top:
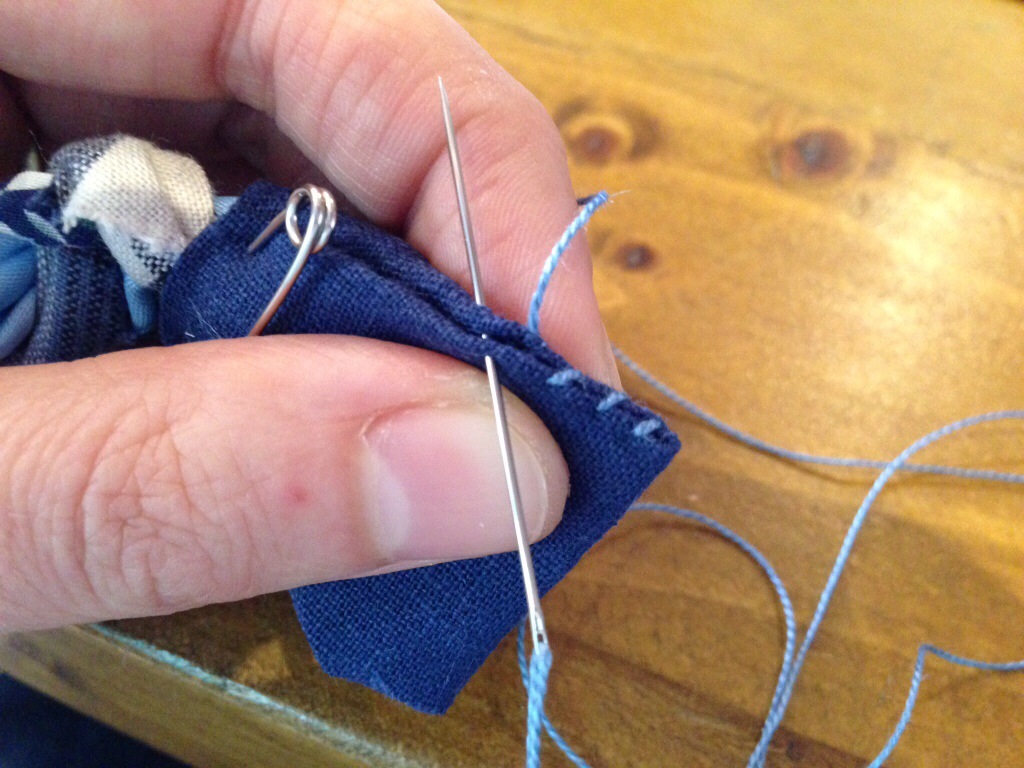
At the top of the bootie, whip stitch around the entire top edge encircling the plait (ie. circle around until you get back to your previous stitching). Catch some plait fabric into each stitch instead of going all the way through to the other side of the plait.

When you return to your stitched edge, push the needle through the plait across to the other side and resume whip stitching down to the corner of your bootie.


At the corner, anchor the thread by taking a couple of little stitches on top of each other. Push the needle in at the corner and out through the middle of the bootie somewhere and trim it close to the fabric (this is called “burying the thread”).
Do this for all eight booties, and then stand back to admire your handiwork!


