You’ve probably all experienced grief in some form. Grieving for some one or some thing is different to feeling upset about something bad happening. It goes deeper than that.
Today I’m feeling those mixed feelings I get when I feel true grief. I had to take my youngest chick up to the vet today, and she was so sick that she needed to be put down. Poor little Charlotte!
So I’m very sad at her passing. I’m angry at the breeder for sending me home with chickens that were infected with a virus, and guilty that I couldn’t look after her better. All of these feelings are natural, and some of these feelings are fair.
When you are responsible for a life, however small, you always feel guilty when something bad happens to them. It doesn’t matter whether you did 100% the right thing and looked after them the best you could. There is always guilt. And so, I feel guilty. What could I have done? Apparently, not a whole lot.
The vet told me that there is not much you can do for a virus — there are no medications to give like you would for a bacterial infection. You just have to keep feeding them and looking after them. Well, that is what we did. We brought her inside every night, and made sure she had clean water and fresh food. She must not have been well enough to digest the food, though, because she dropped a lot of weight.
Chickens are really good at hiding that they are sick. This is because in the wild, a sick chicken is a really good target for predators, who will go for the weakest ones first. And the other chickens aren’t kind, they will sometimes peck and harass a sick chicken. Charlotte did a great job of seeming well. Last week when I pointed out her new hen’s tail I had no idea that she was getting thinner and thinner under all that puffy down. I thought she was growing up nicely!
So when she developed a limp on the weekend, we thought she might have jumped down off something and hurt herself. We kept her in the warm and gave her cuddles and that’s all that we could do.
So today I light a candle in my heart for little Charlotte, who was with us for such a short time. I won’t forget.
Today was an amazingly warm autumn day – a big change from the very cold weather we had over the Easter weekend!
The little chicks are growing up fast. Cricket is now saying “bok bok” a lot more than “cheep cheep”, and charlotte is growing a rather lovely hen’s tail. I’m feeling a little reserved about whether Cricket is in fact a girl (not again!) so I’m keeping a closer eye on her.
The afternoon lighting was rather beautiful for photographing the garden. Hope you enjoy this update 🙂
The beetroot is growing on nicely, and the greenhouse is so pretty in this light!
The green manure in the left bed is growing nicely. Turns out a lot of it is broccoli from letting them go to seed!
The green peas have managed to survive this year, and are climbing onto the trellis. Inside the A-frame is some Kale
The comfrey under the citrus trees is looking quite lush. Time to cut it for some fertiliser 🙂
The garlic we grew last year is now sprouting up with shoots, ready to overwinter.
A glimpse inside the greenhouse. Onion and leek seedlings looking good! And an old broccoli seedling waiting.
The broccoli in the garden is looking good, except for some caterpillar damage on one or two. The potatoes are beginning to get more foliage. These will harvest at the end of winter
The camellias have been flowering well for a couple of weeks.
We have just one olive on our olive tree. It turned black a few weeks ago. Probably ripe!
The self-sown borage on the driveway is overtaking the gazanias we have planted here. Oh well!
Cricket (back) and Charlotte (front) are looking bigger. Charlotte is still a very snuggly chick. Cricket … is a little rocket
It seems we are in the middle of a plague of tiny ticks at our house at the moment. Our house backs onto bush, and there are creeks throughout our area – perfect for ticks! 😦
Normally we see a variety of sizes, ranging from teeny tiny pin-prick ticks up to size-of-a-glass-headed-pin. Thankfully we are only getting the itty bitty ones at the moment, because I’m developing a bit of a reaction to the bite of the larger kind!
I’m not feeling particularly thankful at the moment, though, because these tiny ticks are really destroying my enjoyment of the garden. I’m now going outside dressed from head to toe like this:
Rain slicker plus ski pants!
Now that’s a face that says “happy to be gardening”!
In short, I’m putting a rain slicker and ski pants over the top of whatever clothes I’m wearing, in order to go out into my garden and pick herbs, sort out the chickens, wrangle the children, etc. The ticks are THAT BAD! I figure that with a layer I can peel off immediately I might have some chance of avoiding the ones that crawl onto your skin from your clothing.
We’ve also been dosing up on insect repellent and showering after garden exposure. I’m getting pretty sick of washing all the tick infested clothes!
Costuming! I participate in the SCA, which is a basically a bunch of people who get together to reproduce medieval arts and crafts, costuming and combat. You may have heard of them, they are everywhere!
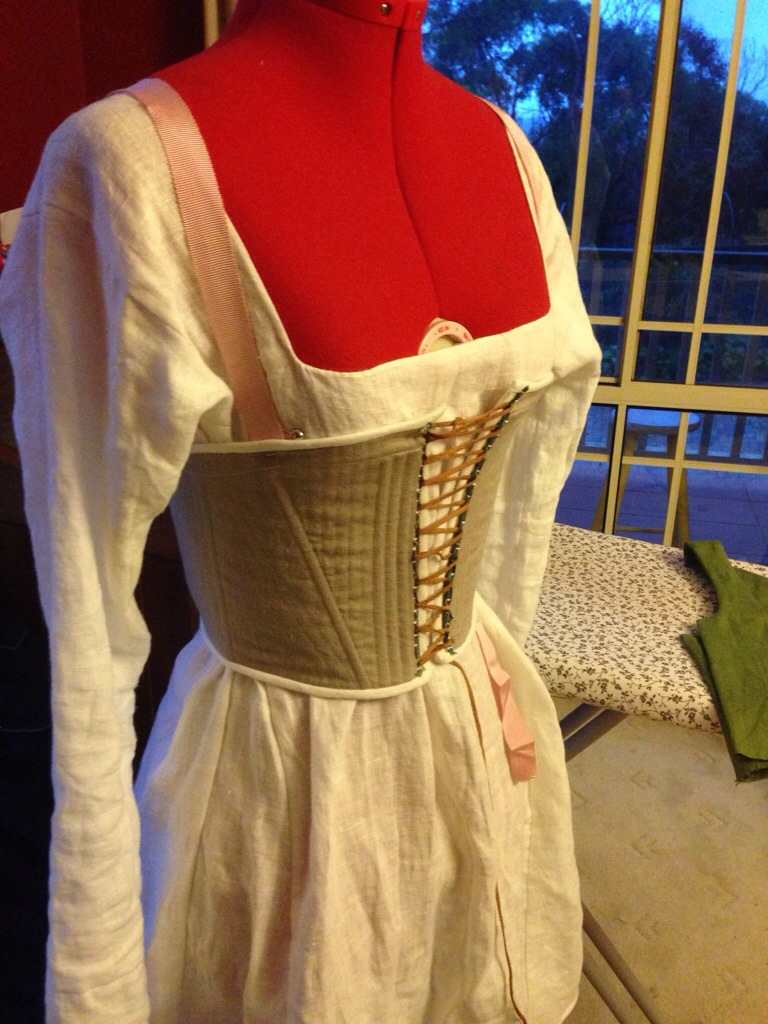
In my local area we have a festival at Easter that I’ve been preparing for. So far I’ve made a chemise (a long white undershirt), a corset, and I’m in the process of making an early tudor kirtle.
A kirtle is a supportive dress that performs a similar function to a modern bra, with a dress included. A tudor lady would wear another dress over the top of this. That’s a fair few layers of clothing!
I’m about to put some temporary lacing onto the bodice of my kirtle, so that I can fit and sew the skirt.
Here are a couple of pictures of what I’ve been up to. 🙂
The chemise is made of geometric shapes. Very economical with fabric!
Rolling the hem on the square neckline
The chemise, sewn except for hem and cuffs
There is a square gusset connecting the sleeve to the body. I used french seams this time (this was hard!!)
Making a corset is like quilting: I’ve basted layers together ready to sew boning channels.
Finished sewing the boning channels.
“Finished” corset. I still need to make proper straps and ultimately use eyelets instead of a lacing strip, but it will do for now.
The top of the kirtle is square fronted and laces at the side. I need to pleat a skirt onto the waistline and add lacing strips or eyelets.
Hi everyone! I’ve been crazy busy with some sewing in preparation for a major medieval re-enactment event held each year at Easter. I’m madly attempting to pattern and create new gowns for myself and Isobel, but of course I have to start with all the undergarments first (chemise, then corset, then first gown, then the outer gown) … yikes! So I will be a little slower with the posts in the next couple of weeks.
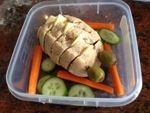
Today I have a gallery of school lunches to share: this is a little project I’ve been doing for a number of weeks, taking photos of what I send to preschool with Will (and now Evie too!). I aim to send something that they will actually eat, but without sending junk (which I just don’t buy at all, to avoid temptation).
Each of these lunch boxes takes only a couple of minutes to assemble. Mostly I just pull the veggie drawer out of the fridge and make up whatever I can find. Sometimes I will add some bread (always wholemeal, or wholemeal grain bread, or something I baked). Other times they get a treat like the Salada biscuits.
I find that sometimes almost the whole lunch box comes home with a few bits picked out, and more often it comes back scraped clean except for a few tomatoes. This is pretty much what happens at home, too! Apparently Evie eats *a lot* of fruit at morning tea time, so I’m not surprised if she is still full by lunch. Hmmm.
One great thing about packing lunches like this is it doesn’t cost much unless you choose to add some meat, or processed biscuits. Avoiding muesli bars and pre-packed biscuits-with-cheese saves a small fortune, I believe. These last two I see in lunches here *a lot*. Also, fruit juice poppers! That’s a whole lot of added sugar and salt that my kids just don’t need. They have water bottles to refill all day, and I’ve sent plain white milk to school in a bottle on occasion.
Note: there is a fridge at preschool, so I can send anything I like and it is kept safe until lunch time. When William goes to school I will need to pack a freezer block to keep the items fresh especially if I send meat.
Everything except a few baby spinach leaves were eaten.
The broccoli and tomatoes came back.
Will loves snow peas and cucumber, but Evie likes mushrooms. Evie ate hers, but Will sent most of it back.
I tried a sandwich this time: vegemite and cheese. The soft fruit is stewed apple and peach (home made)
Both kids had similar meals. This time Evie sent much of it back and Will ate about half. The sliced rolls have vegemite.
I tried some fried rice leftovers, which was *really* quick to pack. The rice came back, and Evie spread hers around preschool.
These creatures are fun to make. They are a huge hit at preschool, but Will sent most of it home.
It is disappointing to see the food come home again, but I’m not tempted to send junk instead. I’m sure they are just filling up with fruit at morning tea, or they have small appetites like they do at home! They won’t starve themselves!
I’m most proud that the kids don’t ask for food that other children have. I’m amazed that the afternoon tea basket is full of packet chips, Tiny Teddies and other junk food. And my kids don’t seem to envy (yet!). Yay.
We’ve had a fair bit of rain over the last few days, and some of our recent plantings have started to shoot up! Here’s a pictorial update, and some random extras thrown in. 🙂
I spotted this runner bean shoot growing in our lawn last weekend. We mowed only one week before!
The pineapple sage has another wonderful flush of flowers
A bee sips nectar from some Borage flowers
The rainbow chard is starting to get a lot bigger, and in the front there are plenty of Bok Choy seeds germinating to replace the ones we’ve eaten up.
The shelling peas are up and well on their way.
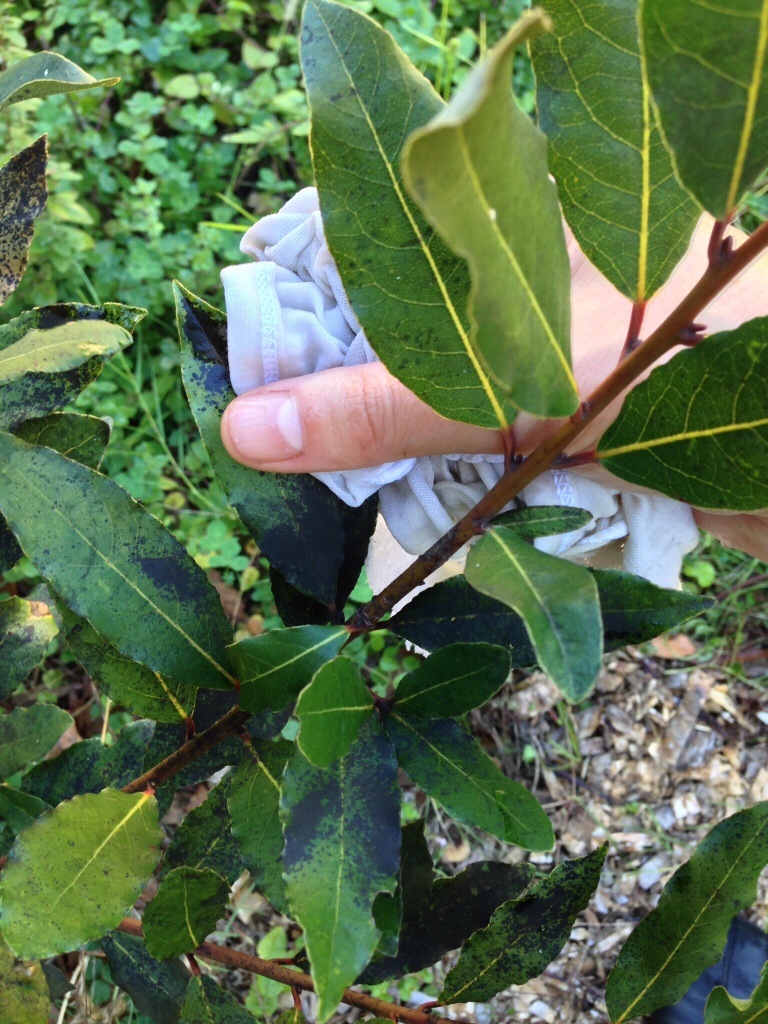
(Mostly) dead aphids on the underside of our Bay tree, after spraying with home made white oil.
We let the chooks into the top of the orchard where we had seeded lucerne and green manure. Chicken paradise!
All five chickens are now running together quite nicely. The little ones still say “Cheep! Cheep!”. Harriet does occasionally chase them.
The new chicks are getting bigger! Here Cricket tries to steal a blade of grass from Charlotte.
I love Gazanias! This one is a cheerful creamy yellow. 🙂
I discovered this awesome fungus when I was dusting off the flour bag ready for washing. That’s what the white powder is. So cool!
I put vege net over the broccoli to keep out the Cabbage White Moth. This is working well!
Peeking under the net, the broccoli plants are getting much bigger!
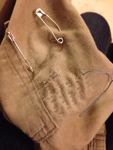
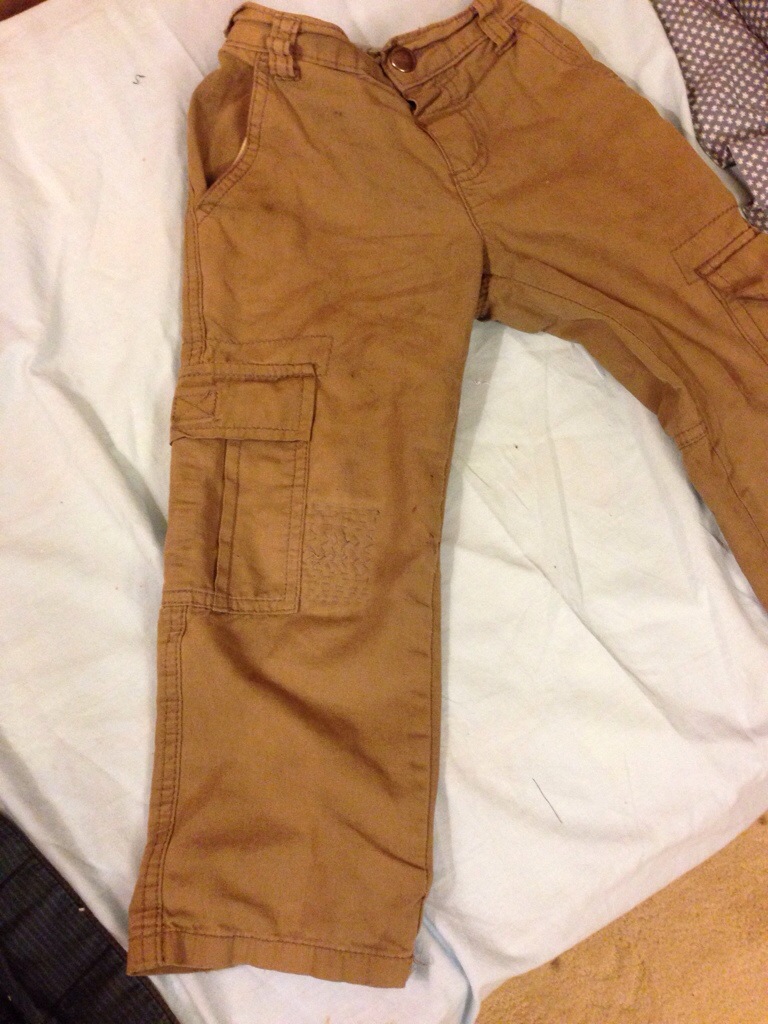
William’s cargo pants (one of two pairs of long pants in his wardrobe) had a hole in the knee on Tuesday:
My finger poking into a hole in the knee
Since I don’t have many long pants for him, and it’s starting to get a lot cooler, I decided to mend the hole before it got any bigger. He will be wearing the pants regardless! Mending a little hole like this is pretty quick and easy, so long as you have some kind of scrap fabric, and a needle and thread!
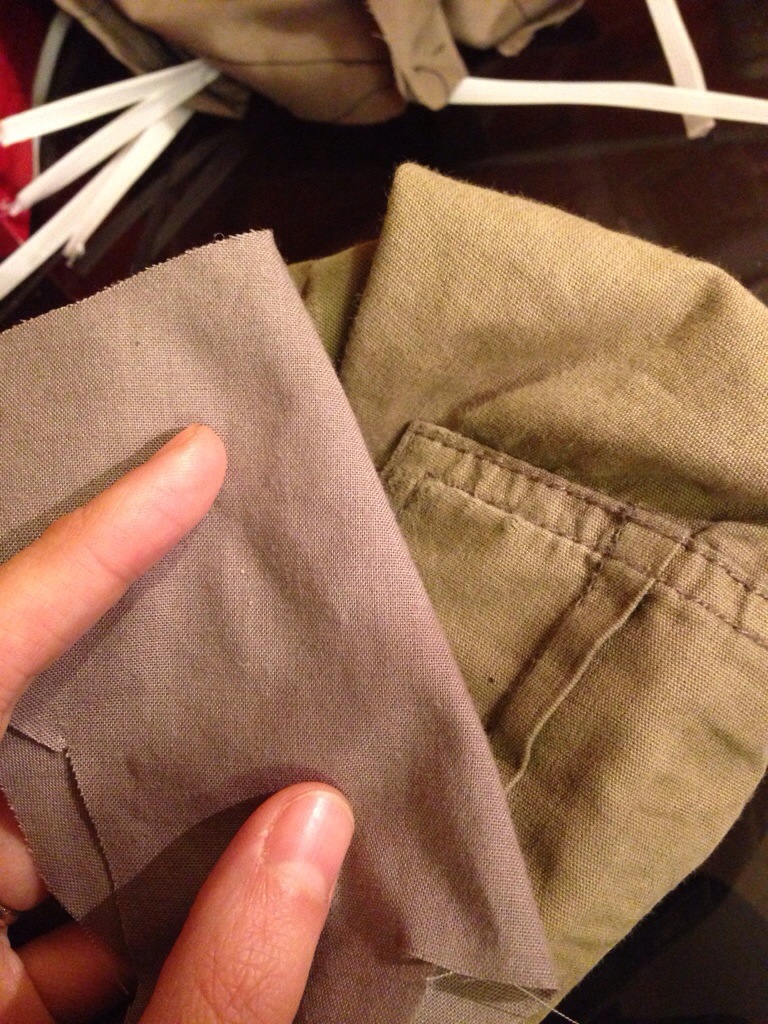
Matching scrap sheeting, folded, for a patch
First of all, I pinned my scrap fabric on the inside of the clothing, behind the hole. I like to have a patch about three times as wide as the side of the hole to make sure any weak fabric in the area is also reinforced.
The patch is pinned behind the hole.
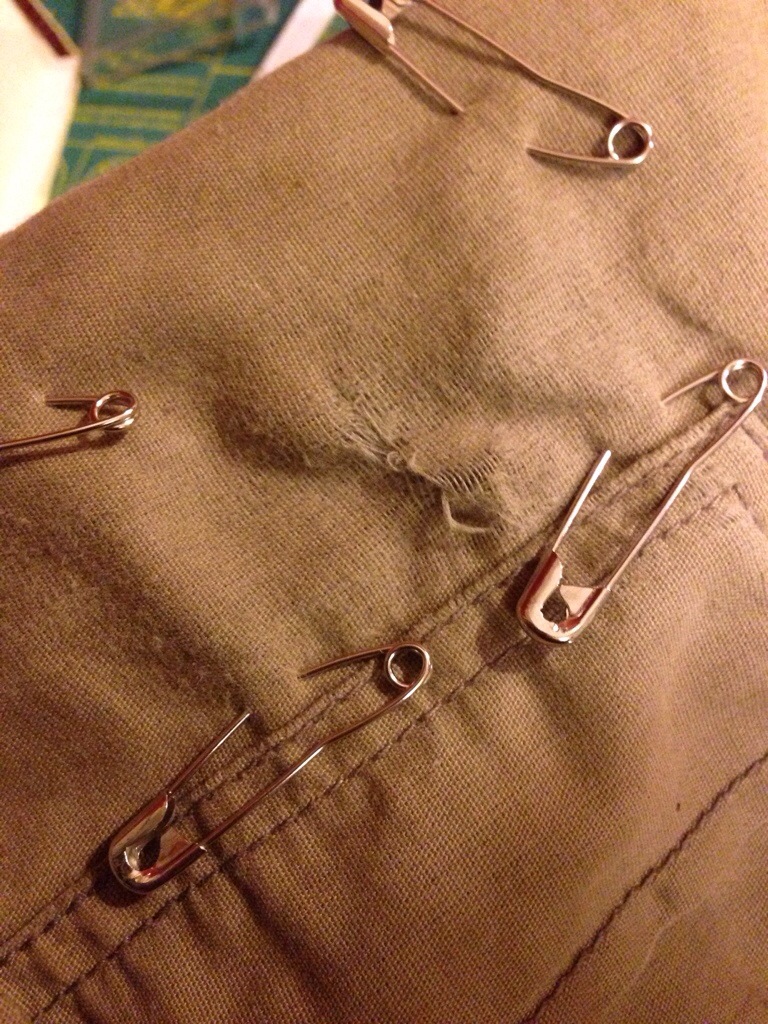
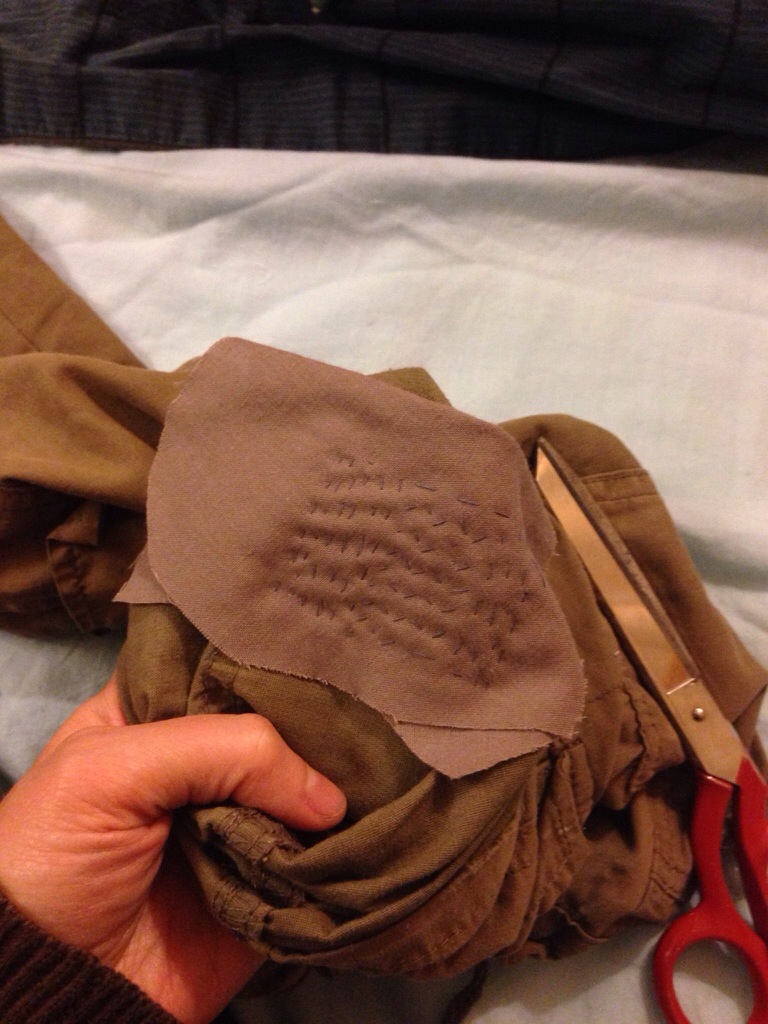
The stitching area I used is bordered by the safety pins. The scrap fabric is a piece of old sheeting which was pretty thin, so I doubled it over.
Several rows of running stitch to quilt the patch
I used a contrasting-but-not-ugly thread colour because I didn’t have any matching thread. My patching is not invisible! It looks great with either white or black thread, but the paler blue colour I used made the patch a little less obtrusive.
I started with some rows of running stitches to quilt the patch onto the fabric. Next time, I think I will use pad stitch instead, as it was quicker to cover (not that it was particularly slow). Pad stitch also made a nicer ‘feel’ to the quilting.
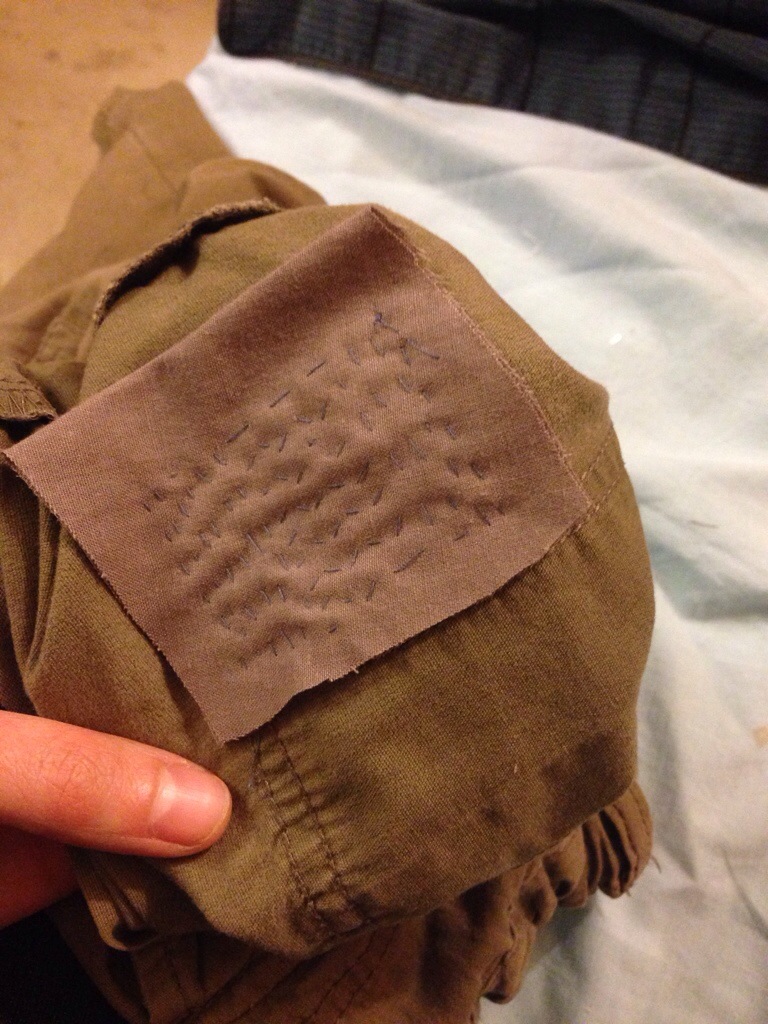
Quilted patch complete
Here is the patch completed – in the centre of the patch I’ve used pad stitch, which was necessary to grab the fabric around the hole. If I’d continued with running stitch, the raw edges of the hole would have been parallel with the stitching, and would have flapped loose.
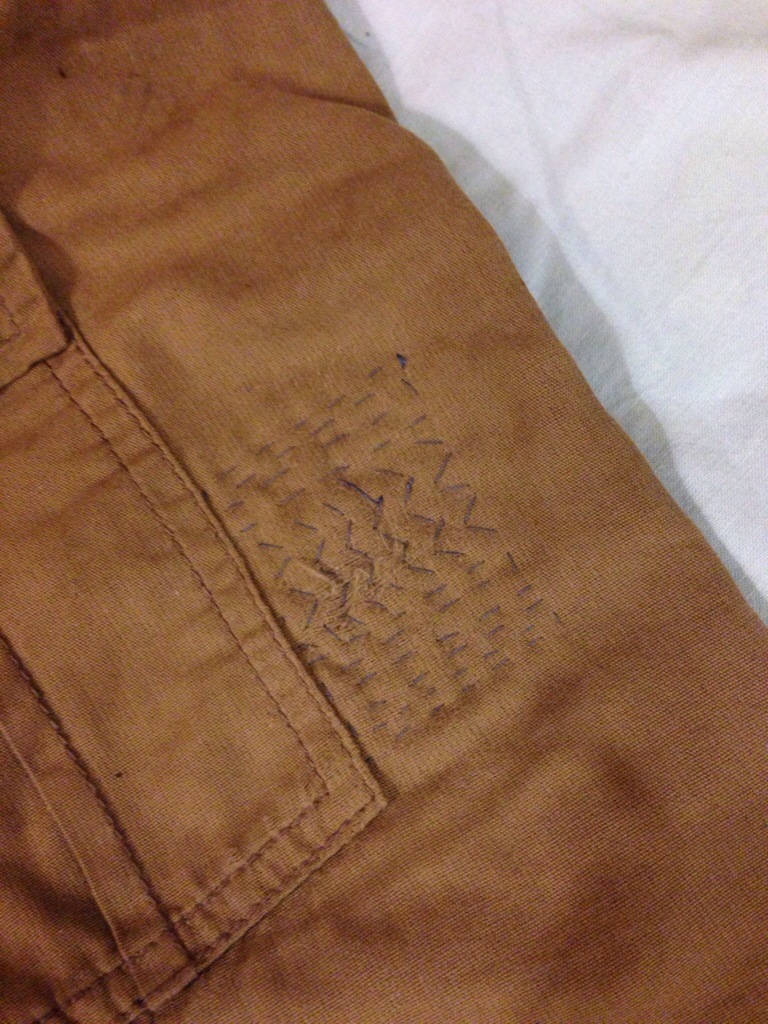
View from a more normal viewing distance
It’s not terribly noticeable, is it? The faded colour in the knee area makes it more obvious, but because the pants are pretty decorated already, the extra stitching just blends in.
Here’s what it looked like on the inside. I simply trimmed a little closer to the stitching (being careful not to clip any pants fabric) and left it.
I didn’t bother finishing the raw edges of the patch because it’s likely William will grow out of these pants before the patch ravels away. If there is a lot of ravelling in the first wash, I will just whip stitch the edges to prevent it.
Why bother? Well, whilst kids clothes are cheap and I can probably get some replacement pants at my local thrift store — these pants are still good! I’m attached to them, and it will take time and effort to take the kids shopping. I’d rather spend a few minutes with a needle and thread, and my thoughts, and just get it done.
I also really hate throwing something away that I know can be saved. 🙂
Now we are going to finish off with some scrap booties!
In previous projects I have used denim cut from old jeans, but this time I had some leftover blue linen which I thought would make a nice change. The material was easier to work with as it wasn’t as stiff, so I’d recommend a medium weight fabric as a first choice for the booties.
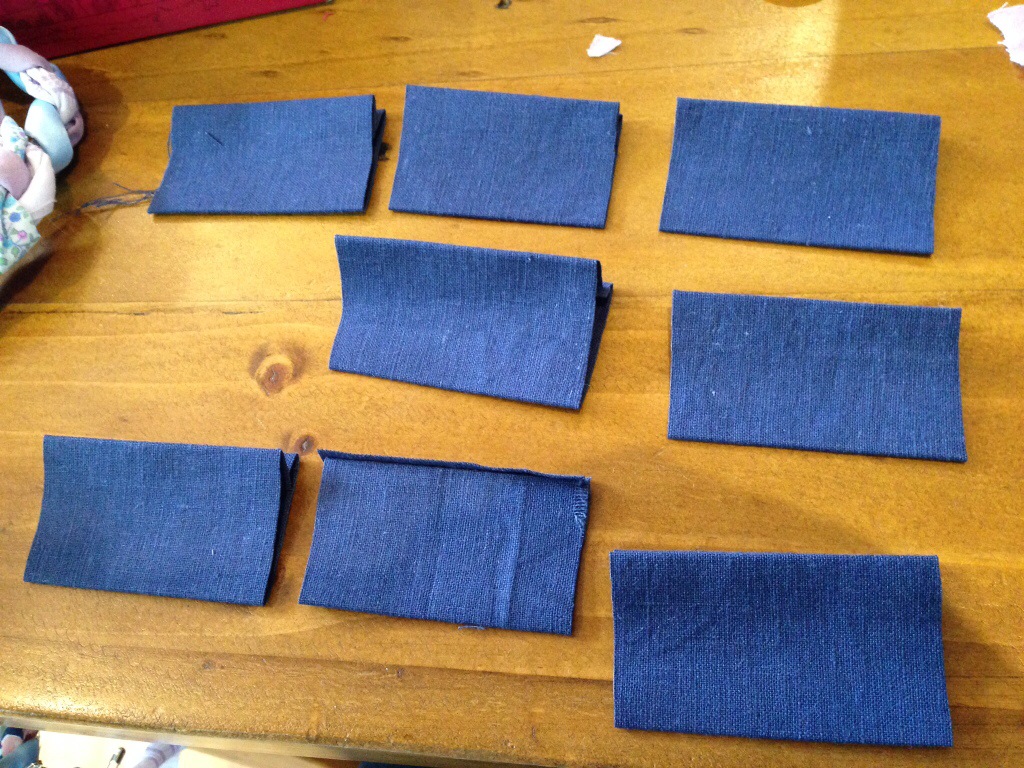
Step One: Cut and Fold
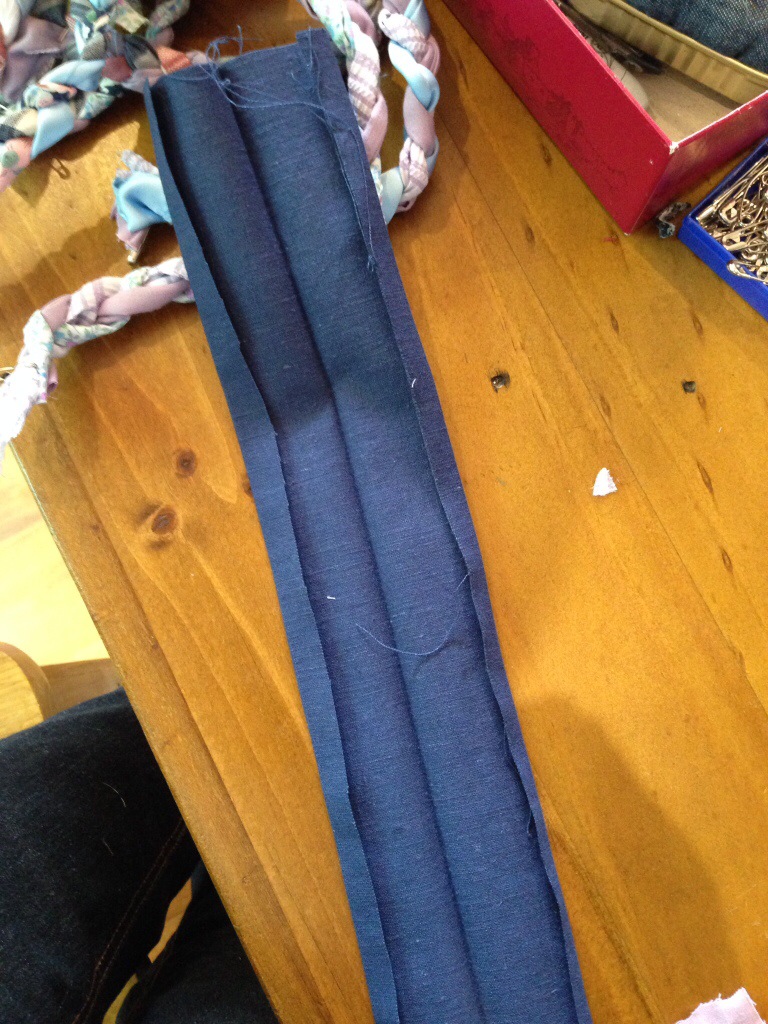
Take a long narrow strip of leftover fabric and cut it to 22 x 4 inches. Fold this in half lengthwise, and press flat. Then fold the long raw edges in by at least a 1/4 inch, and press them, too:
Press the long raw edges, and the centre line
Cut this long strip into 8 equal parts, so that each folded strip is now 2 3/4 inches wide:
Cut into eight parts
Each one of these will make a bootie. If you don’t have a long thin scrap, you can instead cut 8 strips that are 2 3/4 x 4 inches, (fold the short edges in this case). This is just a little more fiddling, so I took advantage of having one long piece.
You could also do each bootie a different colour, if you liked!
Step Two: Origami
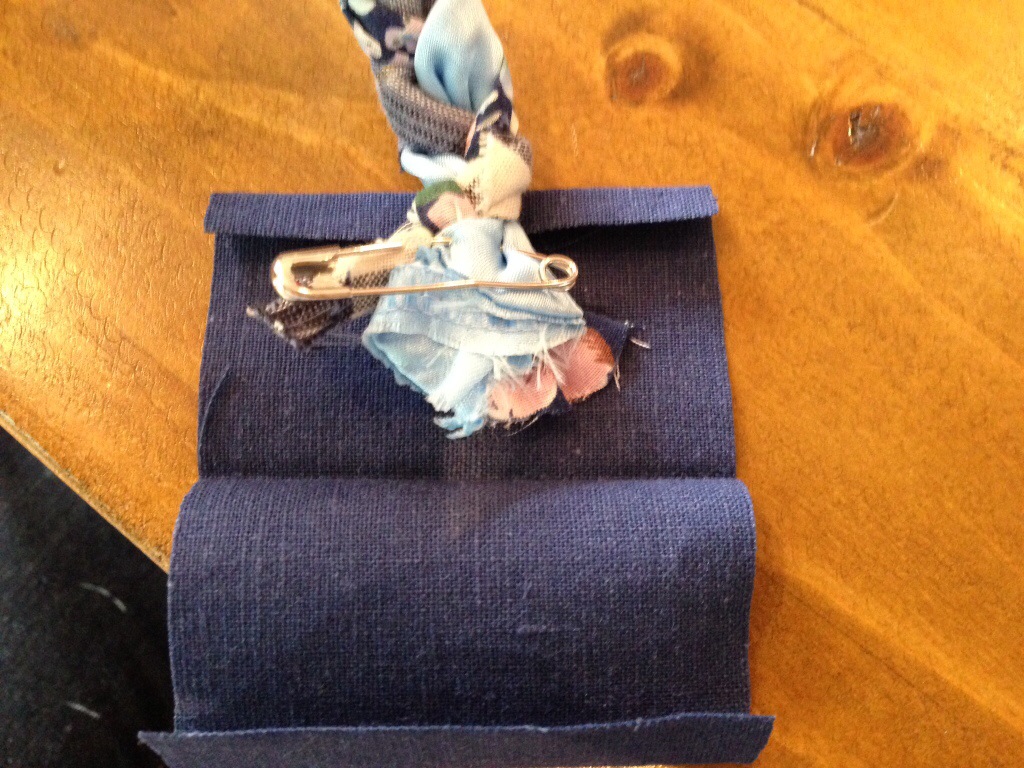
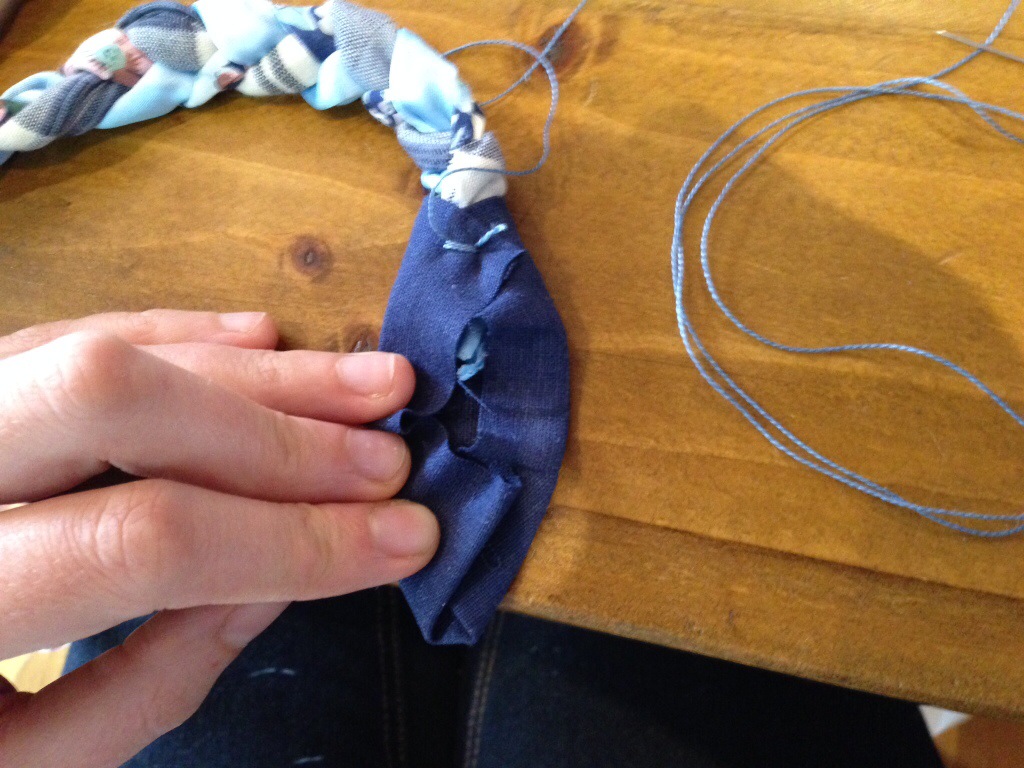
Take one of your pressed bootie pieces and place it behind the end of a plaited leg:
Unfold, then place behind the plait
Make sure the middle fold is lower than the raw ends of the plait (trim if necessary), and that the top folded edge is going around a firmly plaited part. Ultimately you are going to fold up the bottom part over the end of the plait to enclose all that mess.
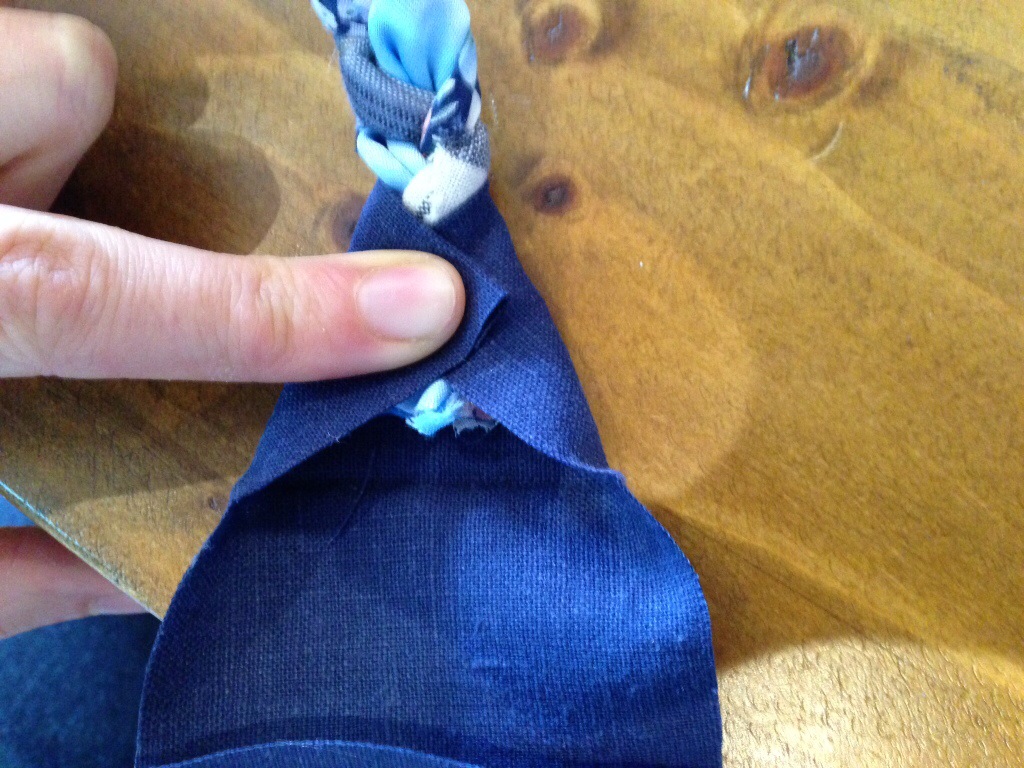
Fold one corner over, on a slight diagonal, and then the other:
Fold the top corners in
You may like to remove the safety pin first, and pinch the whole lot together so the plait doesn’t come undone. Or, you could remove the safety pin after tacking down your folded corners:
Tack the fold firmly in place
I used no. 8 perle cotton for decorative effect, but you could match the fabric with regular sewing thread if you liked.
Stitch a few times in place to get the thread anchored, and then catch up both bootie corners, and maybe a little fabric from the plait. Don’t cut the thread off just yet, we will sew the edges of the bootie with it once we’ve folded it up.
You now have a little ‘cape’ around the end of the plait: make sure the neck of the cape is folded tightly enough that the ends of the plait won’t slip around whilst you work.
Next we do some folding at the bottom of the bootie. Make another diagonal fold on the right hand side that is a similar angle to what you did at the top:
Fold the bottom corner to match the line of the top
Squish the pointy bit at the right hand side (where the middle fold is) down flat so that the raw edges are all facing to the left.
Now you do the same thing to the left hand side, to match:
Then the left hand side
There should be a little flat section along the bottom: make this about as wide as the width of your plait.
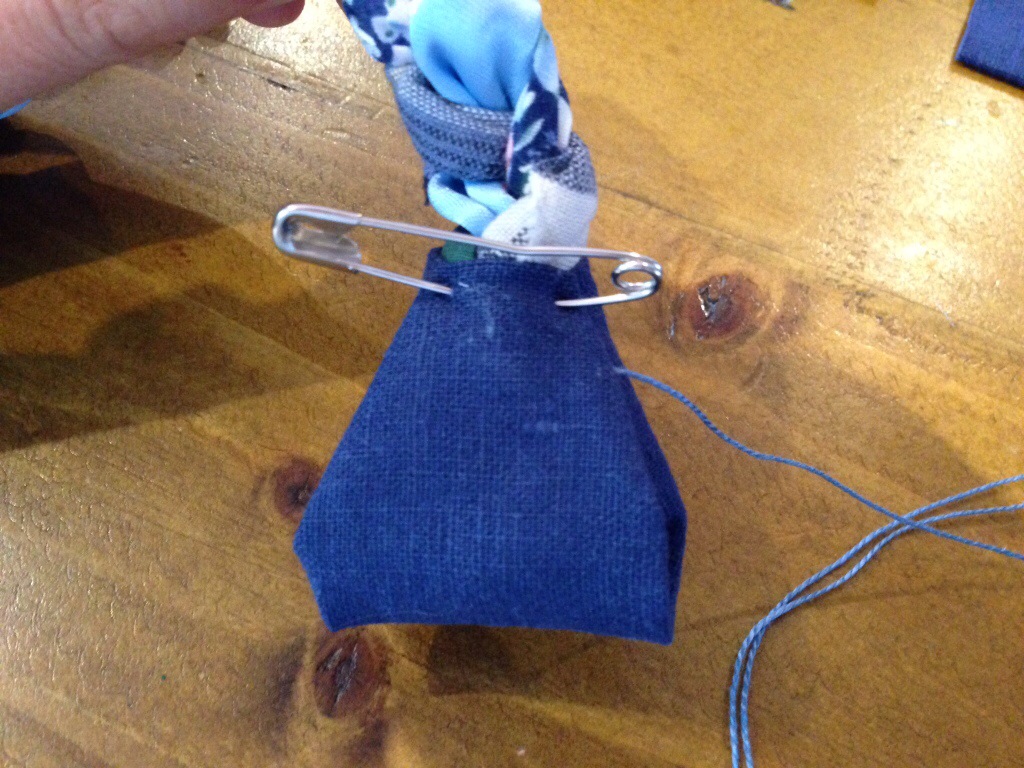
Now fold the bottom of the bootie up along the middle fold line to meet the neck of your little ‘cape’, like so:
Fold up and pin over the tacking
I pinned mine with a safety pin so I could sew it up without pricking myself.
You see how the flat part is now covering the tacked fold? You can fiddle about with the angles of your bottom folds to make sure it looks right when folded up. You quickly get the hang of this after the first couple of times!
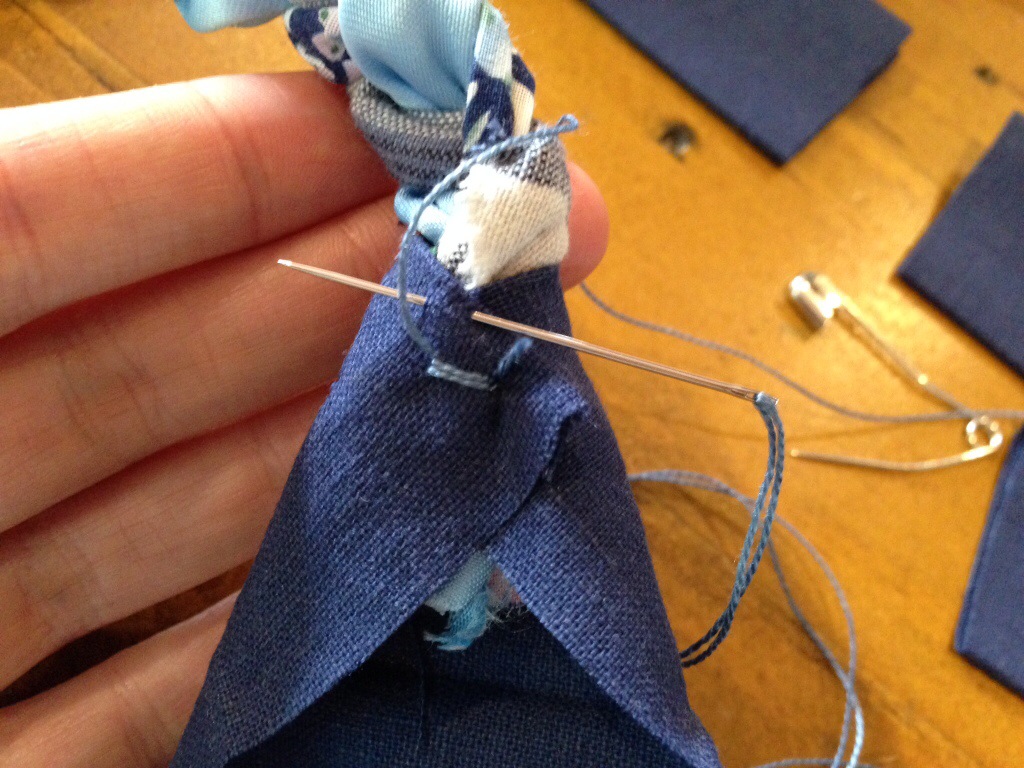
Step Three: Sew it up
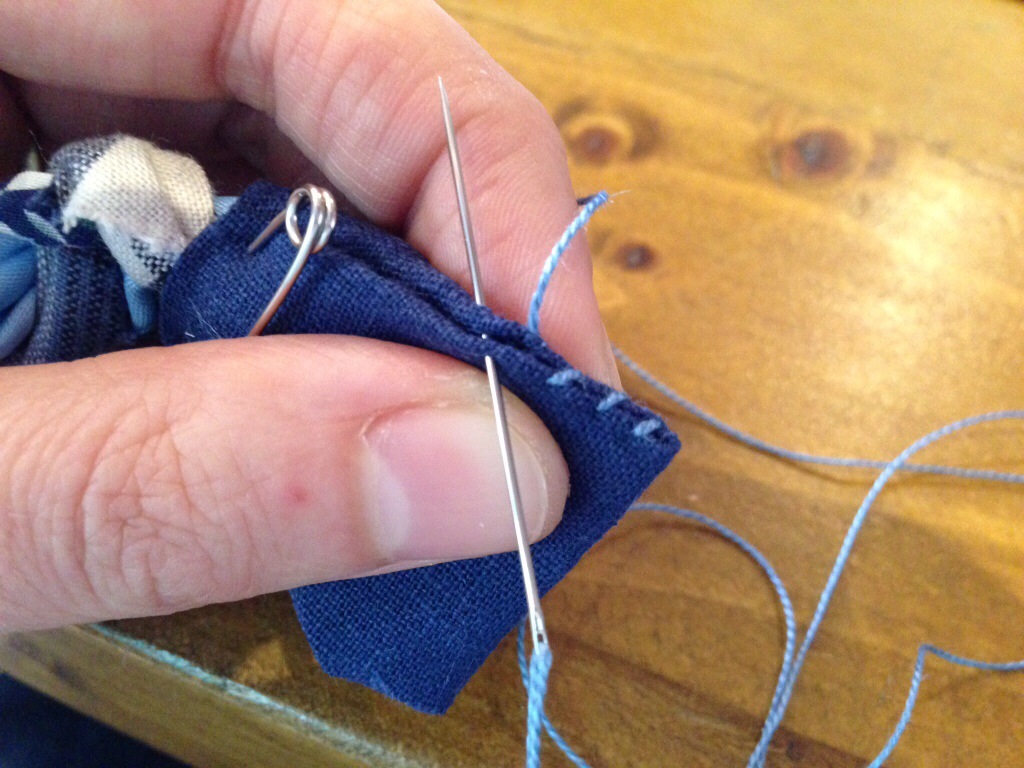
Take your needle up again and put it through the bottom corner of your bootie, from the inside, facing out. Now whip stitch around the edge of the bootie, working your way up to the top:
Whip stitch from the bottom corner to the top
At the top of the bootie, whip stitch around the entire top edge encircling the plait (ie. circle around until you get back to your previous stitching). Catch some plait fabric into each stitch instead of going all the way through to the other side of the plait.
Note stitching at the top of the bootie goes all the way around the plait!
When you return to your stitched edge, push the needle through the plait across to the other side and resume whip stitching down to the corner of your bootie.
Stitching complete on one side
And this is the back – looks the same!
At the corner, anchor the thread by taking a couple of little stitches on top of each other. Push the needle in at the corner and out through the middle of the bootie somewhere and trim it close to the fabric (this is called “burying the thread”).
Do this for all eight booties, and then stand back to admire your handiwork!
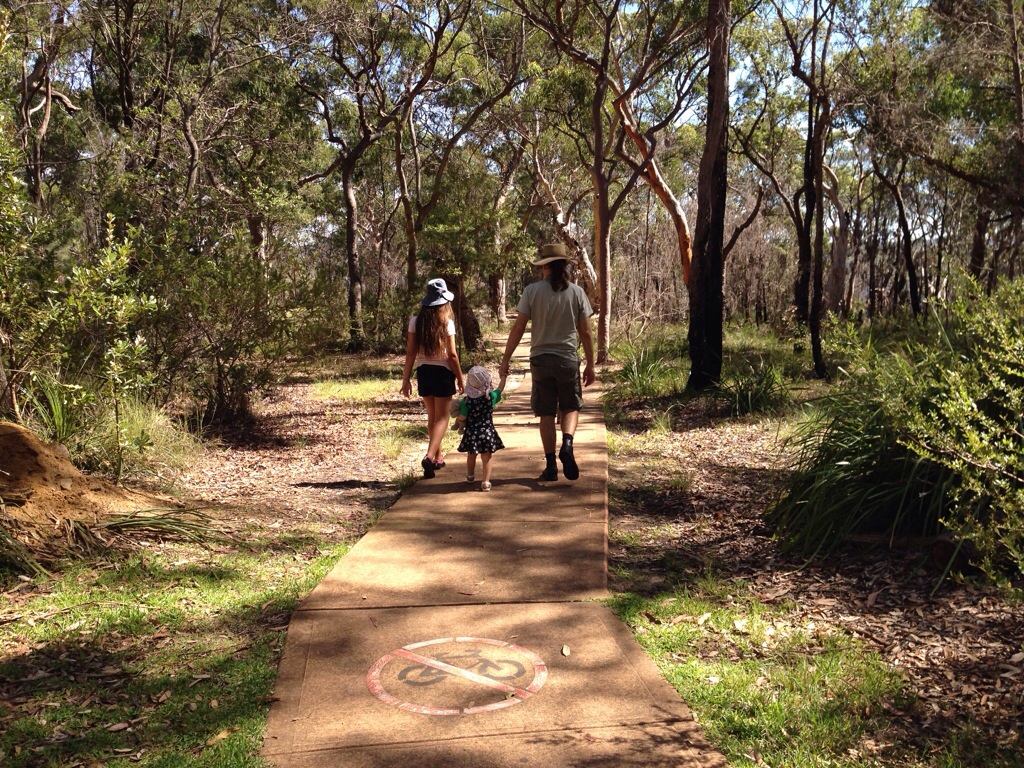
Last weekend we ducked out to a local park to have a picnic, and a short bush walk.
We are lucky enough to live right on the edge of a National Park, which means there are many bush walks within a few minutes of us. We moved here when I was still pregnant with William, so we’ve not done much long distance walking (I was either too whale-like, or the kids too small to take the steep grades). There is a lot of up and down in our area!
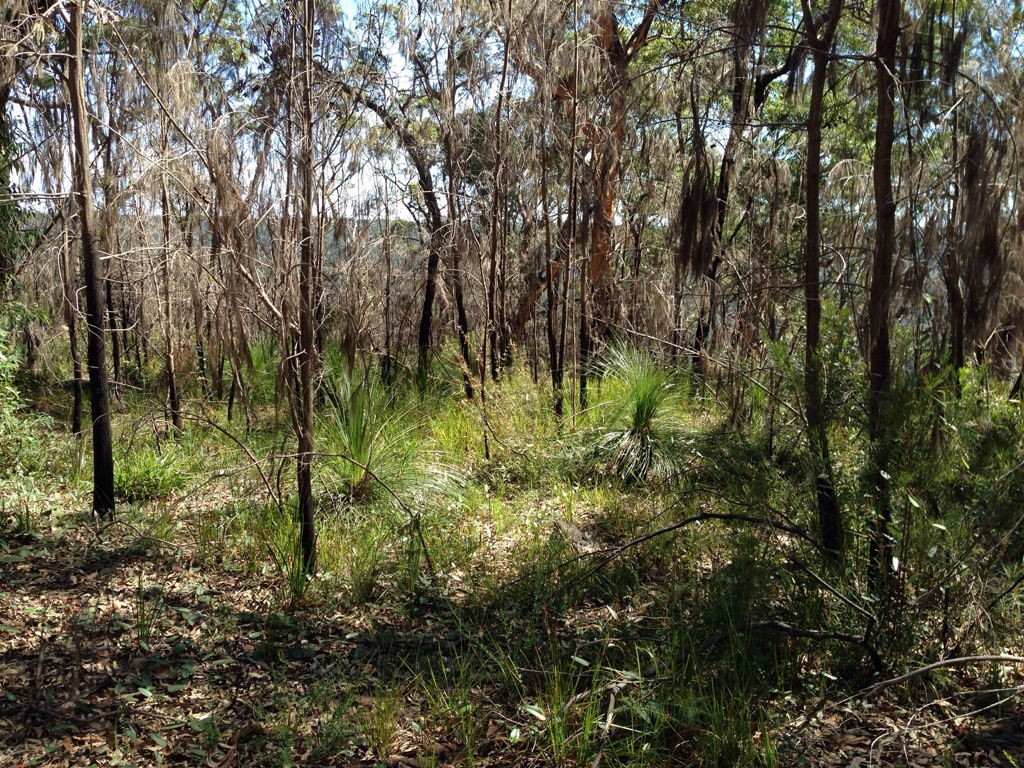
The native bush in Northern Sydney is full of gum trees of various shapes and colours: absolutely beautiful trees.
Beautiful twisty tree
There is evidence of bushfire back-burning in this area, with a fair bit of regrowth over the spring and summer. In the next picture, check out all the blackened tree trunks, and in the foreground there is a flowering “grass tree” (Xanthorrhoea). It’s a grassy-shrub with a long reed-like spike coming out of the top.
Blackened trees with rich regrowth
This area is full of grass trees, but they don’t flower very often. We have a grass tree in a pot at home, but it has not flowered yet, and I’ve had it at least ten years. They are very slow growing plants.
Undergrowth, thick with grass trees
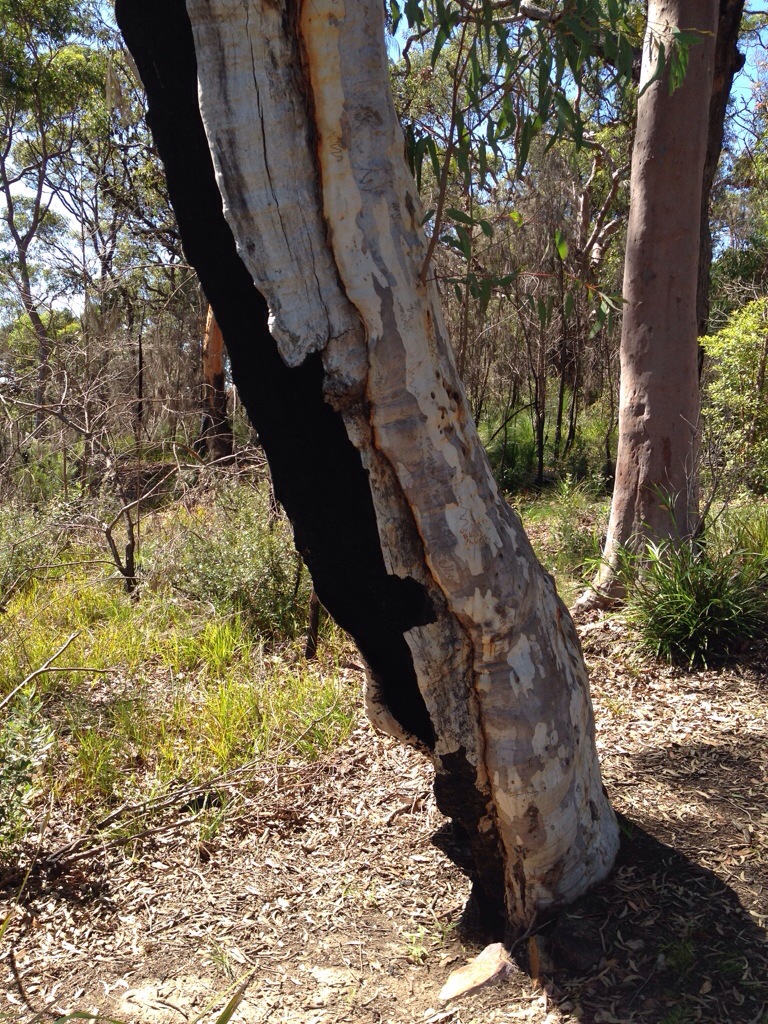
There are also a couple of really big burnt out trees that are so hollow, much of the tree trunk is missing.
That one is so big I think you could fit a park bench across it!
This tree has a peek-a-boo hole!
This one is right by the path, and William loves to peek through that hole when I’m on the other side. 🙂
This is the side of the peek-a-boo tree. I hide on the inside. 🙂
I don’t how these trees stay upright! They are so beautiful with their scribbly bark.
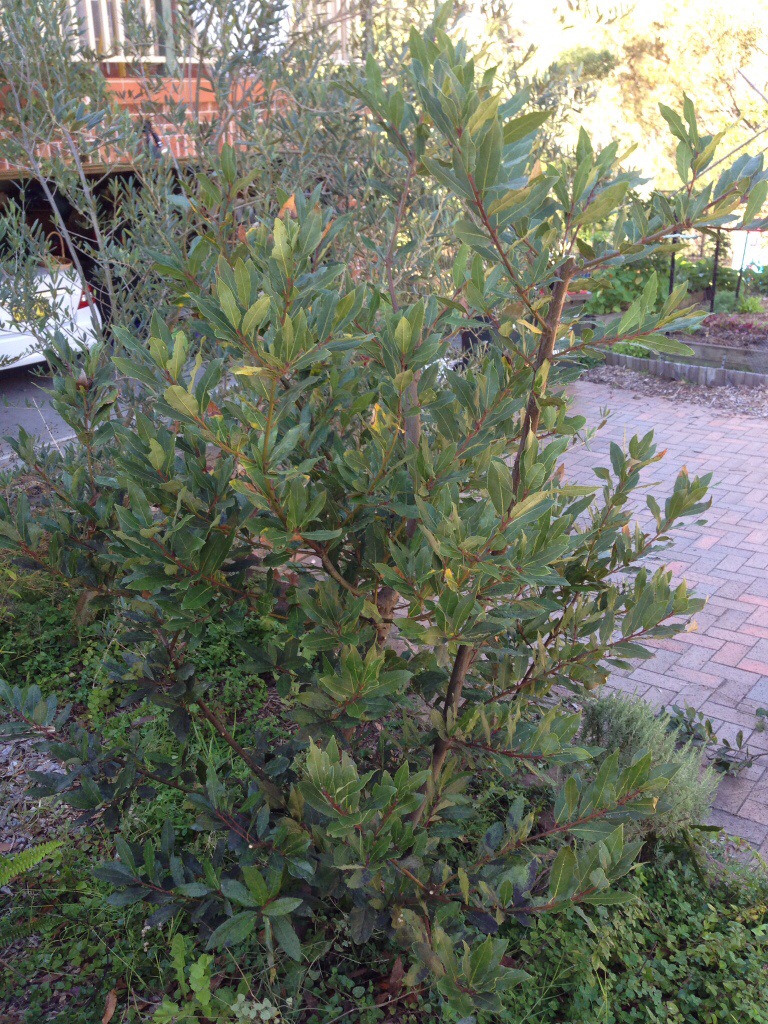
On the weekend I discovered my Bay tree was infested with Aphids. This is the first time in a couple of years I’ve seen a plant in our garden really inundated, and there was not a ladybird in sight!
Looks like the natural Aphid predators we have been nurturing have all gone quiet for Autumn, and there was nothing stopping these wretched pests from taking hold.
White aphids under a bay leaf
Black aphids — far more numerous
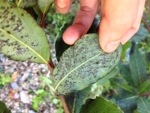
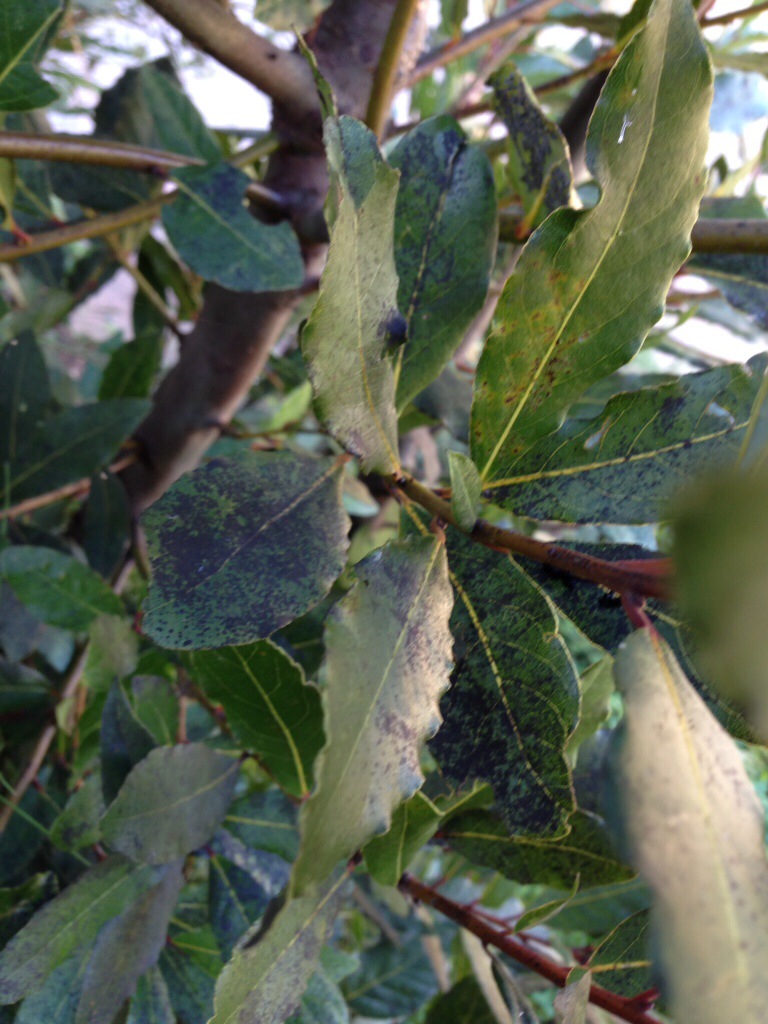
I found hundreds of Aphids on the under side of every leaf. What tipped me off? The tops of the leaves are covered in sooty black mould:
Sooty black mould on the tops of the leaves
The Aphids exude a sticky sweet substance as they feed on the leaf. This stuff is a perfect food for sooty black mould.
Well, when I saw this I was most unhappy. Just up the slope we used to have a pair of topiary trees that became infested with sooty mould and no matter what I did, I couldn’t get rid of it. We ended up removing them (they were also very, very ugly)!
I don’t want to lose my lovely Bay tree, so I went to work with my secateurs to prune the worst of the sooty black mould away. The tree won’t mind a trim, I haven’t been pruning it since we planted it and it was getting a little tall.
Bay tree, pruned
The back of the tree was much worse where there is more shade. I took a fair bit from low down and behind to let the air flow more freely here.
Once I was happy with the new shape I took some soapy water and a rag and scrubbed away at the sooty mould:
Washing the leaves with soapy water
I can’t say this was hugely successful! Maybe I should have used soapier water? Or a toothbrush, maybe. Quite a lot of the aphids wiped off from the underside of the leaves, leaving me with (still a lot!) of the more sticky ones. But I didn’t make much headway on the mould up top.
As you can imagine, washing a tree by hand takes a long time! I did the best I could, but the morning started to get away from me. At some point I realised I would have to just get on with the white oil and return to my nagging children! 🙂
I make up my own white oil using a recipe from Gardening Australia. Jerry Coleby Williams suggests you make up a batch of oil and store it for up to three months in a jar:
2 cups of vegetable oil (sunflower or cheap bulk olive oil)
1/2 cup dishwashing detergent
When you want to use it, shake this up well and add 1 tablespoon to each litre of water. I find I hardly ever need white oil any more, so I’ve stopped storing it in bulk. Instead I just scale the recipe to suit my pressure spray bottle.
I use a pressure sprayer to save my hands from pumping a trigger
Spray the whole plant
Make sure you get the under side of the leaves
I coated the leaves and stem well with the spray, especially the underside where the aphids are actually hiding. I also coated the leaves without aphids to make sure the pests don’t take control there too.
Here are a couple of spray tips:
Avoid spraying in really hot weather, or the leaves will clog with oil and suffer
Avoid spraying in hot sun, because the oil can get very hot and burn your leaves
Floppy and hairy leaves (like lettuce and lamb’s tongue) are not suitable to spray because they will burn
Gently bend the stems over so that you can get more easily at the undersides of the leaves. That way you spot where you’ve missed and the spray dribbles all over
Check the leaves after rain to see if they still feel a bit oily. If not, you might need to spray again to recoat the aphids
In a week I will check the aphids and see how many have died off, and if there are new aphids there. I will probably need to spray a total of three times, two weeks apart.
I think I will also look up the Bay tree and see what fertiliser and soil condition it likes, just to make sure it can get back to full health quickly!


 and Evie (right)")


 and Will (right)")