Hey all! I’ve been very busy since Easter, with a bunch of stuff. My professional life (as a consultant) collided somewhat with my ‘simple life’, and so I’ve been juggling what I can get done at home. One of the tasks I always choose to do myself, though, is haircuts! People are often nervous about giving someone a haircut. I would be nervous of attempting a haircut on someone else’s child, but for my own family I think it’s a total win to do this myself. Why? Even the cheapest haircut costs $15 (for a short boys cut) around here. And that’s if you pick a weekday during school hours. For a Saturday, you are looking at $25. That may not sound much to you, and we could afford to pay for haircuts if I chose to … but I don’t see the value in it, when I can do it myself. Today I managed to pin down William for a haircut. Here’s what he was looking like before I pounced:
Will’s long hair: covering up the cute.
Pretty shaggy, and you can’t tell from this photo but his hair is in his eyes. I’ve been cutting his hair for a while, and sometimes I do a really nice cut, and sometimes it’s a bit off. But I don’t mind (if he doesn’t) and I figure that the more I practise when he is little, the better I will get, and when he is older (and less wriggly) I will be doing a Pretty Good Job (TM). I was very pleased with today’s cut:
Finally finished: he looks younger now!
I’ve used a bunch of different instructions from around the web on cutting hair, but today I refreshed my technique with this tutorial, which I found described things with real pictures quite nicely. The hardest parts I find with cutting boys hair are:
He gets annoyed and complains. Mostly I pounce when he is distracted playing a game, but he doesn’t like being told to put his head up, and so the hairs go down his neck and make him itchy. I try to be quicker every time. It’s a trade-off between quick and accurate!
I don’t do very well taking the hair sections. Usually I get too much hair and I think I have to re-cut the section over and over because of that. I’m working on doing this better.
I’m nervous cutting the front part of his hair. I think this means I’m not cutting it quite right (I don’t like to take too much off and make crazy layers). I’m going to have to just follow the instructions for this part of his hair (next time!) and suck it up.
The most satisfying part?
I didn’t have to book in a haircut time, so I can get his hair washed and cut at any old time that suits us,
I didn’t have to fork out any $$$ now that I’ve spent the few dollars on a pair of haircutting scissors (bought at the supermarket),
I feel clever when I get it looking as good as this,
I don’t have that rotten feeling I get when a professional does it and I don’t like how short they cut it.
Well, what’s not to love, really? I do my husband’s hair too (his is easy, being shoulder-blade length, just straight across and no tricky sections). I also do my teenage daughter’s hair (she has very long hair — waist length — but it’s easy too). I even do MY OWN hair. Seriously. Since I wear it mostly in a ponytail, I don’t notice if the back section isn’t cut straight across. I haven’t yet cut Evie’s hair. I’m still growing it out, but the time is coming soon when it will need a trim! I may take her to a professional for that first cut, so they can save me some hair. It’s tricky to catch a lock of hair whilst holding the comb and cutting it! The only tools I use for this job are a water spray bottle, a pair of hairdressing scissors, and a comb with a skinny poky end:
Hair cutting scissors and a comb
I used to use regular kitchen scissors, and then I decided I’d try the proper ones. I will never go back to kitchen scissors. Wow, a huge difference! If you are thinking of cutting hair, do yourself a favour and buy proper scissors. Messing about with kitchen scissors is a Pain In The Proverbial! Do you cut hair? Do you cut your OWN hair? 😀
This last week has been so warm, it was classed as a heat-wave. Which feels very odd indeed, as we are just about to leave Autumn behind us for Winter! Yesterday was beautifully sunny and warm, but not hot: perfect for some chicken coop maintenance.
Every now and then (and I don’t really keep track of this, but it’s maybe once a month or so) I rake out the floor of the chicken coop and take the bits and pieces over to our compost bin. This part of the coop is where we throw our scraps down, and the chickens give it a good raking over. It breaks down amazingly fast, so even things like orange peels are barely recognisable after a few days.
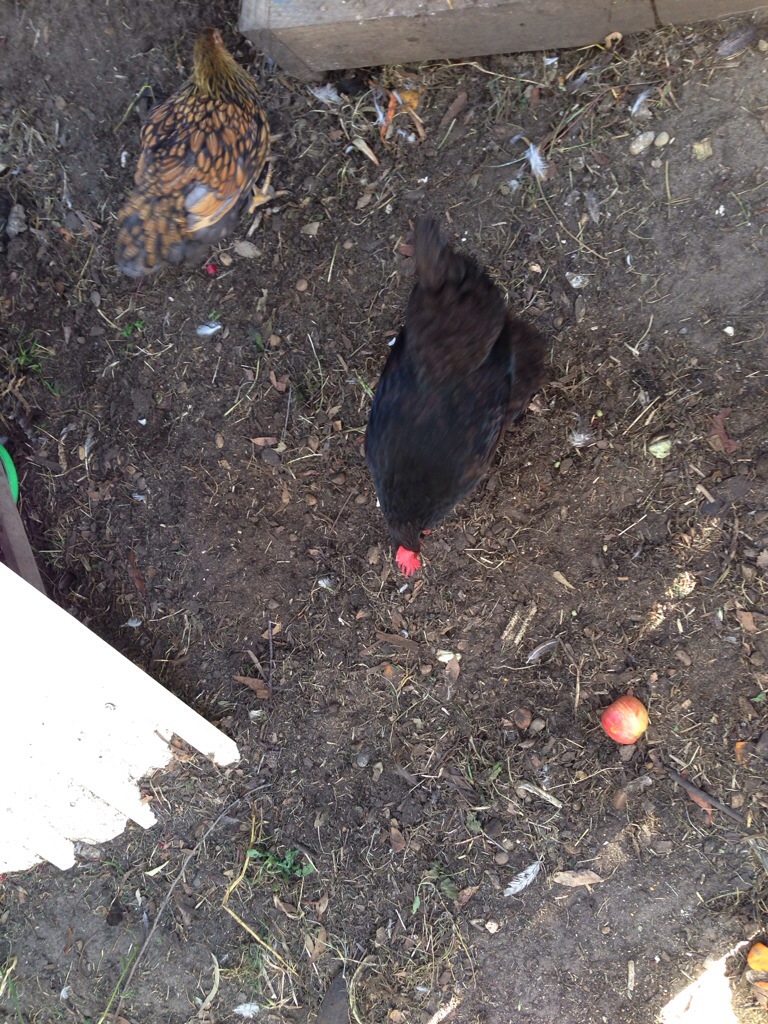
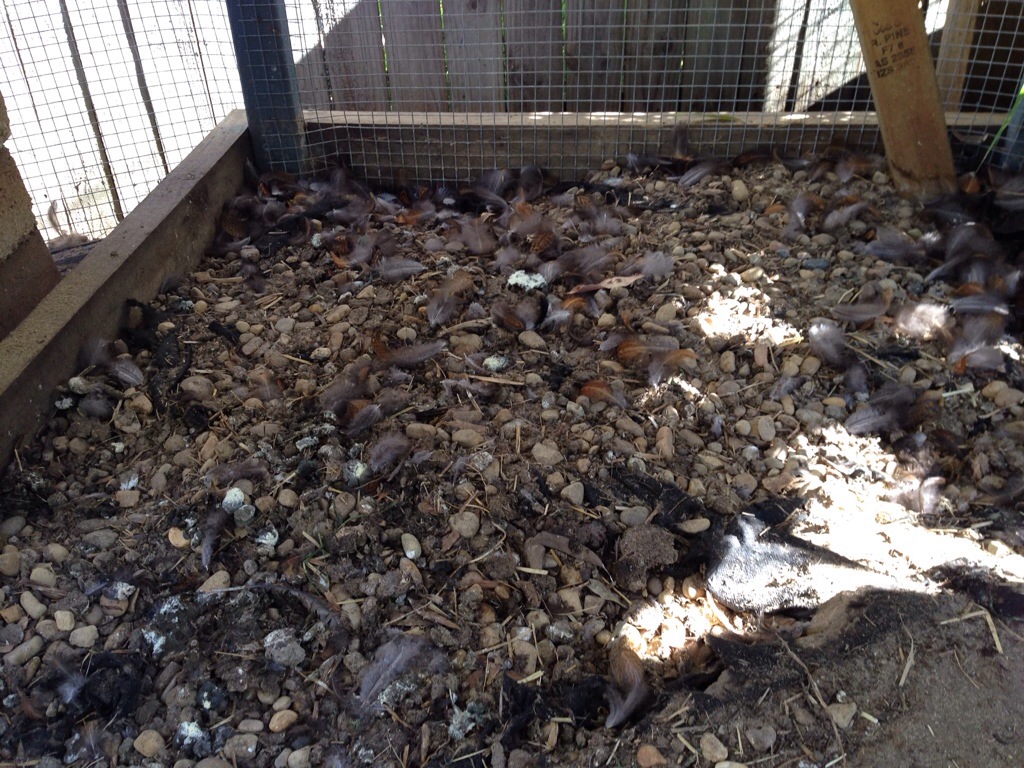
Usually when I do this, the earth underneath is moist and almost black, and full of worms: about the best soil you can probably imagine for growing stuff in. Today the soil was pretty dusty, as it has been dry here for about a month:
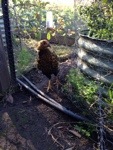
The floor after raking out. Raven has come to investigate.
Still, the chickens always have fun with the fresh floor and go nuts digging and searching for little chicken treasures.
I pile the rakings into a tub, and then I take the straw out of the nest boxes. Usually there is not really much straw in there: it’s more of a hint to the chickens that this is a “nest”, but in reality their big fluffy butts tend to dislodge what I put in there, and after a week it looks pretty bare. This time I needed to get the trowel out and scoop up the dried night poops that one of the chickens has been leaving.
In case you are wondering: the coop doesn’t smell bad: it smells kind of like a farm, but not stinky. It does smell like chickens and a bit of poop, but not overwhelmingly. This is because we let our chickens out of the coop and into a reasonably large run every day. They put their poop out into the garden and (assuming we have rain) it washes into the ground pretty fast. Even the overnight dew will tend to dissolve the smells. It is nothing at all like the strong smell of pelletised chicken manure (or Dynamic Lifter, if that brand is familiar to you)!
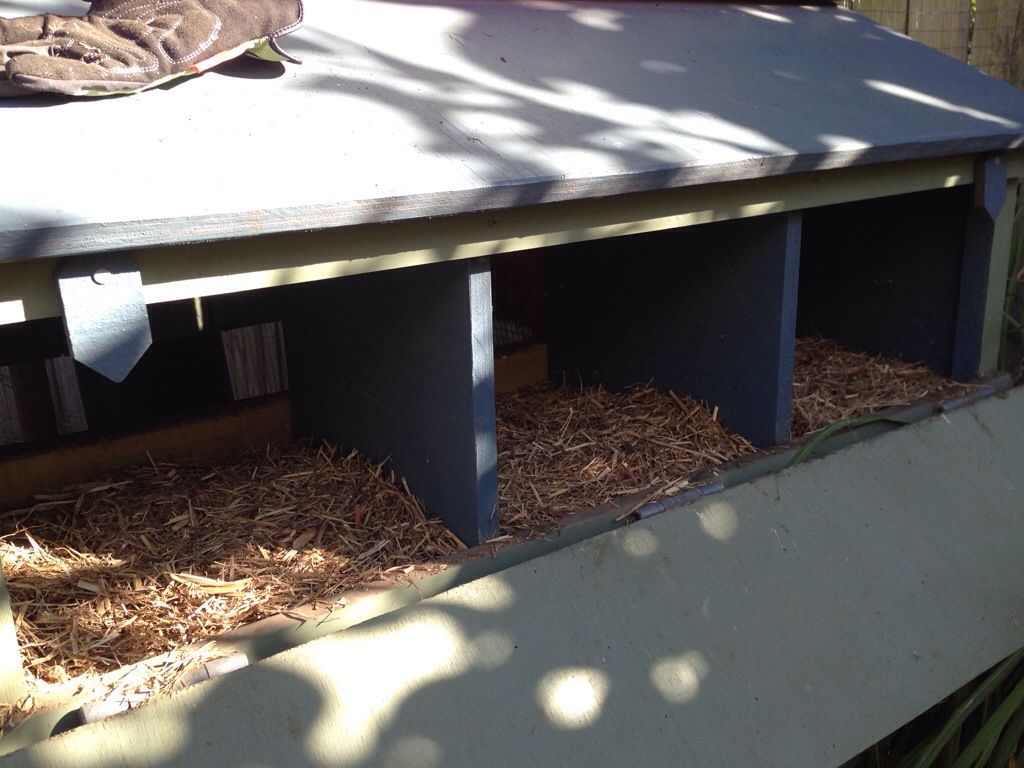
I put more straw in than usual, yesterday, because I wanted whoever was sleeping in there to be fluffy and warm. They don’t actually need straw, though. Some people have nest boxes with a sloping floor so that the eggs roll gently away and down into a collector box, even.
I designed these boxes to have a door that flops open and down, so it would be easy for the kids to open and check for eggs. I’ve been really happy with this design, as the kids can see inside without having to hold a heavy wood flap above their heads, and it is at tippy-toe height for peering in.
The two blue wood blocks stop the flap flopping open. These are impossible for a fox to open, being too far apart.
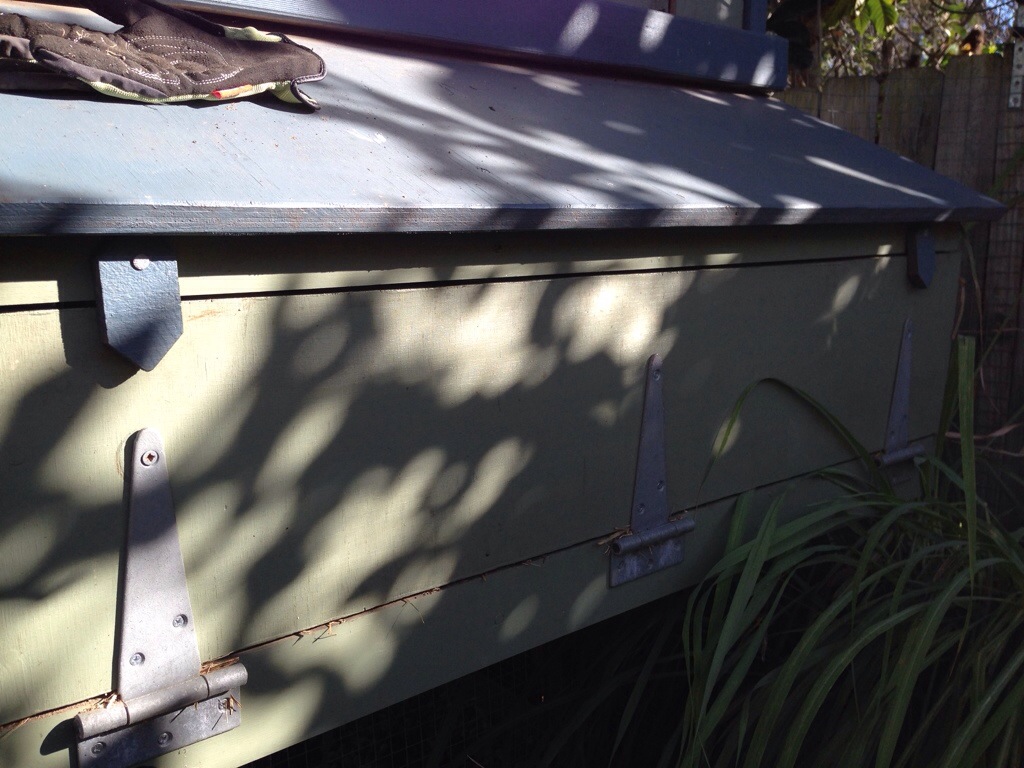
The flap fastens at the top using a simple bit of swivel wood on each end (I used some off-cuts that we put 45 degree points onto for decoration). These are screwed very gently into the top of the nest box frame, using screws with a longish shank (so that the wood pivots, but the screw bites into the frame and doesn’t unscrew itself). I forget what these screws are called, so if anyone is interested, I’ll look it up. But I digress!
The tub of rakings goes into the compost heap, and counts as ‘brown’ material, mostly. It’s a bit of a question whether to count it as ‘green’, as it has a lot of nutrient and nitrogen in it from the chicken poop (typically ‘green’) but also a lot of dried grasses and husks of dried out fruit peels and corn cobs (typically ‘brown’). So far, putting it in with other fresh green scraps has worked well for balancing our compost heap.
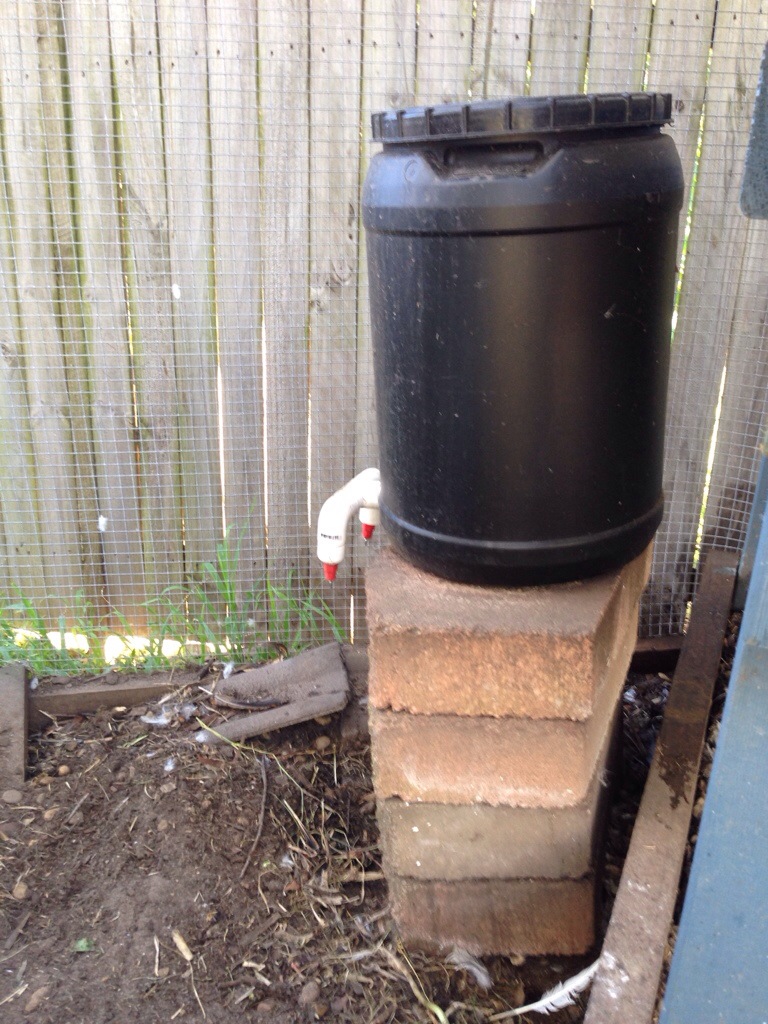
Water barrel, with red “nipple” waterers (x2). These are up high so the chickens can reach comfortably.
I also put fresh water into the new waterer, which I do semi-regularly. I put a whole bucket in at a time (so there is enough pressure in the barrel to stop the drippers from constantly dripping) but I check regularly to see that the water is still fresh. The barrel is black and in the shade, so it doesn’t grow green slime. The top is also sealed, so nothing gets in there, like dead insects or fallen leaves. I’m cautious about this, because I know chickens need fresh water.
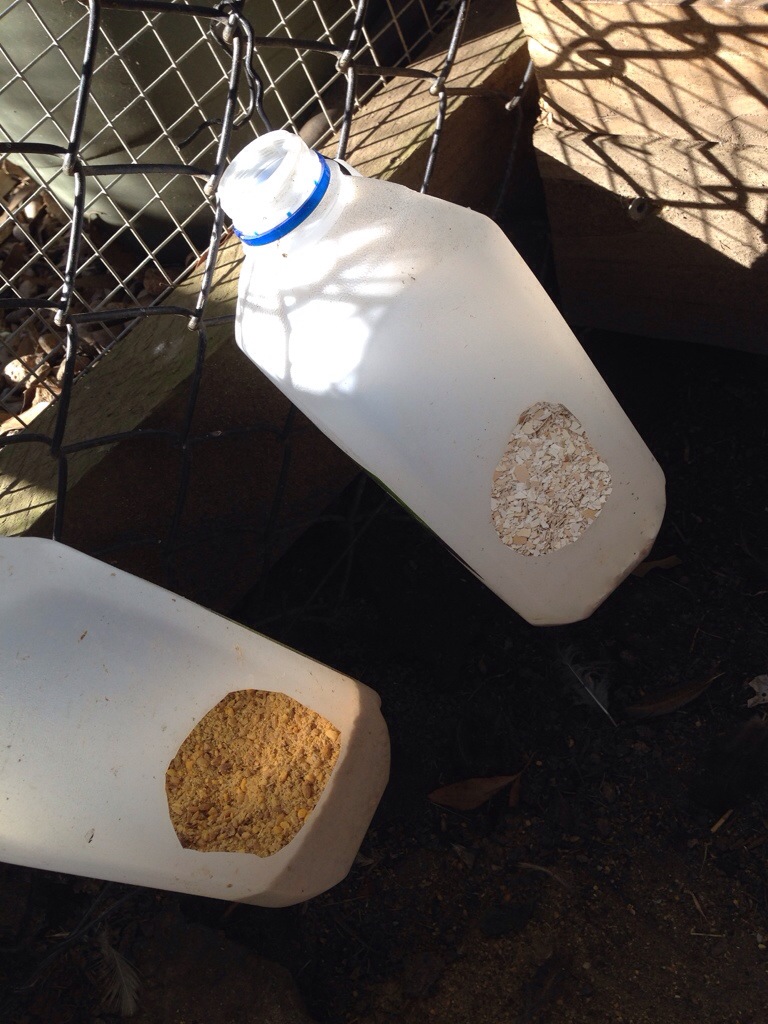
Old water containers, now holding chicken layer mash, and crushed eggshells
If I left water in one of these feeders, in contrast, it grows green slime within a day or two. We use these feeders now just for mash (on the left) and eggshells (on the right) or occasionally for water, if I’m concerned one chicken is being kept from the other waterers.
We dry out our eggshells on a tray in the green house: it can get really very hot in there on top of the metal work bench! The eggshells are already washed before they out there, so there’s no left over sticky egg on them. We crush the shells up into reasonably small pieces using a mortar and pestle. Really any thing works for this, including a fist in a garden glove, or a rolling pin in a cookie tray, or whatever. It is said that some chickens will eat their own eggs if they get the idea they are food. So we try not to feed them anything that resembles a whole egg or eggshell.
Dried eggshells, ready to crush
A few moments gives nicely ground shell
There’s not much more to the chicken coop maintenance: sometimes (maybe twice a year) I take the door of the coop off and scrape out the perches. And I need to top up the sand underneath the perches as it has been scratched away and undermined by tunnelling rats. Since I don’t have any bags of river sand on hand right now, I will do that another sunny day.
Here’s a bunch of other stuff happening in the garden at the moment. You wouldn’t believe it is actually Autumn from these photos. There are very few flowers out, but what is there is still cheerful! Enjoy.
Naturalised Borage growing along the edge of the orchard
A close-up view of the Borage flowers
Random, cheerful daisies
Our “pretty” spot – the weeping maple. There is a cheerful stretch of nasturtium reaching under this space at the moment.
The pineapple sage is looking very bushy and happy
The asparagus foliage is starting to yellow and fall over
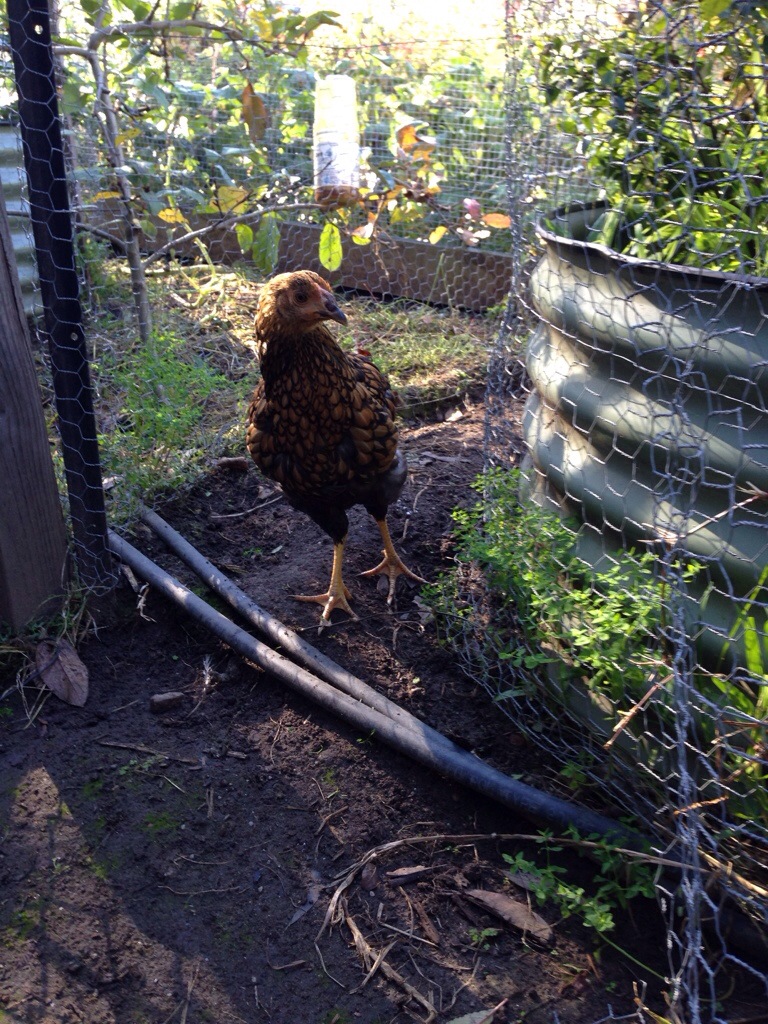
All the chickens lined up for this one. Isn’t Cricket (the gold-speckled one in front) getting big?
Here Cricket demonstrates how the chickens drink their water
A close up of the side-shoots we get after the main broccoli is harvested. These look healthy and tasty!
Another yummy looking broccoli head
This broccoli is infested with Aphids. It is more in the shade, and not growing as strongly (especially now!)
This perennials bed is looking rather overgrown. The pink lavender (left), purple sage (hidden in the centre) and pineapple sage (right) need to have some weeding done around their bases, and maybe a cut-back!
Since our little Charlotte departed, we have been very busy tending to our small flock. Cricket (our other little chick who came to us with Charlotte) was also sick, although we only noticed after inspecting her closely — she seemed to be perfectly well, and growing bold amongst the other chickens.
We took Cricket up to the vet and came home again with a bag full of medicines: antibiotic pills, antibiotic liquid, and some worming liquid. The vet showed me how to do administer the pills and squirt the liquid, but I don’t mind telling you this was pretty nerve-wracking to do! His advice was to keep her warm and separate from the flock, so I needed to make some housing quick smart.
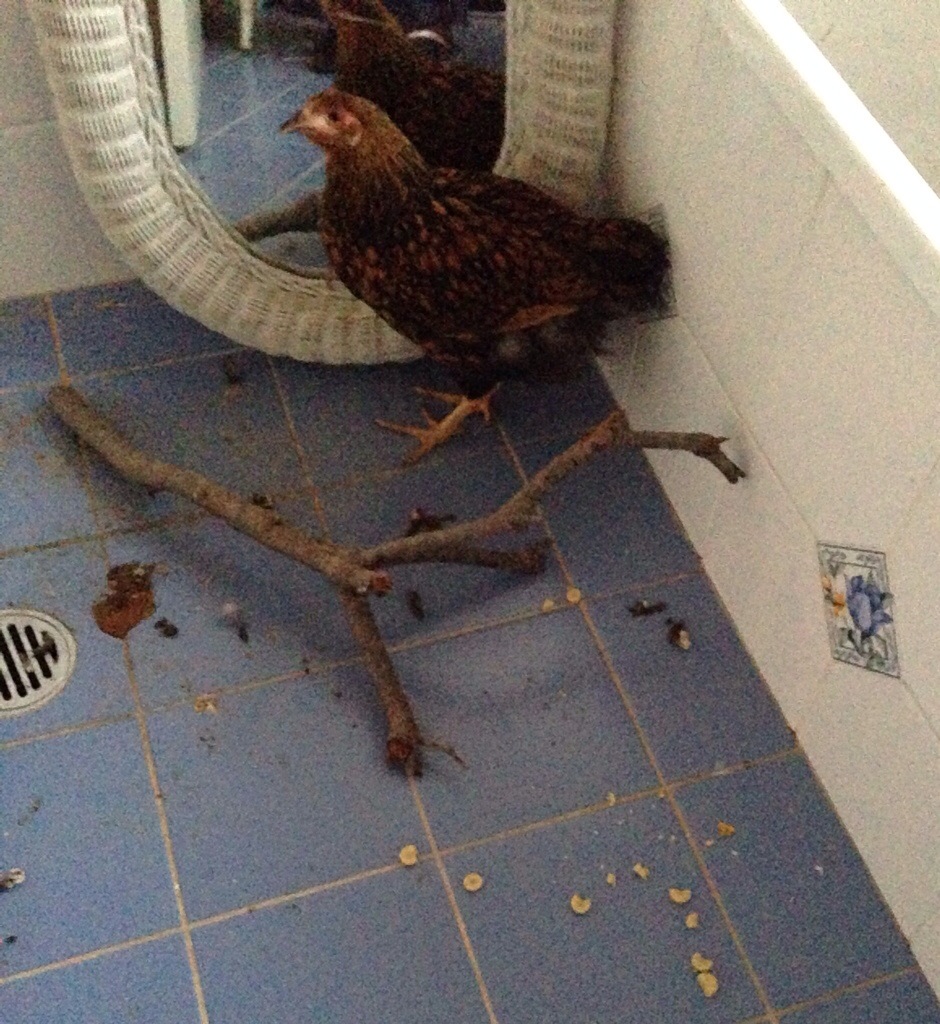
Enter, the upstairs bathroom:
Cricket installed in the bathroom, with a perch and mirror for company.
That picture was the “modesty” version taken early in the piece. After a week of living in there, you can imagine how bad it looked! The key thing to remember here, is that chickens can fly and they like to roost up high (think windowsills). They also have no control over where they go, so there’s no chance of using Kitty litter!
Luckily this bathroom is not our only shower space in the house, we also have an ensuite shower. It was an interesting week!
Stephen and I managed to give the pills and liquids by opening her beak and popping the stuff down. On the second dose we almost choked the poor thing with a pill going down the wrong way, and after that every dose for me was like an execution. I hope I don’t have to do that again anytime soon!
Our efforts were rewarded, though. Cricket started out weighting 950g and a week later had put on 100g — 10 percent of her body weight! Very nice. She was also pretty keen to get out of the bathroom, as you can imagine.
Chickens don’t like to be solitary, so we made sure she had a mirror in there. That way she had someone else to hang out with, even if they were an irritating copy-cat friend. The perch was for entertainment, and she did spend a lot of time on it. But by the end of the week she was sleeping on the windowsill and flying around, ready to be out and about.
“Hi mum, watchchya doin’?”
She is much friendlier now! She comes up to me and runs around my feet just like Raven does (the boss chook). Hand-rearing is wonderful for bonding! 🙂
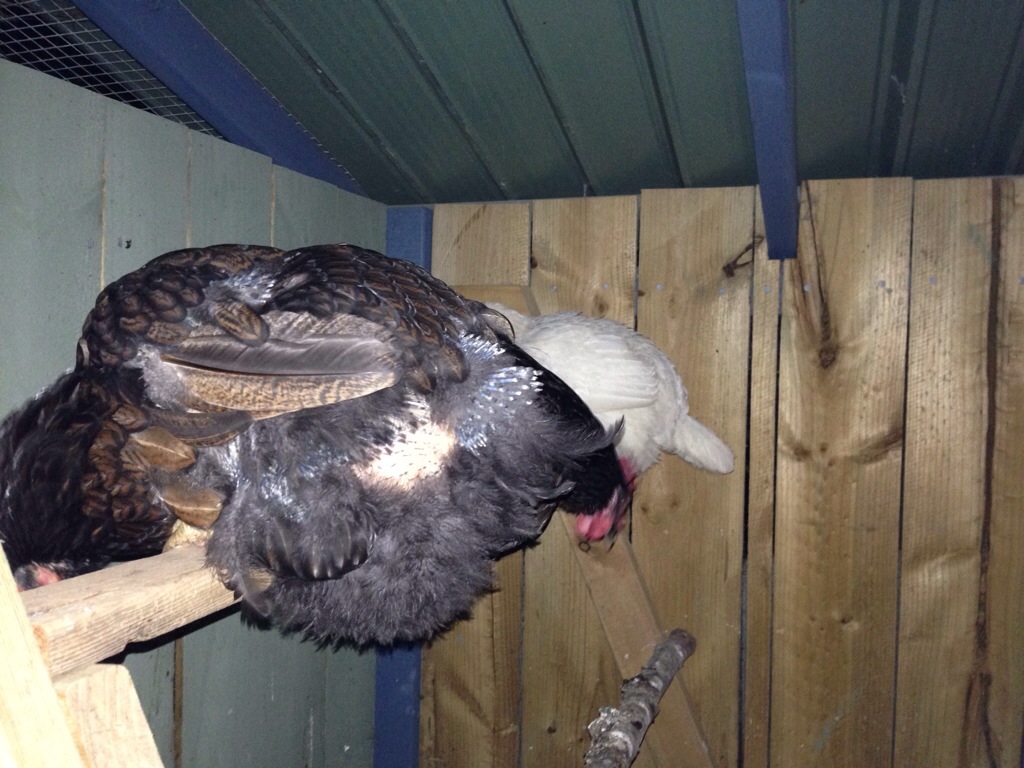
Meanwhile, in the coop, our other chickens seemed well, although a few days into Cricket’s confinement I was alarmed to see a lot of this going on:
Feather explosion?
Turns out that Harriet was off the lay, and losing feathers amazingly fast!
See the big bald patch? Where is her tail gone?
Parts of her were starting to resemble a supermarket chicken, but googling revealed that this is just their annual moult, albeit a dramatic one! She very soon started to show new feathers on her bald patches, so I ceased my worrying and started taking amusing pictures of her feathers growing back in. Check out her tail! She lost it completely, and then it came back pretty fast:
Her tail is reduced to a few wispy fluffs, and some new “pin” feathers
Pin feathers are now growing fast into a new tail
She is starting to look a little more plush, now. But they sure look ratty during the moult! Matilda (our white leghorn) is now doing the same thing, and she looks like she’s been dragged backwards through a bush. Worse – some of her fluffy wing feathers are gone, leaving just the really long flight shafts. She looks like a zombie chicken! (She is very hard to photograph, being very skittish, so no funny pics for you!)
Both the moulting chickens have chosen to sleep in their nest box whilst they have hardly any feathers, and I don’t blame them! This means I’m cleaning out the nest boxes a lot more than usual, as they are doing their night soil in there. *sigh*
Cleaning up all that muck has given me a poop-exhaustion. Lucky I don’t have to wipe any one else’s bottom, right?
Wrong! I also had to clean up our visiting bunny rabbit, who was having sloppy poos everywhere. Turns out he was so picky with his diet that he was only eating the ‘treat’ food, and not eating any hay or greens at all! I’m not very familiar with rabbits (well, I wasn’t then) so I took him up the vet to have him checked, and realised I needed to change his diet.
I came back home this time with a much cleaner and slightly trimmed rabbit, plus a powdered probiotic (basically, rabbit yoghurt) to help him rebalance his insides. Ayee, what a couple of weeks it has been!
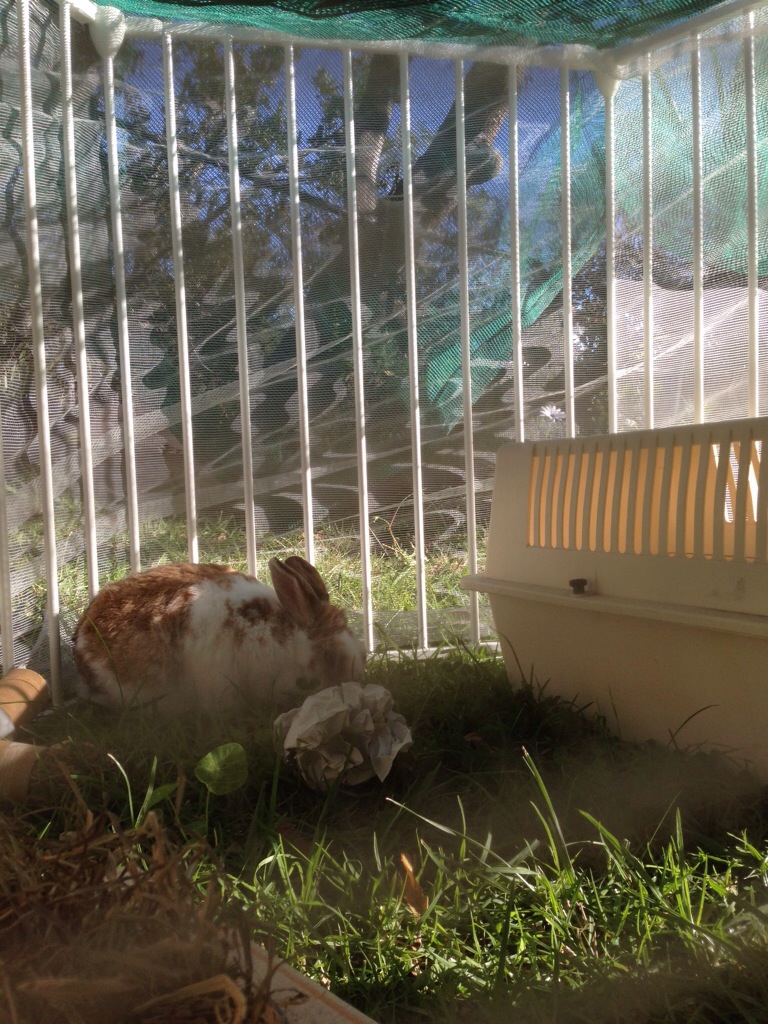
Here’s Charlie playing with some scrunched paper, on the lawn
Here he is, enjoying some outside grass time, with our children’s play pen and some make-shift cardboard toys. He seems to be much better now, with normal looking poop. Yay!
I hope you are all enjoying some warm Spring weather, or some colourful Autumn leaves, wherever you happen to be. 🙂
We are harvesting our broccoli at the moment, and this year has been the best yet! Previously we’ve managed to get just one broccoli plant to produce a “head” of broccoli, out of about eight plants. This year, I think we have about five plants, and three good heads! Yay. 🙂
How good do these babies look?
Best broccoli yet!
Peek-a-boo Matilda 🙂
These guys took me by surprise, as it seems like yesterday they were still pretty small:
Broccoli at the end of April
As they were at harvest
Turns out a whole month has flown by since I took that first picture! Boy, have I been busy.
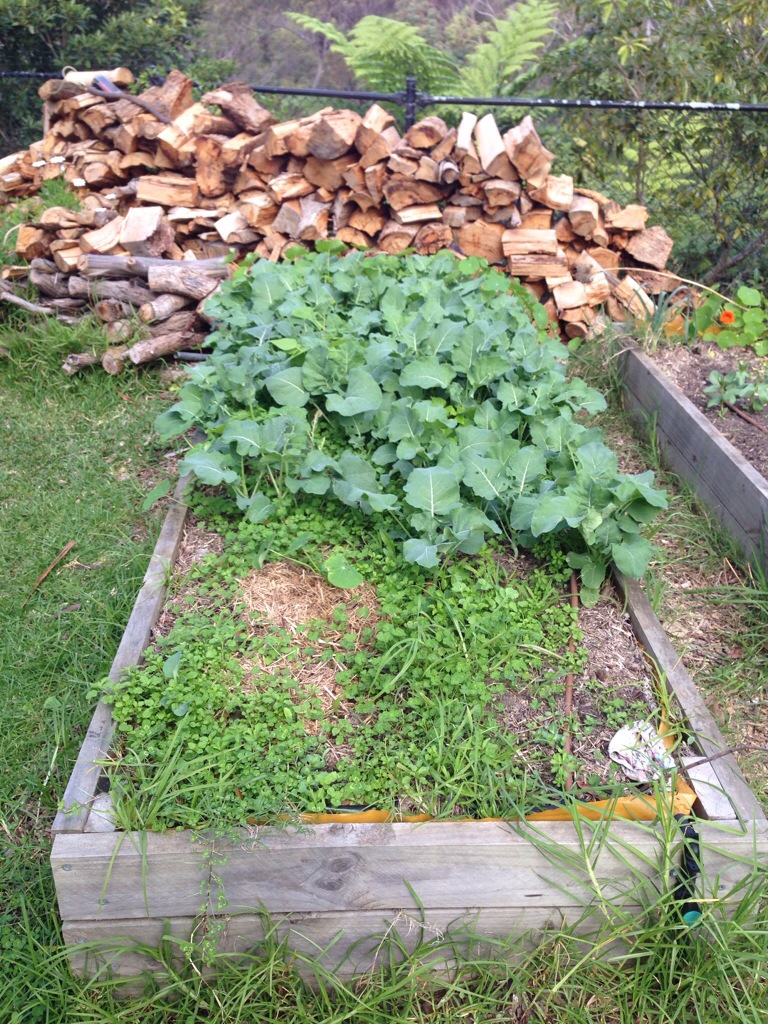
Meanwhile, in another part of the garden, our bed full of “green manure” has been producing a lot of baby broccoli (from where we let the seed fall last season). I’m amazed at how many seedlings we have coming up! They are hugely enjoyed by both the chickens, and our visiting bunny rabbit (he is going back soon though, and it will be hard to find something for him fresher than this!)
The broccoli is at the back, clover at the front.
Every day I take about six plants out of that patch and it barely makes a dent. The bunny is getting two or three (depending on size) and the chickens get five or so. The lucky ducks also get a bit of Cobblers Peg in there, which is a fantastic forage food for chickens (you may know this plant as Pygmy Spears). This is a pervasive weed in our area, spreading easily via the little woody seeds that catch in clothing and fur. But whenever it comes up, our chickens mow it down, they love it. 🙂
This was the fate of two of those heads of broccoli:
Colourful steamed broccoli
See how vibrantly green the stems are, all the way down? With commercially grown broccoli, even with organic stuff (although to a lesser extent) the stems tend to be thick and white. Partly this may be because our heads are small and loose compared to a “proper” head. Whatever the reason, it means our broccoli is absolutely full of delicious flavour. That goes double for the little side shoots we get over the next few weeks, a little bit every day. Just fantastic!
Sautéed in butter with pine-nuts. Perfect satisfying snack!
I remember when Isobel was in early primary school and we visited some friends of ours for lunch one day: we were discussing gardening, as our host was thinking about starting some veggies. Isobel piped up exclaiming, “Mmm, grow broccoli, it’s YUM, YUM!”. The look on my friend’s face was priceless.
I’ve been promising for a while to document how I look after my wool nappy (diaper) covers. Well, here it is at last!
Caring for wool covers is quite a different story to your typical laundry process. This is mostly because you hardly ever have to wash them! This is just amazing, in my opinion. I used PUL covers until they wore out for my first baby, and there is no way you would go even two days without washing a PUL cover. They smell mousy and rather yucky after a day of swapping covers. Wool covers don’t smell much of anything, and feel maybe faintly damp when you take off the nappy.
How many covers and how often do I wash?
Here’s a little comparison of wool versus PUL, which are the two main methods of covering up a cloth nappy:
Wool — Right now, I need two covers. I alternate them during the day, and air them both over night (inside out). I am currently using disposables at night, so I don’t use any cover. If I was doing cloth at night, I’d probably use a third wool cover. I wash all my covers every 6 weeks or so, unless one gets a poo, in which case I wash it straight away. 6 weeks!
PUL — I needed 7 covers. I alternated two during the day, then one over night. The next day I would use another two, plus one over night. I would wash as many dirty covers as I could (5 of them) during the second night, and I would line dry them in the morning of day three. I needed a 7th PUL cover for wearing on day three.
In reality I have about seven wool covers, but most of them have shrunk and I don’t use them any more for my big girl, almost ready to toilet train. I’m using the two burgundy ones I made recently, and the pink cover I modelled them on. That’s truly it! And I’ve washed them twice since I wrote that post.
I can make two or three covers from recycled wool for practically nothing ($3 at a thrift store, or nothing if it’s an old sweater from the cupboard). Each PUL cover I paid $14 for, and I bought three sets (so I bought six in Small, six in Medium and seven in Large, having learnt the lesson of wash day). That’s a total of $266 for all the PUL covers. Can you see why I didn’t replace them when they wore out?
Okay, this is diverging somewhat from nappy cover maintenance into a comparison of PUL versus wool. Back on track!
How to wash Wool
I’m going to assume if you’re still reading that you have some experience washing woollens. Wool nappy covers are no different to any other woollen garment: you wash them in “Wool Wash” liquid, and you use tepid water, trying not to rub the wool too much (or it will felt and possibly shrink). If your washing machine has a Wool cycle, then you can use that; otherwise it’s hand wash time.
The good news is: they aren’t hard to wash. It’s not disgusting to hand wash a wool cover. There is the occasional poo incident which if you are doing cloth nappy covers, you already know is going to be less fun. But poo in disposables is also disgusting! I’ve seen grown men gagging over changing a disposable poo nappy. Nobody is immune to the gross!
The key thing is to rinse off any deposits straight away so that it doesn’t have time to dry onto the wool and make it difficult to remove later.
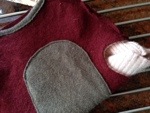
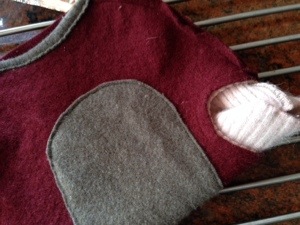
Waterproofing the cover
This is my favourite cover now
Rinsing the wool cover will probably not remove the Lanolin coating, but washing it with wool wash certainly will. The Lanolin is what makes your wool cover waterproof: without this, you just have a time delay between the wee on the inside getting to the outside.
Wool will absorb a lot of liquid. I know this because for ages I was doing the wool nappy covers wrong, and whenever I took the cover off it would be very damp (to the point where I might have squeezed it out if I was feeling sufficiently insane). This meant that I was using all of those seven wool covers each day, and getting pretty annoyed with how wet and stinky the covers were getting.
I thought I wasn’t waterproofing my covers correctly, but really I just didn’t have enough nappy inside — I needed two flat nappies instead of one. Simple! And yet I didn’t realise until I tried two nappies just how wrong I was before. D’oh!
To lanolise a wool cover you need:
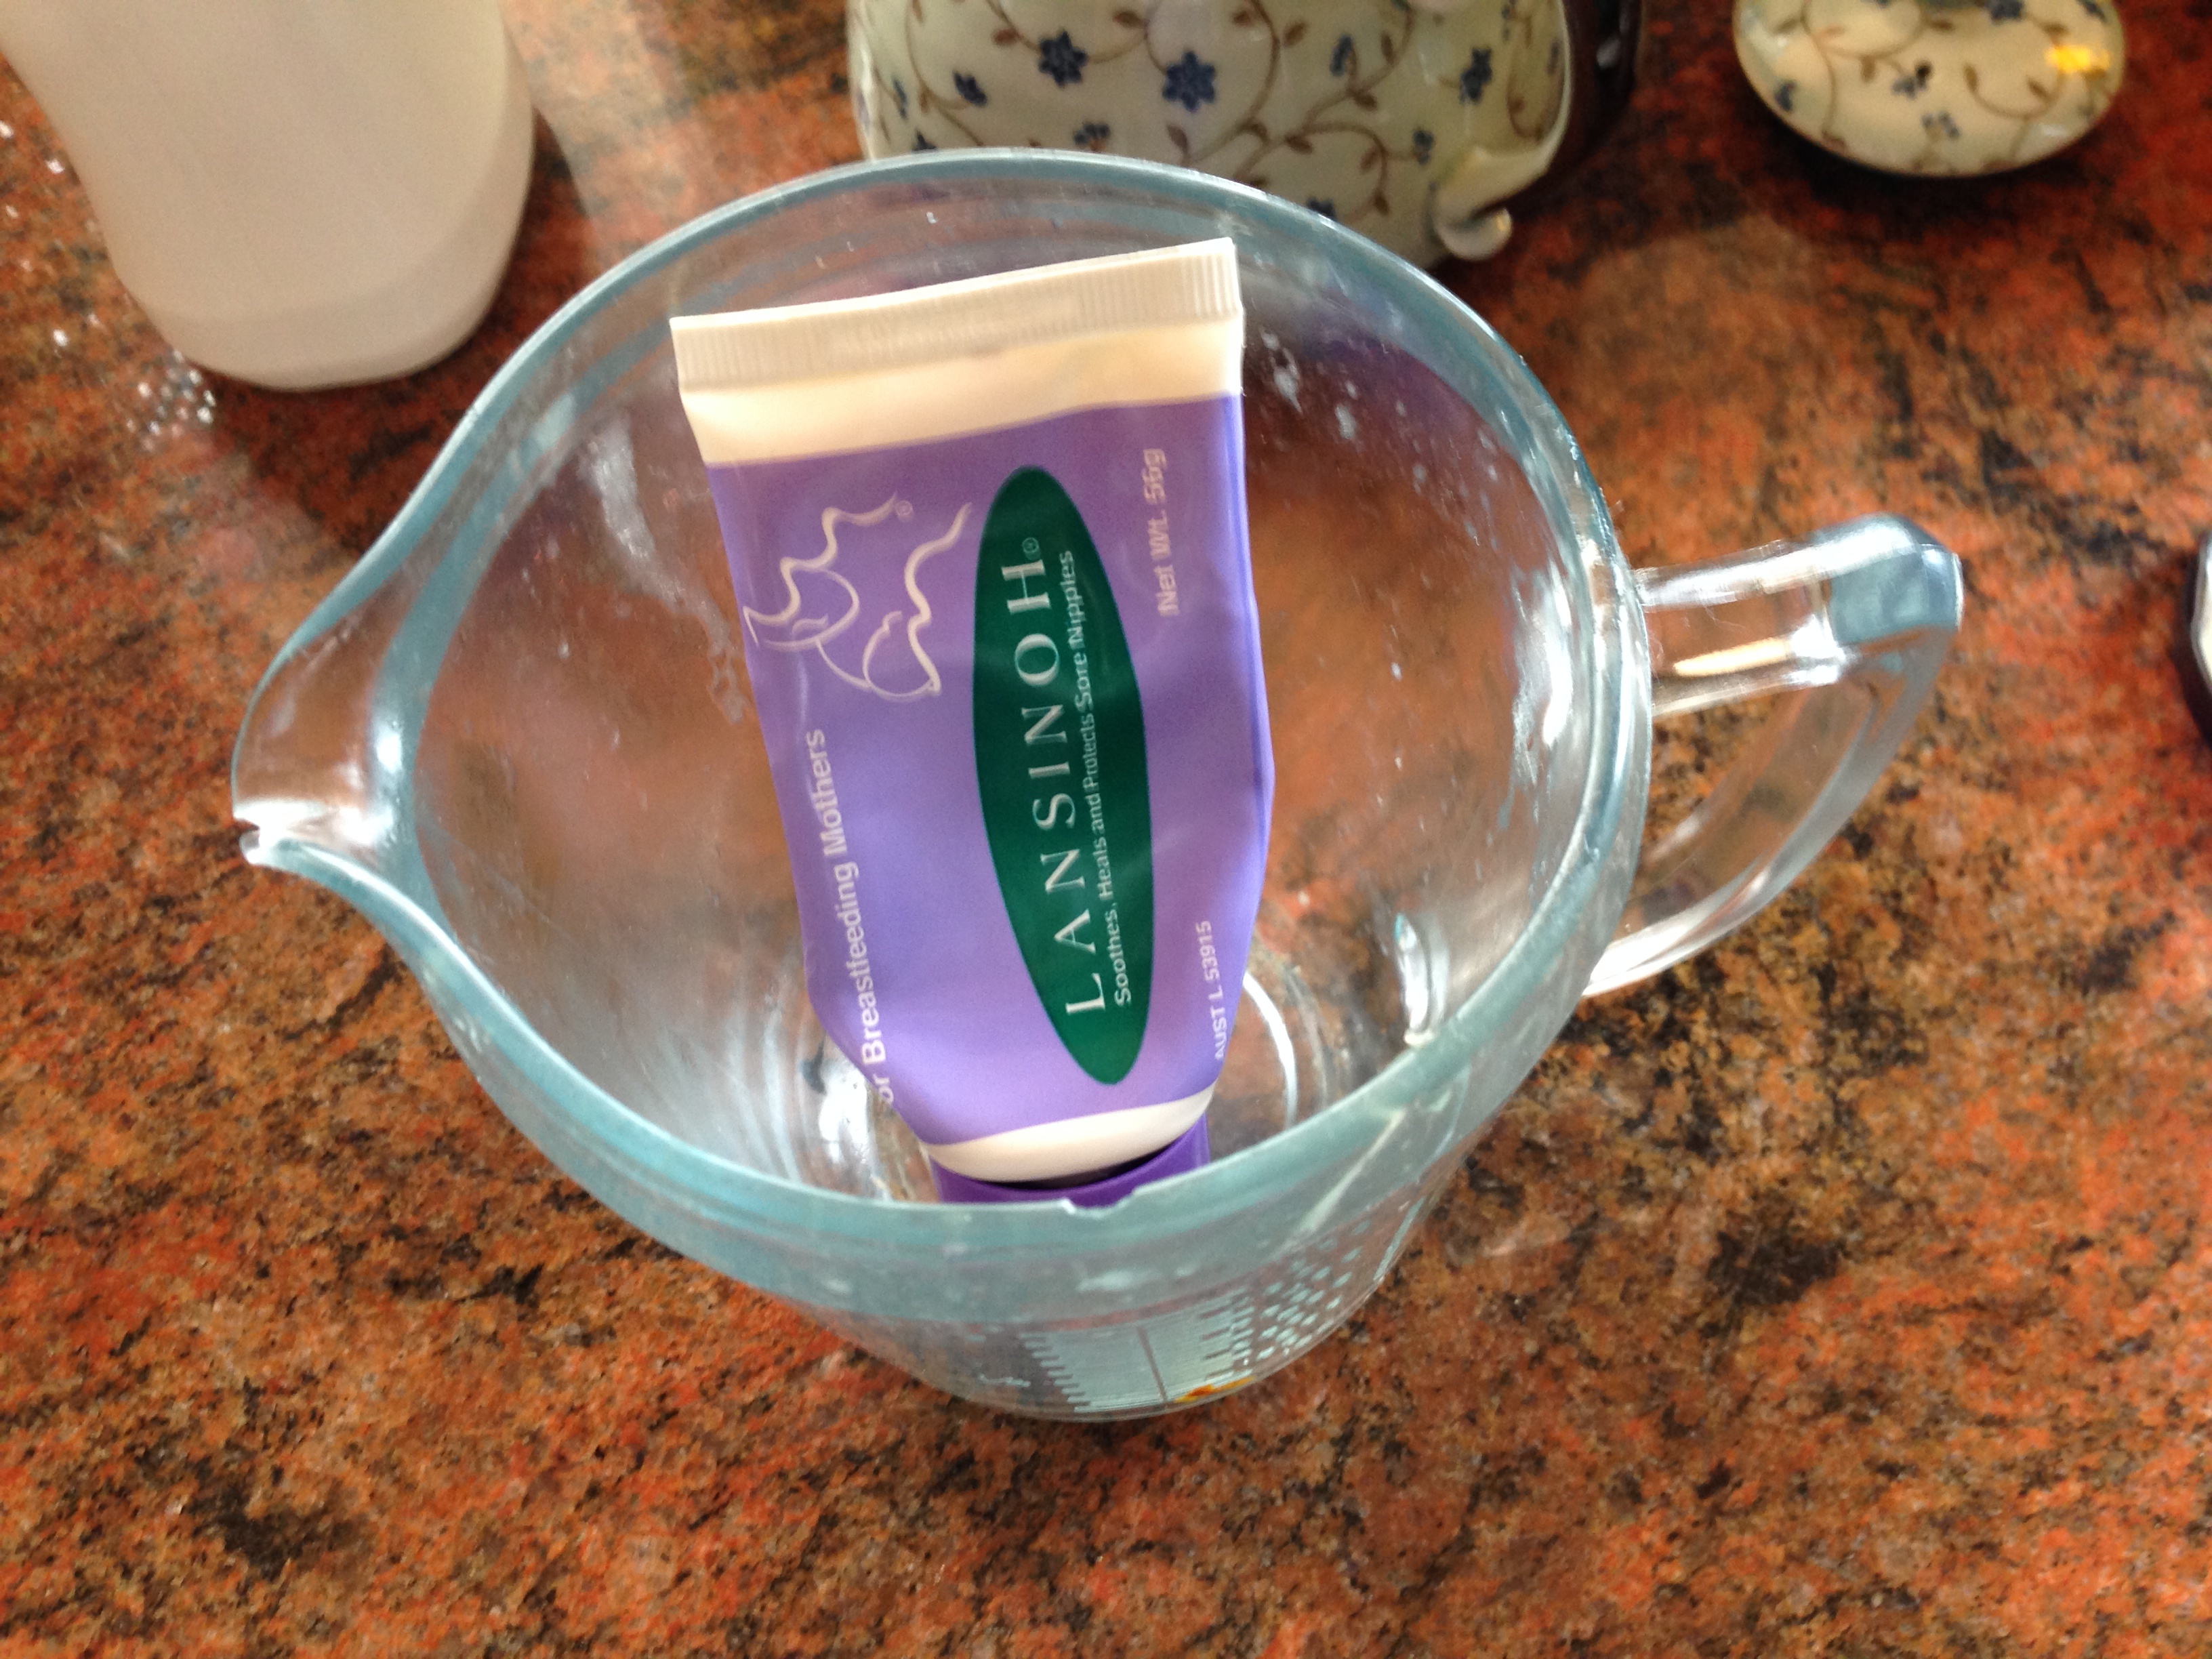
100% lanolin. Commonly used products are Lansinoh and PureLan. I have a small tube of both from when I first had William and they’ve lasted all this time. (4 years so far). Available at the chemist, or sometimes in the supermarket.
A clean nappy cover or covers – I do mine damp. Dry is okay too, though, just use enough water.
A bucket big enough to hold them
A small jar and a measuring jug
A drop of washing up detergent
To get the lanolin out of the tube it is much easier to soften it first. I do this by sticking the tube into a measuring jug half full of boiled water. My measuring jug is pyrex, so this is okay, it doesn’t crack the glass.
Pure lanolin
About thirty seconds later, you can easily squeeze out a bit of lanolin – it’s gooey like honey. They say use a “pea” sized amount, but honestly I use a bit more, like a bit of a dribble (almost as much as could cover the back of a teaspoon).
I add the lanolin to a small jar of hot water, about half full. A drop of dishwashing detergent goes in too, and then you put the lid on and shake like crazy. This turns the liquid cloudy, and emulsifies the lanolin.
Lanolin floats on water
Emulsified
Basically it makes the lanolin spread around the bucket and go all over your nappy covers – if you don’t do this step you will end up with splodges of lanolin on your nappy, and leaky bits where the lanolin didn’t coat.
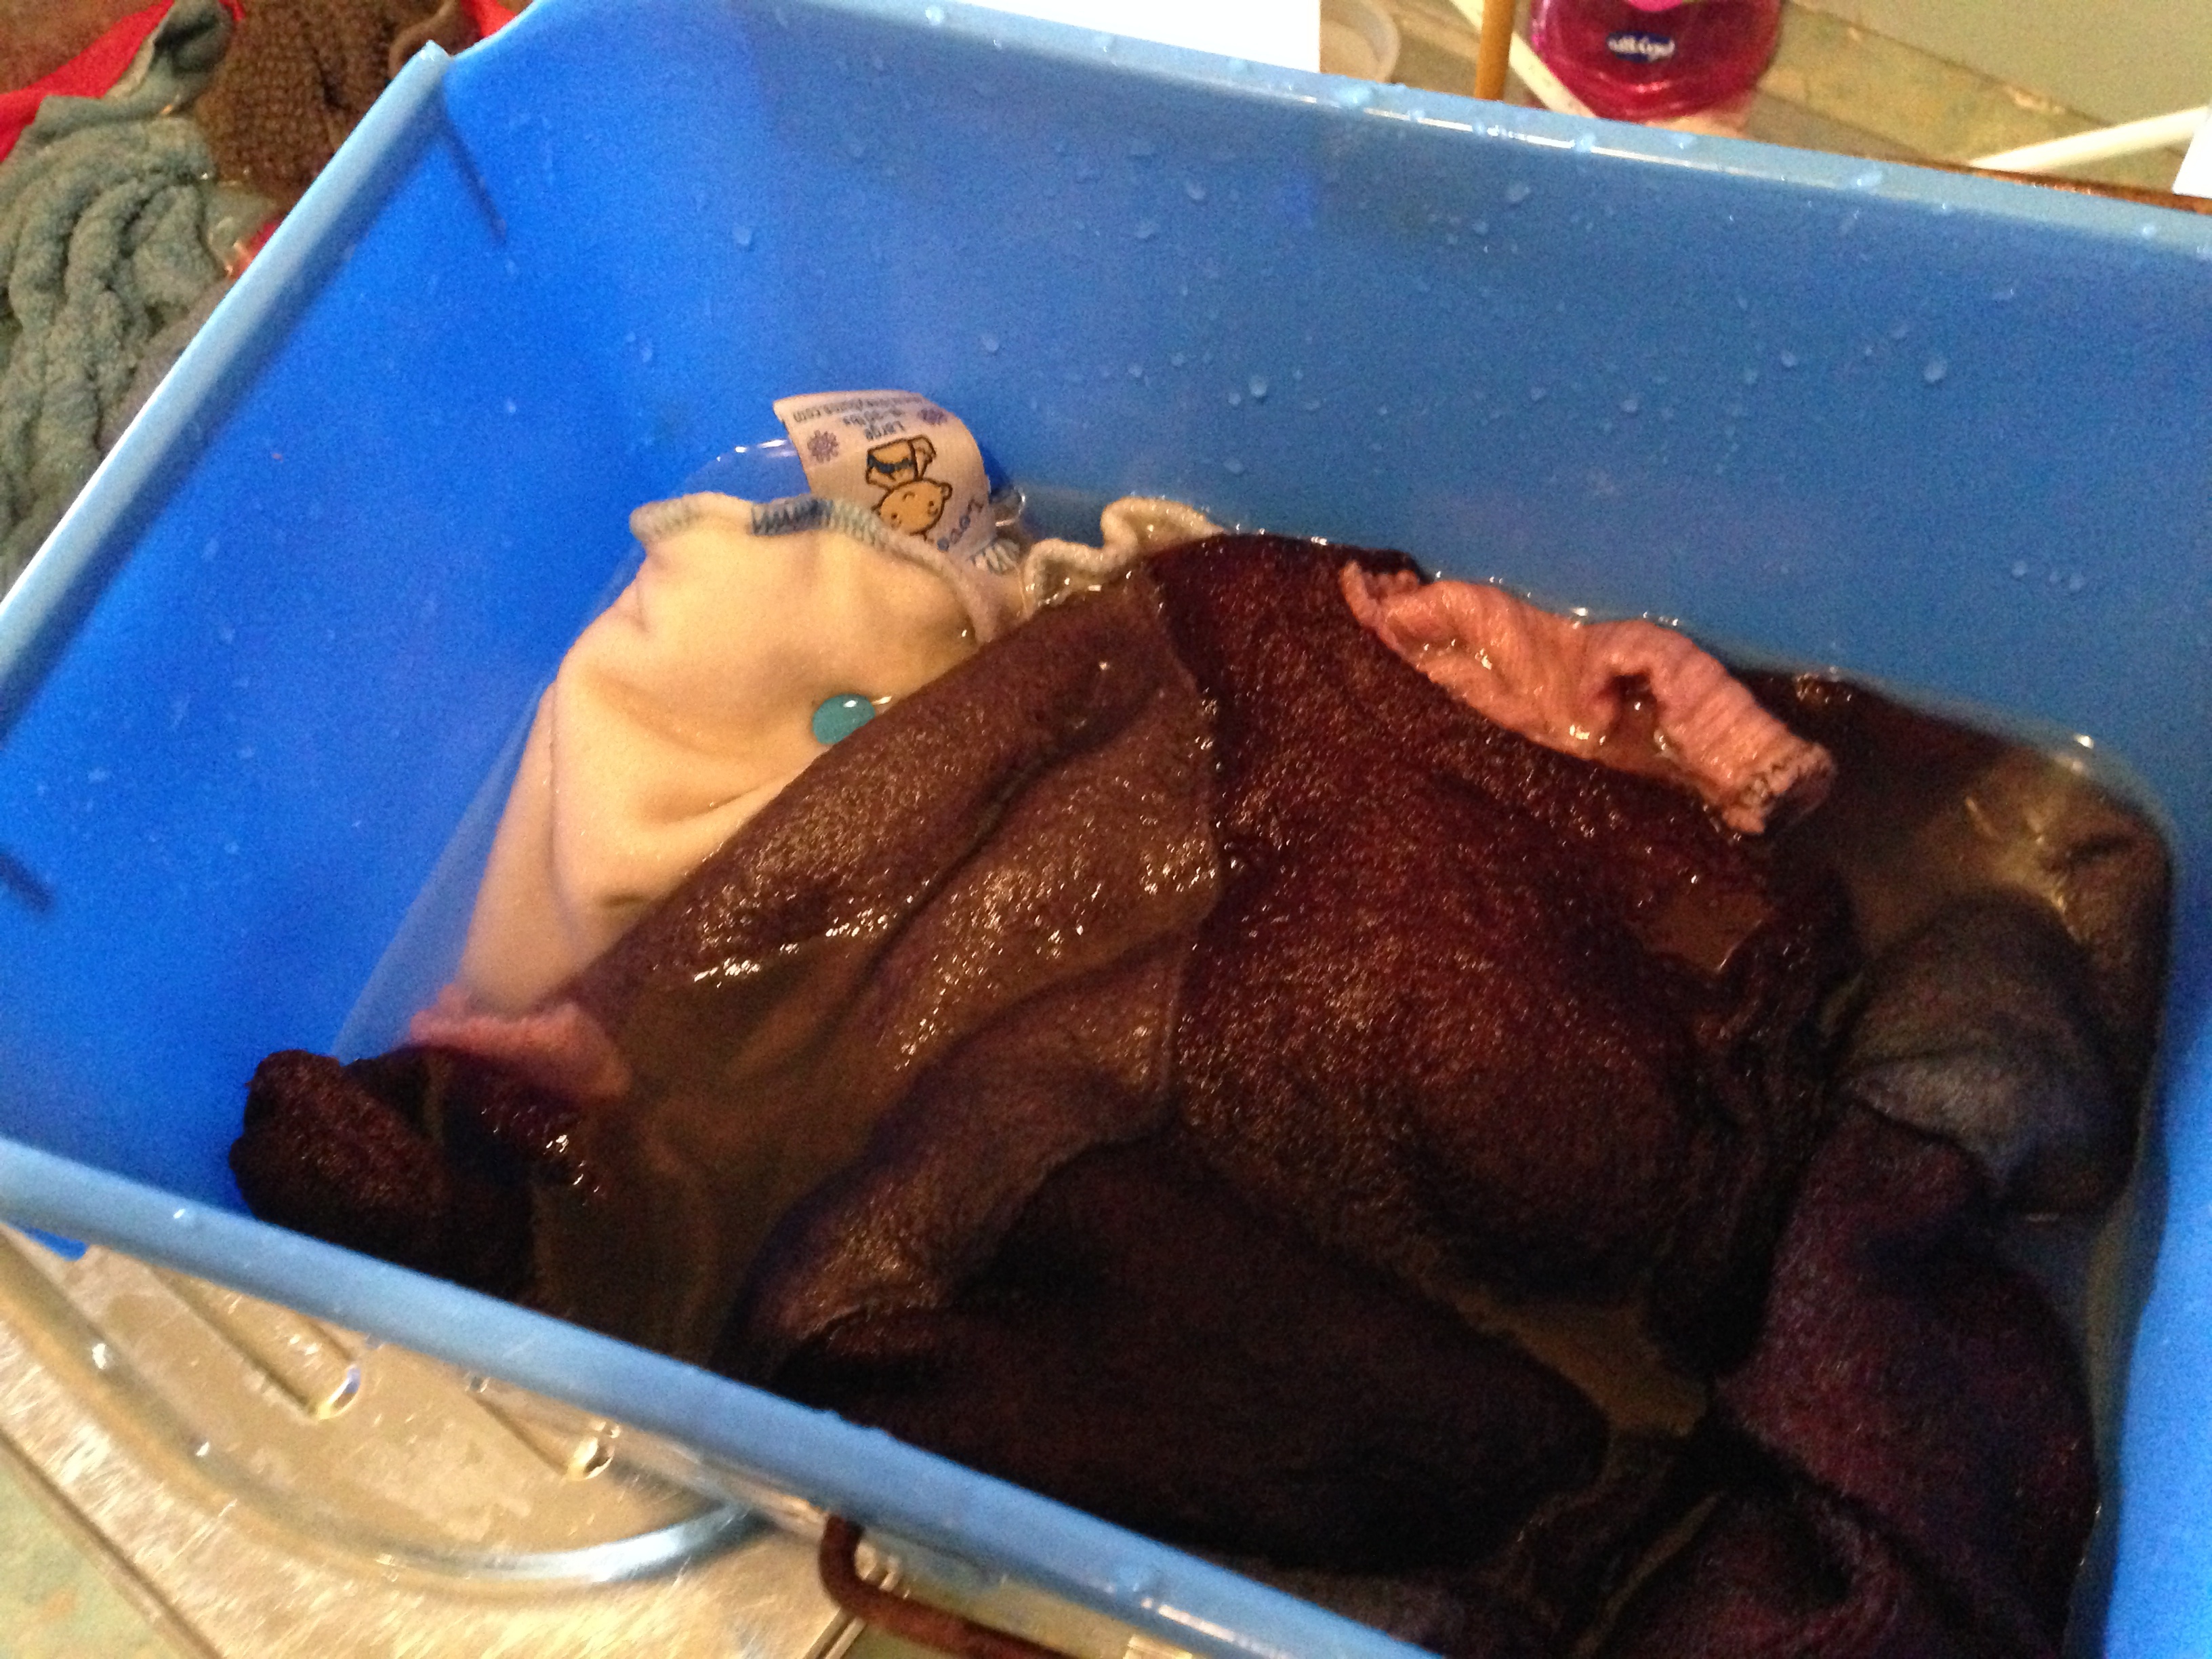
Add enough tepid water to your bucket to soak your covers, but don’t put them in yet. Turn all your covers inside out to get the best coverage where it counts most. Then add the emulsified lanolin. Give it a swish around with a stick or something.
Now it’s finally time to lanolise the covers! Plunge each cover in, and push it under the water – it will feel kinda weird! The cover will probably want to float, even if you damped them down first. Make sure all covers get a good swish through the water on all sides, and then are pushed under with something on top to keep them in there. Leave them for about half an hour.
Soak the covers with lanolin
Once they’ve soaked for a while, I like to run them through the spin cycle on my washing machine to get as much water out as I can, as they dry quickly this way. If I just squeeze them out by hand it can take a couple of days to dry: you do what you need to. 🙂
All this sounds like a bunch of hard work — and the first few times you do it it will take you longer thank you think. But once you get the hang of it, it’s not such a chore. I find a bit of annoyance every few weeks is preferable to the daily small annoyances associated with PUL covers. And I think they look so much cuter and smell so much better that I don’t mind. If you’ve been thinking of trying it – just do it! It took me ages to take the plunge, but I’m happy I did.
Until I started raising small children I hadn’t really any idea just how important volunteers are in my local community. In my profession (a computer programmer, now consulting) I don’t come into contact with volunteers a whole lot, unless it is to pass people in the street collecting money for their cause. But in the world of small children, and schools, volunteers are pretty much *everyone* you encounter.
Obviously that’s a huge generalisation, but if I tried to enumerate for you all the different volunteers that I interact with now, I’d be here all week. I find it surprising just how much gets done in my community on the backs of volunteers.
My local primary school is a major hub for volunteer activity. There are the necessities, such as the P&C, uniform shop and canteen, which require a regular workforce of (to be honest) long-suffering parents. Then there are working bees in the school grounds, volunteer extra-curricular teaching (such as music lessons or gardening), you name it, the local primary school requires it in order to function. This doesn’t even touch on all the fundraising needs such as cake stalls, sausage sizzles, and the behemoth of the school year: the school Fete.
Having experienced 7 years of primary school parenting, I can say: here’s to you, volunteers! You guys are the trumps.
Well, many of you.
What about the parents who don’t contribute any time or resources to the school community? Do the rest of us judge them as being a bunch of slackers? … Yeah, pretty much!
All of us have times we can’t be available. Then there are times where we feel overworked and don’t want to be available. The volunteers you see in your community all around you are overcoming this last obstacle, turning up time after time even when they are pretty sick and tired of it all. So if you are the sort of person that never ever turns up, then you’re likely to be labelled as the person who simply can’t be arsed.
Why do we do it, then? Didn’t I write in the title that volunteering was for fun? Well … that’s not been the majority of my experience. Volunteering is rewarding, though. And without the volunteering, mostly it just doesn’t get done.
So, what do I do? I take a shift with the local Toy Library, which opens in the morning every Monday and allows families to borrow toys. This is an awesome service, if you have small kids. There is nothing so exciting as playing with a brand new toy. And with a toy library, you can get something new every single week! Change out the toy that has already been pushed into the corner. Experience the fun from the big expensive bulky toy princess castles, or the ride-in vehicles, or a roller coaster (!). Try out a toy you’ve considered buying, but are not sure whether they will actually play with it. And all for a yearly fee of $30. Pretty good, huh?
There aren’t many toy libraries around now, and our local one has been in danger of shutting down due to lack of volunteers, in recent times. So I decided that if I wanted to use the library myself, I should put my hand up and do some shifts to keep the place open. My efforts (it’s only once a month) plus the combined efforts of a bunch of like-minded people mean the library is staying open again this year. Yay!
Do I enjoy my time behind the desk? Sometimes its fun to chat with another librarian, if I’ve been lucky enough to have two on my shift. Lately it has been just me, which is harder. Mostly though it’s a bit of a chore because I need to count the toy pieces for every toy that goes out (to make sure the borrower has the expected pieces) as well as on return (so we know if any pieces have been left behind). Some of our toys have over 100 pieces! When I see one of the big boxes of Duplo coming out, I do experience a small moment of dread, especially if there’s a queue.
But you know what? The people borrowing toys are so nice and patient, and understanding, and we can always exchange a laugh about our kids going nuts in the background because they haven’t had their rice cake and little Timmy is having a turn in THEIR big car and can they pleeeeease go to the toilet NOW, mummy? And so on. This kinda counts as fun for parents.
I often get people saying “Thank you soooo much” for volunteering at the desk, when it’s really busy. Mostly people have gratitude in their hearts, and they think well of you for doing something that they couldn’t do. That does make me feel good. Before I volunteered, I felt guilty that I was at home with the kids, but not helping out. I felt that other people looked at me and wrote me down as a slacker (regardless of if this was true, or not). Now I don’t feel that way at all, and that feels really good.
I also volunteer as an Ethics Coordinator at my local primary school. I did this for entirely self-serving reasons, which was to enable those classes to run, and my daughter to be able to attend them. And yet now that she has moved on to High School, I’m still doing it. Why? Because I know that if I pull out, those classes might not be able to run any more.
This volunteering is a different kind, it’s organisation. I don’t have to turn up to a particular shift, which is handy. I just organise all the teachers so that I have someone covering all of their classes, if I can. The work comes in bursts, because mostly things just hum along by themselves, except when I have to train a new teacher, or at the start of the school year. Then look out email inbox: Ka-POW!
Both of these volunteering activities keep me pretty well busy enough that I feel like I’m “doing my bit”. They are not thankless tasks, and on the whole they allow me to connect up with other people and feel part of things. Volunteering is a great way to banish loneliness and isolation. 🙂
There’s something so delightful about human nature when you are travelling into the city on the train and spot a bunch of track workers waving happily at you. I wonder how many of the rest of us waved back? I feel 10 again.
Recently I received my monthly credit card bill, and my eye was drawn — as it always is — to the fascinating section labelled “Minimum Repayment Warning”:
This warning appeared on my Credit Card bill
The credit card companies in Australia are required to put this section onto everyone’s bill so that you are aware just how much it costs to repay your credit card by paying only the “Amount Due” that is their minimum required amount.
For my bill, the minimum repayment amount is $53. So if I just paid this amount each month, I would be paying off the credit card debt for the next 27 years or so. WOW! That’s with the massive proviso that I don’t add any further debt by using the credit card … for 27 years!
The example that they give shows you the outcome if you manage to make about 2 1/2 times the minimum repayment instead. I am always astonished by the difference this makes. Just 2 years instead of 27, and look how much interest is saved! It’s no wonder they had to force the bank to include this section on people’s bills.
It’s a pretty black and white example, for me, why I choose to repay my card in full every month.
I realise that many people reading this may have a credit card debt, and are working really hard to repay it. You may be looking at this post and thinking I’m just trying to be smug at you: I’m really not! You guys have already made the first key step, which is to recognise your goal of paying off your debt. You may already have a plan of action, and are working towards that goal. Great work!
This post is rather aimed at anyone who doesn’t realise how much it can cost to use a credit card, instead of paying up front (eg. with cash). In Australia credit cards are everywhere, and where I live, I don’t know anyone who doesn’t routinely use them. I had assumed that people used them like I do — as a budgeting tool — and pay the full amount off each time to avoid paying interest. Apparently, this was a totally naive assumption!
So, if you are a young person wondering whether it’s true that you should “build a credit rating” by using a credit card: think twice. Unless you intend to pay the card off in full, you are taking on unnecessary debt. It’s bad enough that housing costs so much without having the added pressures of spending more than you have and then maintaining a debt for potentially years.
If you are someone who has been using credit for a while, and not paying off the full balance: think about what that really means. Think about the kinds of things you are using your credit card for. Are they essentials? Do you buy movie tickets or a new blouse or shout a round of coffee at the office using your card? If you had to use cash instead, would you have bought that?
I’m not saying you should all go out and be hermits and not buy anything that’s a luxury, and not have any friends … 🙂 Far from it! Just, think about it.
Yesterday marked the end of our Easter holiday break. This year, Easter landed smack bang in the middle of the school holidays, which was great! It was also close to ANZAC day (a major memorial for World War I, which is a public holiday in Australia). This meant Stephen could take just three days off work and get a whole bunch of continuous time off. Yay!
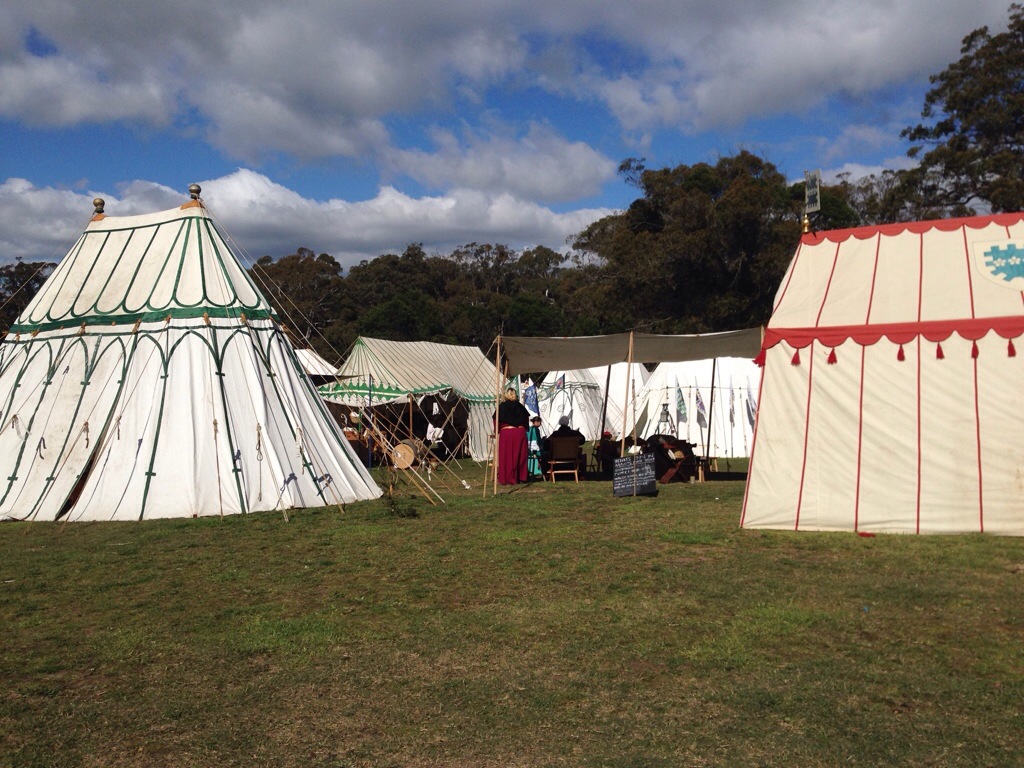
Easter for me means Rowany Festival. Many years ago (like, about fifteen!) I joined the SCA and went to my first Festival. This is held every year at Easter, taking advantage of the two public holidays and the nearby full moon for perfect autumn camping conditions. If you are familiar at all with the SCA in the US, you may have heard of “Pennsic”, which is similar — a huge medieval camping event. Rowany Festival is the Australian equivalent.
These are period tents. Totally not mine! I wish!
This year, Isobel and I left Stephen minding the little ones, and we spent four nights away. We haven’t been camping for more than one night since … hmm, I can’t think how long! I went a little mental preparing for this one, as you need to spend the whole time in medieval costume. Four nights of camping was enough complexity for me to be thinking about without this added “little” detail!
We knew this Festival would be colder than usual, as we’ve just moved to a new site in the Southern Highlands (about two hours South of me in Sydney). It gets COLD there at this time of year! Those of you in the US will probably snort when I say it got down to almost freezing overnight, but for Sydney-siders, this is a big deal. Where I live, we don’t experience a frost, even in the depths of winter! Camping out in the cold is therefore pretty darn unusual.
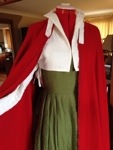
Isobel and I, in medieval garb
Here we are, all rugged up about two hours after dawn: I’m wearing my market day gear that I finished sewing in time for the event, and Izzy is wearing a borrowed gown from a friend in the same campsite. What you don’t see here, is that in addition to the chemise (undershirt), gown, shoulder partlet, and woollen red cloak, I’m also wearing my pyjama pants, a red petticoat, and two pairs of socks!
At market, with the bustle in the background
Market day is the highlight, for me, as everyone tends to wear their prettiest medieval outfits, and the “tavern” area turns into a marketplace with everyone selling medieval stuff (belts, home-spun yarns, pottery, you name it!). I picked up a beautiful tudor-green mud for Stephen, and something for my Mum for Mothers’ Day later in the year (Hi Mum!).
A present for Stephen to say “thanks”!
I managed to finish most of the clothing we needed in time for the event, but I was still hand sewing the inside of my woollen cloak whilst enjoying the sun in the campsite on the first full day we were there. 🙂 To give you an idea of the amount of sewing I got through, here is a list of what I made:
2 white chemises
an early tudor corset, for me
2 kirtles (supportive dresses). Mine was green; Izzy scored a wonderful plum coloured one
2 partlets (white shoulder coverings)
1 almost full circle wool cloak — scarlet! Izzy was using my old one with the fake fur
2 pairs of reversible detachable sleeves, Izzy’s green and beige, and mine, green and blue.
A white linen apron for me
Wow, that was a lot of sewing! There’s a lot of work still to do, such as sewing eyelets where the lacing goes (I cheated with some lacing tape for the event), and by hand sewing the hems where they are machine-basted. I also need to hem the cloak, but as I “fulled” the wool first (partly felting it) I was able to get away with leaving it raw for a few days on site.
Ultimately I will make an over-gown for these outfits which laces across the tummy in the Flemish / Netherlandish style. This was all heavily inspired by the work done by Drea Leed, on the Elizabethan Costuming site (an excellent resource for anyone interested in this sort of thing!). Here are pictures of her version. I used her corset pattern generator to make the corset (which I forgot to take with me, d’oh!) and I also used the chemise pattern (the authentic version) for our white undershirts.
Rowany Festival has much more to offer than just camping in medieval dress: there is dancing, fighting, archery, children’s quests, feasting … pretty much anything you can think of that was medieval you can do it (or learn about it) at Festival. Such fun! I’m already looking forward to next year, when we might take Will along too. 🙂
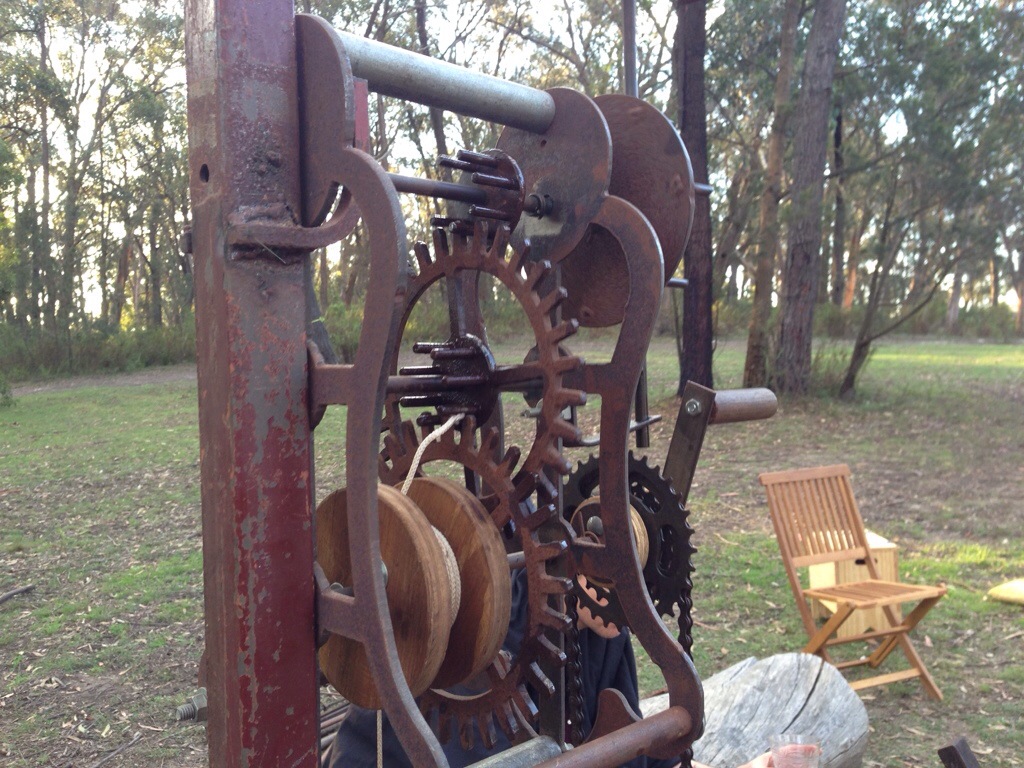
But let’s face it, camping with a medieval contraption like this over your campfire is reason enough!