Last year I knocked over painting one wall of cabinets in the kitchen, and pretty soon I was ready to get on with phase two: painting either the cabinets under the bench top, or the ones over the stove.
I took a few weeks to mull this over, as both were significantly harder, logistically, than the ones I’d just done. If I chose the under bench ones, the kids were going to be able to get into all my stuff, and fencing off the large cabinet boxes could be awkward. The overhead cabinets avoid this, but there’s a lot of glass to mask off, and the whole cabinet would be exposed to steam and grease from the stove area underneath for the duration of the drying time …. hmmm!
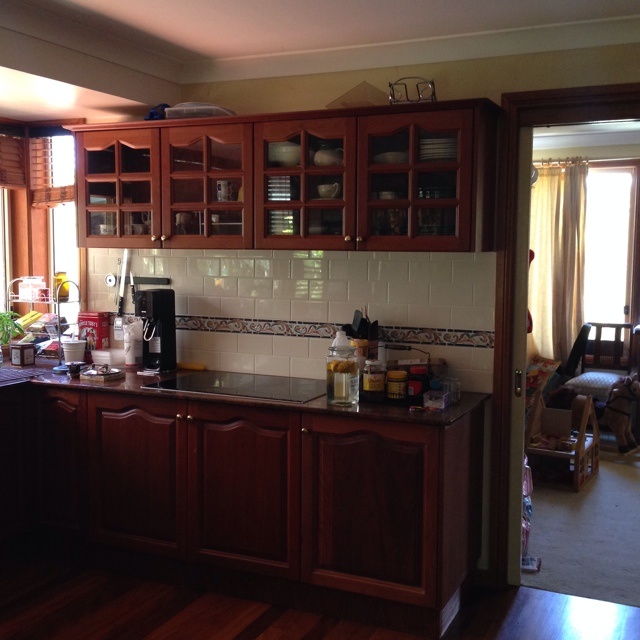
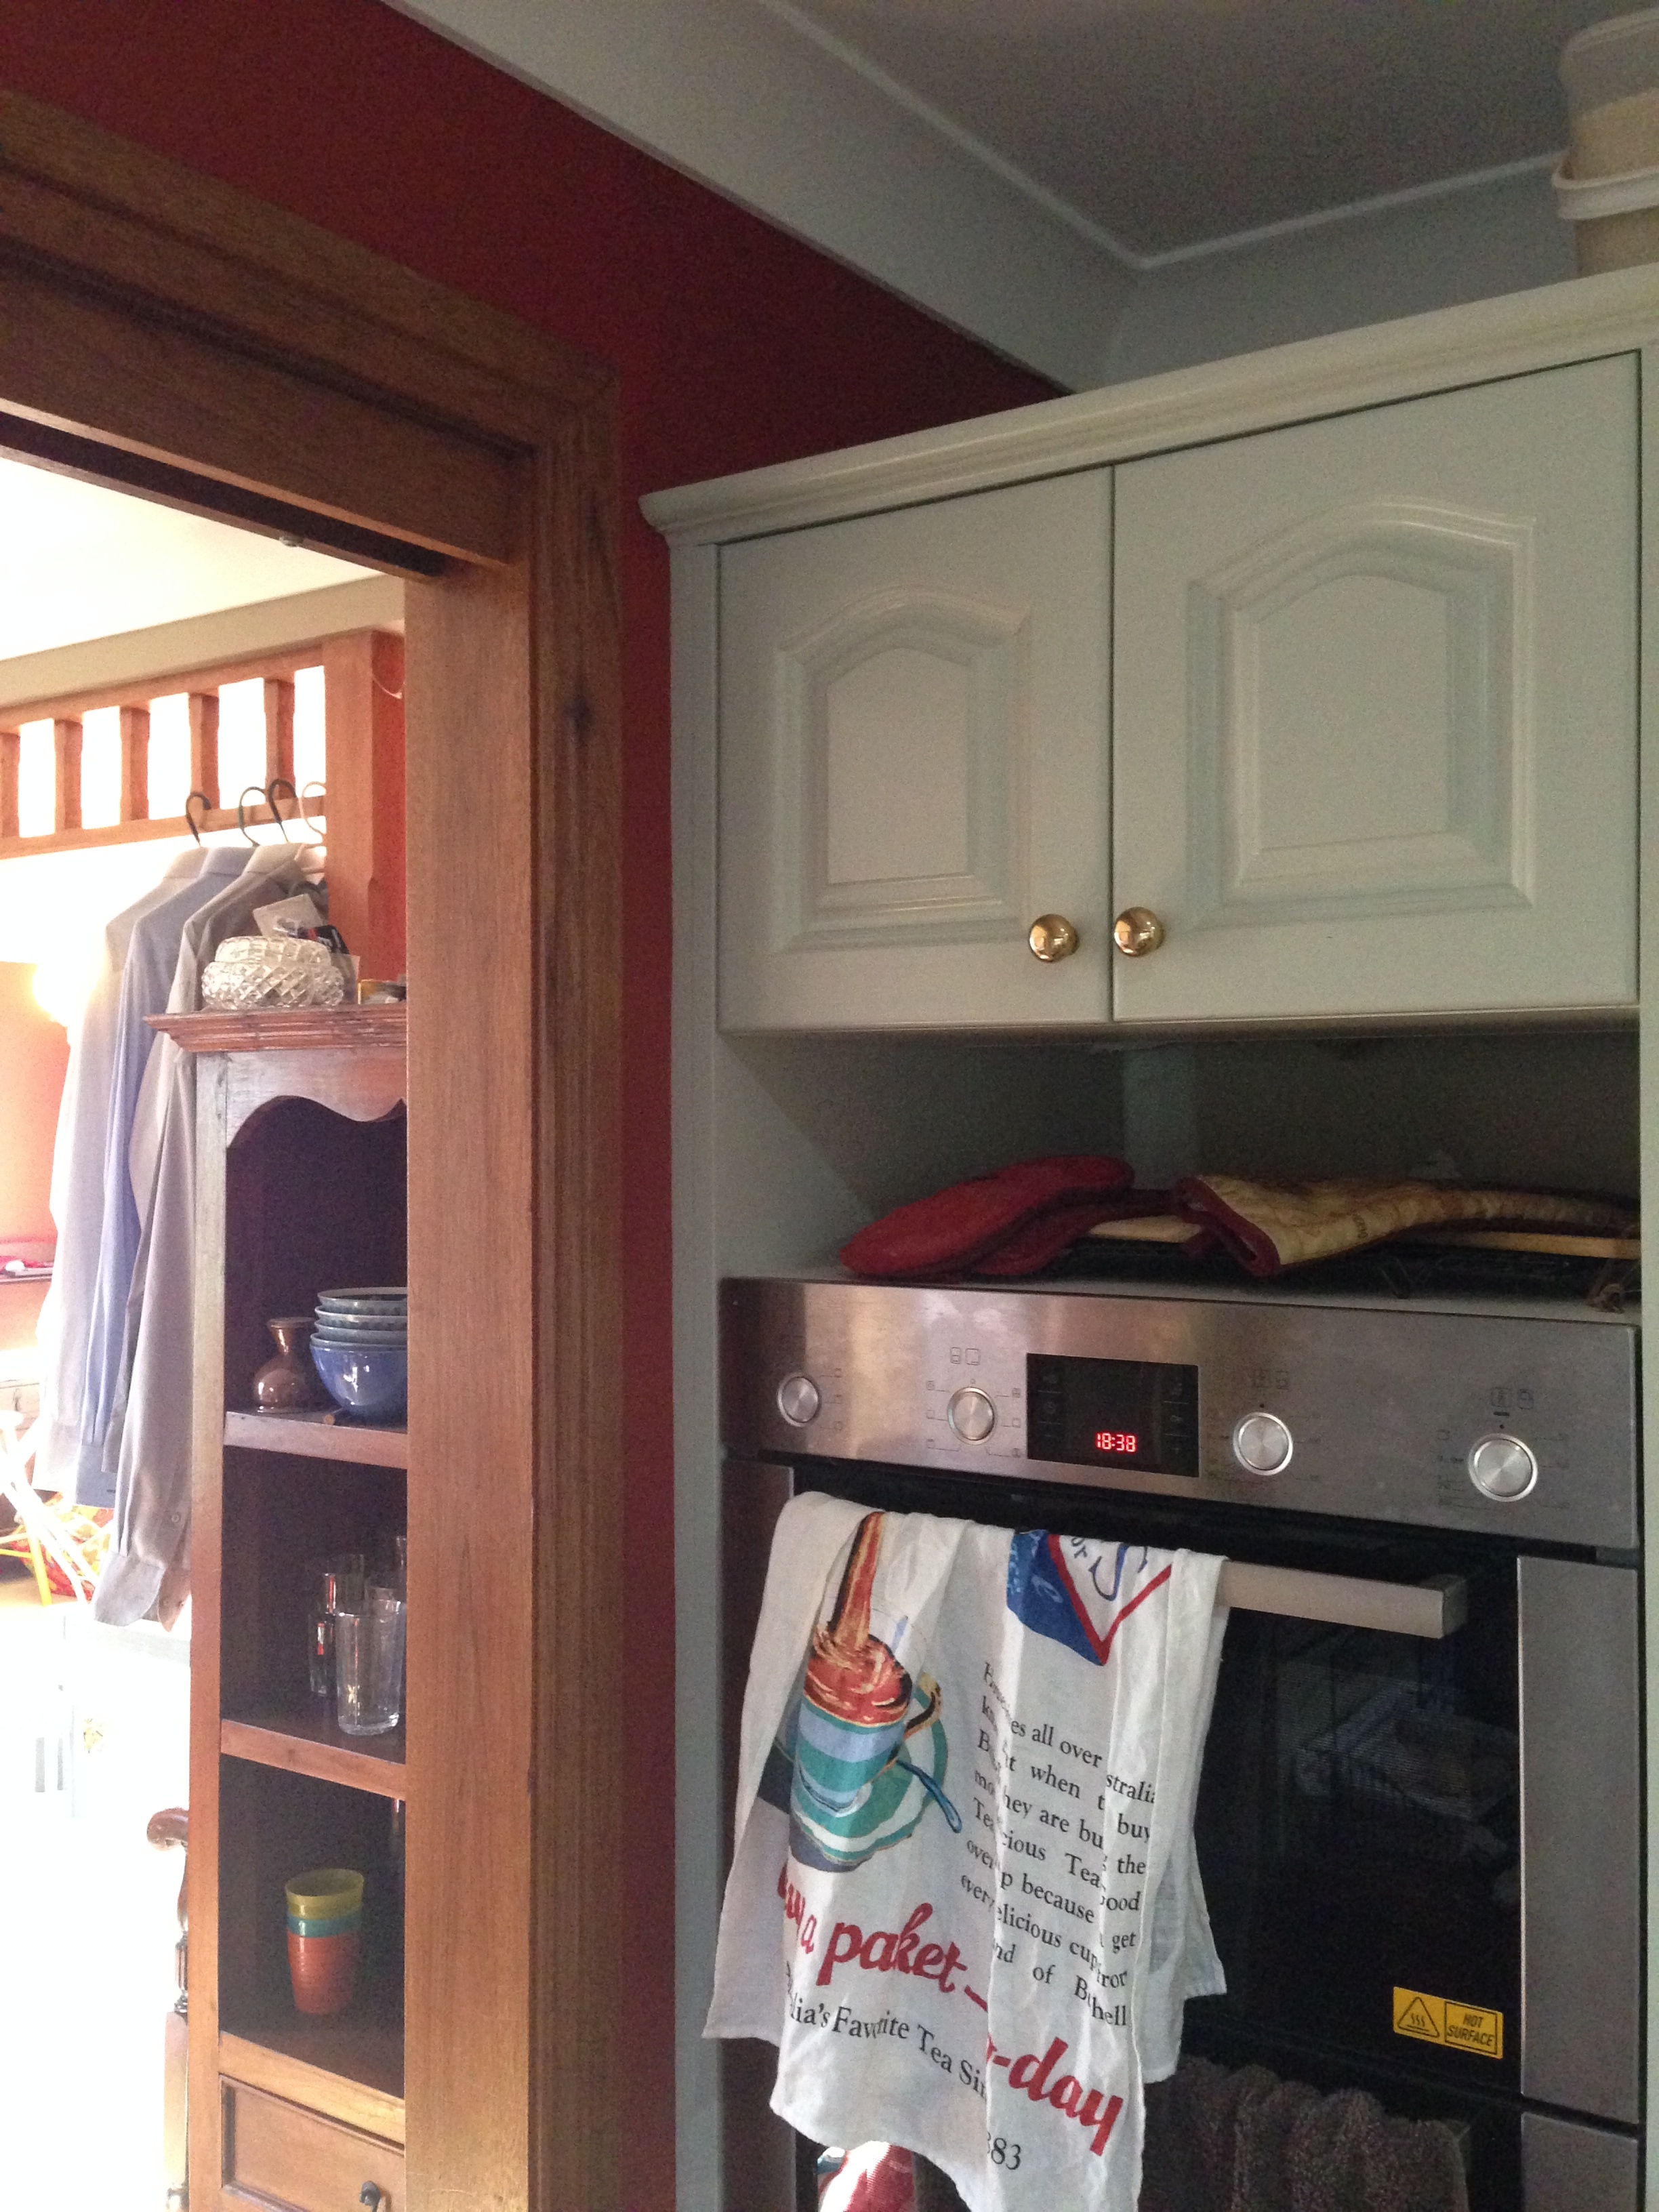
I cast my eye over the stove area to focus my pros and cons:

The more I looked at this space, and how we used it, the less keen I was to start working on those overhead cabinets. They were storing our fancy plates, and the teacups. Above the cabinets we were collecting junk, plus a whole lot of greasy dust. HMMMM.

Noink! Just after Christmas I decided (after hinting to Stephen a bunch of times) that really we could live without that cabinet at all, and move it somewhere else in the kitchen. So one afternoon Stephen came in from the garden and found me up on the bench, knee deep in plates, and wielding a screwdriver!
I don’t recommend taking your husband by surprise like this. He was not impressed. Although we were on the same page about the cabinets (in the end!) I had not sufficiently prepared him for imminent DIY chaos. And the holes in the wall!
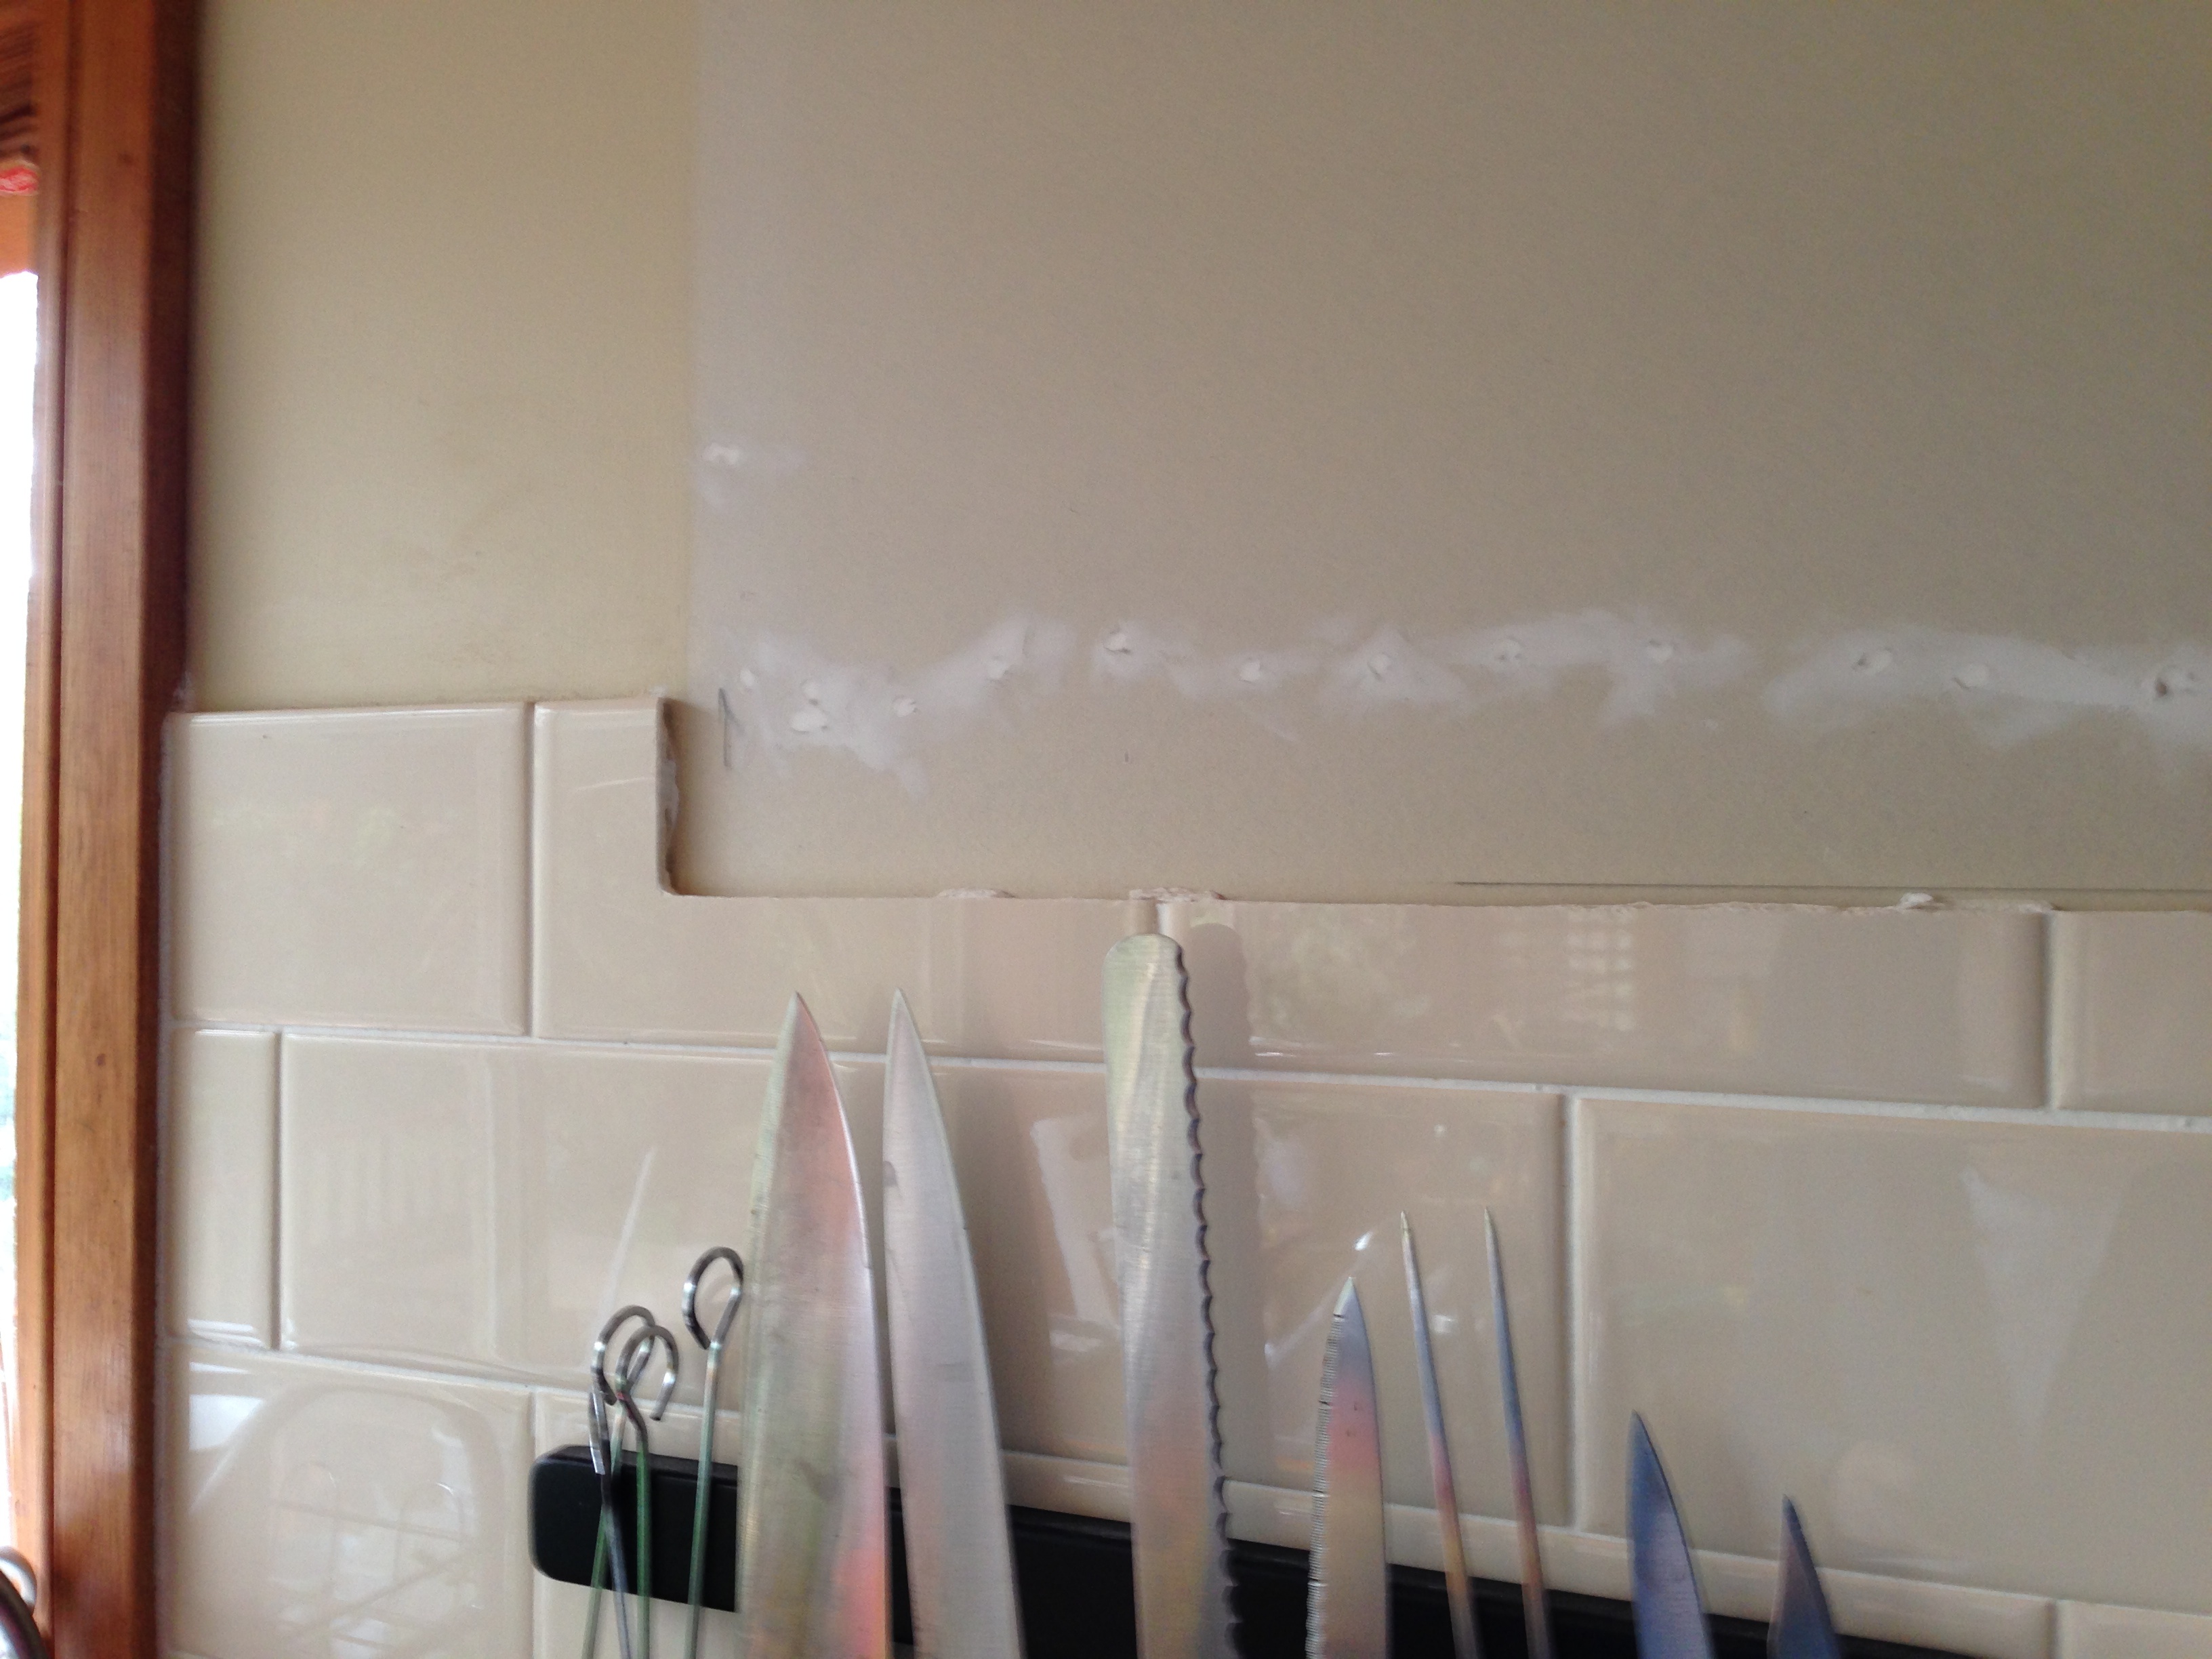
I promised to make good as quickly as possible, which made me gulp a little – I’ve filled countless screw and nail holes, but never patched a hole that large before! There was also an ugly row of part tile to remove, which made me wonder what kind of mess I was really about to make! I needed to get some research done ASAP and at least cover those holes so the steam didn’t get into our wall.
I stuck a plastic bag over the big hole in the wall, and filled the little “bullet holes” with ordinary Polyfilla as a quick fix so that steam from the stove didn’t get into our wall cavity. Then I researched how to remove tile, since I figured I’d be making some mess with the drywall, and I may as well do the real patching all at once, after the jump, so to speak.
Prising the tile off was a heart-in-mouth experience, let me tell you! I used a utility knife with a wide blade and a hammer to knock it between the tile and the wall (like using a chisel). The first three tiles made a terrible mess. Clearly I was doing it wrong!
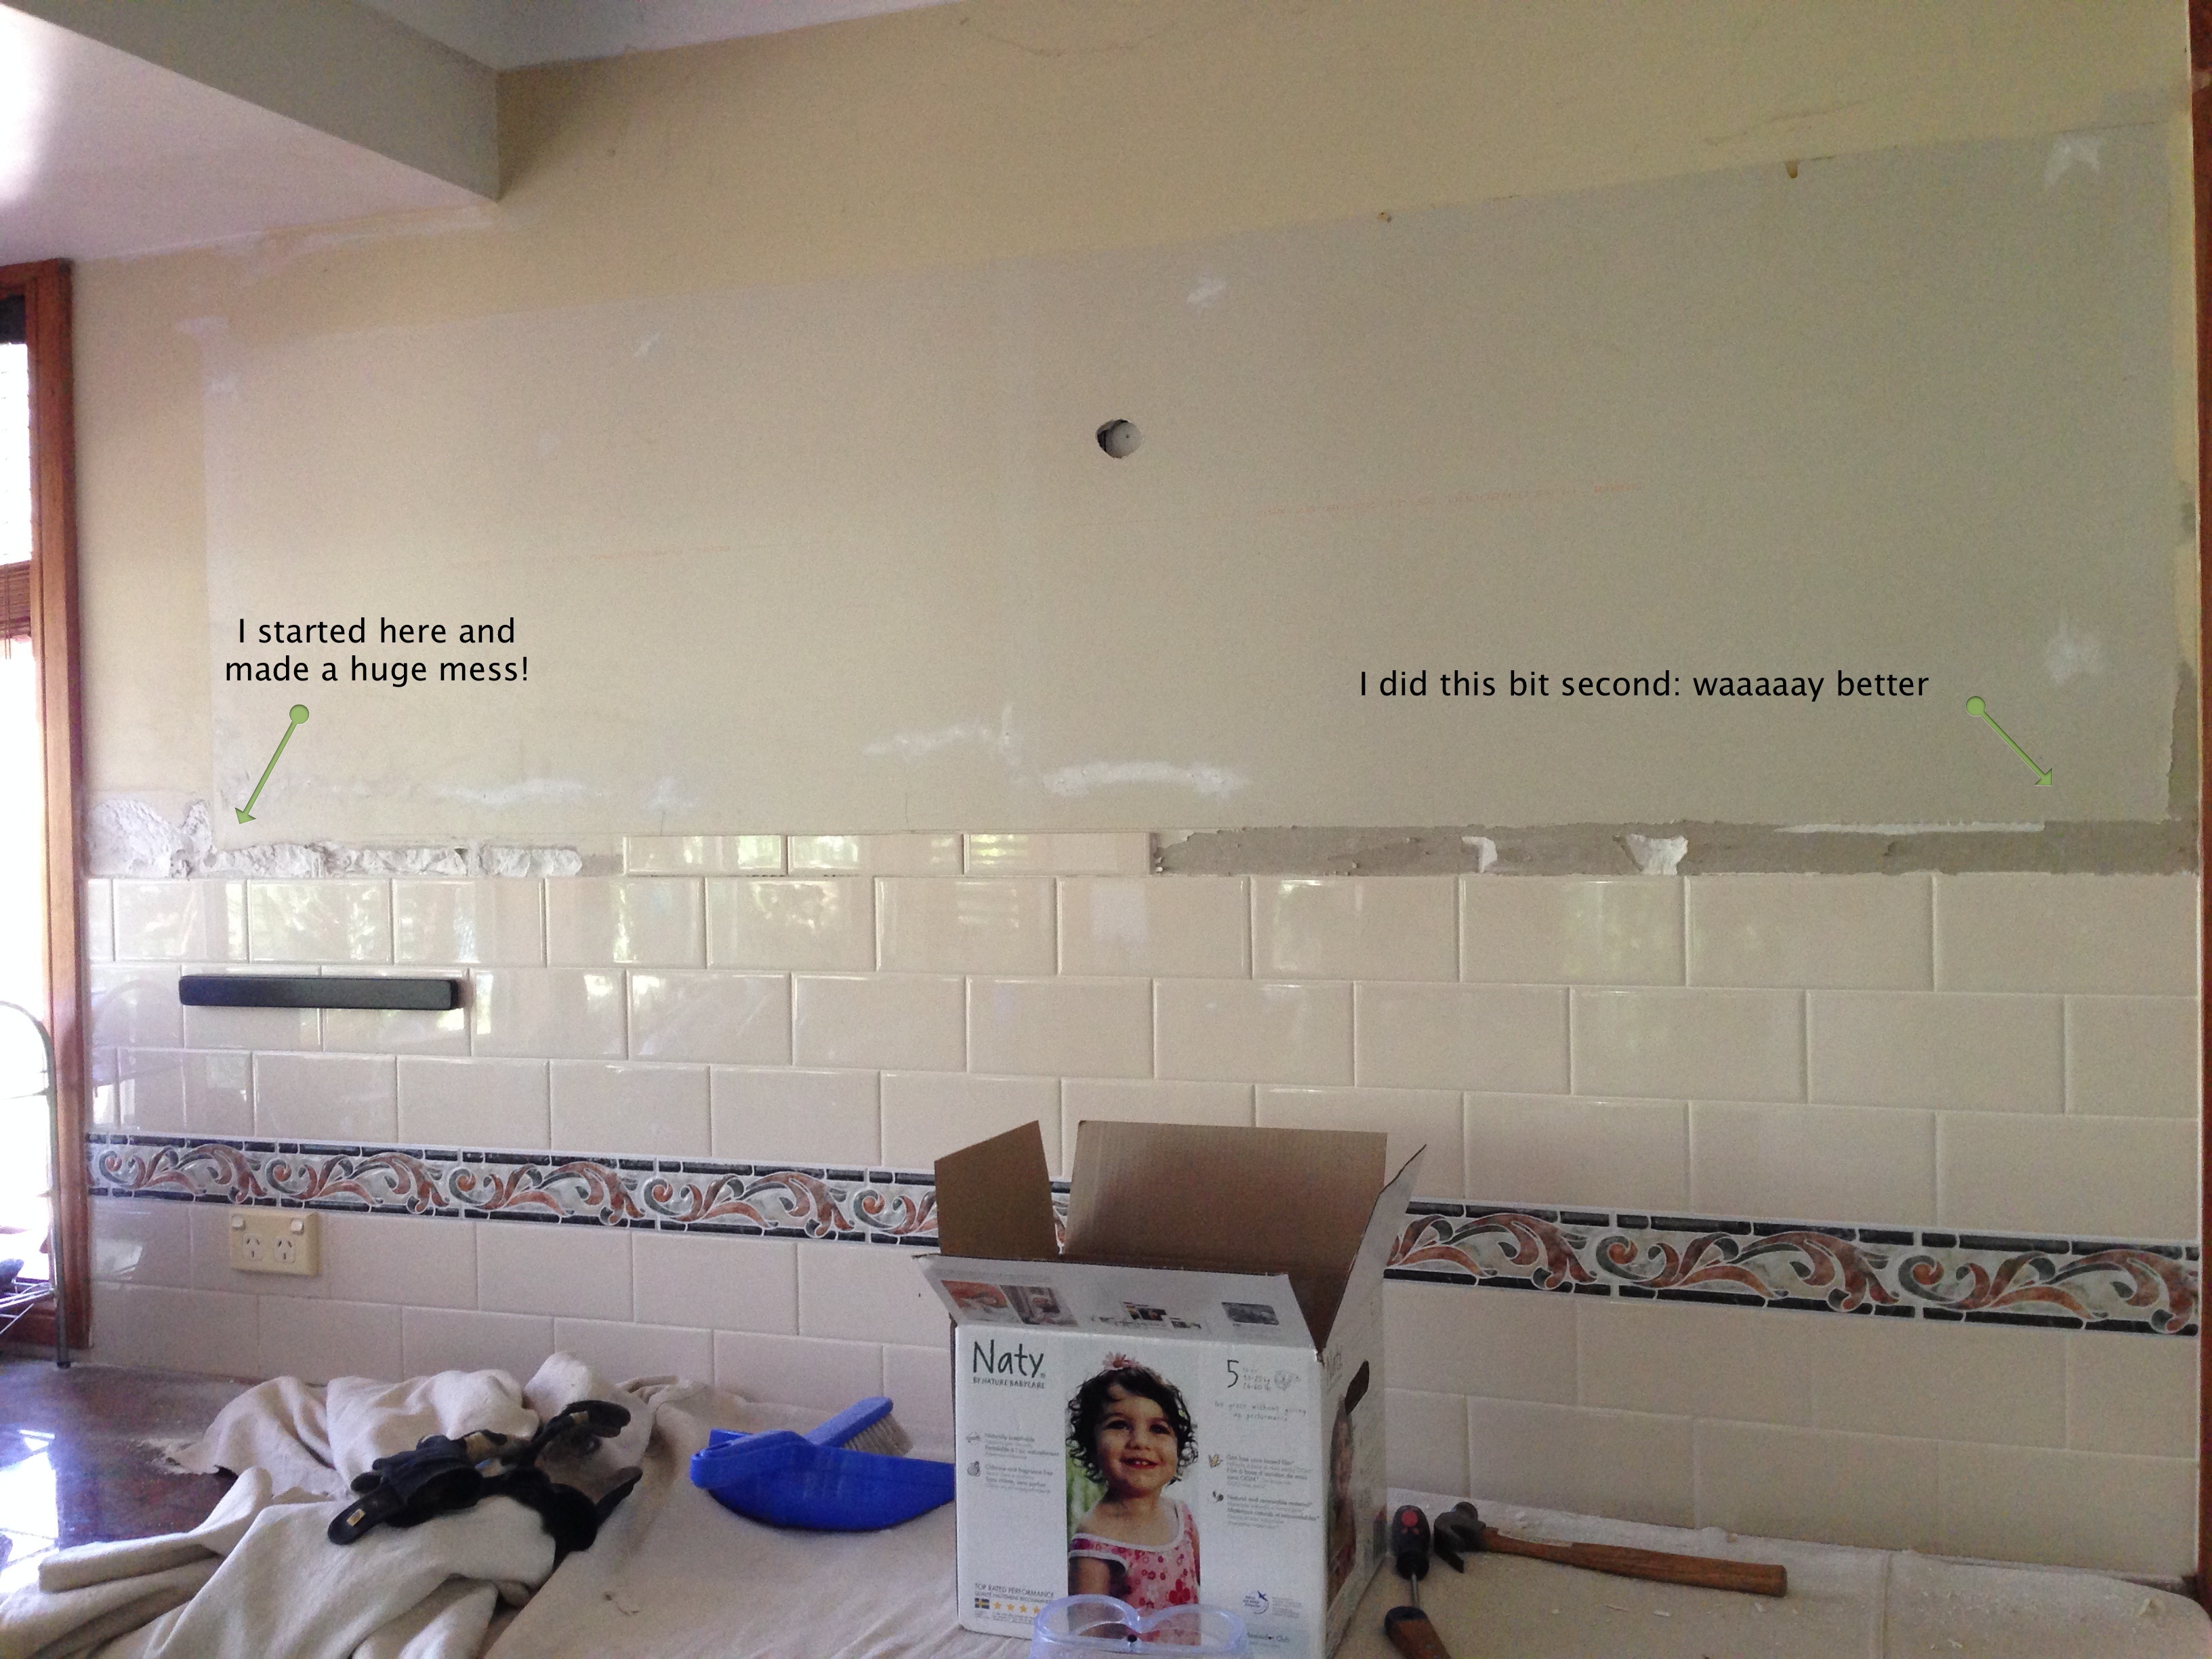
I started again at the other end, and changed how I was inserting the utility knife. Instead of trying to force it between the tile and the glue, I aimed to go between the glue and the wall: much more successful! I got the rest of the row off with minimal damage to the drywall.
Now with some big gouges to repair, I looked up how to fix drywall. I decided to use plasterer’s paper over the top of some drywall compound, as this would enable me to fix that long gouged section. I also bought a patch kit for the big hole, but I kept it in reserve in case my technique with the paper was shonky (my reading led me to believe that paper is harder to DIY than the kit).
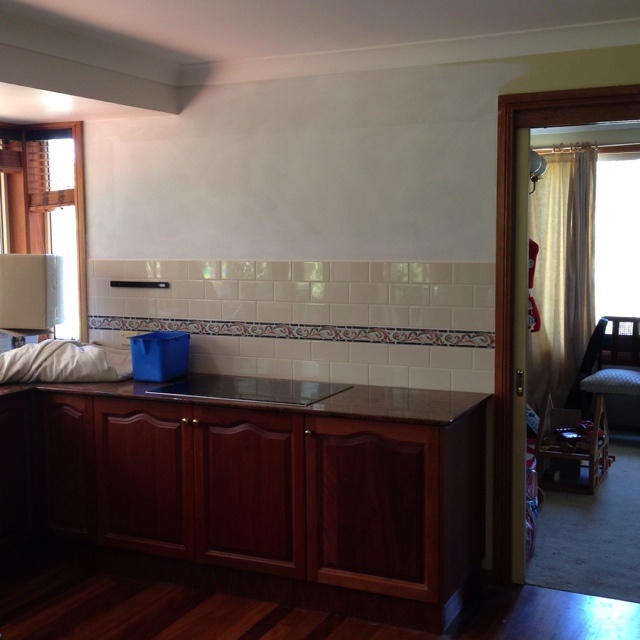
I could go into huge detail about the plastering, but I don’t have any close up photos, and I want to skip ahead to the big finish. 🙂 (There is more drywall repair in my immediate future, so I will show you this process when I get around to it!)
Let me show you what it looked like all plastered up:

All this work took me only a couple of days, and I had a much happier husband on my hands. He realised I wasn’t going to leave us in hole-in-wall hell for weeks! 🙂
After that, I was back in my comfort zone. I just needed to prime the wall (there was unpainted drywall exposed, which requires priming, and also the plastering needs primer to seal it too):
And then choose a paint colour and paint it! The colour choice was hard this time. I really loved the brightness of having that dark cabinet removed, with the light bouncing around the ceiling area and down onto my stove. I didn’t like the neutral colour we’ve used elsewhere, though, because it doesn’t match well with the green colour on the cabinets. Solution:

The final result is the space feels a lot more open (several guests have commented on this, in a tone of surprise). Waaaay more light falls onto the stove area now that the overhead cabinets are no longer blocking the ceiling down lights, and the natural light from the window. I’m also really enjoying cooking and cleaning the backsplash (“enjoying”) without banging my head!
Above you can see the area where the new cabinet and wall colours intersect. I love this combo.
Here is a fun slideshow taking you through the whole thing, double quick time 🙂
And once it was all tidied up, and “styled”, as they say:


Wow! You did a really great job on patching and re-painting the wall. No-one would ever know that cabinets had been hanging on that wall previously! Looking forward to watching the rest of your kitchen re-do 🙂
LikeLike
Thank you! I was pretty chuffed with the plastering job. It’s not perfect, and up close it looks like a plastered wall, rather than plasterboard. I rather like that about it. It feels older, and with a story, like a proper kitchen wall should feel. 🙂
LikeLike