What kind of gift do you get for the boy who has everything? The kind of kid who never gets out of his pyjamas?
Clearly, you get him pyjamas. But not just any pyjamas. These want to be a little special.
Would you ever consider weaving a set of pyjamas?
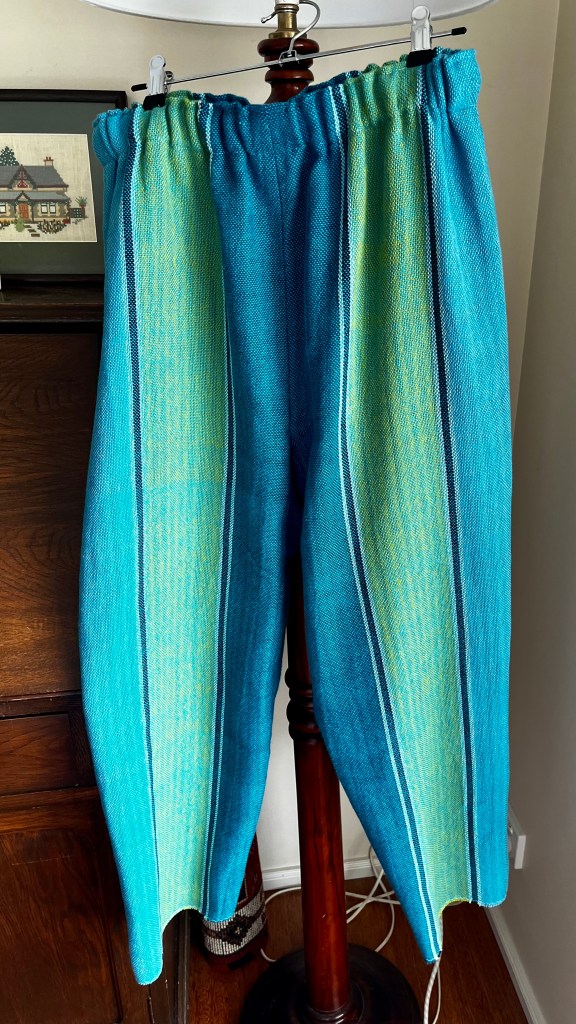
Mompei pants
I have long been a fan of clothing that can be made from rectangles and triangles, like the classic SCA t-tunic and other early medieval clothing.
I came across a plan for Mompei pants on the curious weaver website, and figured a pair of these Japanese field pants would be achievable for me to weave, and then sew.
I would need at least 5 metres of cloth, woven at 14 inches wide. In 2/8 cotton, sett at 16 ends per inch, that means about 224 ends (individual threads in the warp).
I started learning to weave late last year with Jane Stafford’s online School of Weaving. One of her lessons involves designing a warp, so I sat down with some coloured pencils and started drawing swatches.
Each swatch represents blocks of coloured warp threads. Sketching helps visualise different arrangements of stripes (thick? thin? blocks of colour?).
I took a couple of days to fiddle, until I settled on a design I liked: three symmetrical colourful bold stripes, separated by a narrow navy stripe (number 3, highlighted).
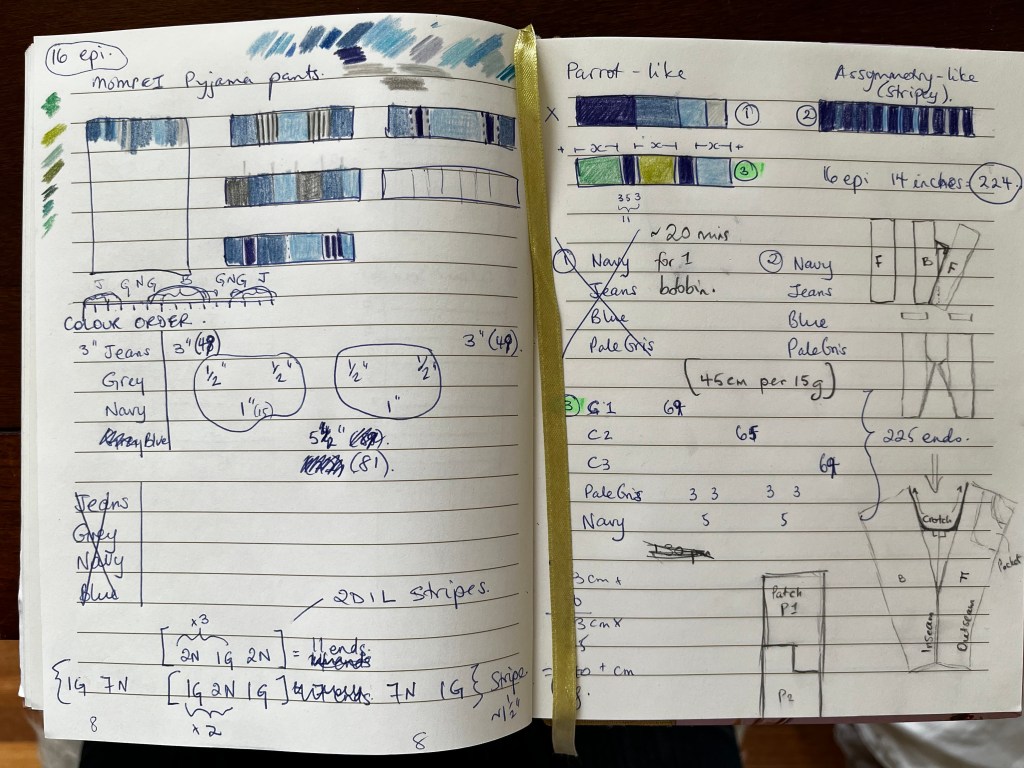
The plan here was to create a vertically striped fabric, with nothing fancy in the weft. That way if my weaving wasn’t even from pick to pick, I wouldn’t have to match anything horizontally (like checks or plaids).
Plotting the execution
If you have ever woven anything, you know it (a) takes a bunch of time, and (b) takes a bunch of space. It’s rather obvious to most people in the house.
I had to be a tiny bit clever whilst starting this project to avoid tipping off my son that I was weaving him a gift. Mostly, this involved hiding in plain sight!
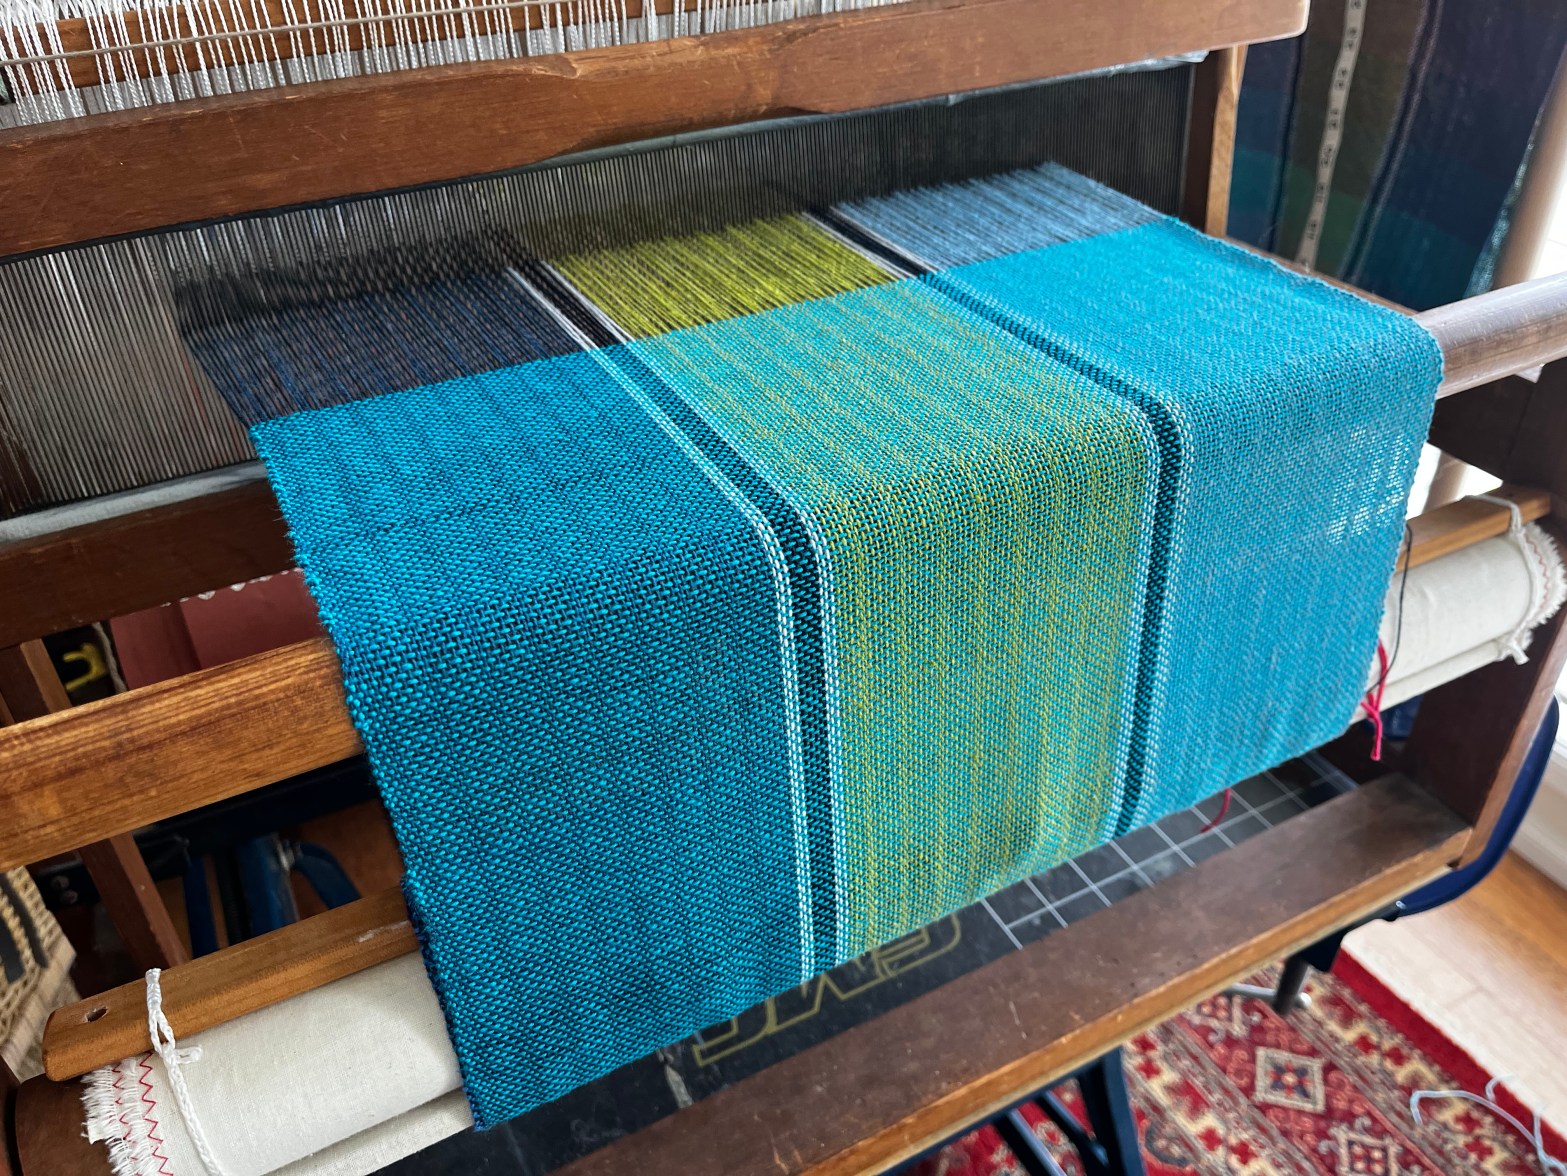
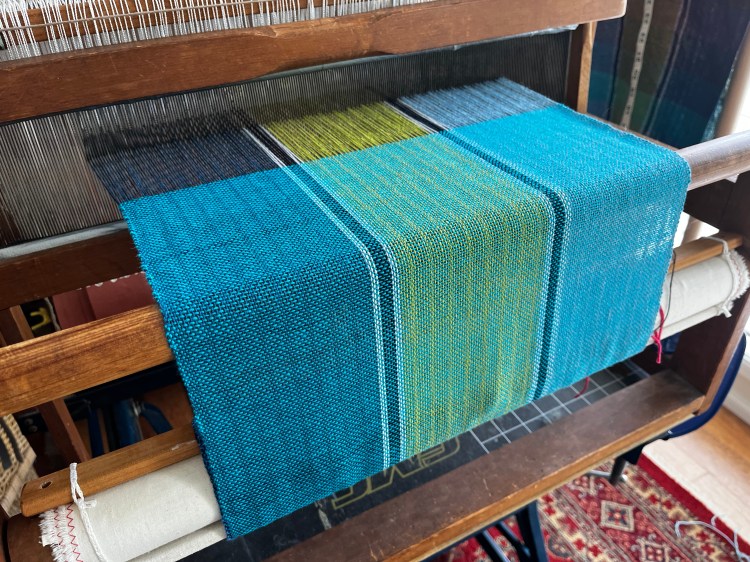
I warped up my little table loom with simple stripes in colours I knew my son would love: blues and greens.
This is Maurice Brassard 2/8 cotton in Jeans, Pale Limette and Slate, separated by stripes of Navy and Natural.
At this point, my loom looked just like it had for my all my recent projects, which were samples from my online weaving course. There was nothing here yet that screamed “secret Christmas pyjamas project”.
Sample time
The first thing I wove off this warp was a sample to discover the best weft colour combinations for this warp:

I already have a startling array of colours from the School of Weaving samples (acquiring a lot of colours like this is a tad expensive, but totally thrilling). I have plenty of leftover yarn (whole cones!) to put to good use in projects like this.
I love many of these combinations, particularly the greens!
I showed this sample to my younger kids and asked each one which was their favourite.
Both children thought I was asking about colours to make more tea towels (since I’d been doing a lot of that for my online course).
Hehehe. Sneaky.
My son’s clear favourite was Peacock, a vibrant green-blue colour.

Weaving, and Sewing
Once the weft colour was chosen, I just got cracking with the weaving.
I hid the table loom in my bedroom, and wove during school hours. It was comparatively fast: plain weave is the simplest weave, and with only one colour, it’s just a matter of filling bobbins and weaving them off, until you run out of warp.
I recorded some stats as I wove, to see how quickly I was making progress.
Each bobbin weighed roughly 15 grams, covered 45 cm of cloth at the loom, and took me about 20 minutes to weave.
(This sounds rather fast, now, it’s hard to believe I was really weaving that quickly!)
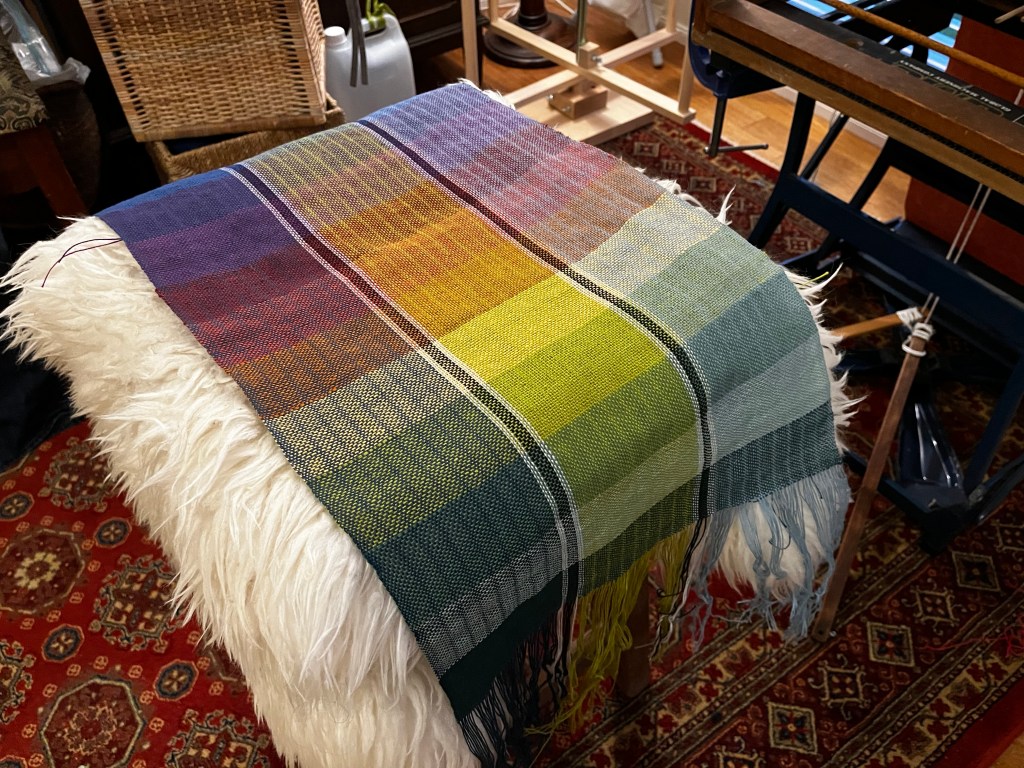
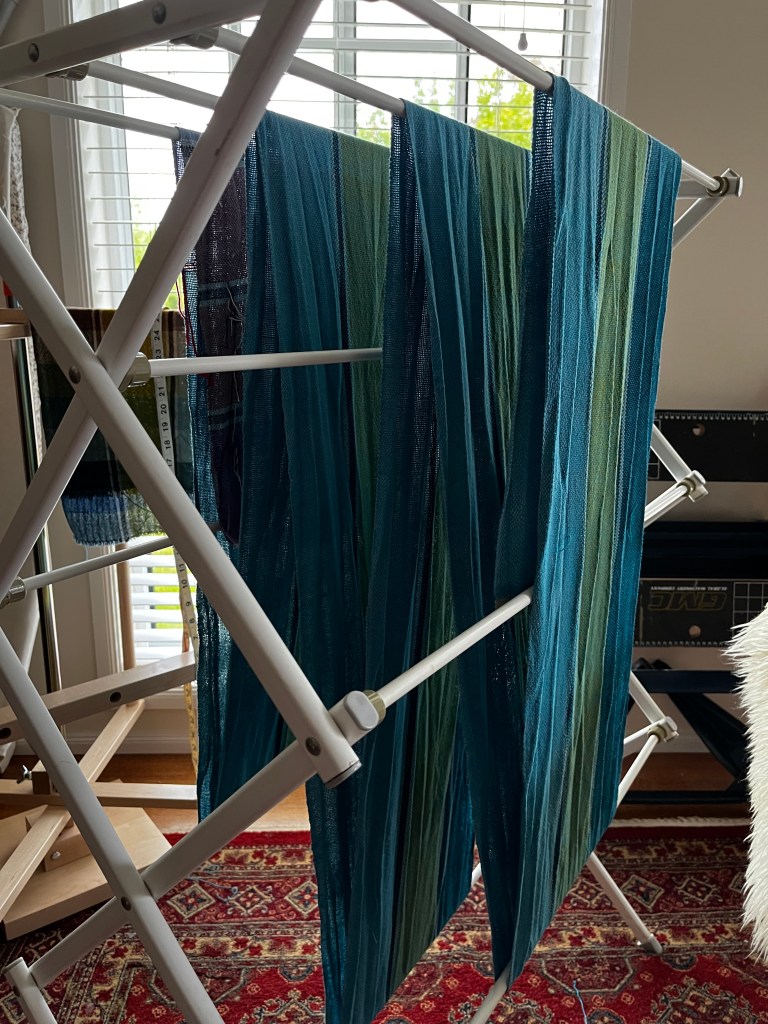
Several days later I had a bolt of cloth to wash and prepare for sewing.
After washing, the cloth measured 12 inches wide, and had fantastic drape.
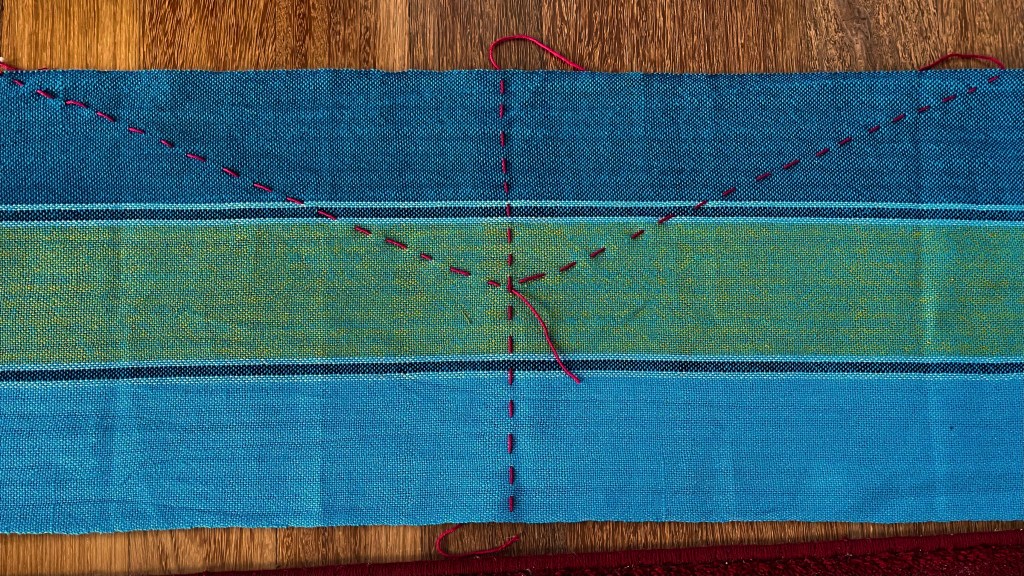
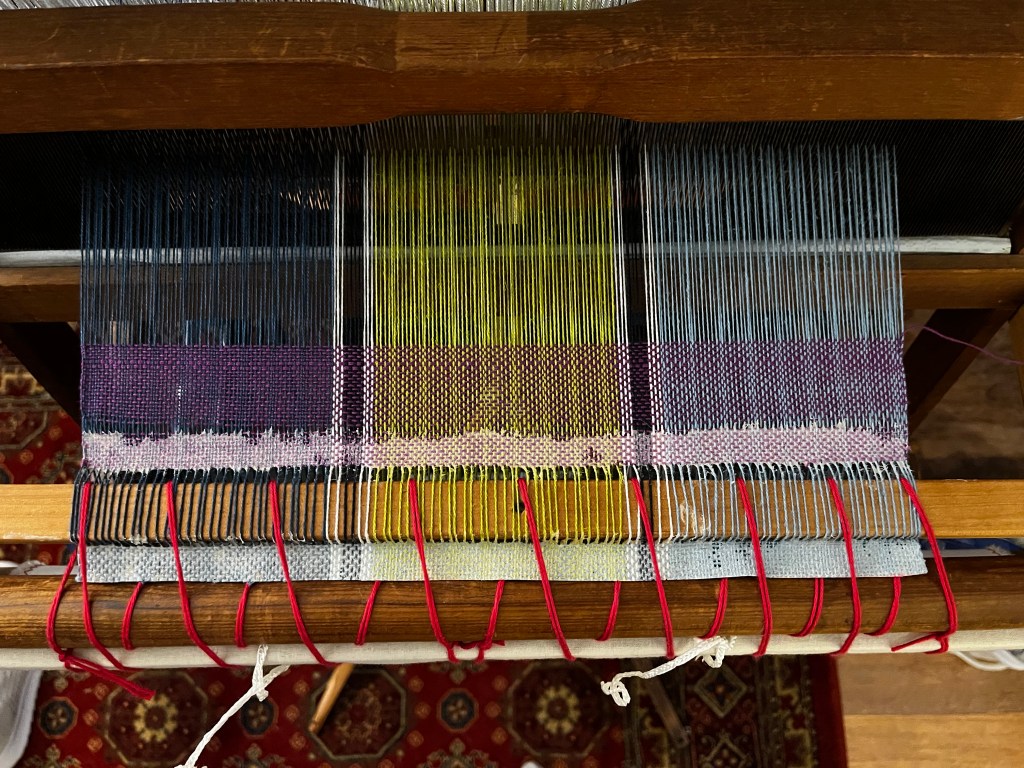
I was nervous of cutting into the cloth without dealing first with the edges, since I’d heard that hand woven cloth is prone to unravelling.
I used a bold thread to mark out the cutting lines, then I put zig-zag stitches on either side before I cut.
In future I would skip all this, and use starch to stabilise the fabric before cutting. Much easier!
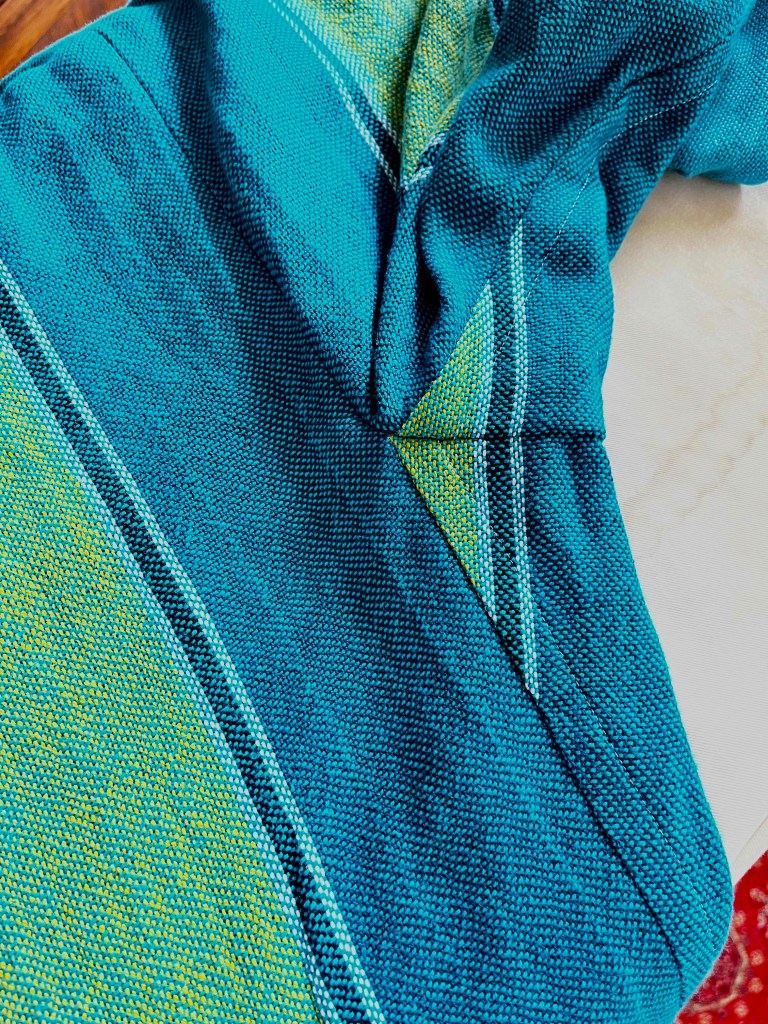
The pants came together very quickly.
I was able to use a flat-fell seam using the selvedge to cover the diagonal cut edges. This was very flat and easier than a regular flat-fell where you have to fold the seam allowance!
Since my handwoven fabric was bulkier than typical store-bought cloth, I bound the crotch seam with cotton binding, for strength and comfort.
Determining the length of the pants was a leap of faith: I grabbed a pair of tracksuit pants from my son’s wardrobe, and added a generous amount up top for the waist band to fold over twice, plus a bit for hem.
In the end, I guessed exactly right, phew!
At this point I had the waist band elastic inserted, but loosely safety-pinned in place so I could adjust it if needed.
The final touches were to hem the pants, but I left that until after the gift was unwrapped so that I could double check the length on his body.
All in all, I think this is a pretty approachable project for a novice weaver (like me). It doesn’t really matter if you can’t get a tidy selvedge, since that gets sewn onto the inside of the garment. You just need a bit of patience, and the ability to install a longer warp (about 6 metres is a good idea).
The sewing is not too tricky, either.
Best of all, using one colour in the weft means you can develop a steady beat, and start to relax into a rhythm. I learned a lot from making this piece!
So, what do you think? The pants turned out perfectly for my son: he loves them. He spent all of January wearing them, so they must be pretty comfortable.
Now I want a pair!
