
Well, the title for this one pretty much says it all, really: I’ve been learning to make cheese! Specifically from goat’s milk, because …🥁… we are milking our goats!
Yes, this is awesome.
Our goats came to us with one doe in milk (Keira) and both does pregnant (surprise!). It has now been over eight months since both Keira and Scarlet had their kids. And we have a lot of milk!
What kinds of cheese can you make with goat’s milk? Turns out a lot! So far I’ve made:
- Paneer
- Halloumi
- Feta
- Chèvre
The next cheese I’m going to try is called Drunken Goat. Yes, really!
So, is it hard to make cheese?
Hmmm, I’m not quite sure how to answer this. At this point I’ve made a bunch of cheese (which is super cool, really) and it was not just edible, it was delicious! I must be doing something right, surely?
It doesn’t seem amazingly hard (so far) to follow a cheese recipe. I’ve used everyday cooking skills, like heating liquids, measuring the temperature of liquids, and using a timer.
Using a double boiler is something I hadn’t done very often prior to making cheese, but it’s really not rocket science.
I think the trickiest part (so far!) has been comparing recipes and deciding which one to use. They tend to vary a fair bit, so which bits have wiggle room and which bits are important to follow exactly? Which one is the “correct” way to do it?
I’ve found the wiki articles at cheeseforum.org to be really helpful in my learning process. I’ve just joined the forum itself, and there’s a wealth of information there, and a bunch of really helpful people.
After reading up on the forum, I’ve discovered my current level of confidence versus competence puts me at the “Naïvely confident” stage of the learning curve:
I think I know what I’m doing, but I probably don’t.
Jess, naïvely confident
But it’s fun! And delicious!
Getting started
Making cheese at home is more approachable than I thought it would be. Paneer and Queso Blanco cheeses don’t need any special cultures or rennet, just pots, a cheese cloth and some lemon juice or vinegar.
When it comes to equipment, you can wing it using things you probably already have in your cupboard (colanders, strainers, plastic containers with snap on lids, saucepans, etc.). Most people don’t have a milk thermometer, though (you definitely need one of these)!
Luckily I was given a pretty full-on Mad Millie kit (years ago) that contained a bunch of things for a variety of cheeses: ricotta and feta cheese molds, a cheese press, draining mats, plus measuring tools for tiny amounts of ingredients (spoon measures and pipettes).
To make cheese you need a way to turn milk into curds and whey. This is done with acid, or cultures, or rennet (it’s easy to get hold of vegetarian sources in Australia) or a combination of these.
My kit gave me vegetarian rennet tablets (which amazingly have not denatured yet) and citric acid, and I purchased some powdered culture from Green Living Australia.
One piece of advice if you’re getting started with a kit:
Use cheese-making kit instructions as a place to start, but go looking for other recipes to compare and contrast!
My advice, take with a grain of salt! (Not literally.)
I’ve found the Mad Millie instructions to be very time-based: “do this and then leave for an hour” type of thing. If your milk is super fresh or your goats have been on lush pasture, it will behave differently and the timings will be out of whack.
Understanding why you leave it for an hour is really useful (e.g. you are trying to get to a certain level of acidity, or to allow the curd to set for a “clean break”).
Understanding why helps you to anticipate the outcome you want and spot it happening early / late, rather than just crossing your fingers and hoping the recipe works for you that day.
Halloumi
If you’ve not had halloumi sliced and grilled with a drizzle of lemon, you’ve been missing out! We used to call this “squeaky” cheese because of the way it feels when you bite into it, and it’s possible to grill it because it won’t melt in your pan.
It’s traditionally made with a mix of goat and sheep milk, but it works perfectly with just goat milk. The basic idea here is to squash the milk curds under a heavy weight, and then boil them in the whey. I store the finished cheese in the fridge, in brine made from whey.
After making this cheese several times, I’ve discovered the reason it won’t melt in your pan is because the curds are not very acidic when you boil them.
Interesting halloumi fact
Here’s a batch of halloumi in progress, taking advantage of the cheese press from my kit.
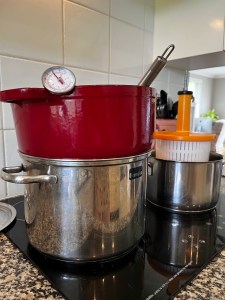
On the left is a makeshift double-boiler (a heavy enamel pot on top of a stainless steel saucepan containing water). The whey is in the enamel pot, and is coming up to almost boiling point before I boil the curd.
On the right the curds are inside the cheese press, which is sitting inside another saucepan to catch the draining whey. The amount of weight I have “pressing” is about 6-7 kg (which is like a full 5L paint tin sitting on top of the curd). I like the cheese press, it’s very handy and compact!
Feta
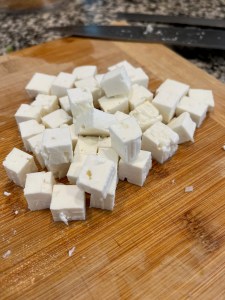
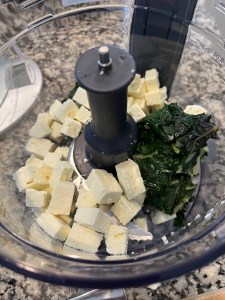
Another classic cheese to make from goat’s milk: this is a firm, white, crumbly cheese you put into salads, or whiz in the food processor with spinach to make Spinach and Feta rolls (omg, yum).
I’ve made several batches, and I’m feeling pretty confident I’m making better feta than we can buy from the shop. Each batch I make gets more delicious, and yields more curd, and so I think there’s still plenty of room for improvement!
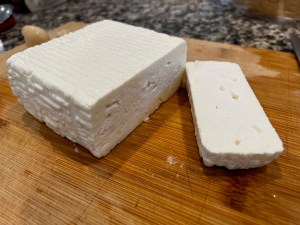
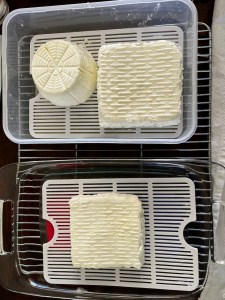
This was my first feta, and it came out pretty darn great.
This was my second, and it was even better. The colour of the cheese is a little more yellow and it had a more “cheesy” flavour.
Making Feta is fun because you drain the curds (basically a bunch of soft wobbly white things) inside a mold instead of a cheese cloth. After just 30 minutes you can flip the curd mass over (using your hands) and see your feta cheese taking shape! It’s like magic!
Chèvre
I made this for the first time on New Year’s Eve (I’m a party girl, me 🎊🧀). Well, I started making it, and I finished several days later. This one was more like making yoghurt: lots of time sitting and fermenting!
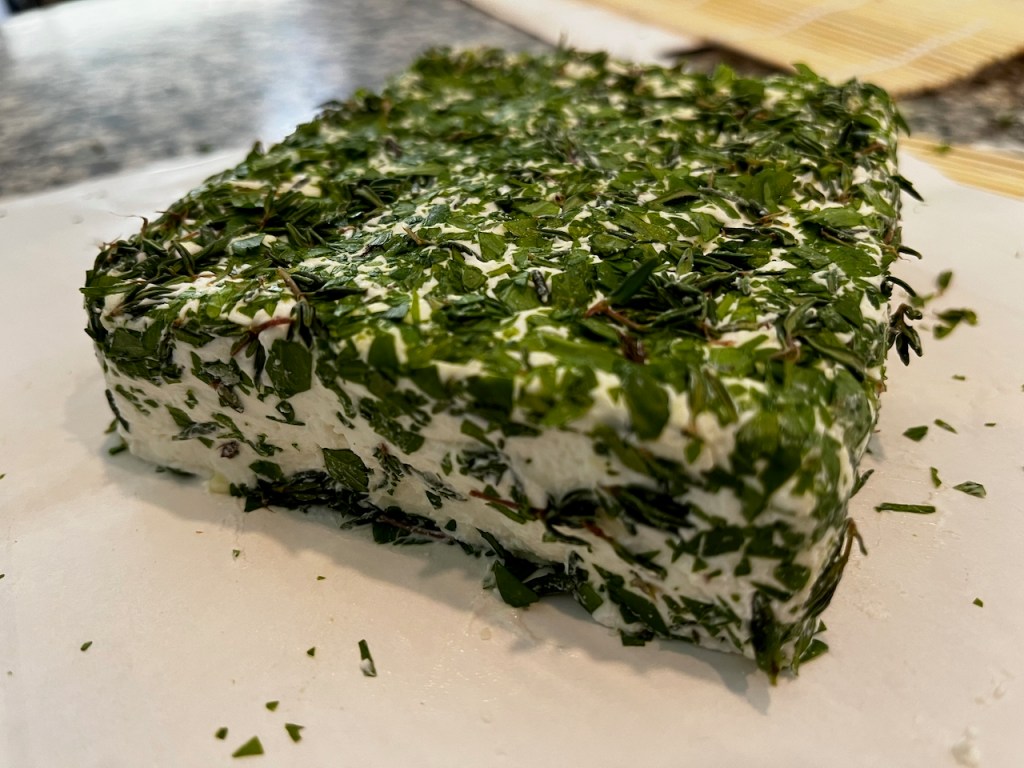
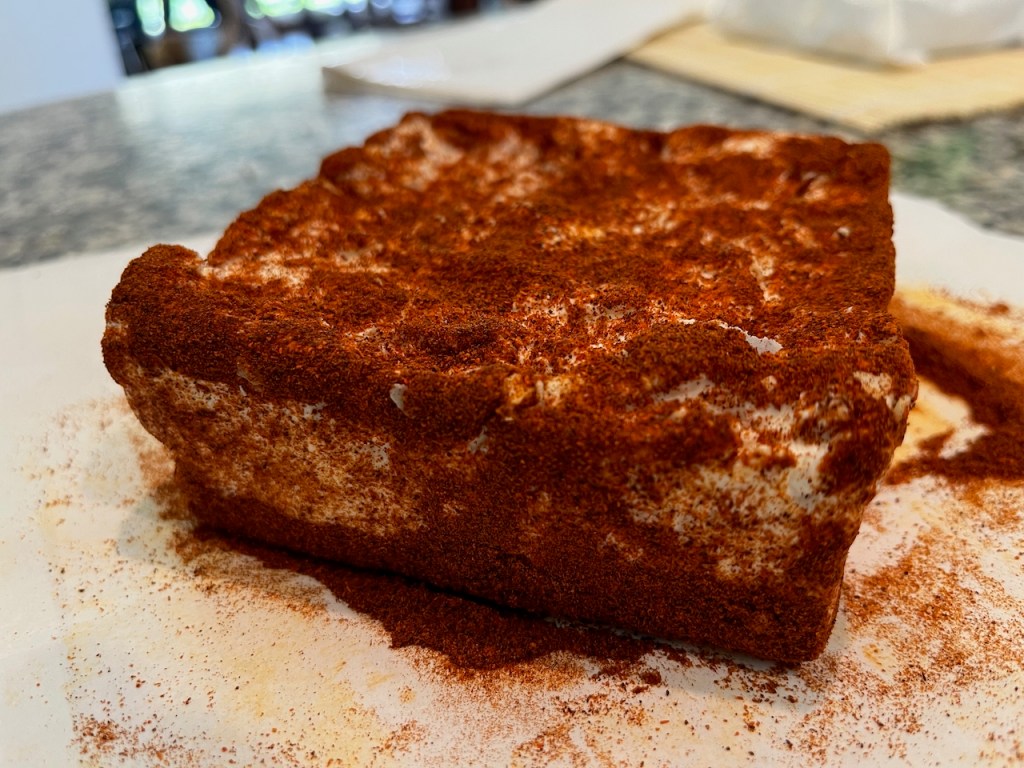
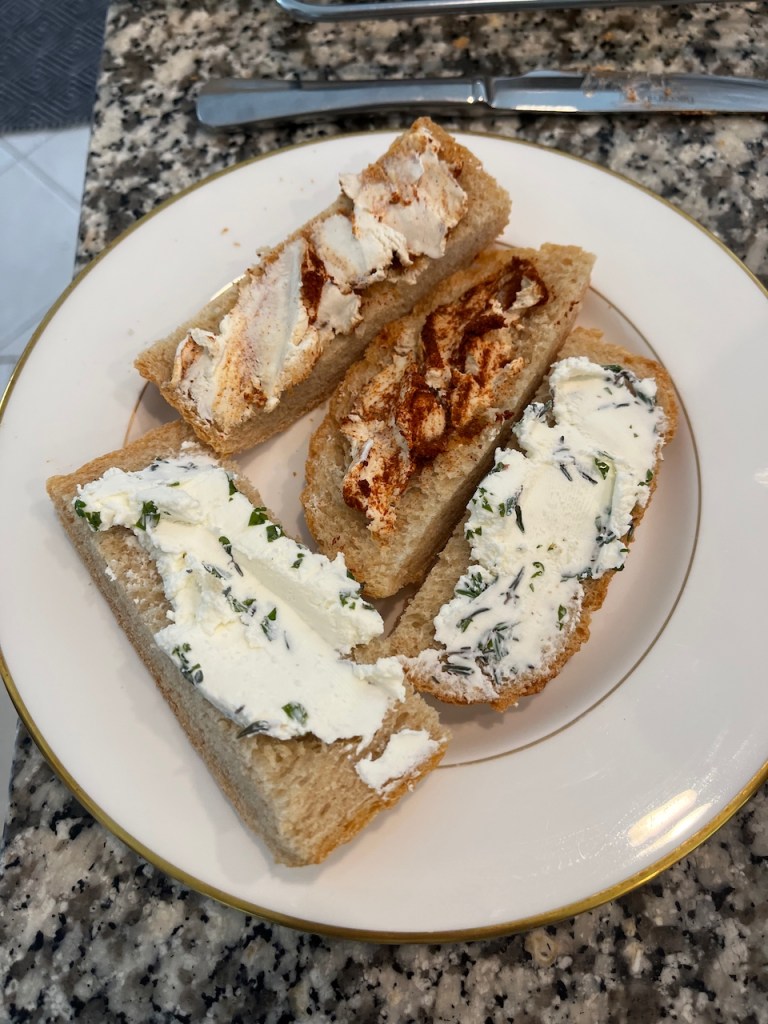
This cheese is a soft spreadable cheese that you can season with practically anything you like. I chose smoked paprika for one, and fresh oregano and thyme for the other. Yum!
To make chèvre you use mesophilic starter culture (I used this “soft curd” culture) to produce curds and whey. The bacteria consume the lactose in the milk and produce acid, which protects the cheese from spoiling on your bench top.
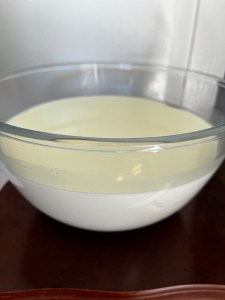
Here’s my 2L of goat milk, sitting in my house at 23 ºC, quietly approaching cheesiness (which is a quality you can measure: the target pH is 4.6, which is very acidic).
The top of the milk is greenish-yellow (that’s actually the whey pooling on top) and the curd is a soft mass of white.
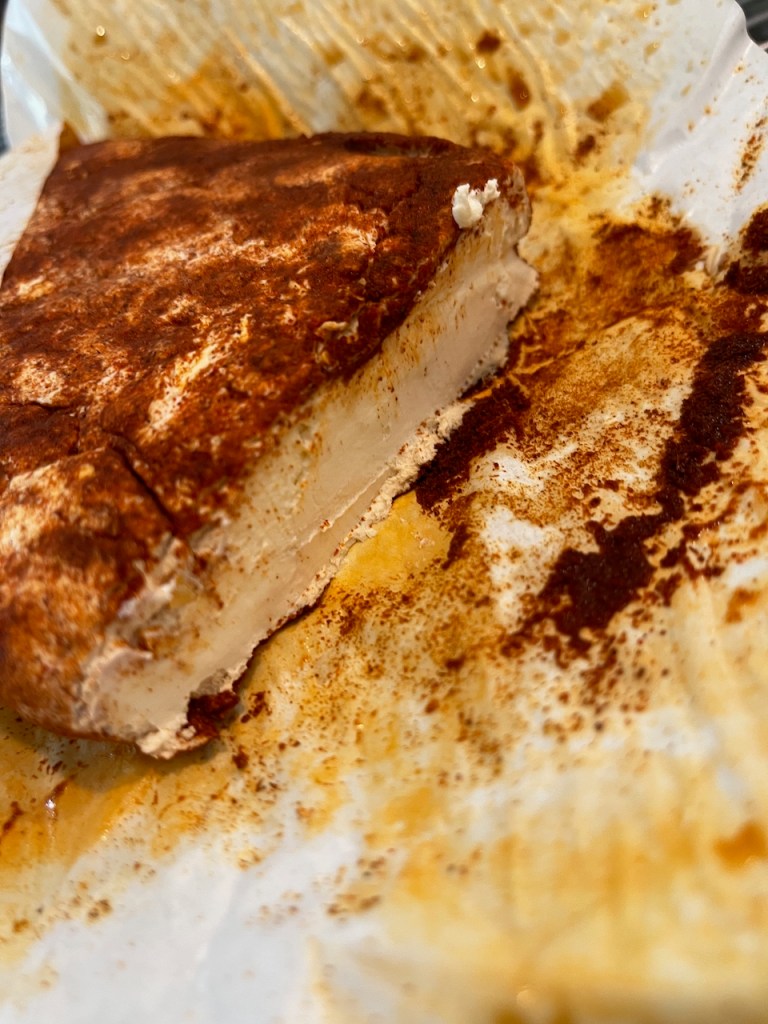
Once it hits that pH (which I measured using pH test strips, like a boss scientist) you scoop and drain the soft curd for another day using whatever you have to hand (like a ricotta or feta mold or two).
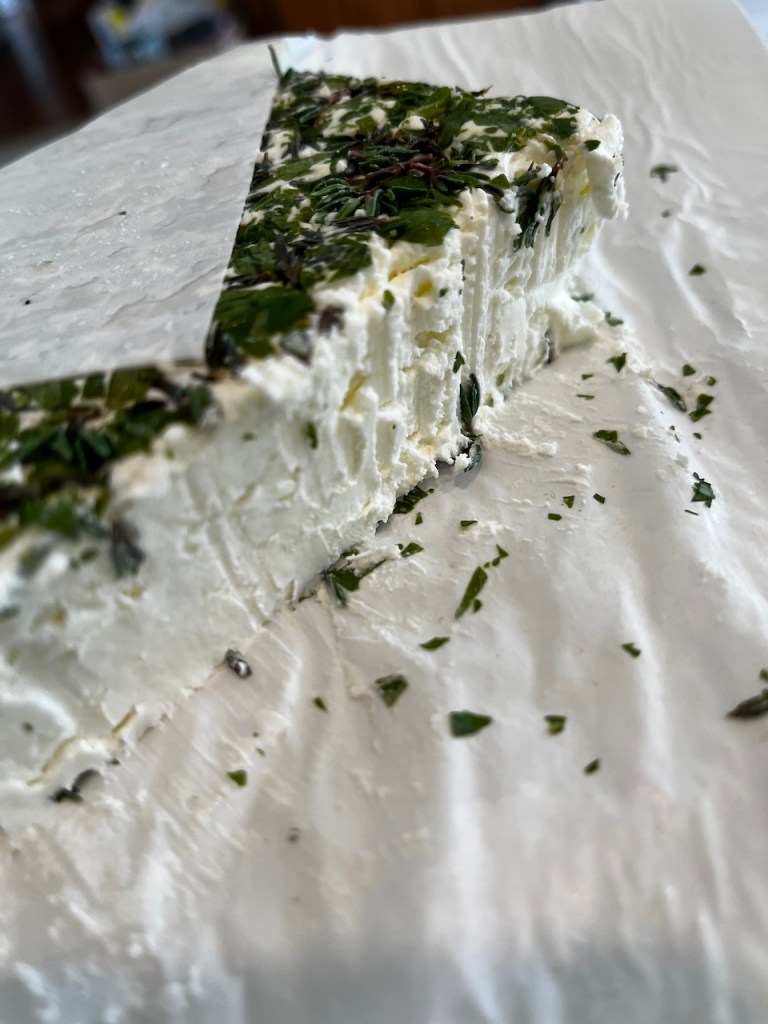
I was able to turn out the curd by flipping it, but it was very soft. I worked some salt into it (by hand, in a bowl) which mixed it all up again. It was smooth and silky in texture, but overall it was firmer than greek yoghurt.
I put it all back in the feta molds to drain again (adding salt draws out more whey) before I seasoned the cheese.
I have to say, this stuff is amazing! It’s really delicious. It’s fantastic spread on toast or inside a salad sandwich, and I can imagine making a cheese cake out of it (skipping the herbs, of course)!
What’s next?
Like I said earlier, I’m going to try making Drunken Goat, or Cabra al vino. Mostly because I saw the name of it and decided I just had to make it!
No, I will not be making my goats drunk before milking them! 😵💫🐐
This cheese will be my first “semi-hard” cheese. It’s made by soaking the curd overnight in red wine before aging it in the fridge, giving it a red rind.
Wish me luck! 🍷

Go you! This is fabulous. Chevre is one of my favourite foods
LikeLiked by 1 person
That is great, Jess! What are your volumes of milk to finished cheese weight?
LikeLike
I think the yield is pretty good at this time of year (but I’m a novice, so …). The chèvre I started with 2L of milk and after draining two days the curd weighed in at 850g, which seems very high to me! The feta block came from 2L of milk, too, but I didn’t weigh it. Next time, I will!
LikeLike