
Pssst: This is my 100th post! 🙂
This is a busy time of year, and in the lead up to Christmas I’m making a bunch of hand made gifts! William’s birthday is just two days after Christmas Day, so this year I’ve made him a much-needed lap quilt:

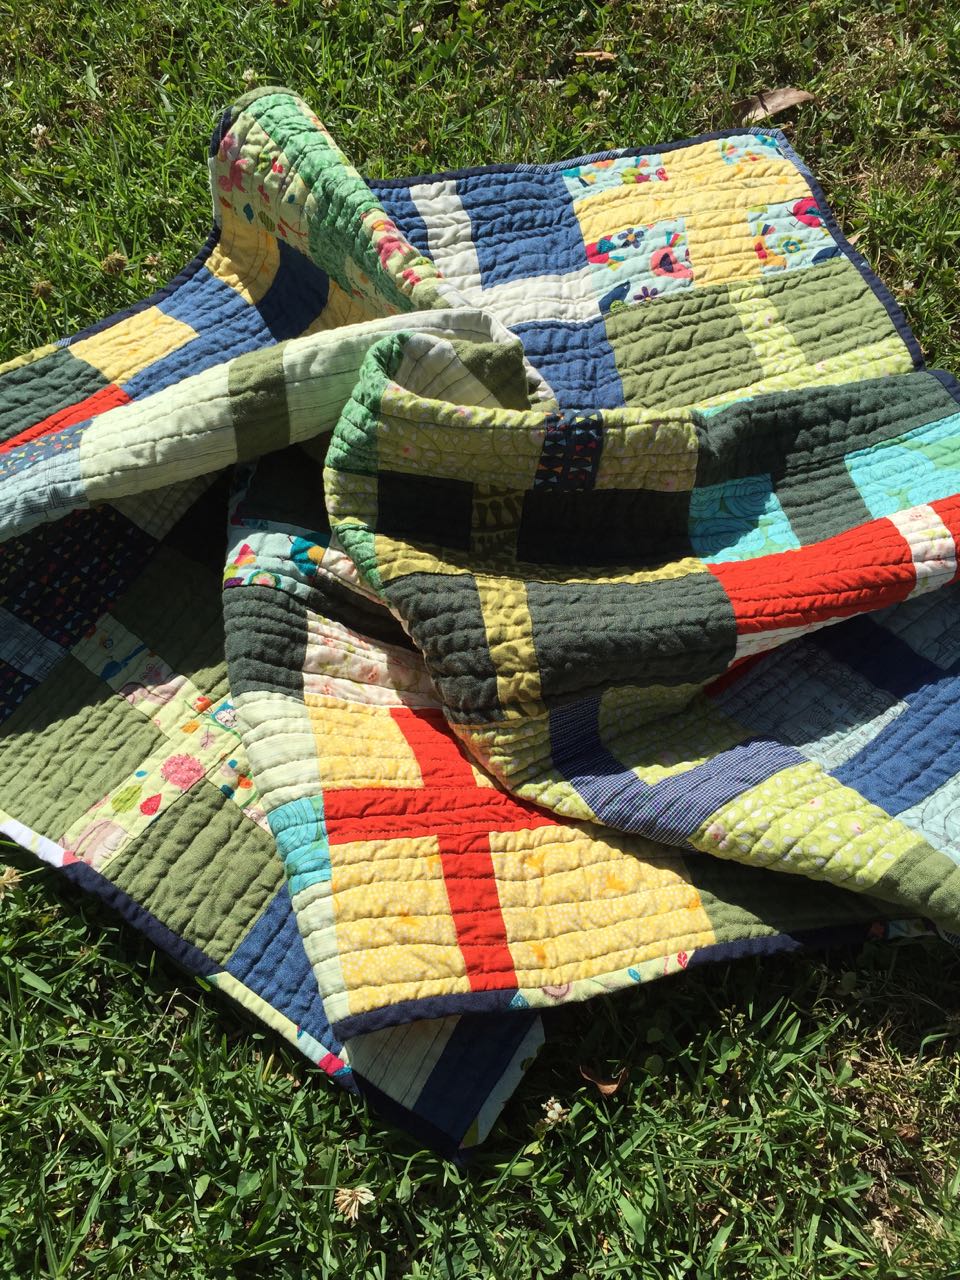
I’ll show you a fancy gallery in a moment, but here are a few details of this quilt.
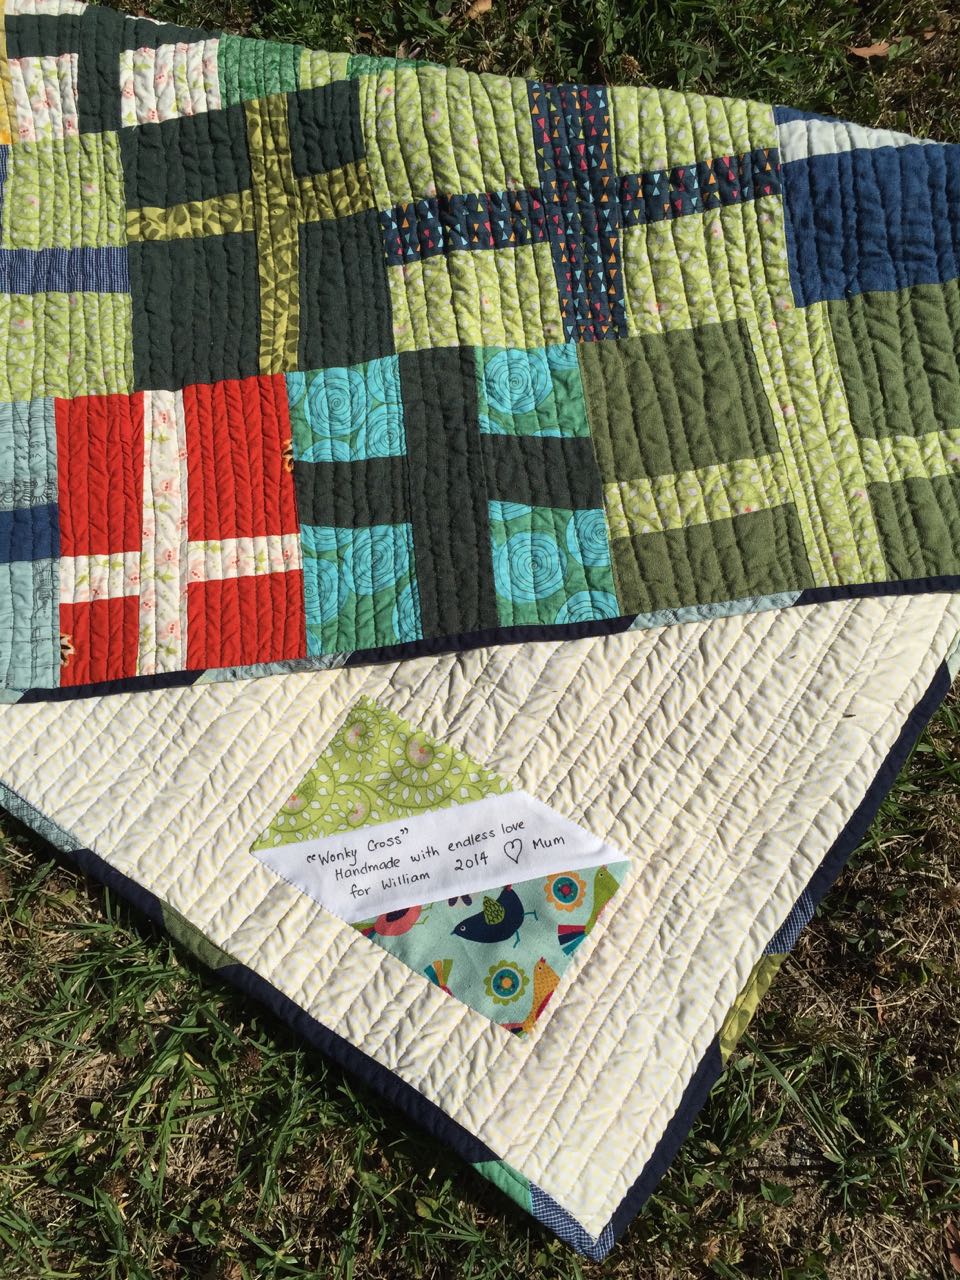
First up, the backing is just as lovely as the front (IMO), with another enormous wonky cross writ large in scrappy fabrics:
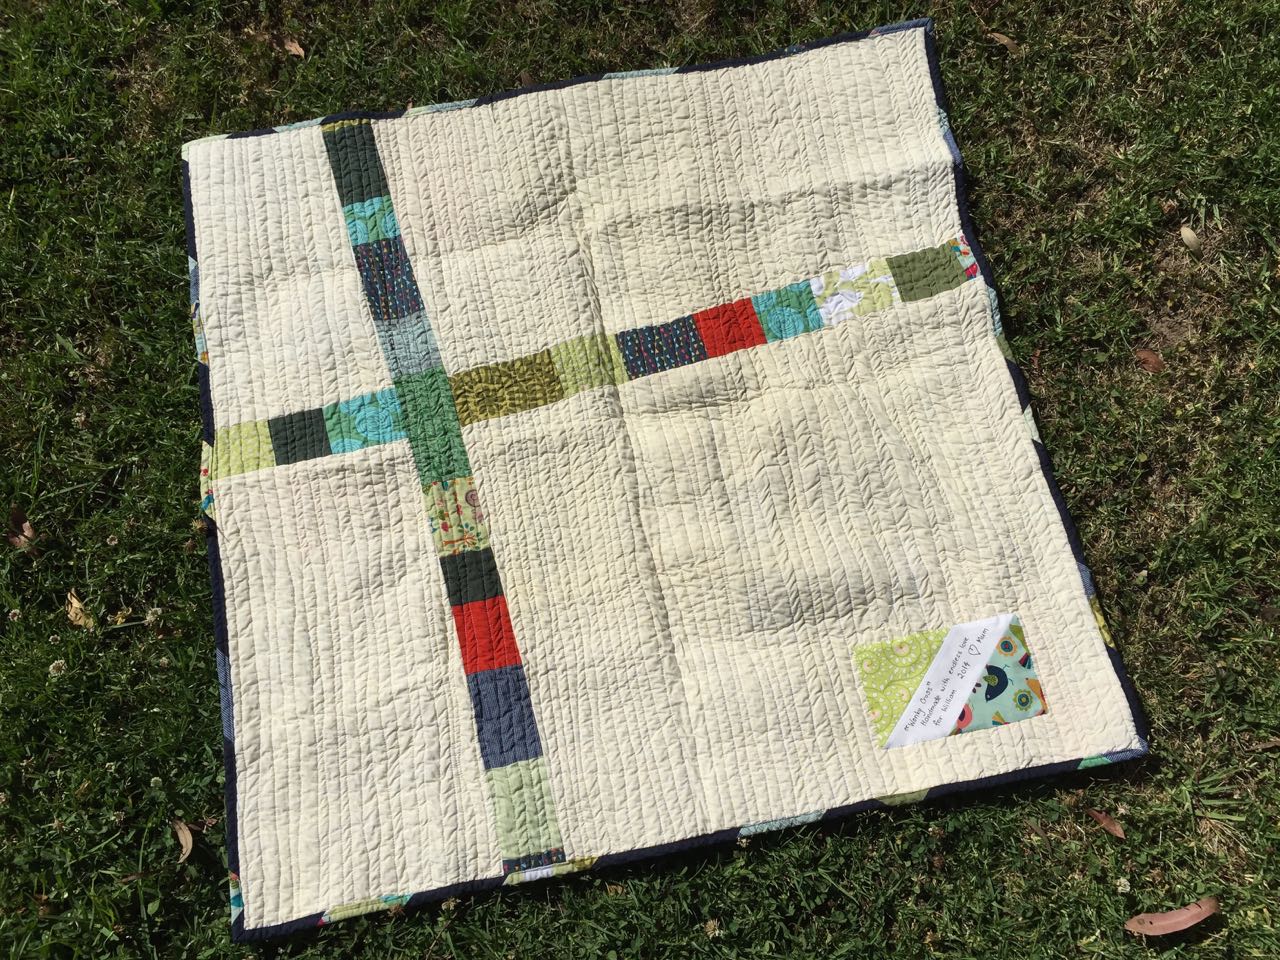
I wanted to pay homage to the front of the quilt by using a cross theme, but executed completely differently. I also wanted it to be quick and easy! So I pieced a long strip out of scraps to make the cross arms, taking care to put the orange “pops” of colour into a pleasant location.
The main backing fabric is a worn-out fitted bed sheet. 🙂
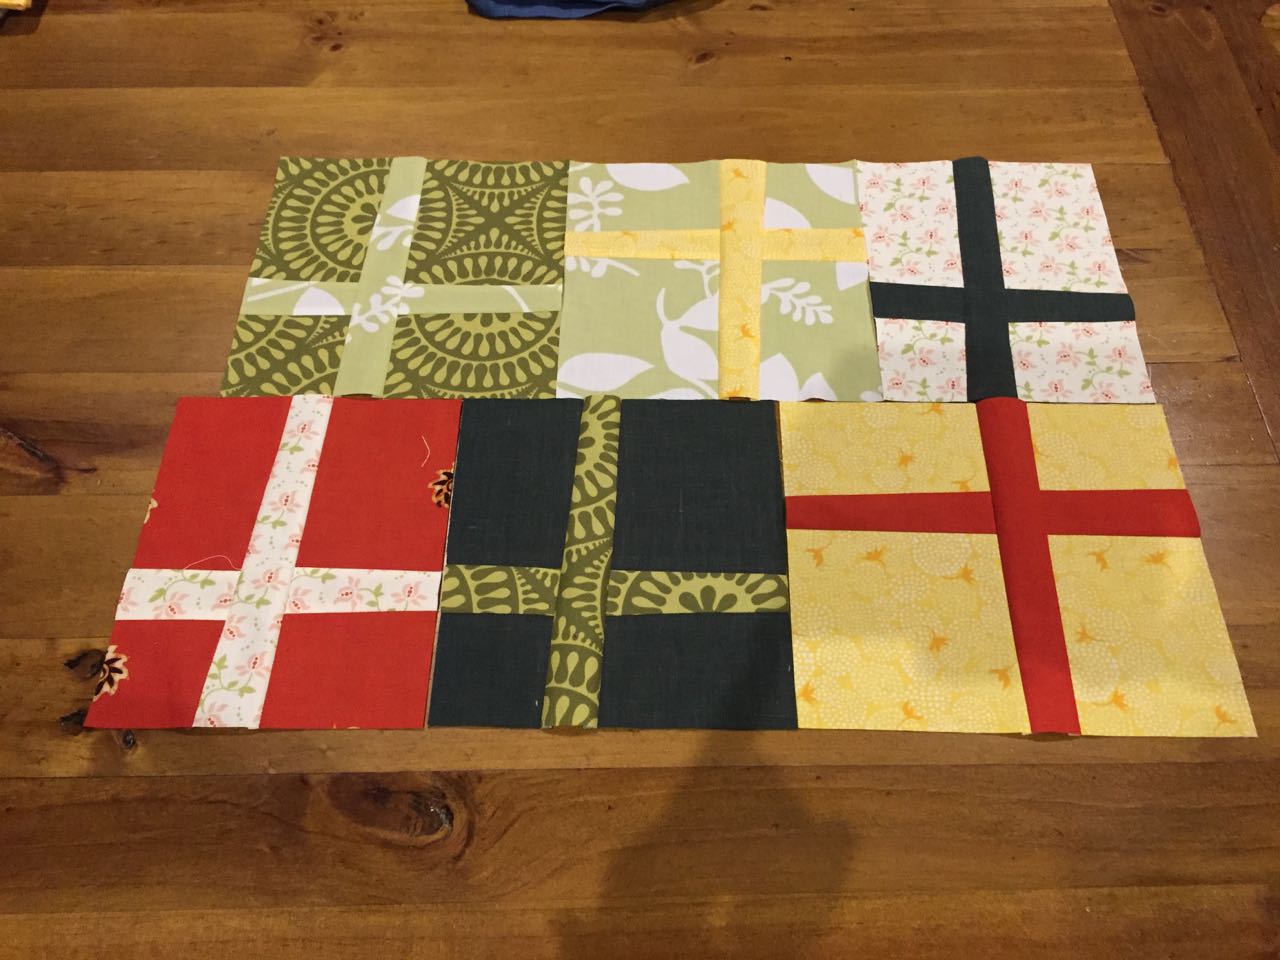
I assembled the quilt top using inspiration from many different “wonky cross” examples. There are so many beautiful quilts of this type out there!
I particularly loved this one, this one, this one, and used this tutorial for piecing the wonky crosses.
William loves green, blue and white, so my original design centred around those colours, but I decided to pull in some “pops of colour” in the form of a bright contrast, like the orange and yellow in the blocks above.
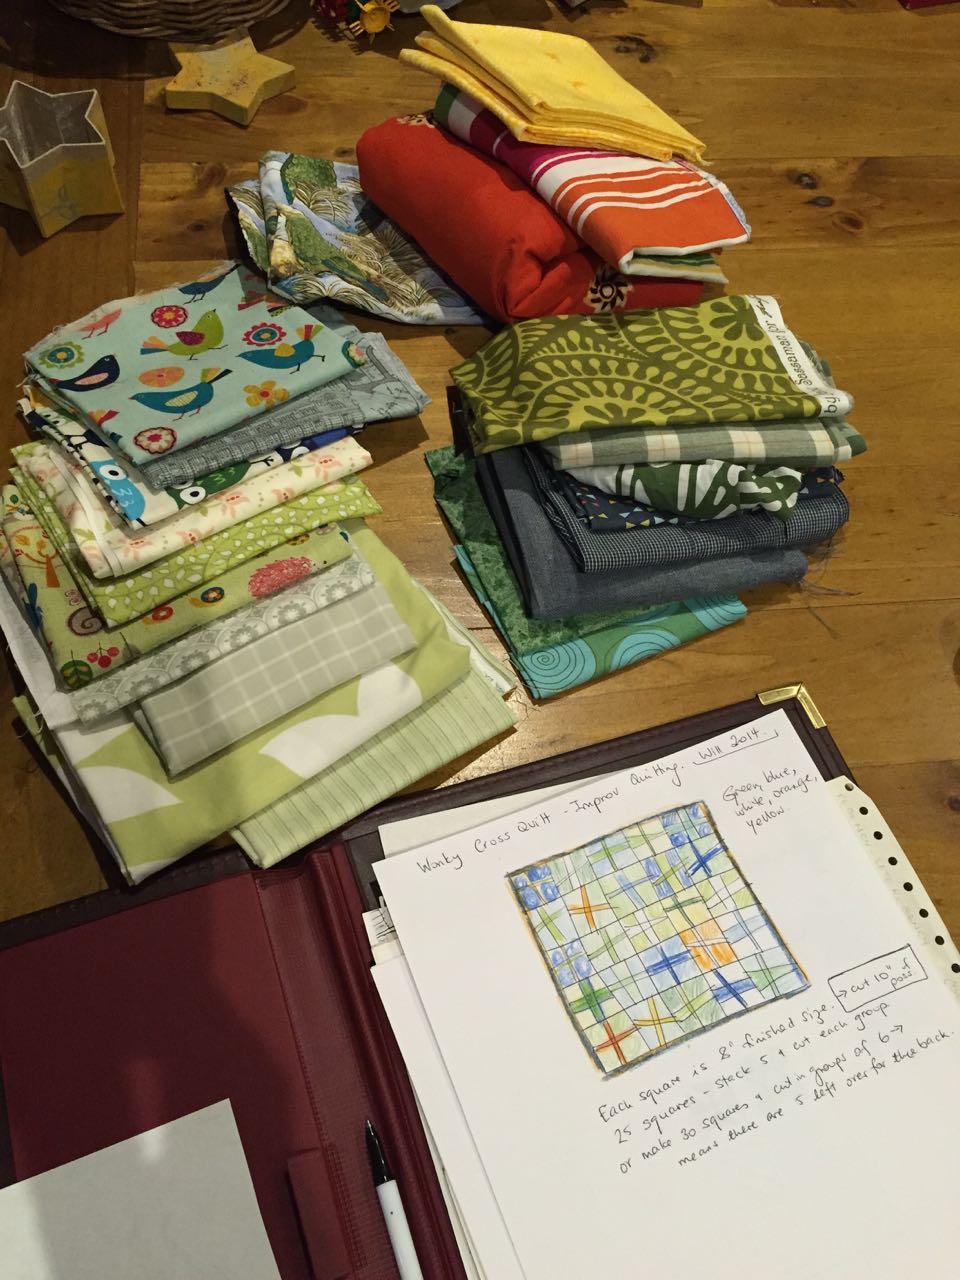
This shows my original concept of what the quilt would be like. I ended up going with a more improv layout, with each block being the same height, but different widths to the blocks around them.
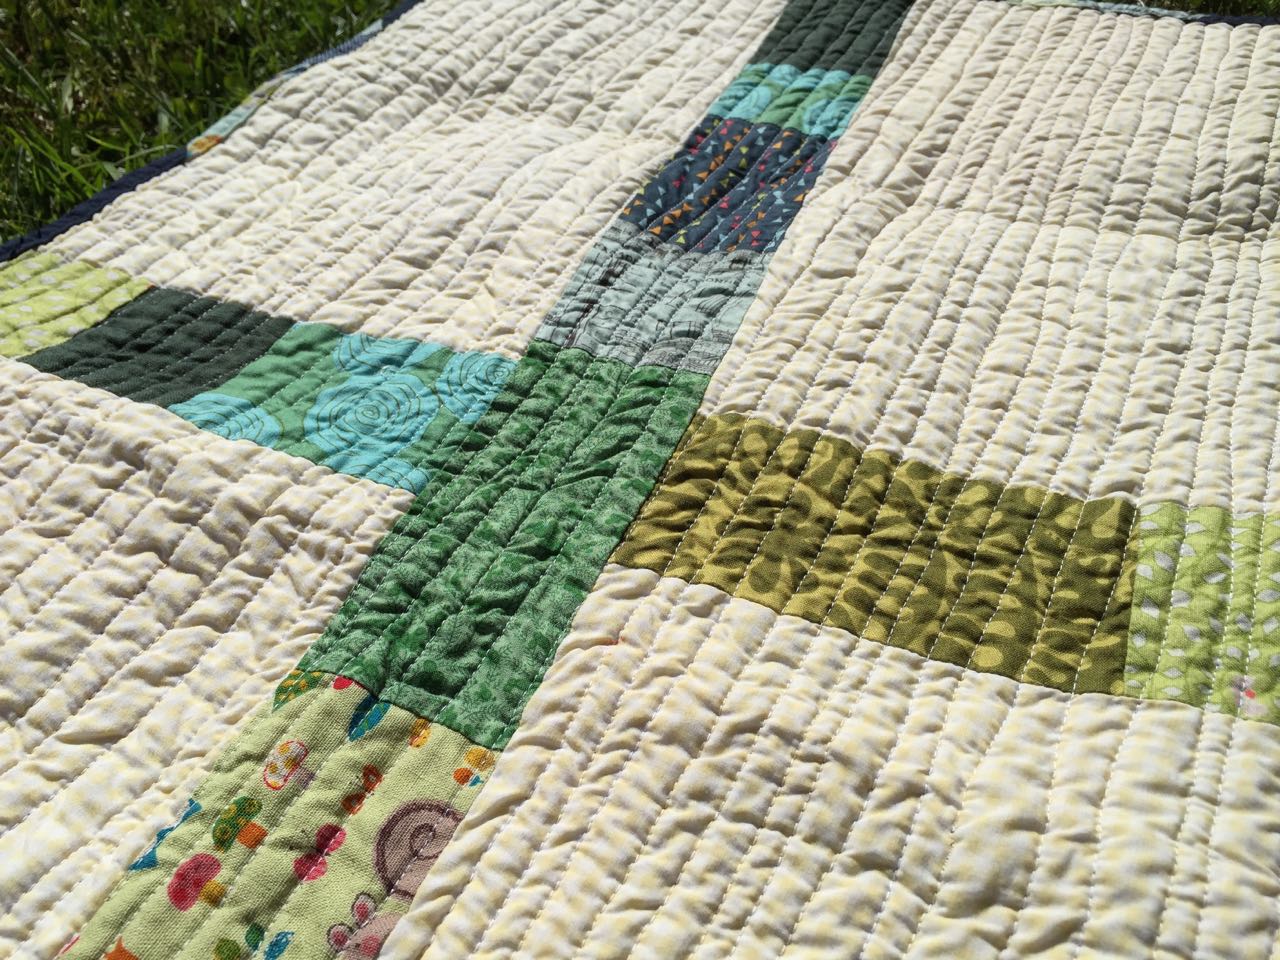
The quilting is white thread on the back, and green on the front. Simple parallel(ish) lines have given this quilt a hugely squishy feel. I ran the quilting up and down using my machine so that there are tiny directional pulls along each line. I really love how this texture has turned out — I think my favourite quilting so far!
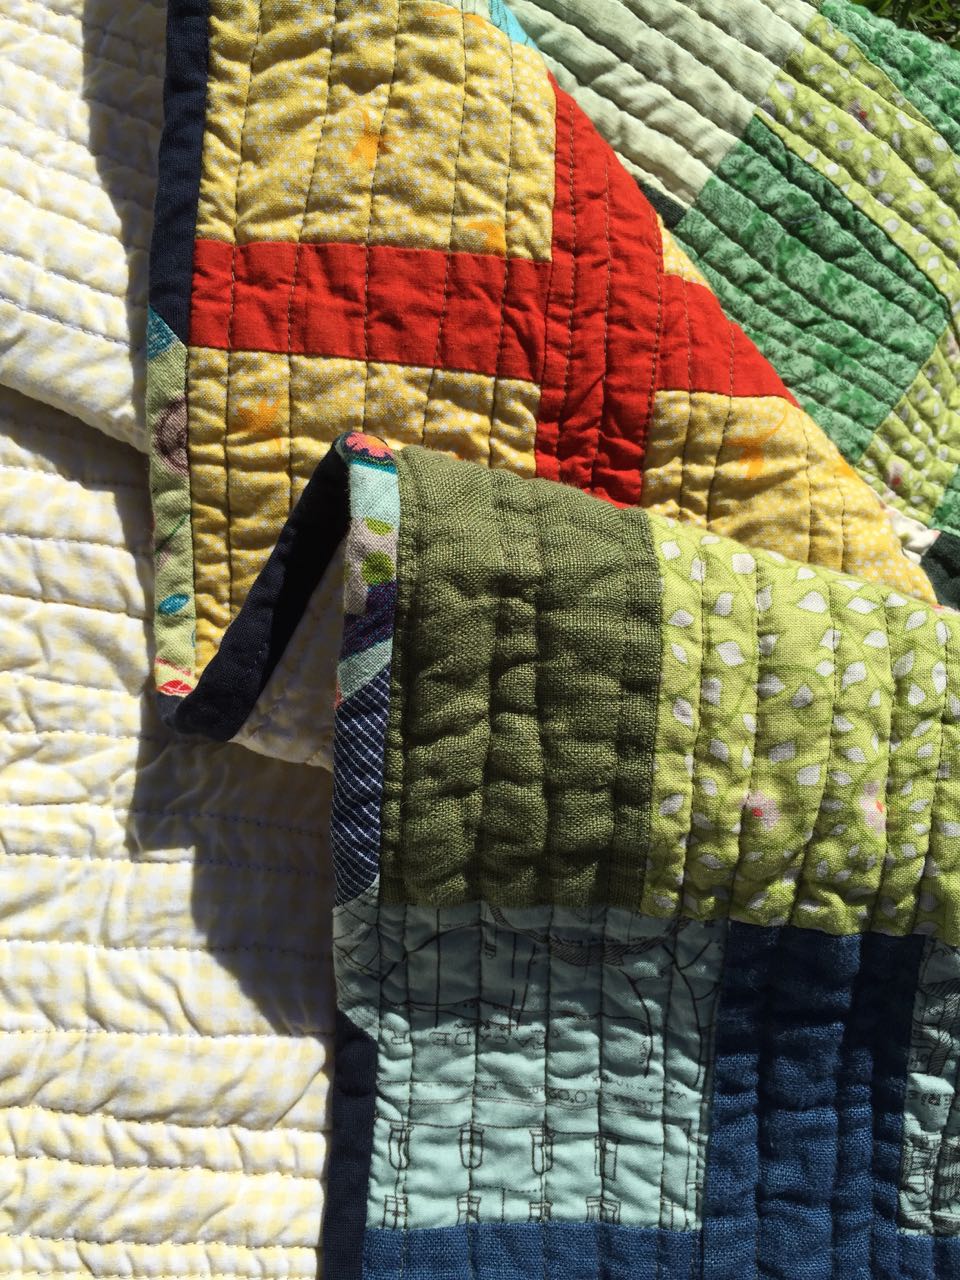
The scrappy binding I showed you previously has worked out really well. I was concerned it would be too navy, but the dark is alleviated by the scrappy colours, and I think it looks fun!
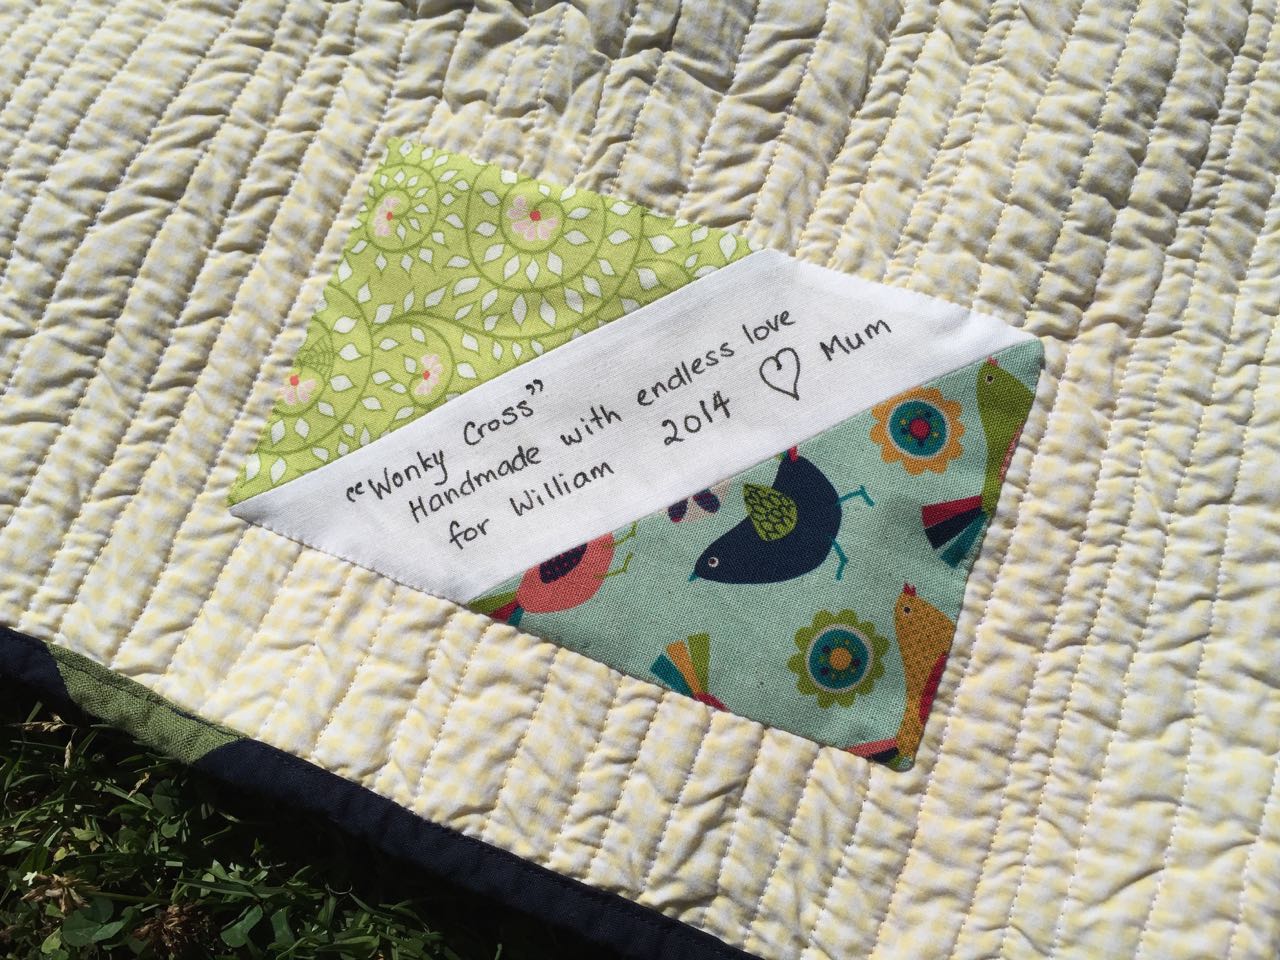
I think the only thing I would do differently with this quilt is to put the label onto the backing before quilting, as the quilting texture was so wonderful! I decided to put the label on by hand, but I bound the quilt with the machine. Hopefully the label will stand up to repeated washings!
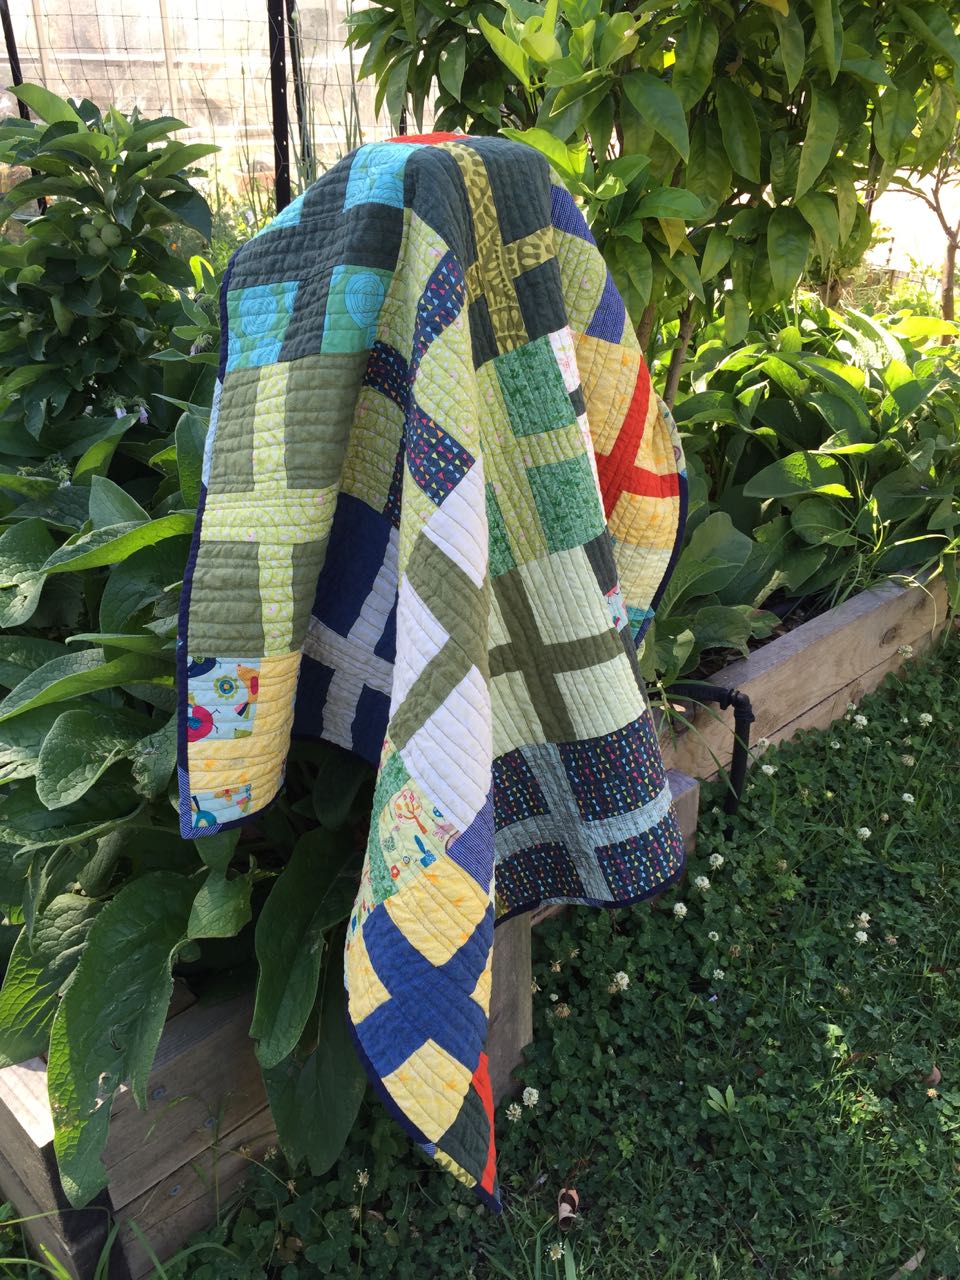
And now, some eye-candy quilt-in-garden shots! 🙂
 Linking up with Crazy Mom Quilts, and TGIFF! 🙂


Absolutely love this cross quilt. And congratulations on your 100th post
LikeLike
Thank you so much! 😀
LikeLike
What a great finish! It came out lovely, and the backing is perfect! I love your scrappy label too–it works so well with the big cross backing. I haven’t created a wonky cross quilt yet, but I think when I do, I’m going to use your method for the back. It complements the front quite well. Congratulations!
LikeLike
Thank you! What a lovely compliment :). I’m glad you liked the label placement — I was very careful to leave a spot for it when I designed the cross!
LikeLike
OMW!!! What a darling cross quilt. I loved your post, all the links and your thoughts. I’ve had one of these on my “to do” list for some time. One question, what kind of batting did you use? and it looks thick, as if you used 2 layers of batting, is that so? I’ll definitely be pinning!
LikeLike
Actually, I only used one layer of organic cotton batting. Hobbs, i think? It has always been rather thin but the quilting made it puff up! I was very surprised. 🙂 Thanks for the lovely comment! I’m so pleased this one will be staying in our household.
LikeLike
Congratulations on your 100th post! And I love the quilt, it looks wonderful and squishy and just right for wrapping around the birthday boy!
LikeLike
Thank you Carie! 🙂
LikeLike