
Hello everyone!
I’ve been a busy bee over the last couple of weeks, preparing for the crazy Christmas and Birthday season that is looming upon me! William was born two days after Christmas, and now I have a soon-to-be-niece arriving somewhere around December 14, so there is much to do!
Luckily I had a couple of ideas for quilts already tucked away. 🙂 The quilt I chose for my sister’s babe is a variation on the original wedding quilt I started for her. (I still haven’t finished her wedding quilt, btw, but a Free Motion Quilting foot is totally on my Christmas list, so next year IT’S HAPPENING!)
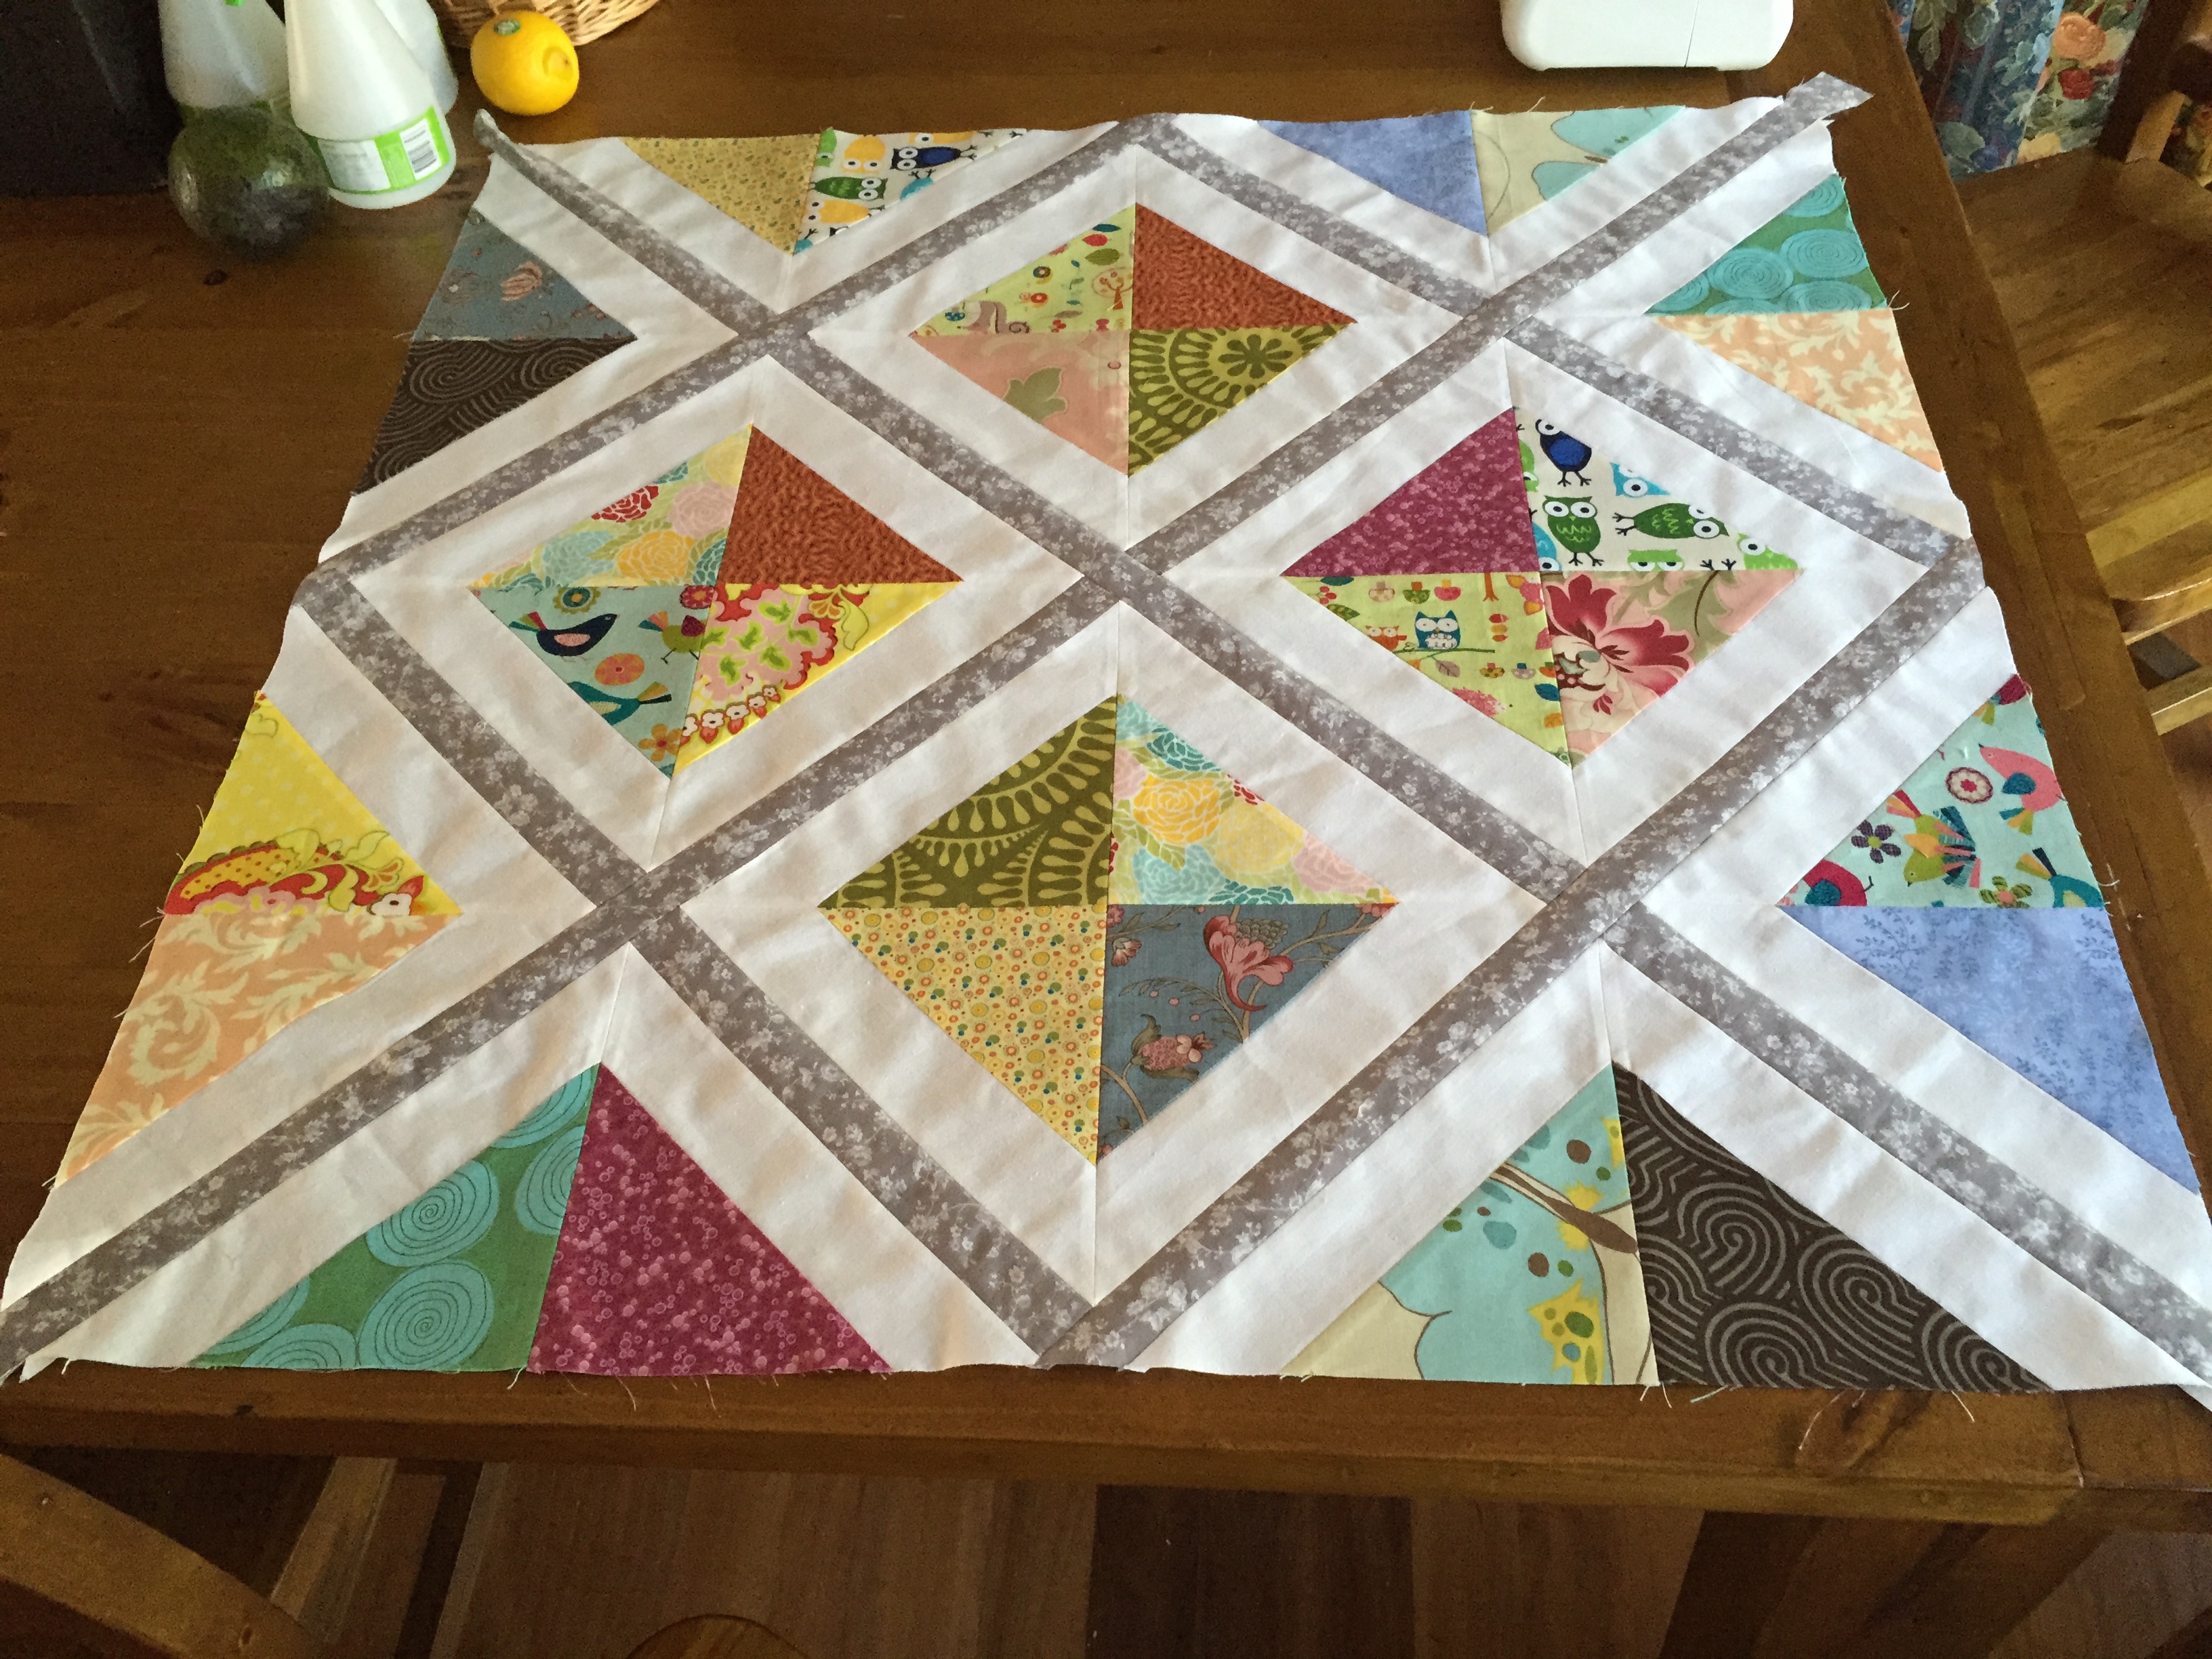
Today I wanted to share a tutorial for putting diagonal sashing into a quilt, based on the quilt top I made:
I started the quilt with triangular blocks shaped like this:
I arranged these into a pleasing arrangement, and worked out where I wanted my sashing to go (between each of the white sashing sections):

When you place your blocks on point like this you have a couple of choices about how to do the sashing.
Method One

This method allows you to put your blocks together by simply joining them up in rows and columns.
I decided not to use this method because:
- It looked fiddly at the corners, especially getting all those points lining up (8 seams converging on a point!).
- It would me take a lot of time to cut and assemble.
- It looked wasteful of fabric, because you have extra seams (using up seam allowance) where each block joins on.
- I wanted a reasonably narrow sashing, which would be tricky to divide in half and have room for seam allowances.
- I didn’t want a seam through the middle of each grey strip.
Method Two

I think that my source inspiration for the quilt used this method, with grey strips inserted into each block (a “block” here being one quarter of the size of my big squares). Blocks are then sewn together in rows and columns.
I decided not to use this method either, because:
- I was concerned I’d have trouble matching up the blocks, especially where each coloured triangle meets up, and where the corners of the grey sashing meet.
- It looked reasonably fiddly to cut and assemble because you need short strips throughout.
Method Three – Mine
My method used longer strips of sashing to join several blocks at once. The block structure is similar to method one, with four triangle pieces arranged with the colours in the centre.
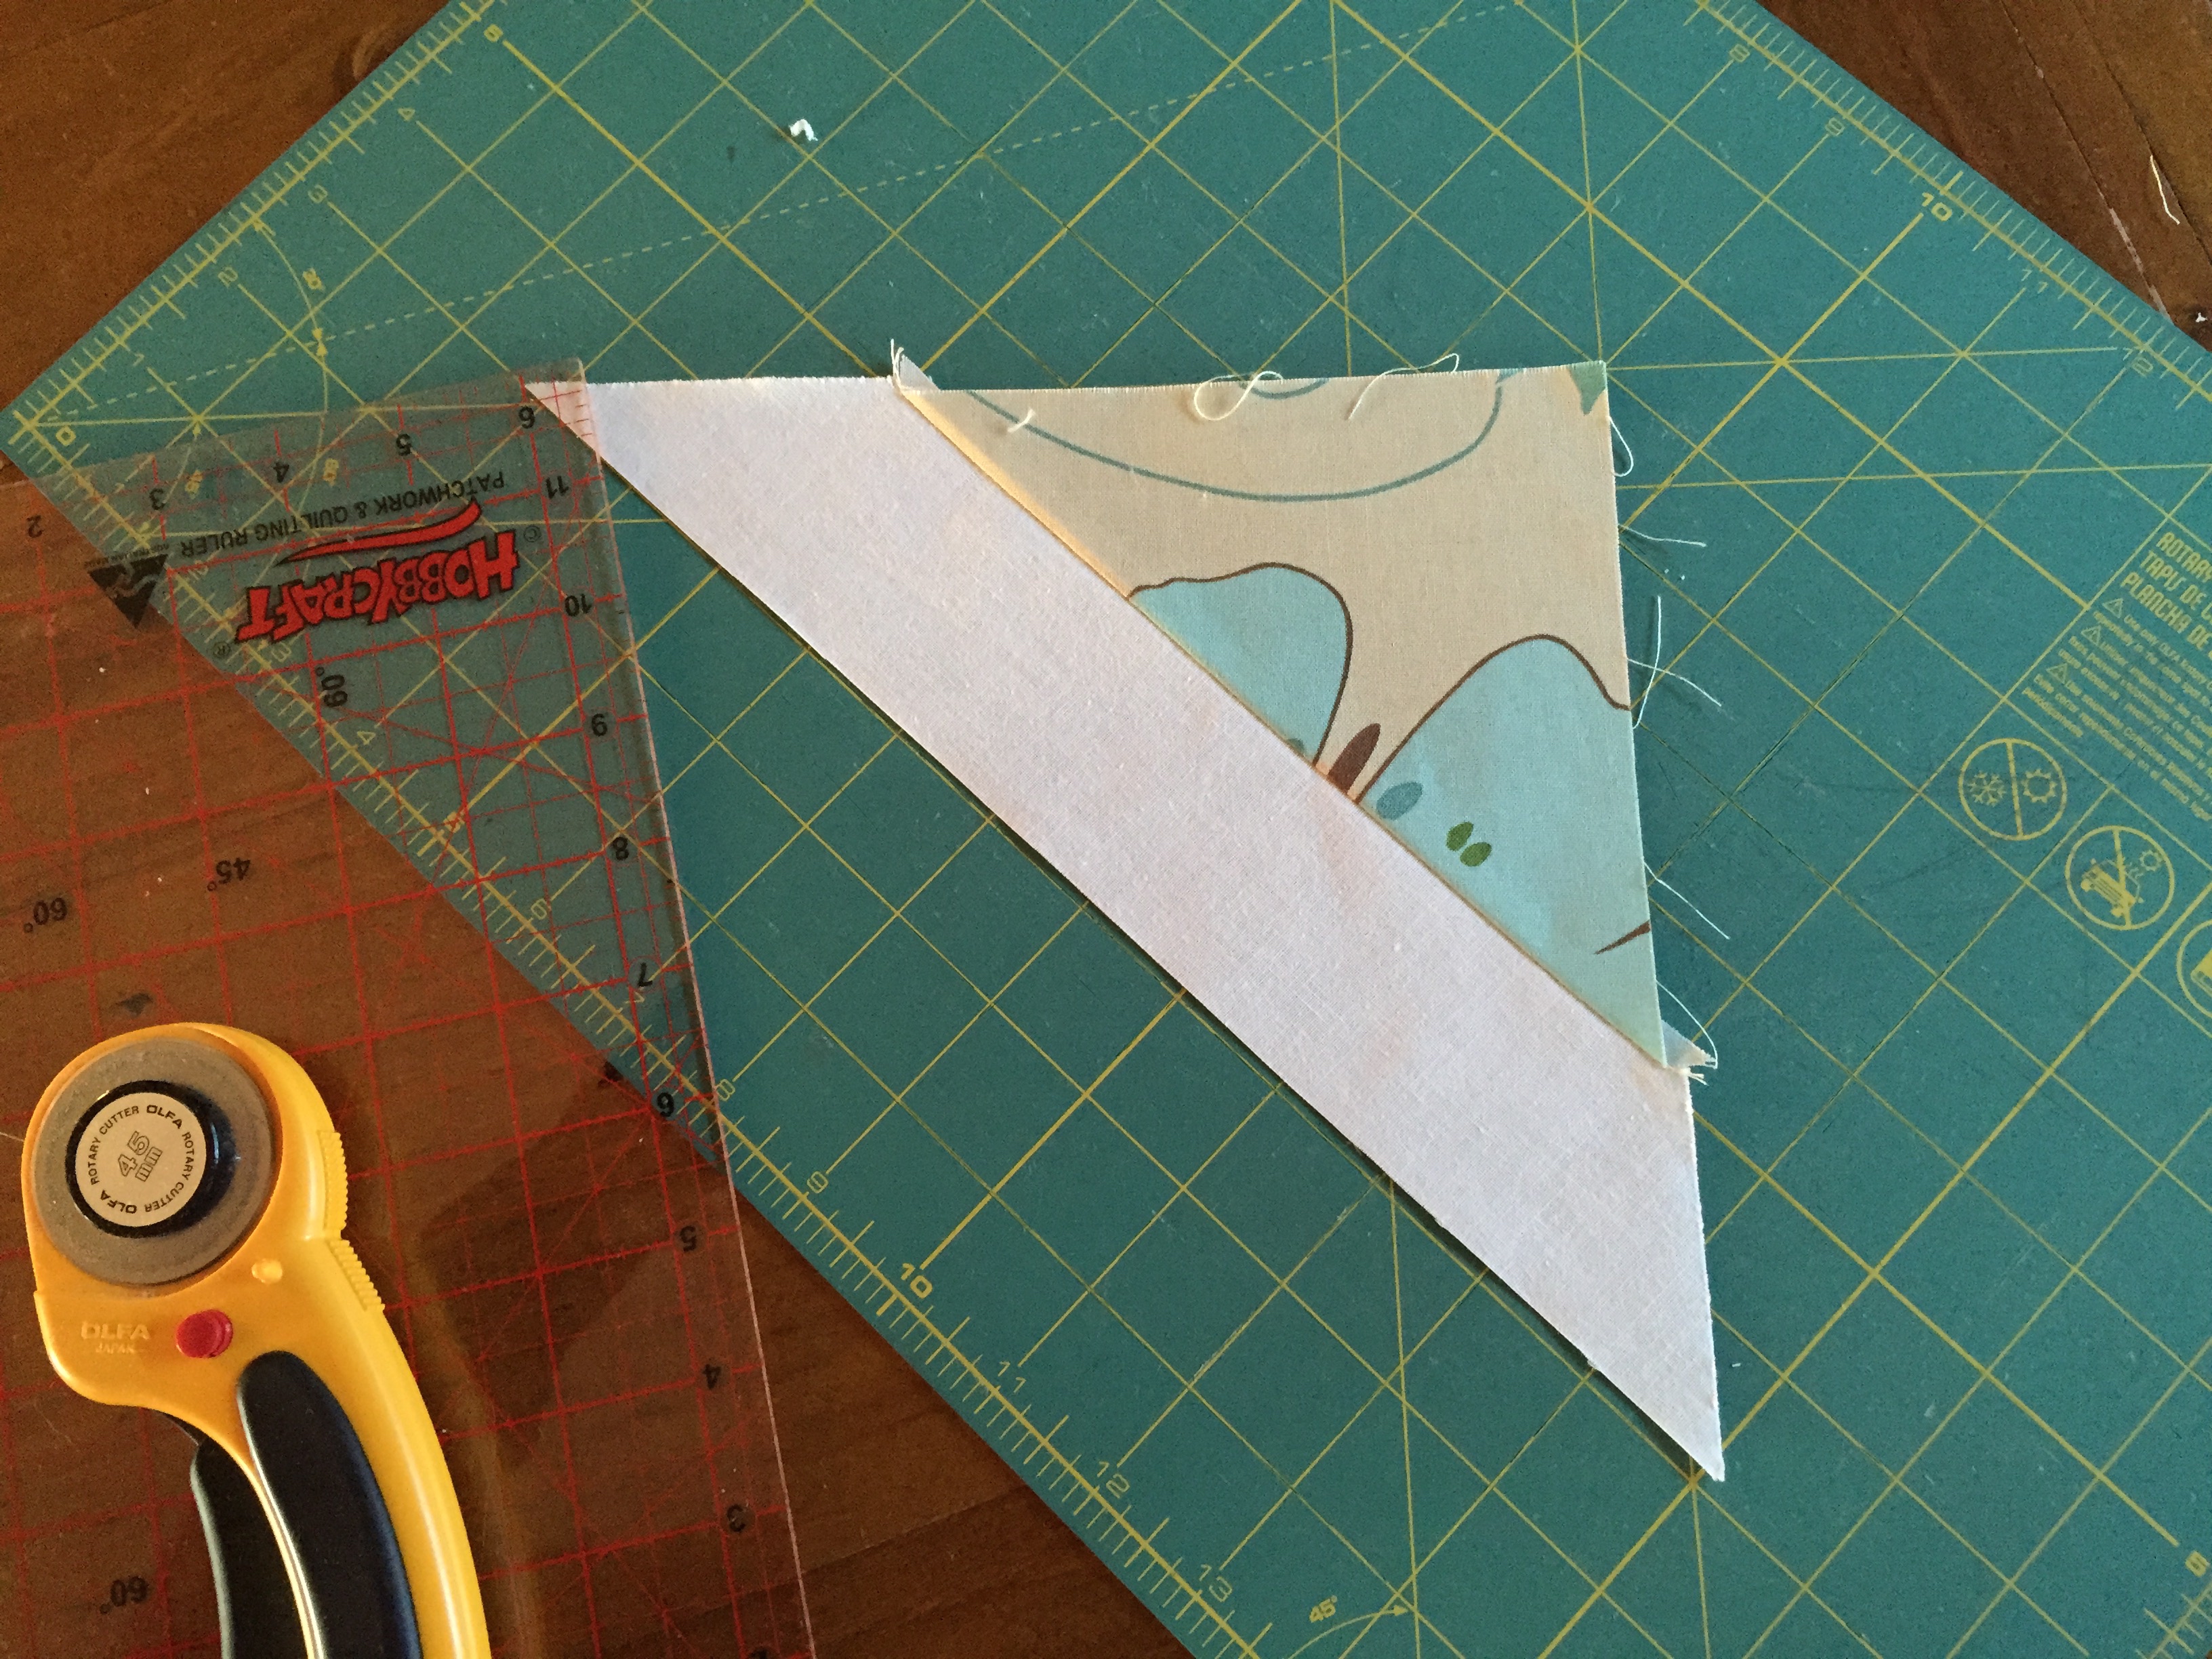
To make the blocks, sew together two triangles at a time:
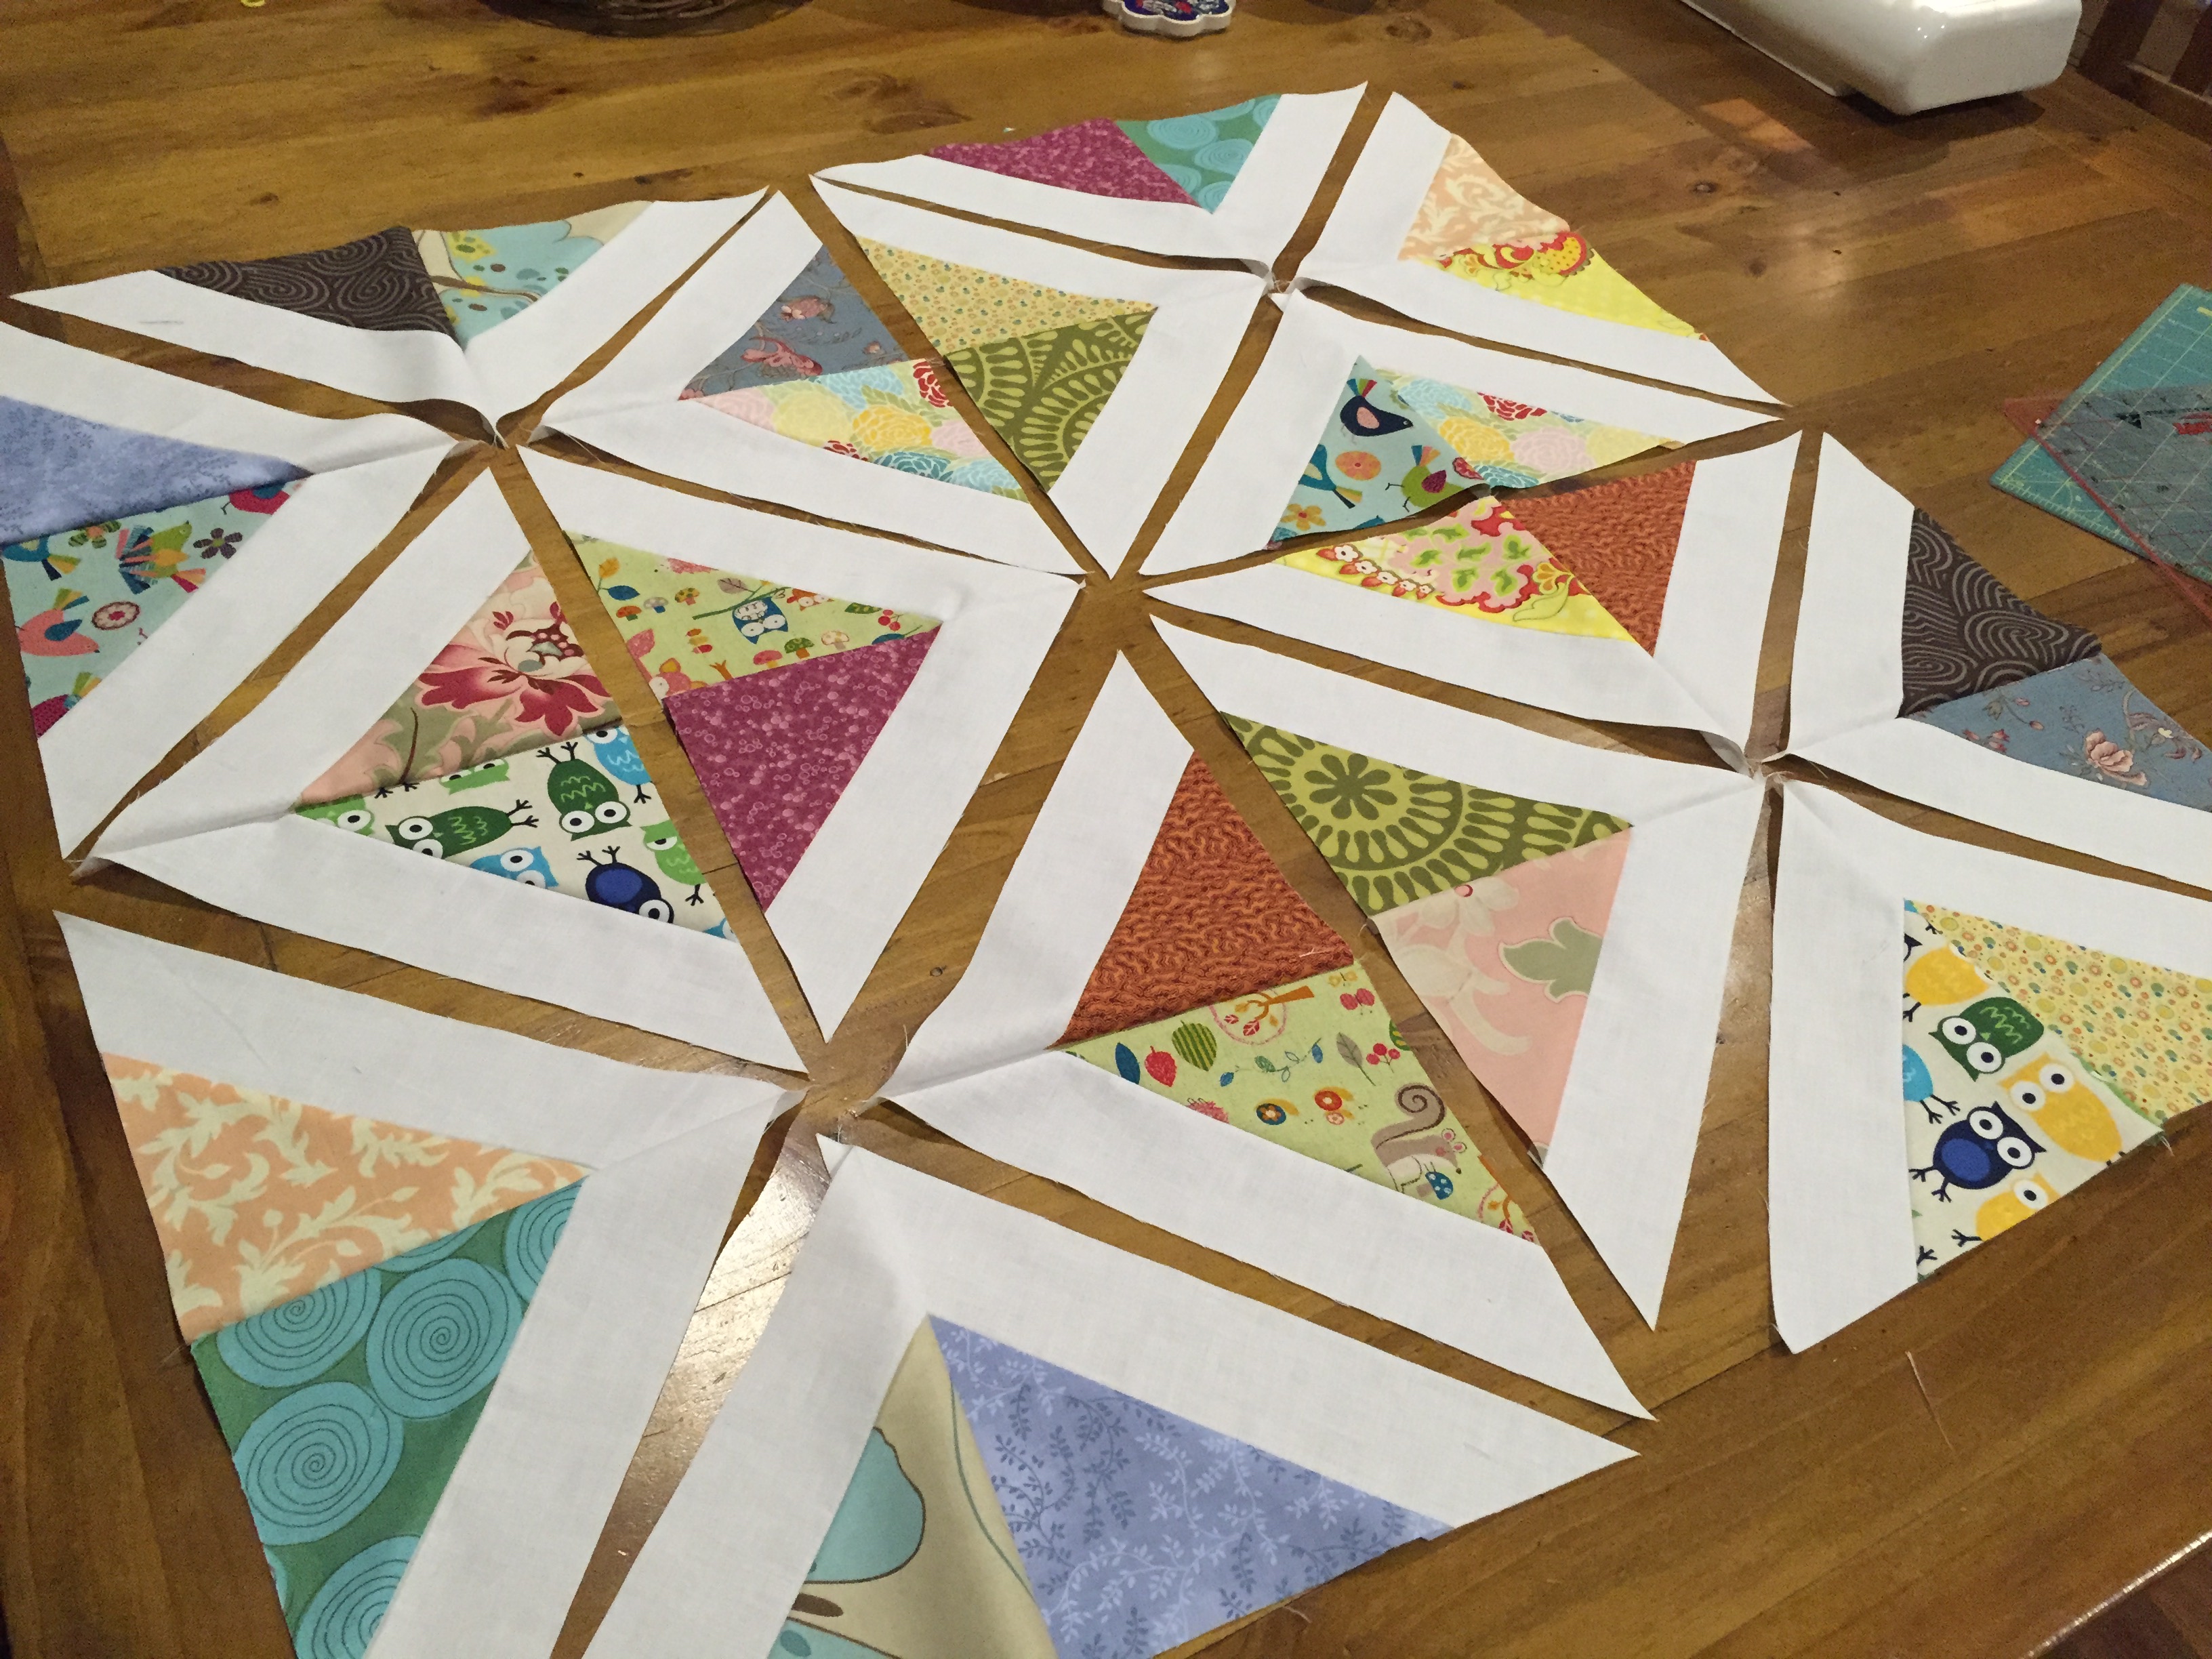
Then sew together the central square sections into a “block”.
Press your seams open, rather to one side, to avoid bulk where the points meet.
Here’s what your quilt top looks like now:

Now we are ready to put the sashing in. Let’s start with joining the two corner pieces together:

(Totally wish I’d taken a picture of that step! Nice excuse for some colouring in, though 🙂 ).
- Take the left triangle section, and add a strip of sashing down the right hand side (marked A on diagram). Press the seam open flat.
- Then lay the other triangle on top of the grey sashing (right side facing down), lining everything up along the top. Again, sew down towards the corner and press the seam open.
- It’s important to leave a little extra sashing at the corner point — don’t cut it off!
Use the same technique to join up two of the square blocks, making sure you align the top edges of the squares.
Now you have something that looks like this:
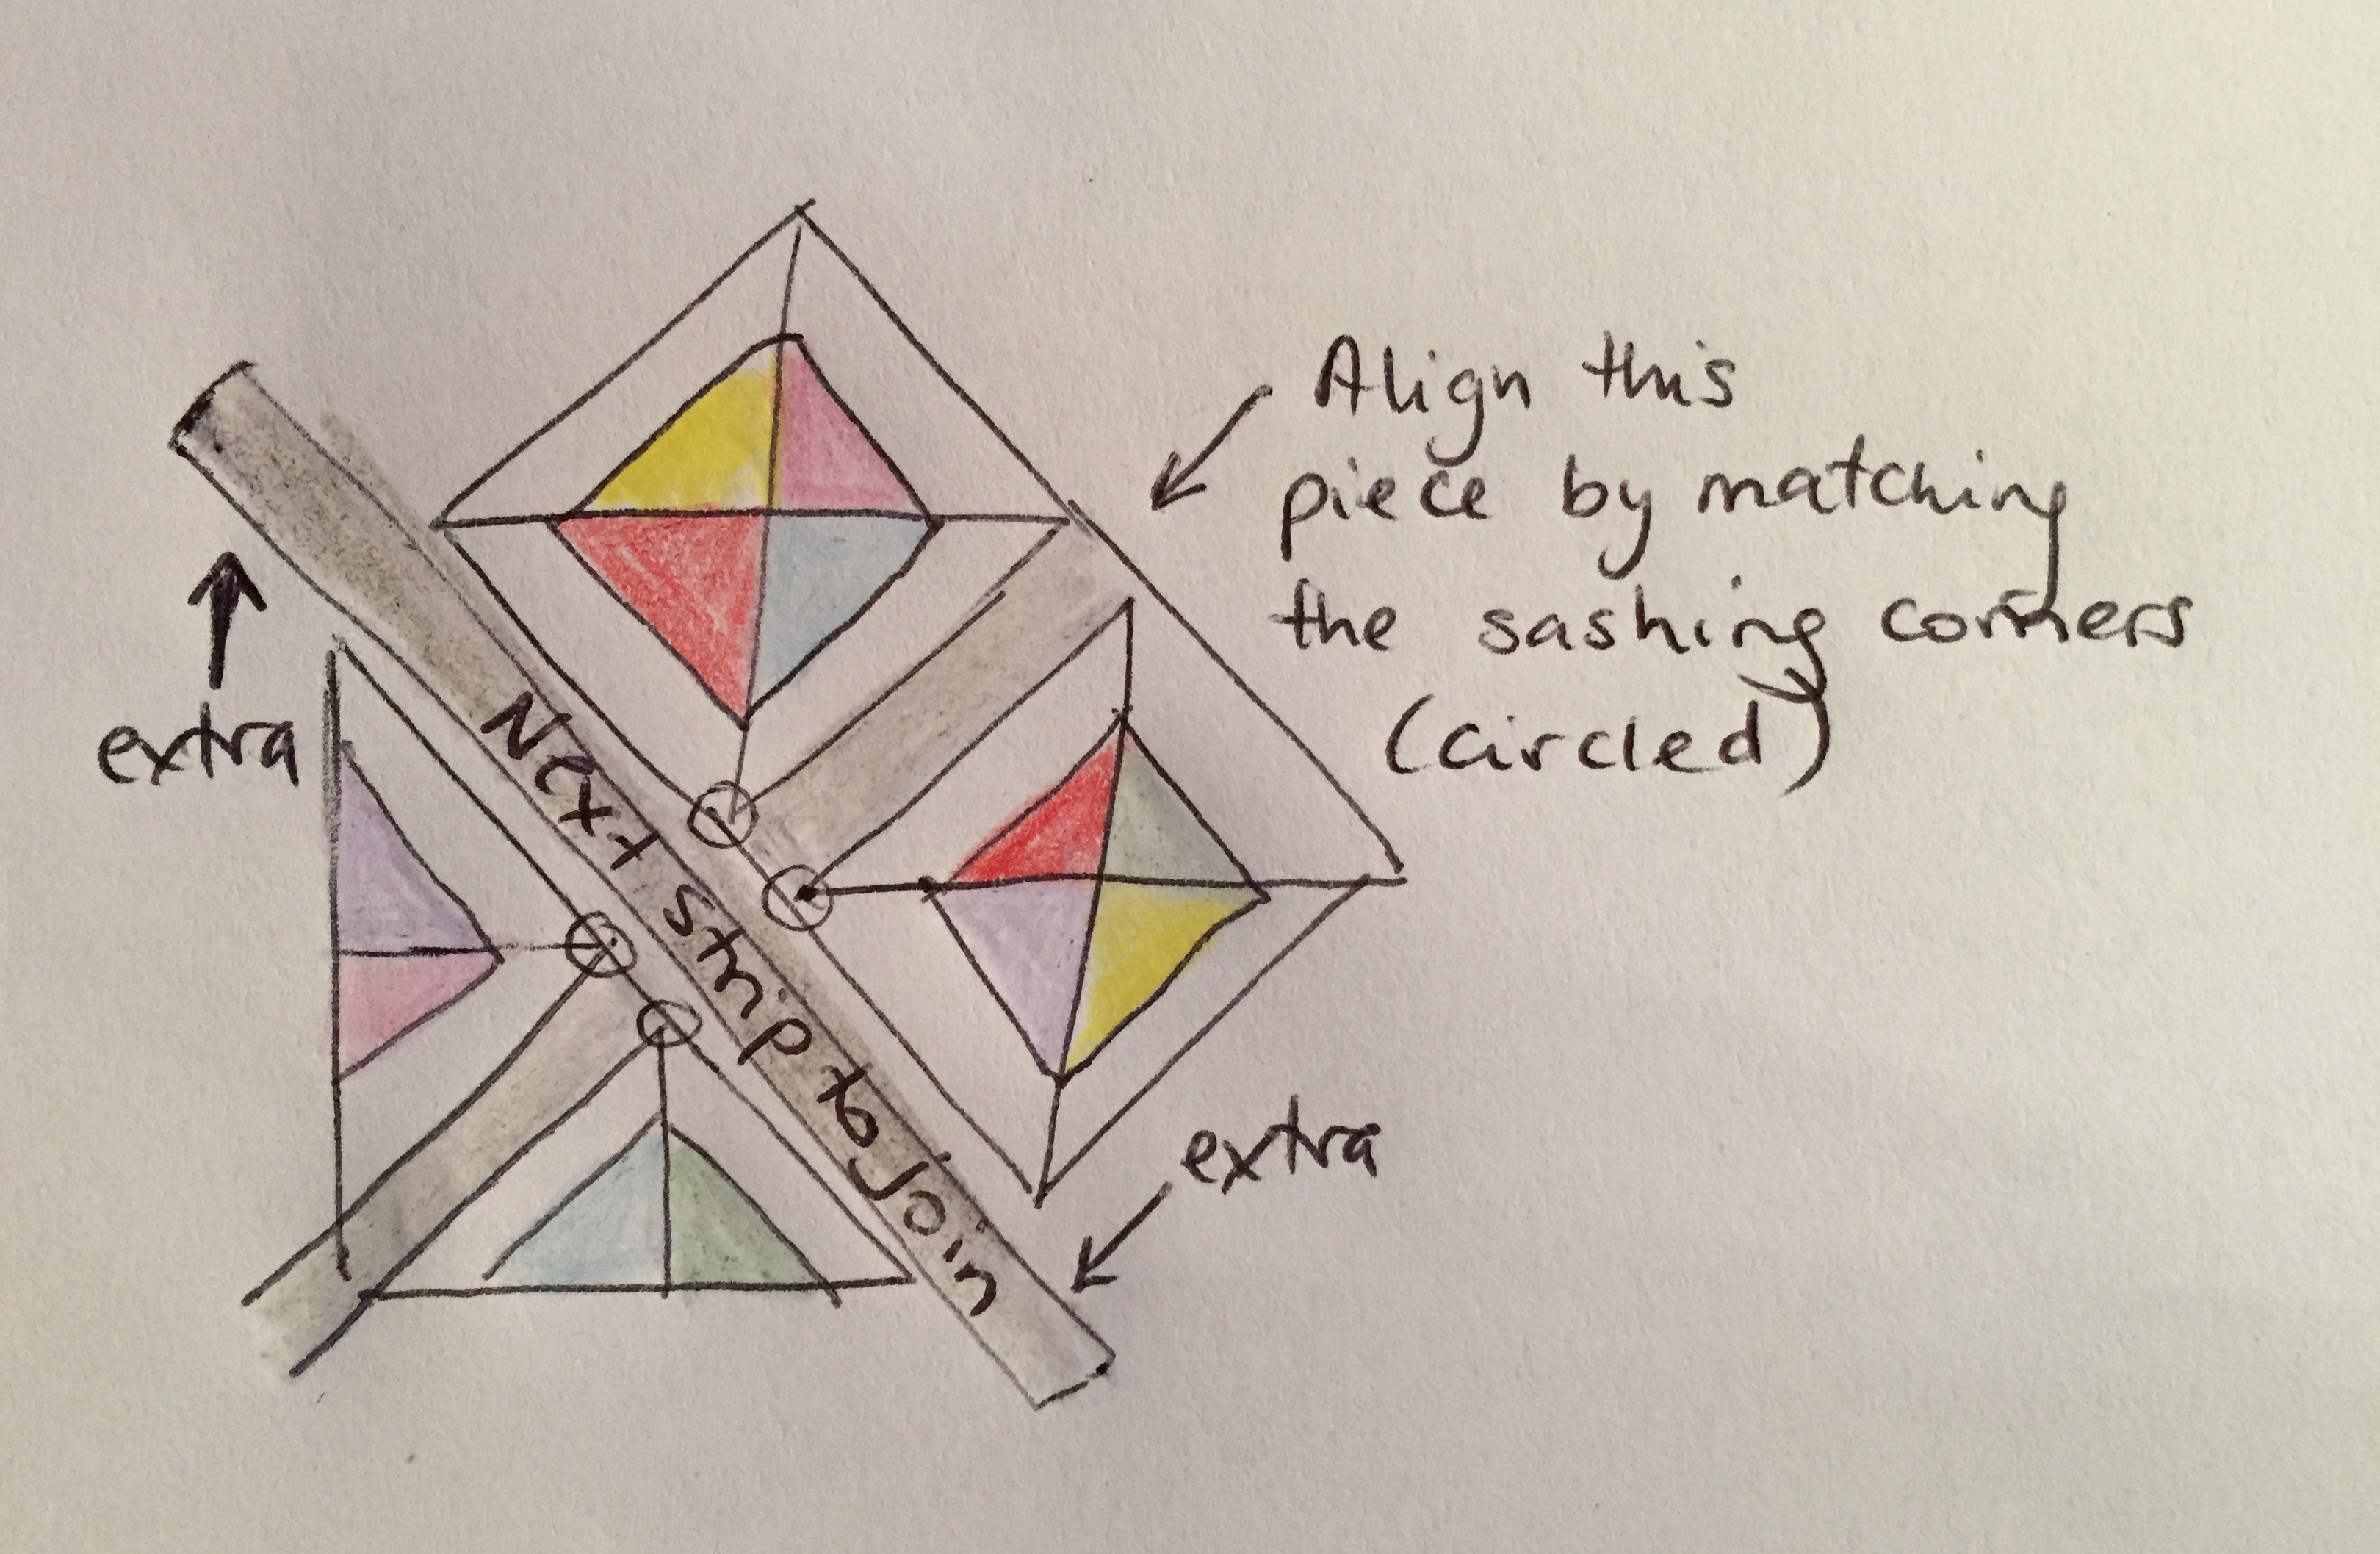
When joining the next strip on to the triangular piece, make sure a bit of sashing hangs off each end of the diagonal (marked as “extra” on the diagram).
Then join the square block onto the sashing, lining up the blocks so that the grey sashing sections overlap. The following picture shows me “testing” to see if my pieces are lined up:
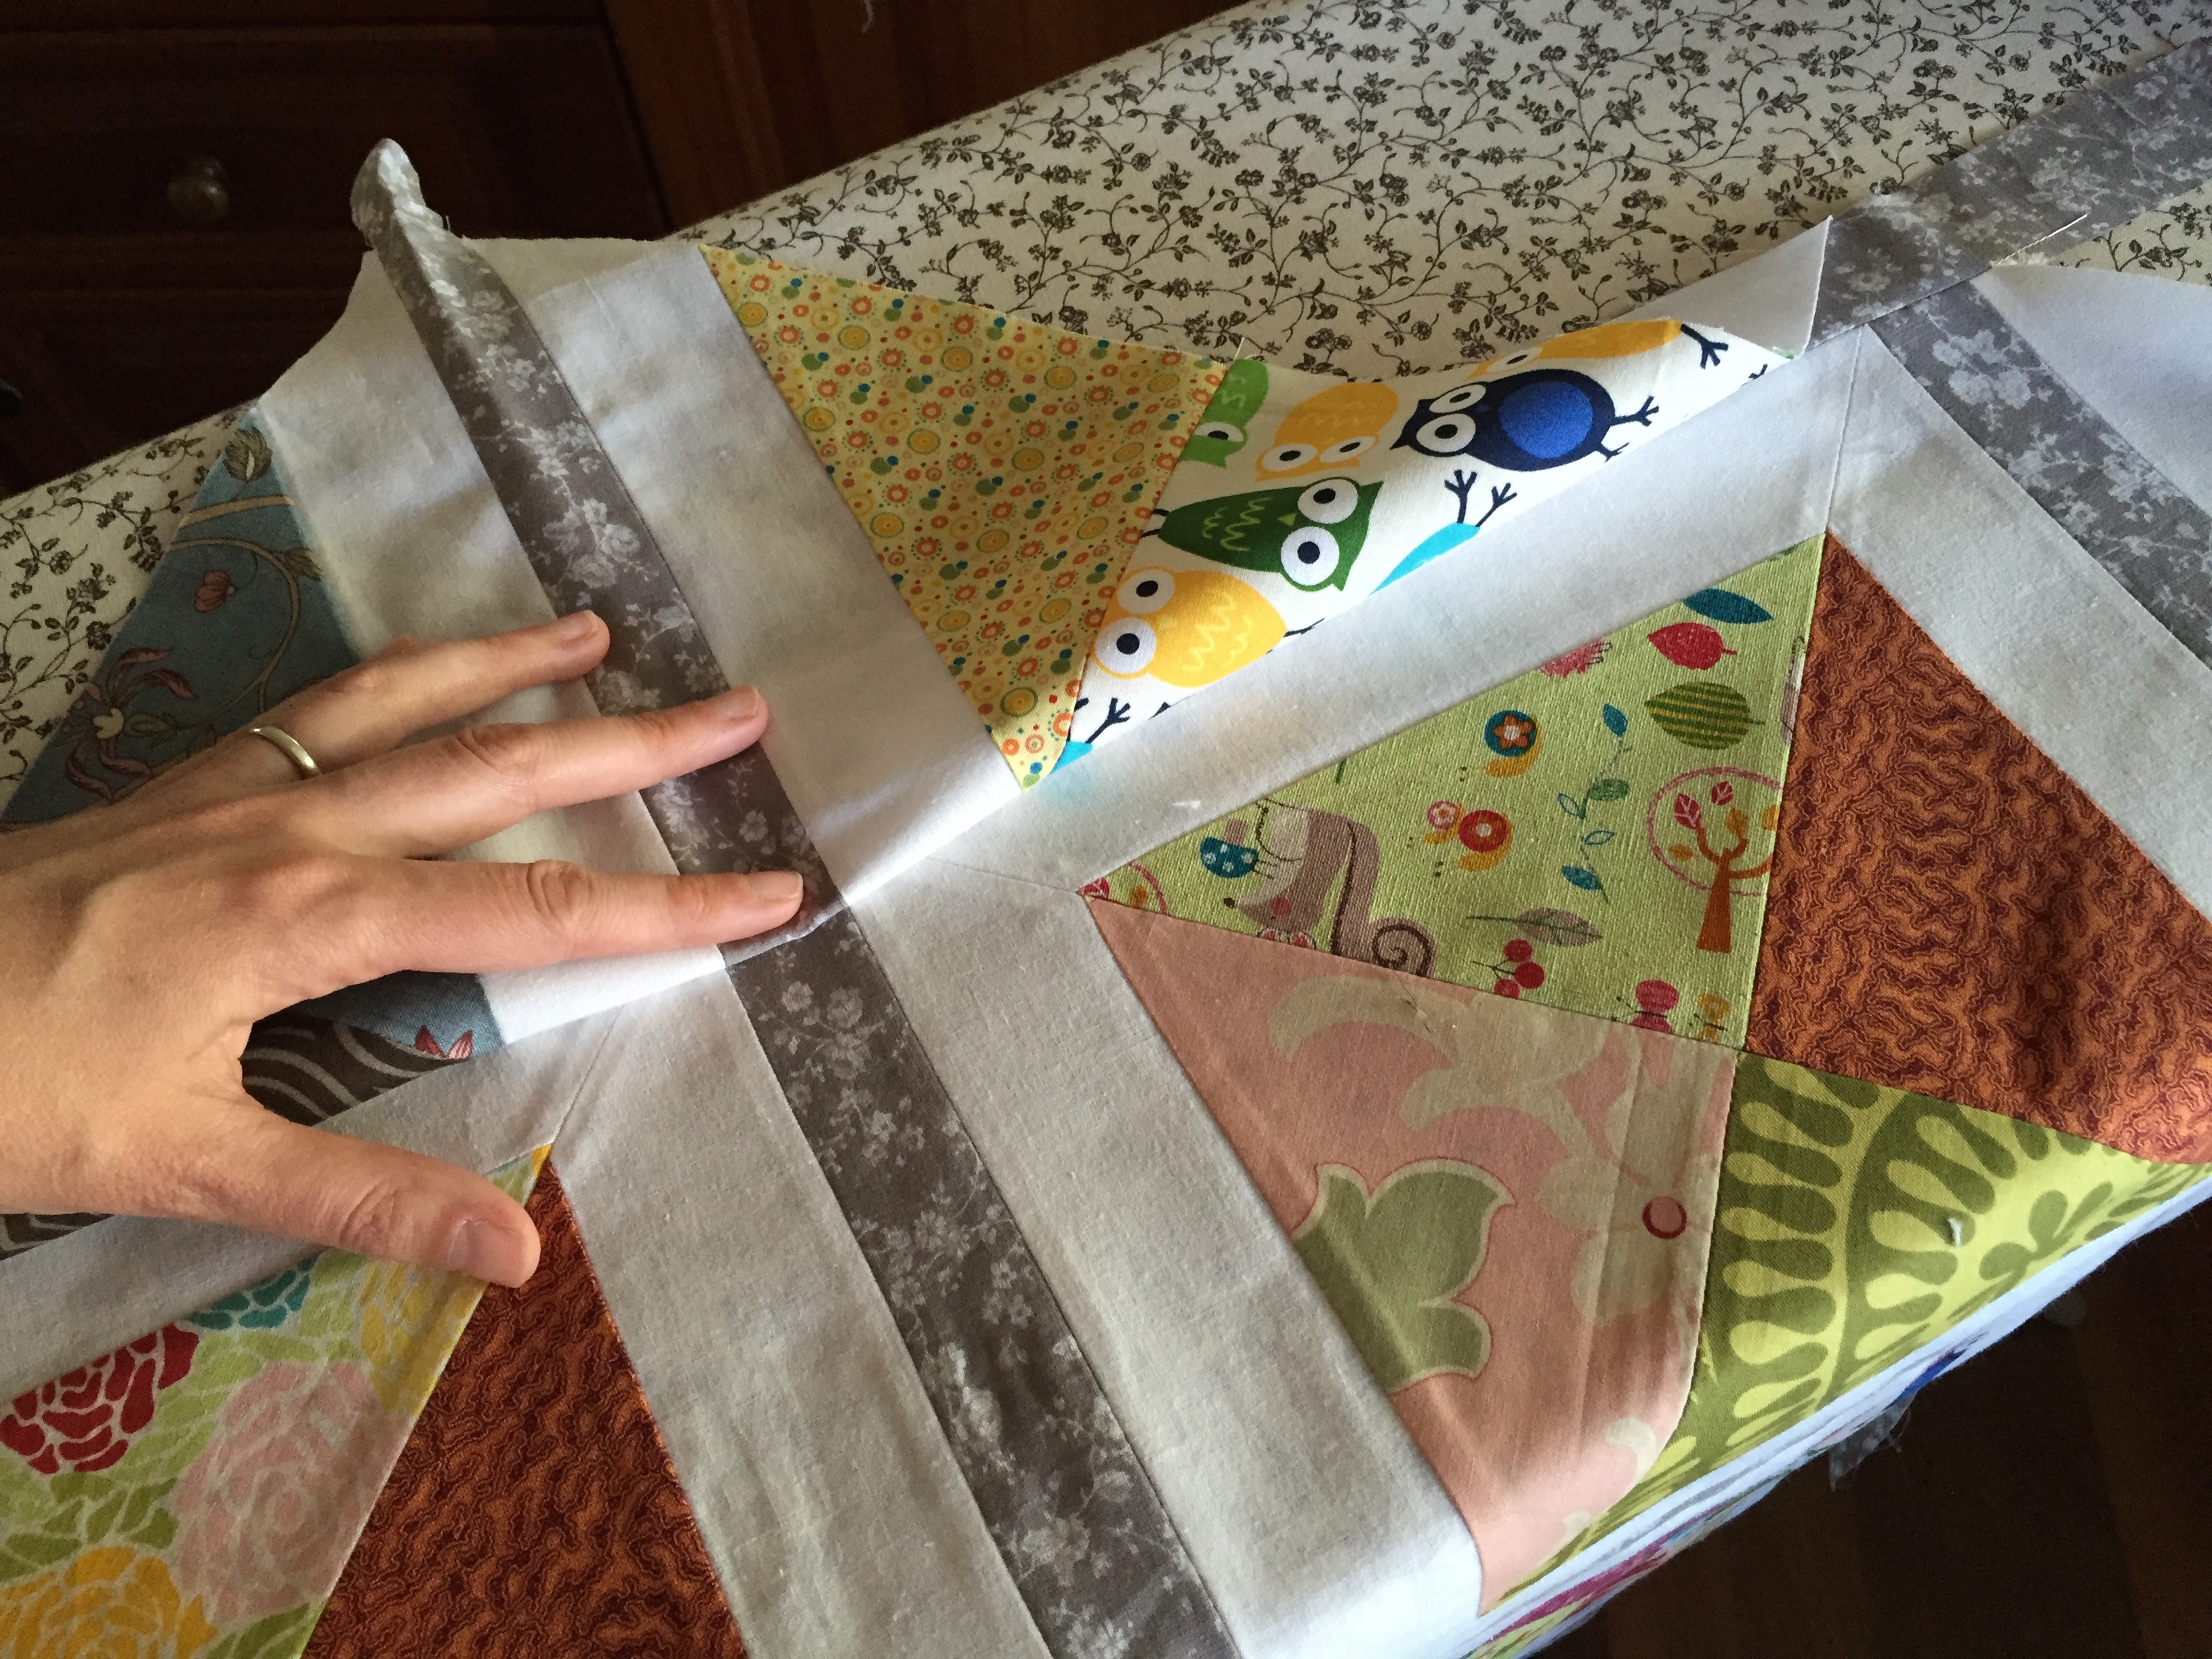
See where I am pinching the fabric? The grey stripe looks nicely lined up. In the photo above I have flipped the triangle piece up so that I can check the alignment. Once I was happy, I flipped it back down in order to sew the seam. Again, press these seams open flat.
Now your quilt top looks like this:

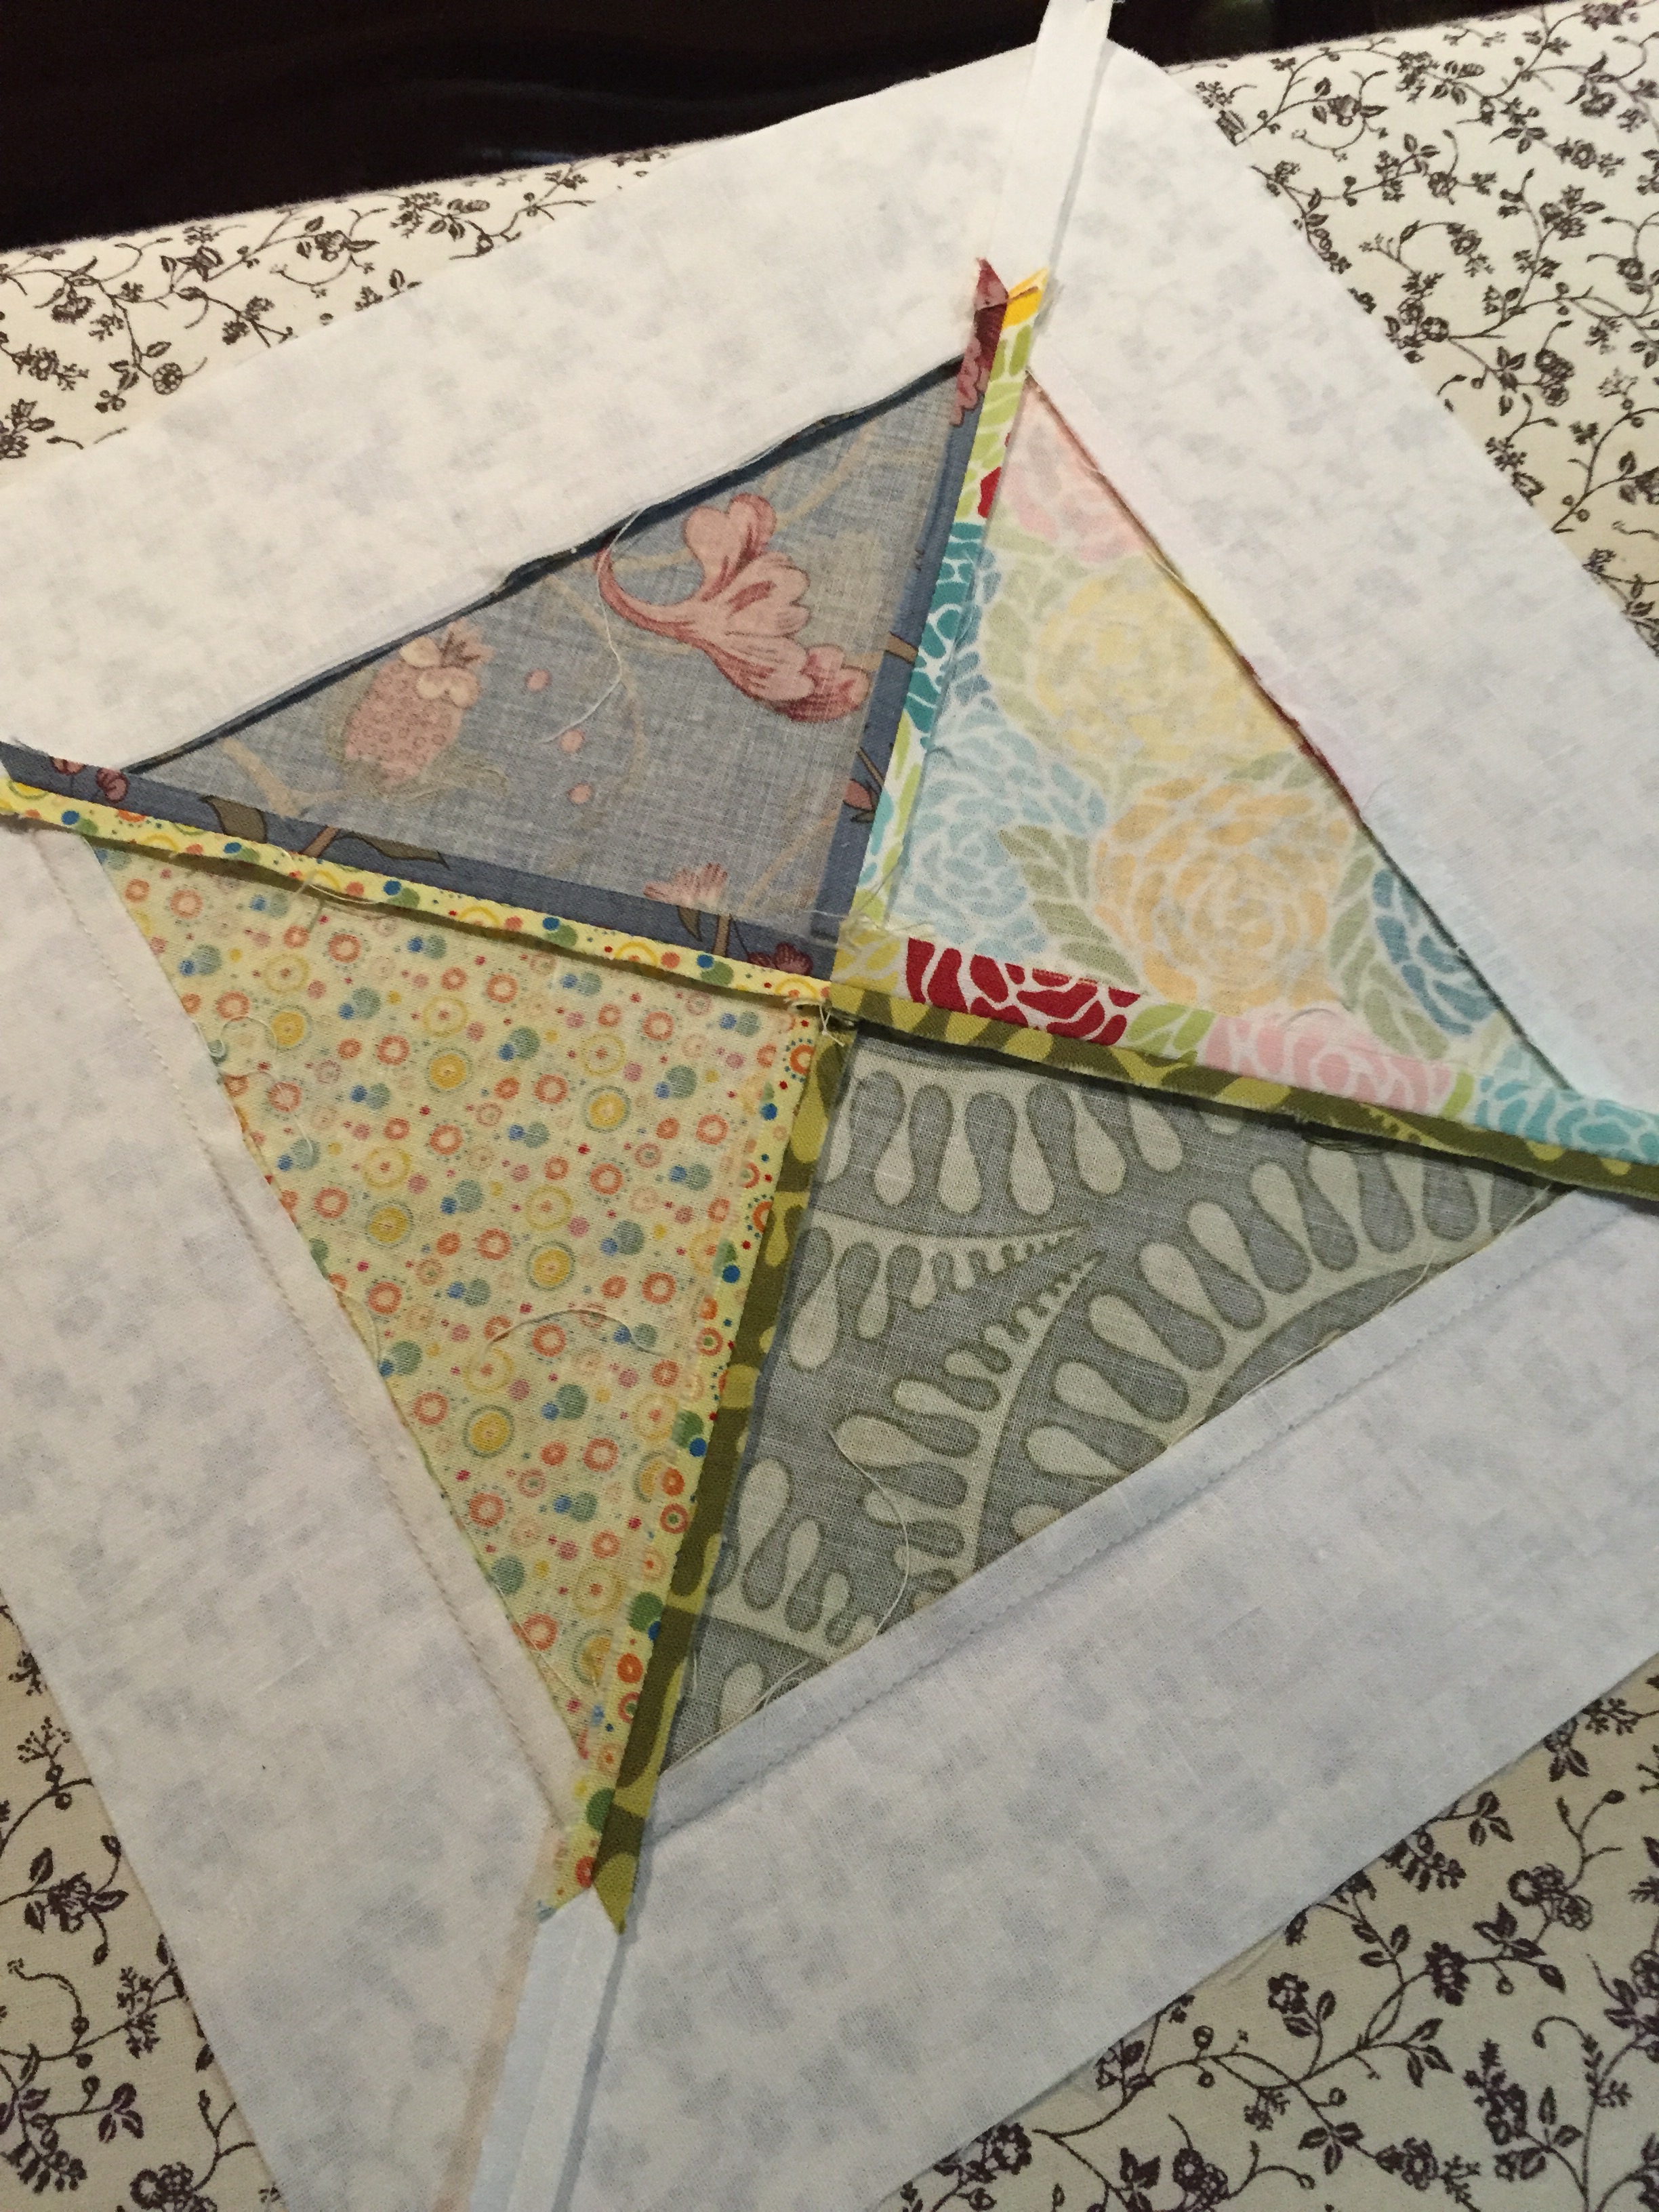
Guess which strip is next? That’s right, the centre piece, joining the square blocks together. Line these up using the grey sashing, rather than the white edges, otherwise the very centre of your piece may be slightly mis-aligned.
This is what the centre will look like after this strip is added:


The seams are not too bulky, but I found I had to take care when pressing open these seams. The diagonal white seams are on the bias, and are easy to squish the wrong way.
Finally, join the two remaining triangle sections to the body of your quilt top, and you are done!
I trimmed off the edges off the quilt top, but not the corners:
I waited until I had finished quilting before trimming the corners, as I wanted to have some wiggle room if the quilting shrunk the corners in.
A few final notes:
- All the sashing is cut on the straight grain, and so are the white pieces. This meant it was easy to join them together, with minimal stretching.
- The edges of the quilt, though, have coloured triangles cut on the bias grain. This meant that when I was basting around the edges of the quilt, those coloured areas had a tendency to stretch. Be aware of this and secure the edges carefully before you put the binding on, to avoid tucks appearing.
At the end of the week I will show off the finished quilt!

Thank you for the great tutorial (and diagrams, well done!). Next time, try spray starching the side triangles. It keeps the bias edges nice and sturdy and prevent stretching. I just did it on a quilt and it worked like a charm…
LikeLike
Thanks Denise, that’s a good idea. I’ve been thinking about starch occasionally, but haven’t had the motivation to go and source some. Was thinking of making some up out of rice water or something, and then my interest faded …
Maybe I should just go and get some from a shop and try it out. ;D
LikeLike