
Well, I really wanted to post about this yesterday, but as is always the way with quilting, it took longer than I thought!
I have been working for months on an epic project: a wedding quilt for my sister! She was married last year in September, and I knew there was no way I was going to get it finished in time for the big day, because check out the design we ended up going with:
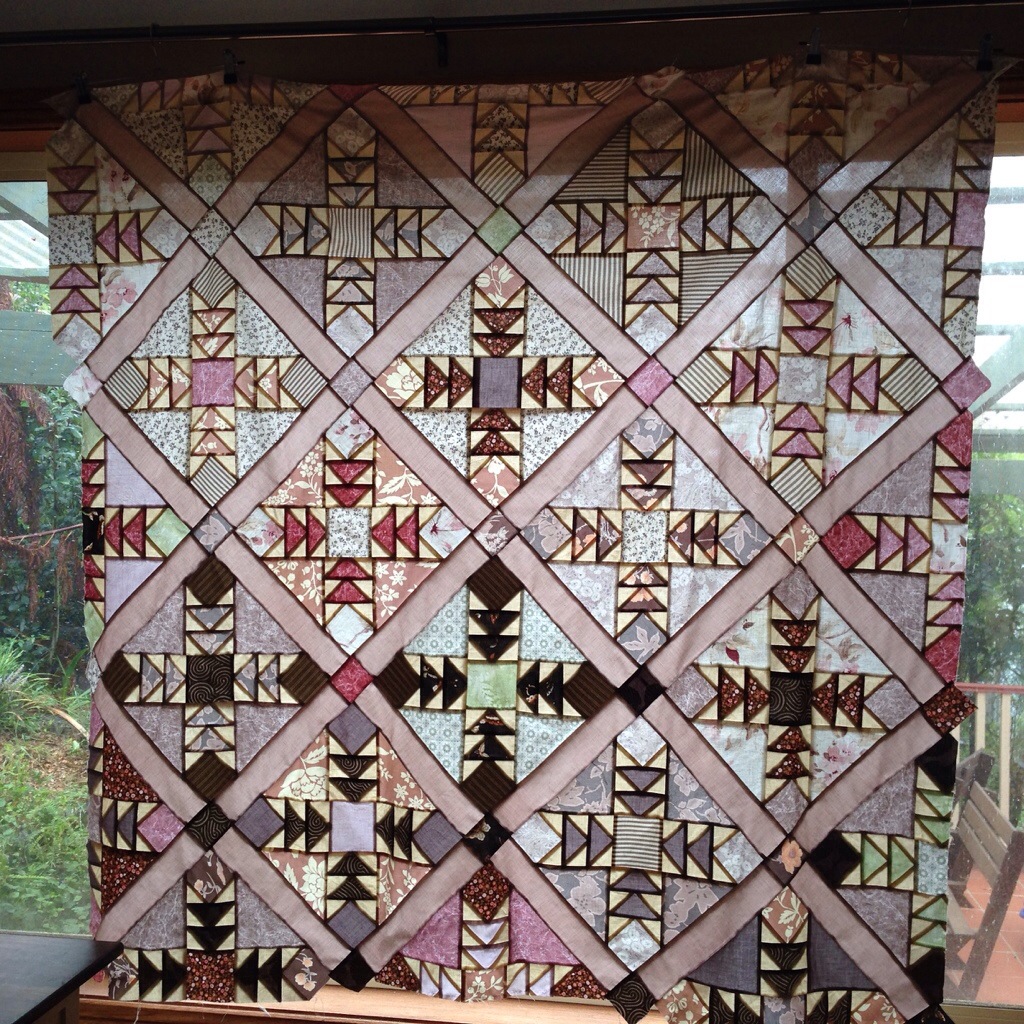
When I embarked on this project, I had made exactly two quilts. Two! The first was in High School, and was my major project in my Year Ten Textiles course. So, just a little time has passed since then. Slightly more recently, I made a cot size quilt for my youngest niece. Both of these quilts were relatively simple pieced squares. My niece’s quilt was my first attempt at QAYG, so it’s not like I was entirely inside my comfort zone. So imagine what I was thinking when my sister picked out this design! (This design was heavily inspired by Jo Morton’s Wild Goose Chase Quilt)
That’s a lot of triangles! That’s a lot of pieces of fabric! It’s on point!
Okay, so that’s enough drama.
My original idea for my sister’s wedding was to do a signature quilt using this block:
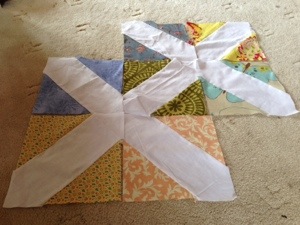
Guests could sign the blocks and I would sew them all up together into a quilt and that would be job done ™. But the colours I’d chosen to start with were too bright, and the brief became a dusky-pinks quilt, to match the theme of the wedding. On the back of the quilt I would create a tree quilt, with leaves that were signed by the guests. So, in effect, two quilts. Gulp.
No worries, I had some time. I began choosing fabrics that would fit into the “dusky pinks” category. Trickier than it sounds! I’m sure if I just spent several hours in the quilting fabric store this would have been easier, but small children and fabric stores do not mix. And I wanted to use recycled fabrics where I could. A few trips to the local thrift store netted me some stretch cotton stripy pants, a couple of floral blouses and skirts, and several usable pillow slips. I then took these off to the store to match some coordinating fabrics as best I could. I think I did pretty well, in the end!

I then started cutting and cutting and cutting. And some more cutting! I cut waaaay too many squares, thinking I would need a lot more blocks. The pile you see above are the large squares I have left after piecing the quilt top. I also have the same of medium squares and quite a few small ones left! Never mind, they will still come in handy when I add a border to both the front and back quilt tops.
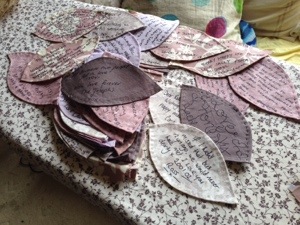
I also made (I think!) about 70 appliqué leaves from a couple of templates I drew free-hand. Each one has interfacing and then a basic running-stitch edge to stop the leaf from ravelling when it was being written on and transported. That was quite a number of swimming lessons profitably spent! I think the other people at the pool thought I was some kind of crazy person with all these hand sewn leaves!
The wedding came, and went. Look how beautifully the guests augmented the leaves! I can’t wait to see what the tree quilt side is going to look like! But I need to finish the front, first, so I have something to appliqué them to. 🙂
Feast your eyes upon the progress so far:


I still need to:
- Trim the quilt top, then add a thicker border in the sashing colour
- Add a pieced border using leftover fabric squares, probably using “coins”
- Source and prepare the background fabric for the tree quilt top
- Stitch a tree trunk and branches using thread art (learning how to do this as I go!)
- Hand sew (probably) the leaves into place around the tree
- Piece another border (probably also coins) for the tree quilt
- Obtain some puffy batting and quilt the three layers together using hand sewn ties
- Bind the quilt
- Throw a quilt-is-finally-finished photography session and party 🙂
Phew!
