
Last year my Mum had a special birthday, and I vowed to make something extra special to mark the occasion! At first I was thinking of making a quilt, inspired by the lovely wonky circles done by Mari of TheQuiltingEdge. I still think that is a great idea (hi Mum!) but I knew I wanted it to be extra specially special. My Mum is really into earthy colours and crafts, and I thought maybe I should try my hand at some weft-faced weaving.
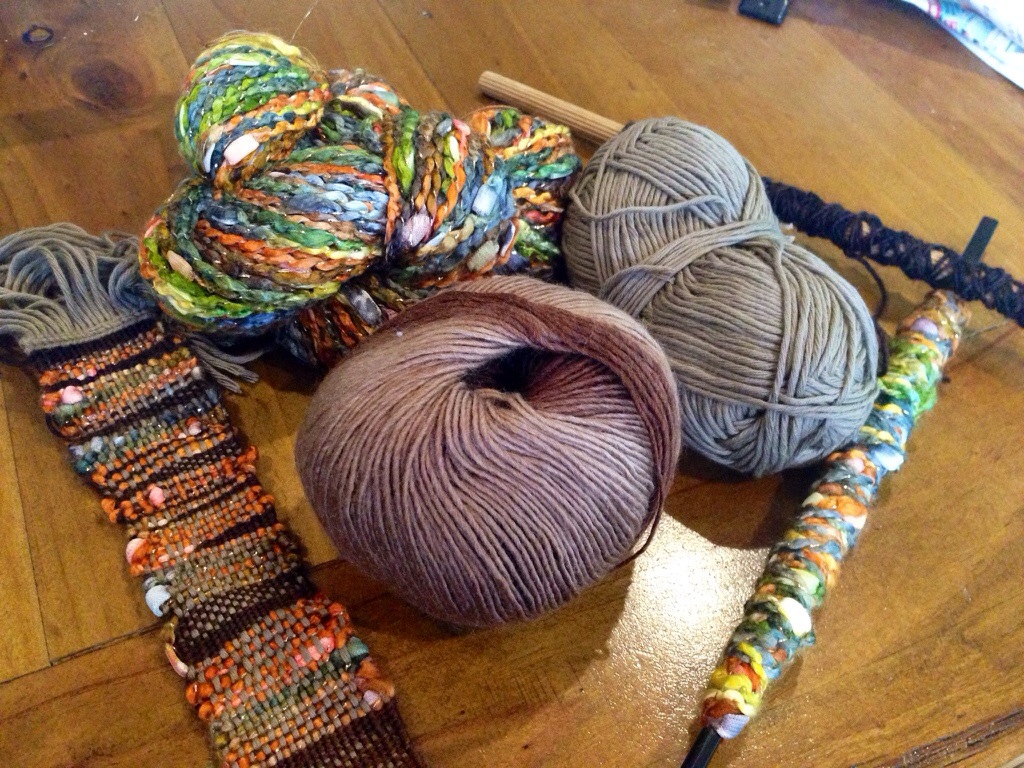 I assembled some materials that I thought would be just right for Mum: something really chunky and uneven to use as the weft, and then something nice and strong for the warp. I ended up with a simple neutral cotton for the warp, and added another ball of graduating colour yarn (I’ve forgotten what fibre this is! It’s awesome, though – single ply) to use between sections of the novelty yarn.
My plan was to try out some weft-faced weaving, as my only other weaving has been warp-faced (either on the inkle loom, or tablet-weaving). I haven’t got a loom, so I dug out my tapestry frame and set it up in the tallest configuration I could manage. Then I wound the warp around the upper and lower bars to get some basic tension going.

The sample looked pretty dwarfed by the width of the frame, but I figured that I might be able to use this set up for the full piece, which would use all the space available. You can see I’m re-using some shorter frame pieces as a heddle stick, and also as a shed stick. The ruler was to keep the shed open whilst I passed the weft (wound onto a bit of dowel, and a chopstick).
I’m using the same set up I’d use on a backstrap loom, except with a fixed tension warp. I was concerned my weaving would turn warp-faced if I tried it without an even, sturdy, tension.
Having warped the piece, I then started twining the first few rows, to make sure the warp stayed evenly spaced (since I don’t have a rigid heddle). I found the instructions on using a simple loom invaluable. These gave me confidence that my tapestry frame idea wasn’t a total bust! I also tried out the kitchen fork idea to tease the weft into place, and that worked like a charm on my narrow warp.
I started with some basic weft-faced weaving, to make sure I had the hang of it. Then I began playing about with how tightly I packed the weft down, revealing bits of warp here and there. Once I was sure I could create something pretty, I launched into the novelty yarn itself.

It wasn’t long before I figured this was looking pretty good! The tapestry frame was awkward to use as a loom because it went on my lap, and I had to manipulate the sheds whilst juggling the frame as well. The tension also became quite tight as the weaving advanced, making it harder to get a nice shed.
I think if I tried to do a full width piece like this, I’d need to stabilise the tapestry frame to have both hands free to fiddle. I don’t think I will find it easy to wind on a long warp, even though the tapestry frame bars can be rolled and re-pegged. What I really need is something like a Cricket loom. Time for some DIY! 🙂
