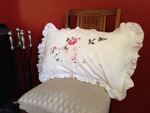
After our recent holidays I found myself with a lot of washing and sorting to do. This morning I came across this pillowslip, which had torn open where the pillow is inserted:

This has been bugging me for a while, because it’s such a lovely pillowslip (I used this when I was growing up and it came in a bag of hand-me-downs recently). The closure is like a cushion, with a slit across the back that the pillow goes through. It tends to bulge open at the best of times, and the torn seam has rendered it pretty unusable. So, time to fix it!
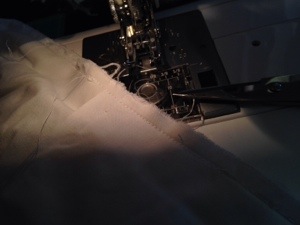
When you have a torn seam, the fix is usually a simple case of turning it inside out, and then sewing over the old seam line. If you have never done any sewing before, and you want to try your hand at it, this type of mending is a great way to start! You only need a few tools (a needle and thread at the most basic, but a sewing machine is a great help).
First up, turn the item inside out, and iron the seam allowance flat. This makes it easier to see exactly how the pieces are supposed to fit together, and to pin them into place. In my case, the pillowslip had two flaps that are supposed to sit on top of each other (I used the other end of the flaps to work out which way to lay them on the seam). I also spotted that the seam edge was still raw and starting to unravel after all these years. It’s very unusual to find a pillowslip like this one! They are all overlocked inside, now.

Pin the seam pieces together and give it another quick press to help the layers stay put when you are at the machine. A quick backstitch at either end of the new stitching will secure the existing seam and the new one. If you are sewing by hand, use a backstitch and be sure to go over some of the existing stitching to make sure the old torn ends are secured.
Repair complete! If you also want to finish any raw edges, you can put a zig-zag stitch over the top, or use an overlocker if you’re lucky enough to have one. If I was repairing this by hand, I wouldn’t have bothered to finish the edges, as the rate at which it was ravelling was pretty slow.
A simple repair like this one helps to get as much use out of your things as possible. Now the pillowcase can go back into rotation with the others, and have another twenty years of service! (Maybe!)

